Turkey Stitch - Learn This Modern Embroidery Technique
Introduction
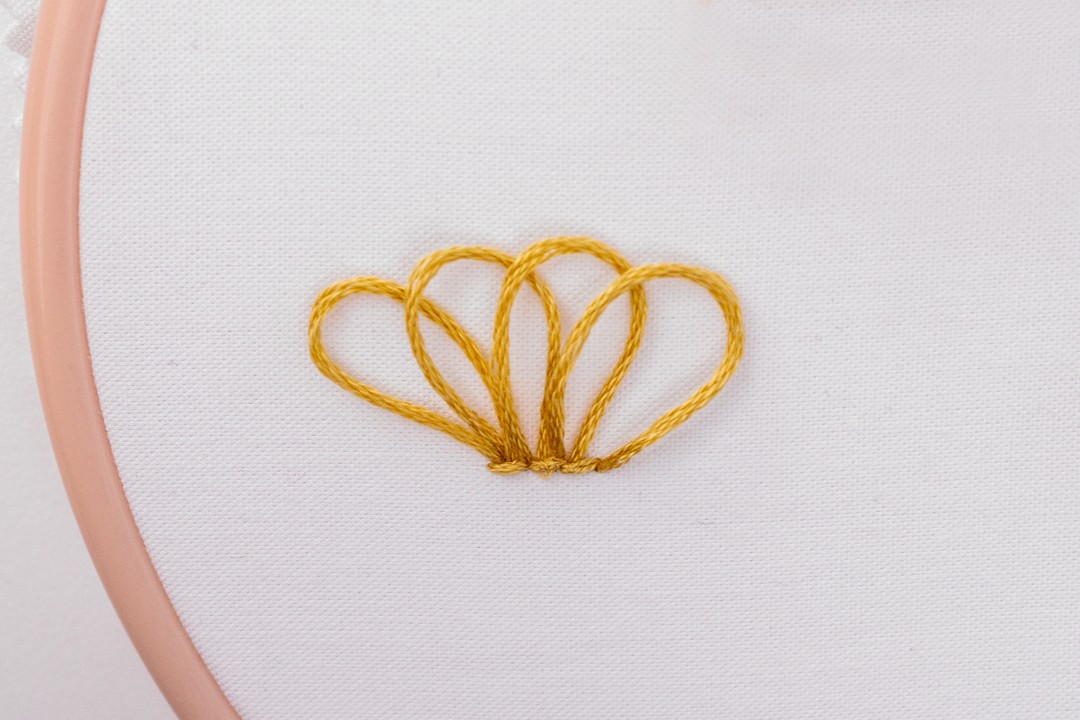
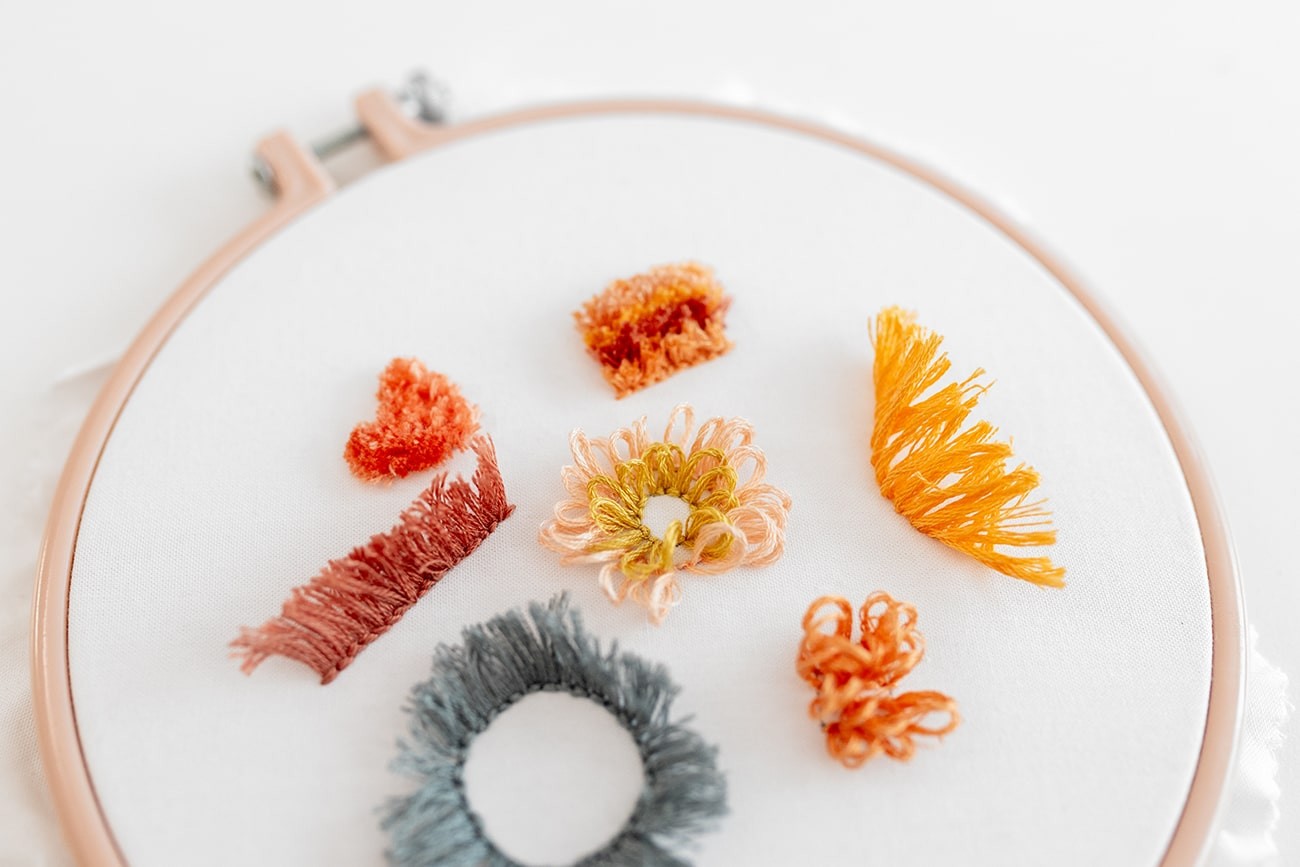
Turkey Stitch (also known as Turkey Work) is a really cool way to add 3-dimensional texture to your embroidery creations. It’s basically a series of thread loops or tails, that are secured into place with little stitches. This means you can go for gold, creating loops or tails of thread and rest assured they will hold in place nice and securely in your fabric. Turkey Stitch is one of those techniques that can be worked into many different looks.
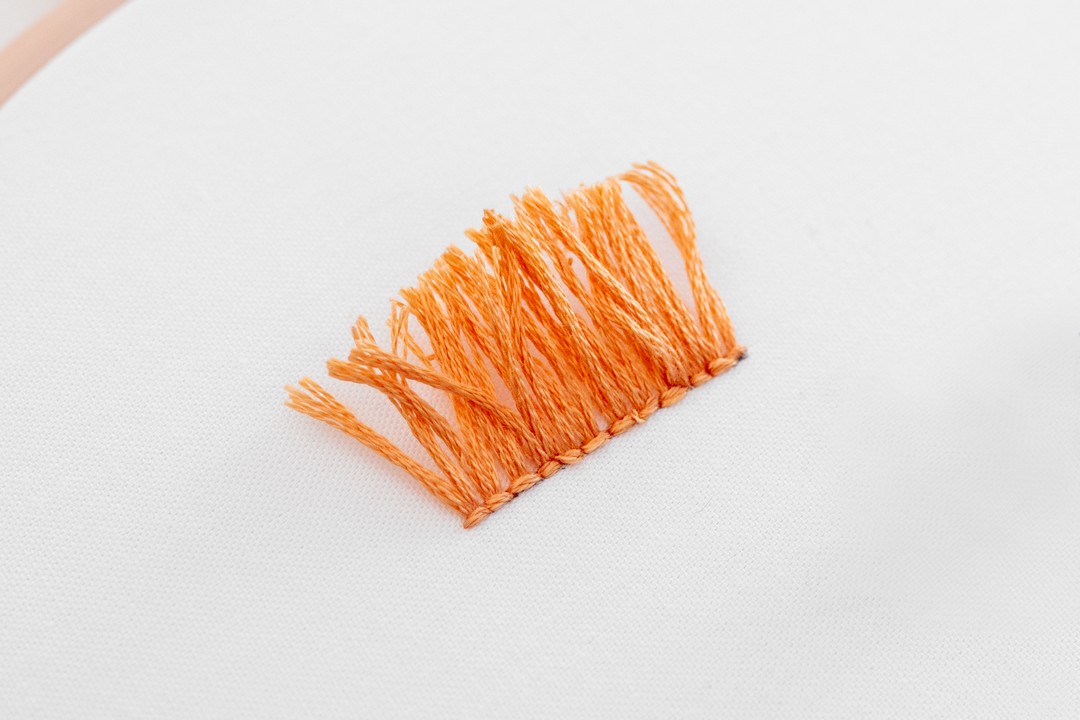
The common theme is that this technique can create really cool raised embroidery effects. For example, you’ll often see Turkey Stitch with a‘snipped’ effect, which is made by snipping all the tails quite short and fluffing them up to create a densely packed area of texture.
Or you may see Turkey Stitch used to create embroidered hairstyles, with longer tails of thread. Another option is to make flowers with looped Turkey Stitch petals.
There are various ways you can work with Turkey Stitch. I have tested many, and in the step-by-step guide below, I will show you the way that I like to work this technique. I will also briefly cover some of the technique variations.
But before we go any further, I want to mention that I find this is a very forgiving stitch technique.
If you end up doing yours a bit different to mine or mix it up amongst the options, that’s totally cool! I want you to find the method that you find the most comfortable to stitch. And while this technique seems quite technical at first, I find it’s actually very forgiving if you do go off-track – this is especially true when you’re using it for decorative pieces.
Ok, so let’s give this technique a whirl, starting with my preferred method:
Step 1.
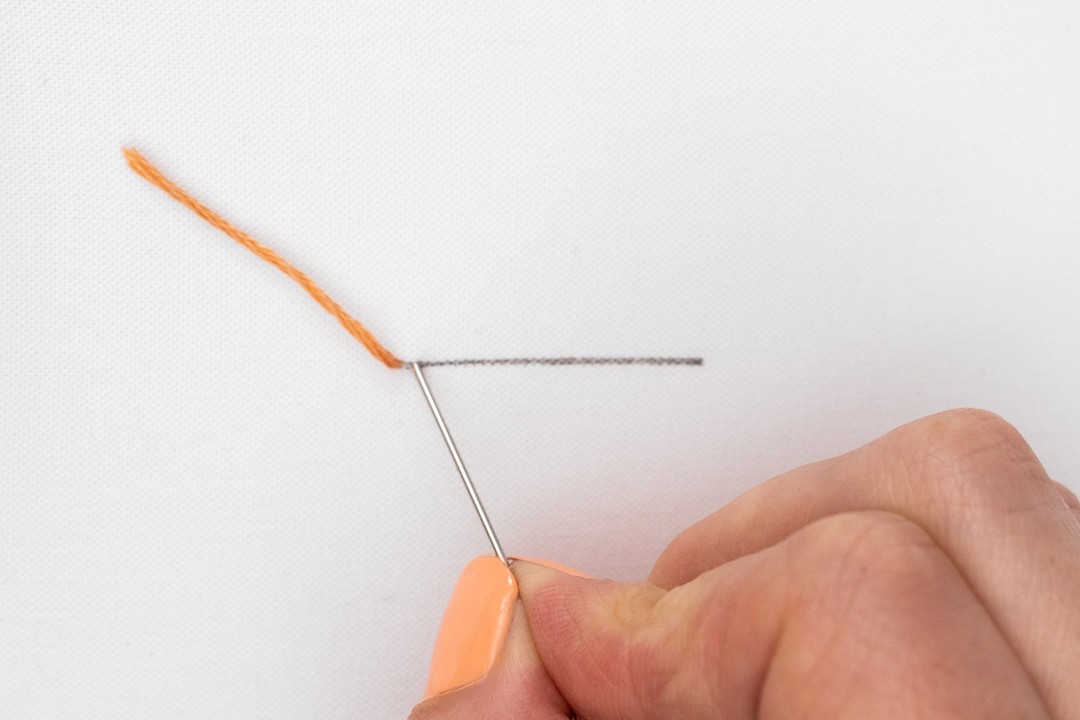
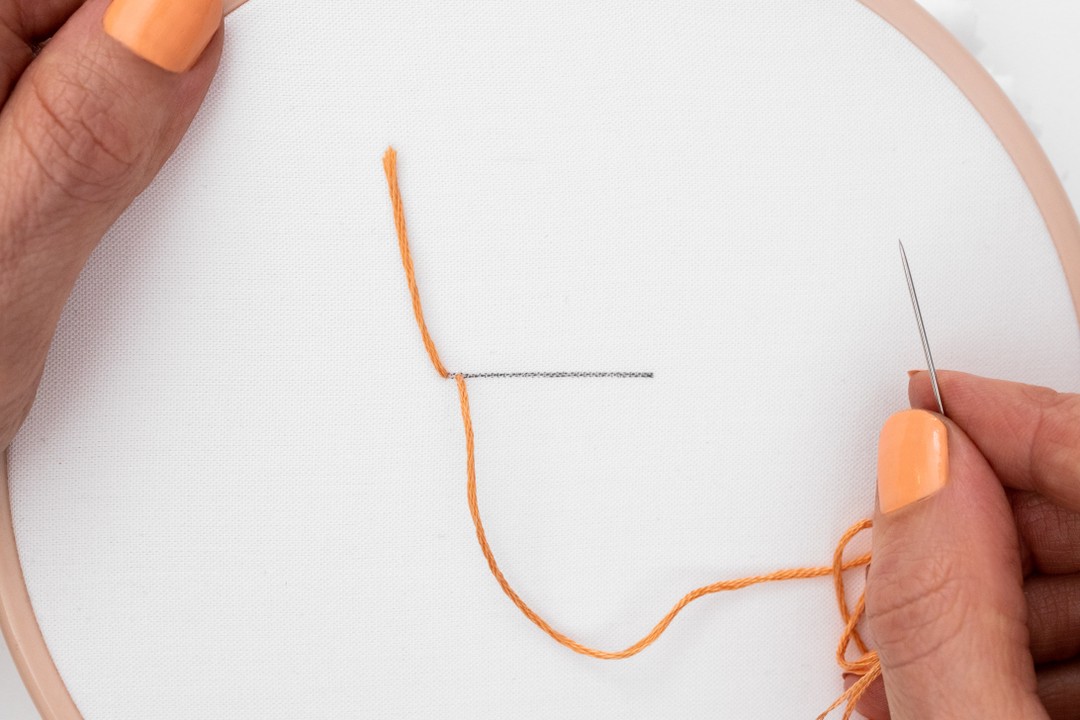
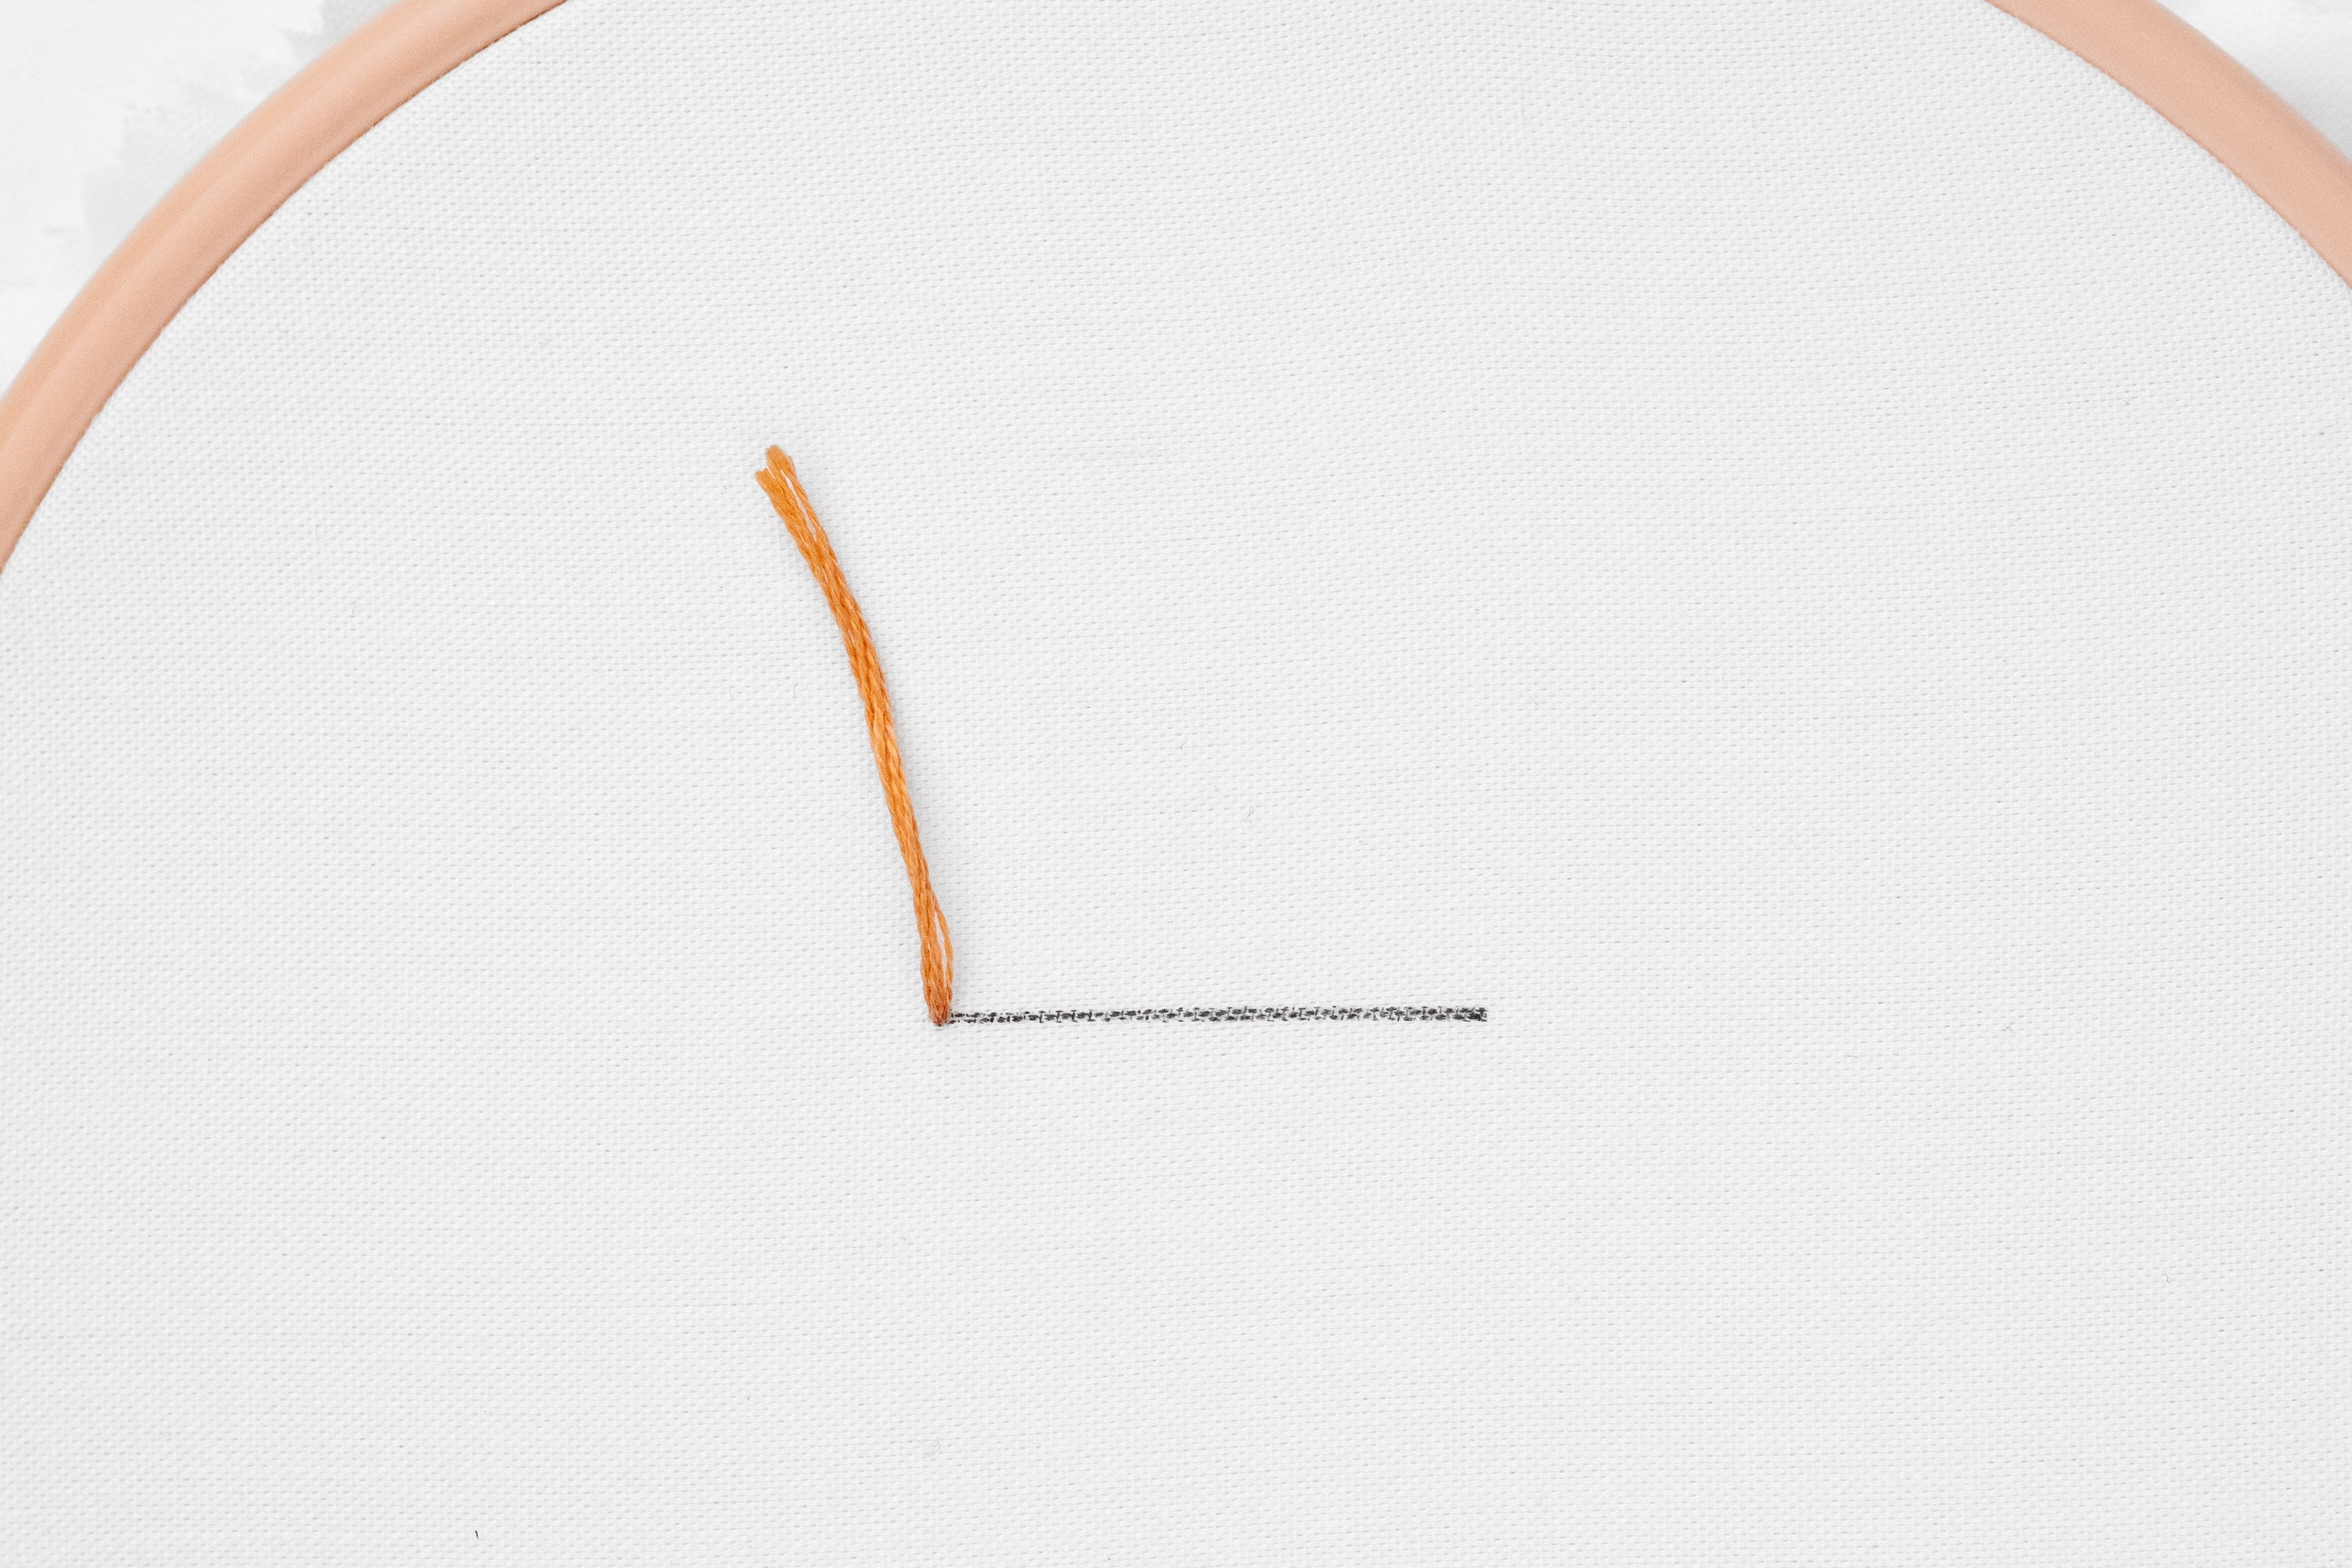
Thread your needle, but don’t bother knotting the end. Then poke your needle down into the fabric, on the line of your subject.
Pull through so that the tail remains on the top side of your fabric. Adjust this tail so that it suits your desired length (2-3 cm is good for learning).
Then nudge it up so that it’s sitting above the line.
Step 2.
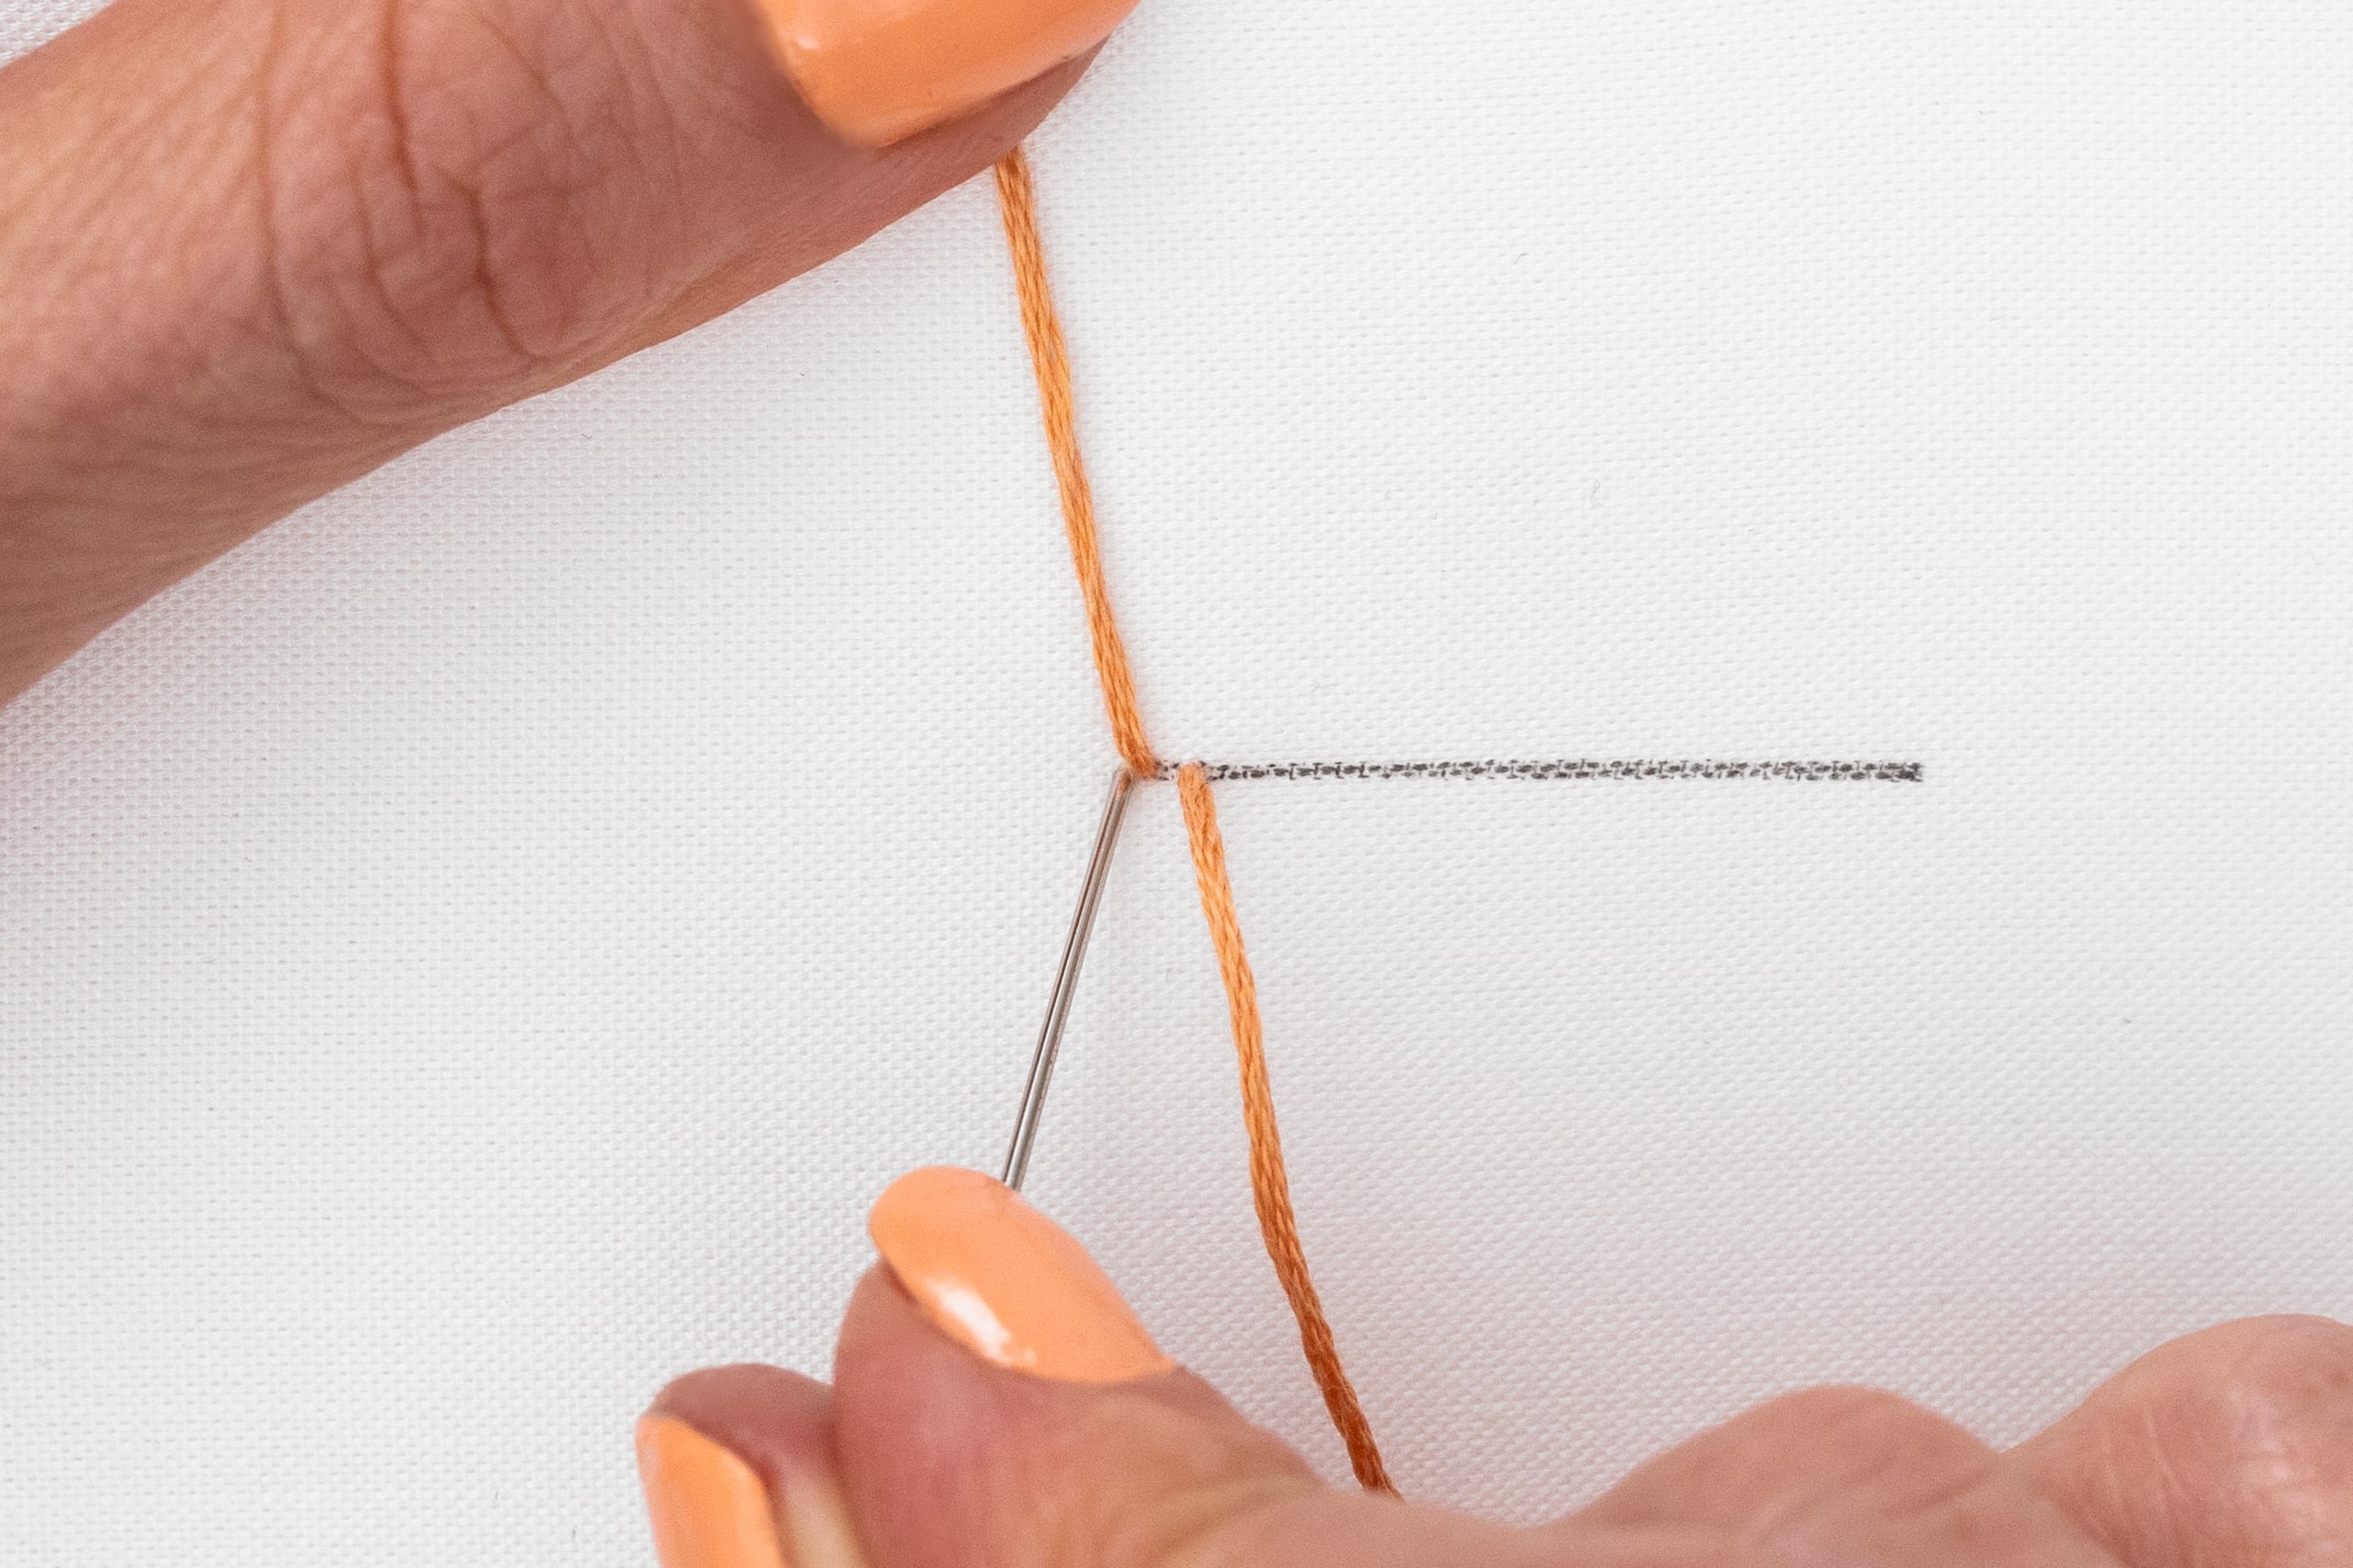
Bring your needle up on the line, to the right-hand side of the tail - but leave a little gap, just a bit wider than the width of your thread. Pull through all of the slack, taking care you don’t pull through your original tail.
TIP: I find it helps to press my thumb on the tail as I pull through the slack so that it stays in place.
Step 3.
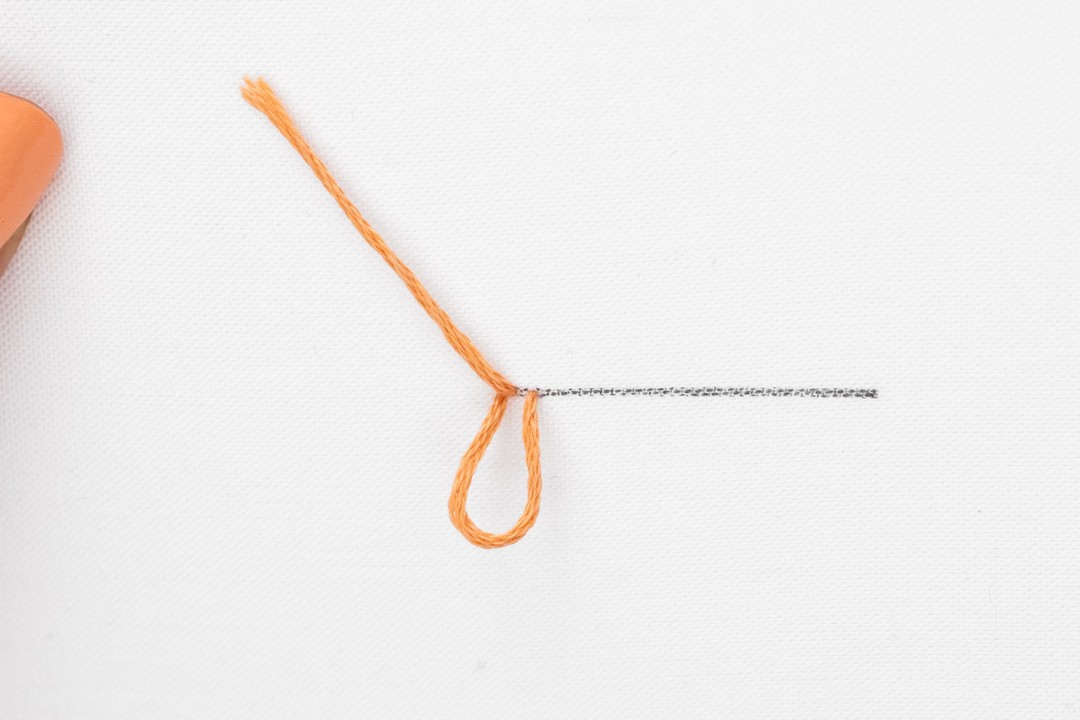
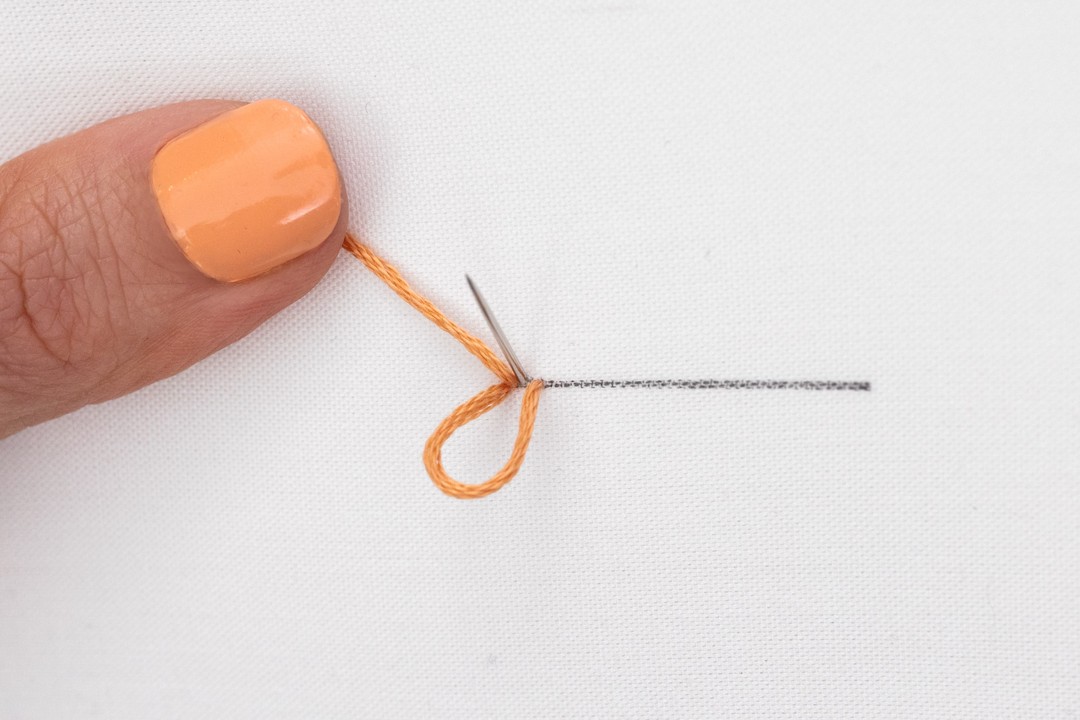
Now let’s do the securing stitch which will lock your tail into place. Do a small back stitch over the tail, so that your needle goes down on the line, just to the left of the tail.
Now here’s the thing – before you pull through this securing stitch, leave some slack on the top side of your fabric (it will form its own little loop).
Nudge that slack downwards, so that you can see the line, and bring your needle back up on the line inside the slack of the securing stitch (aim for that little gap that you made, just to the right of the first tail).
TIP: Always make sure that your needle is above the working thread – this ensures your tails all end up on the same side.
Step 4.
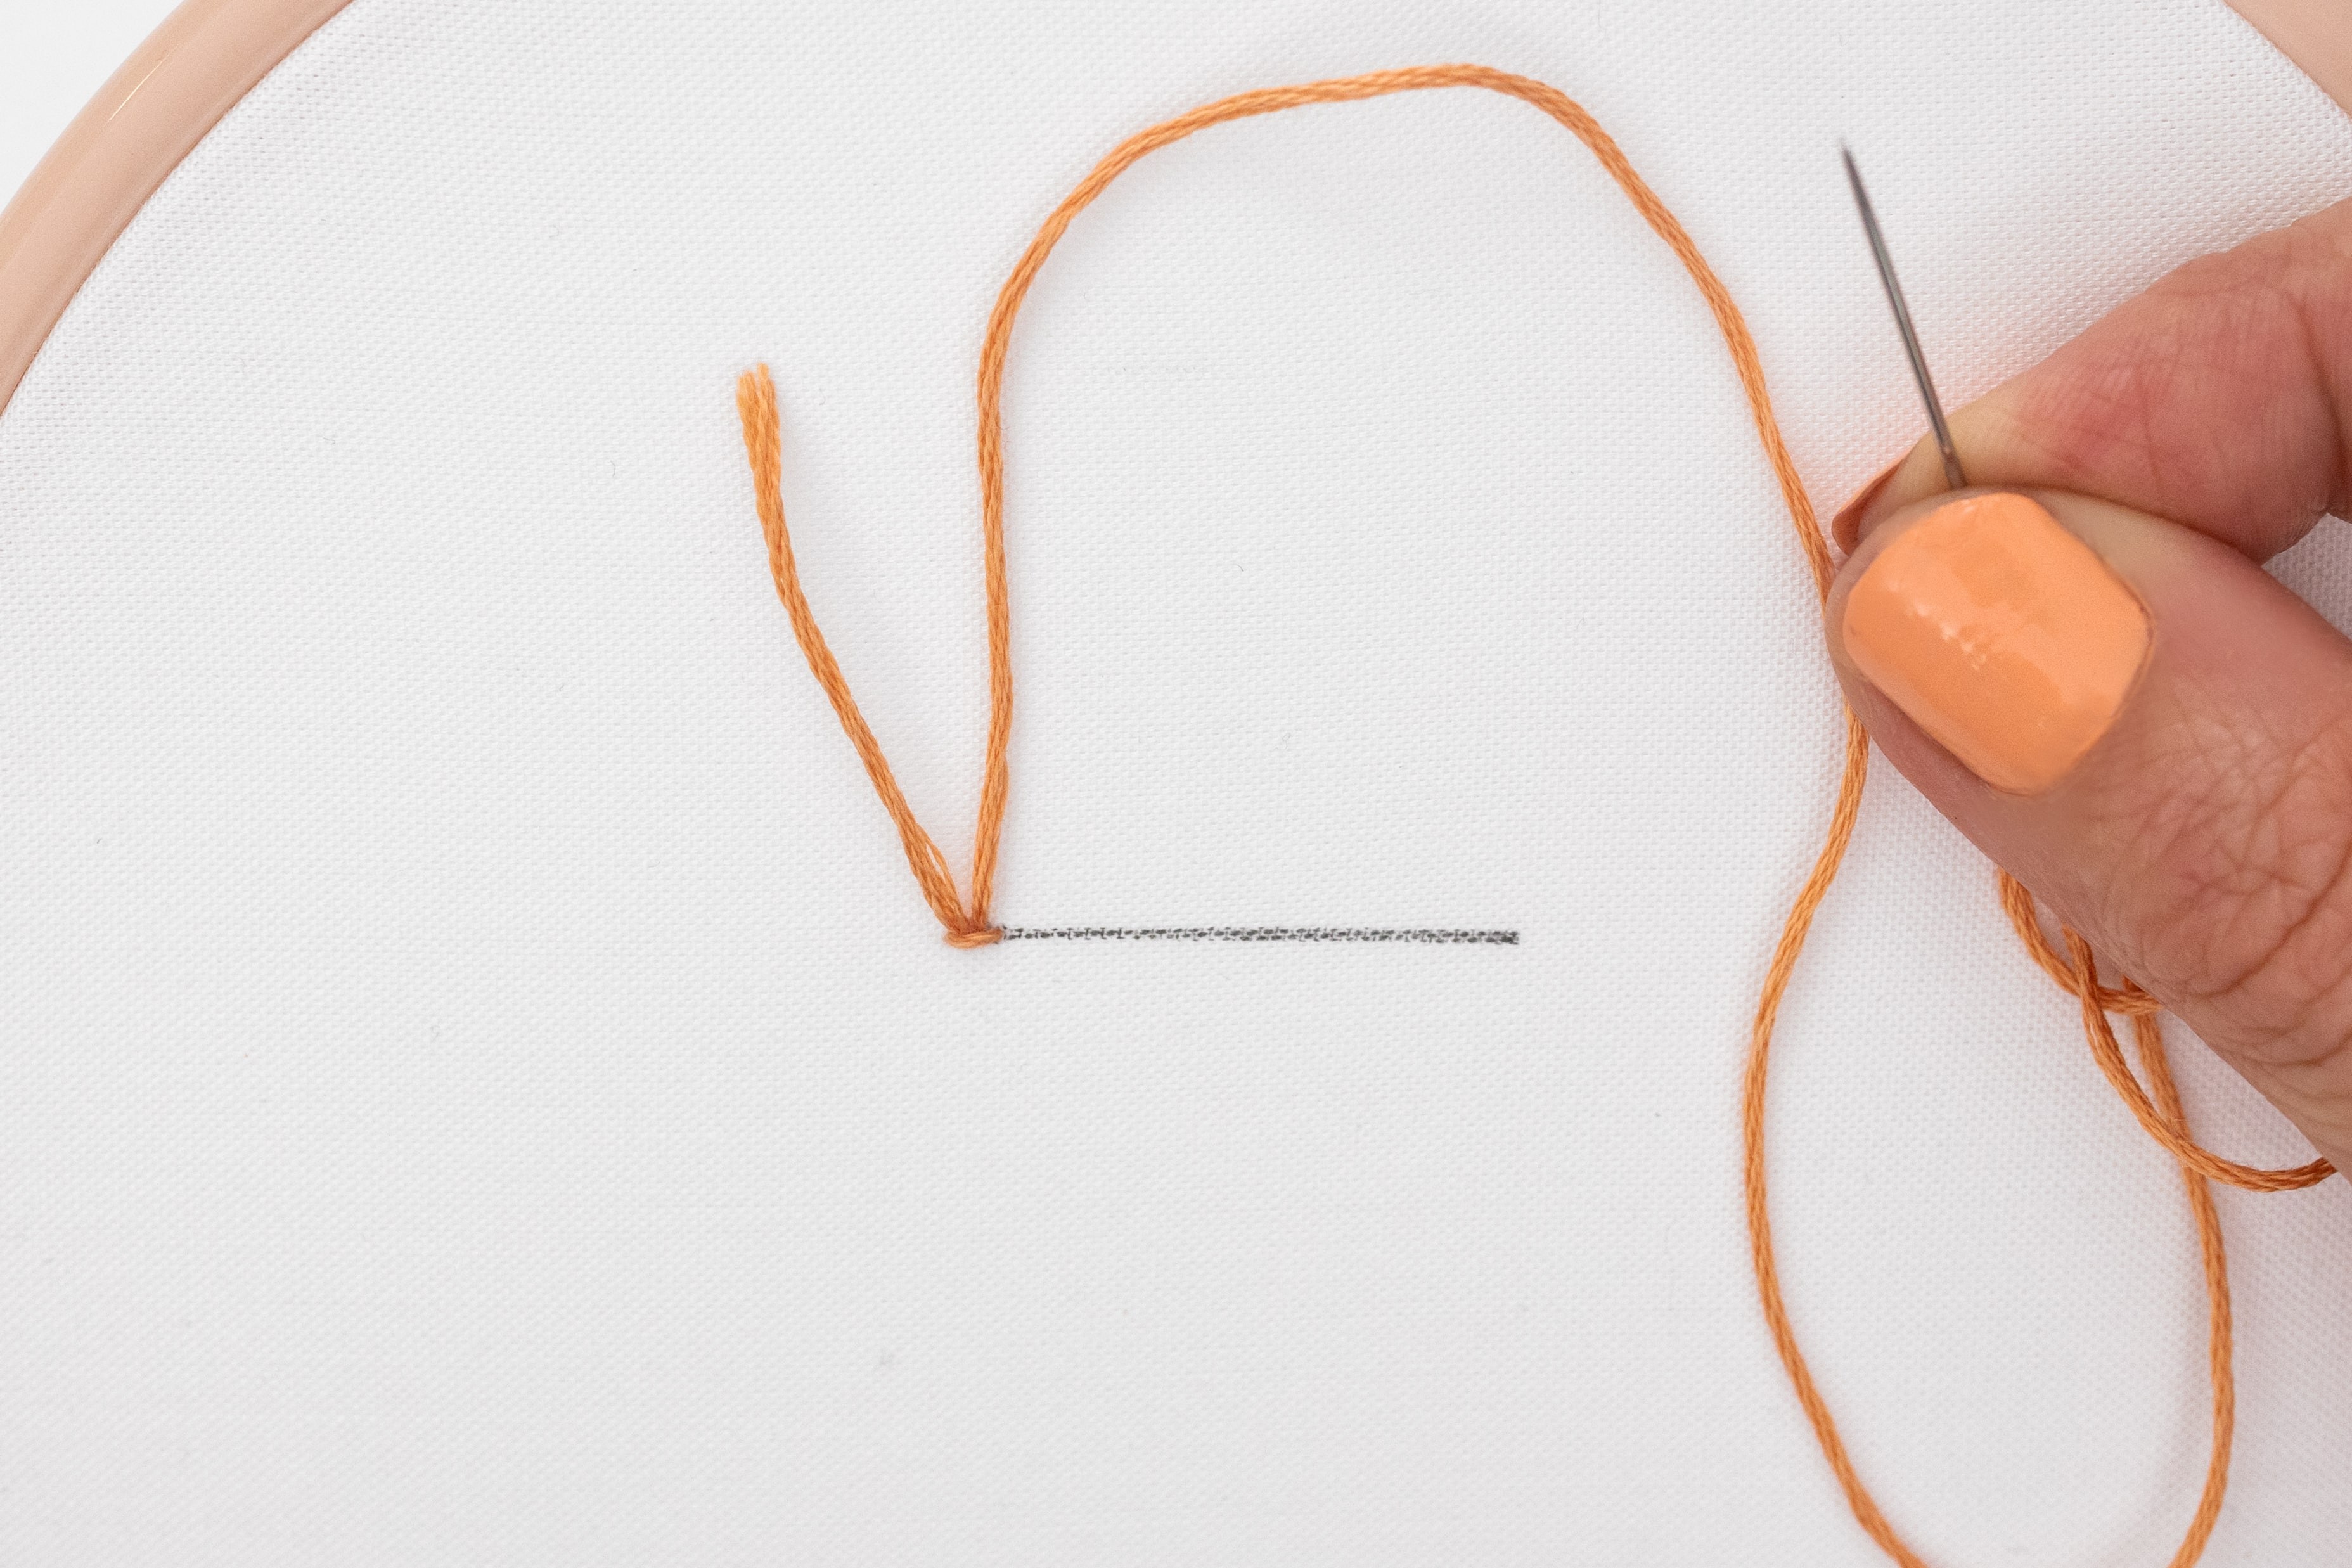
Pull through all the slack of your securing stitch. Now take a look, and see how you’ve made the first tail, which is a stand-alone piece of thread, plus made a start on the next tail - and both are held in place by that little securing stitch. Now continue along the line, and from now on you will be making loops instead of single tails (they can be cut later into single tails).
Step 5.
Lay out your working thread beside the first tail, above the line, and use some pressure with your thumb to hold that in place against the fabric.
Then poke your needle back down to the right-hand side of the securing stitch you just did.
Go gently as you draw the slack through to the underside of the fabric, and use your thumb to hold the working thread so that it turns into a loop (if you forget and keep pulling the loop will get smaller, then disappear!).
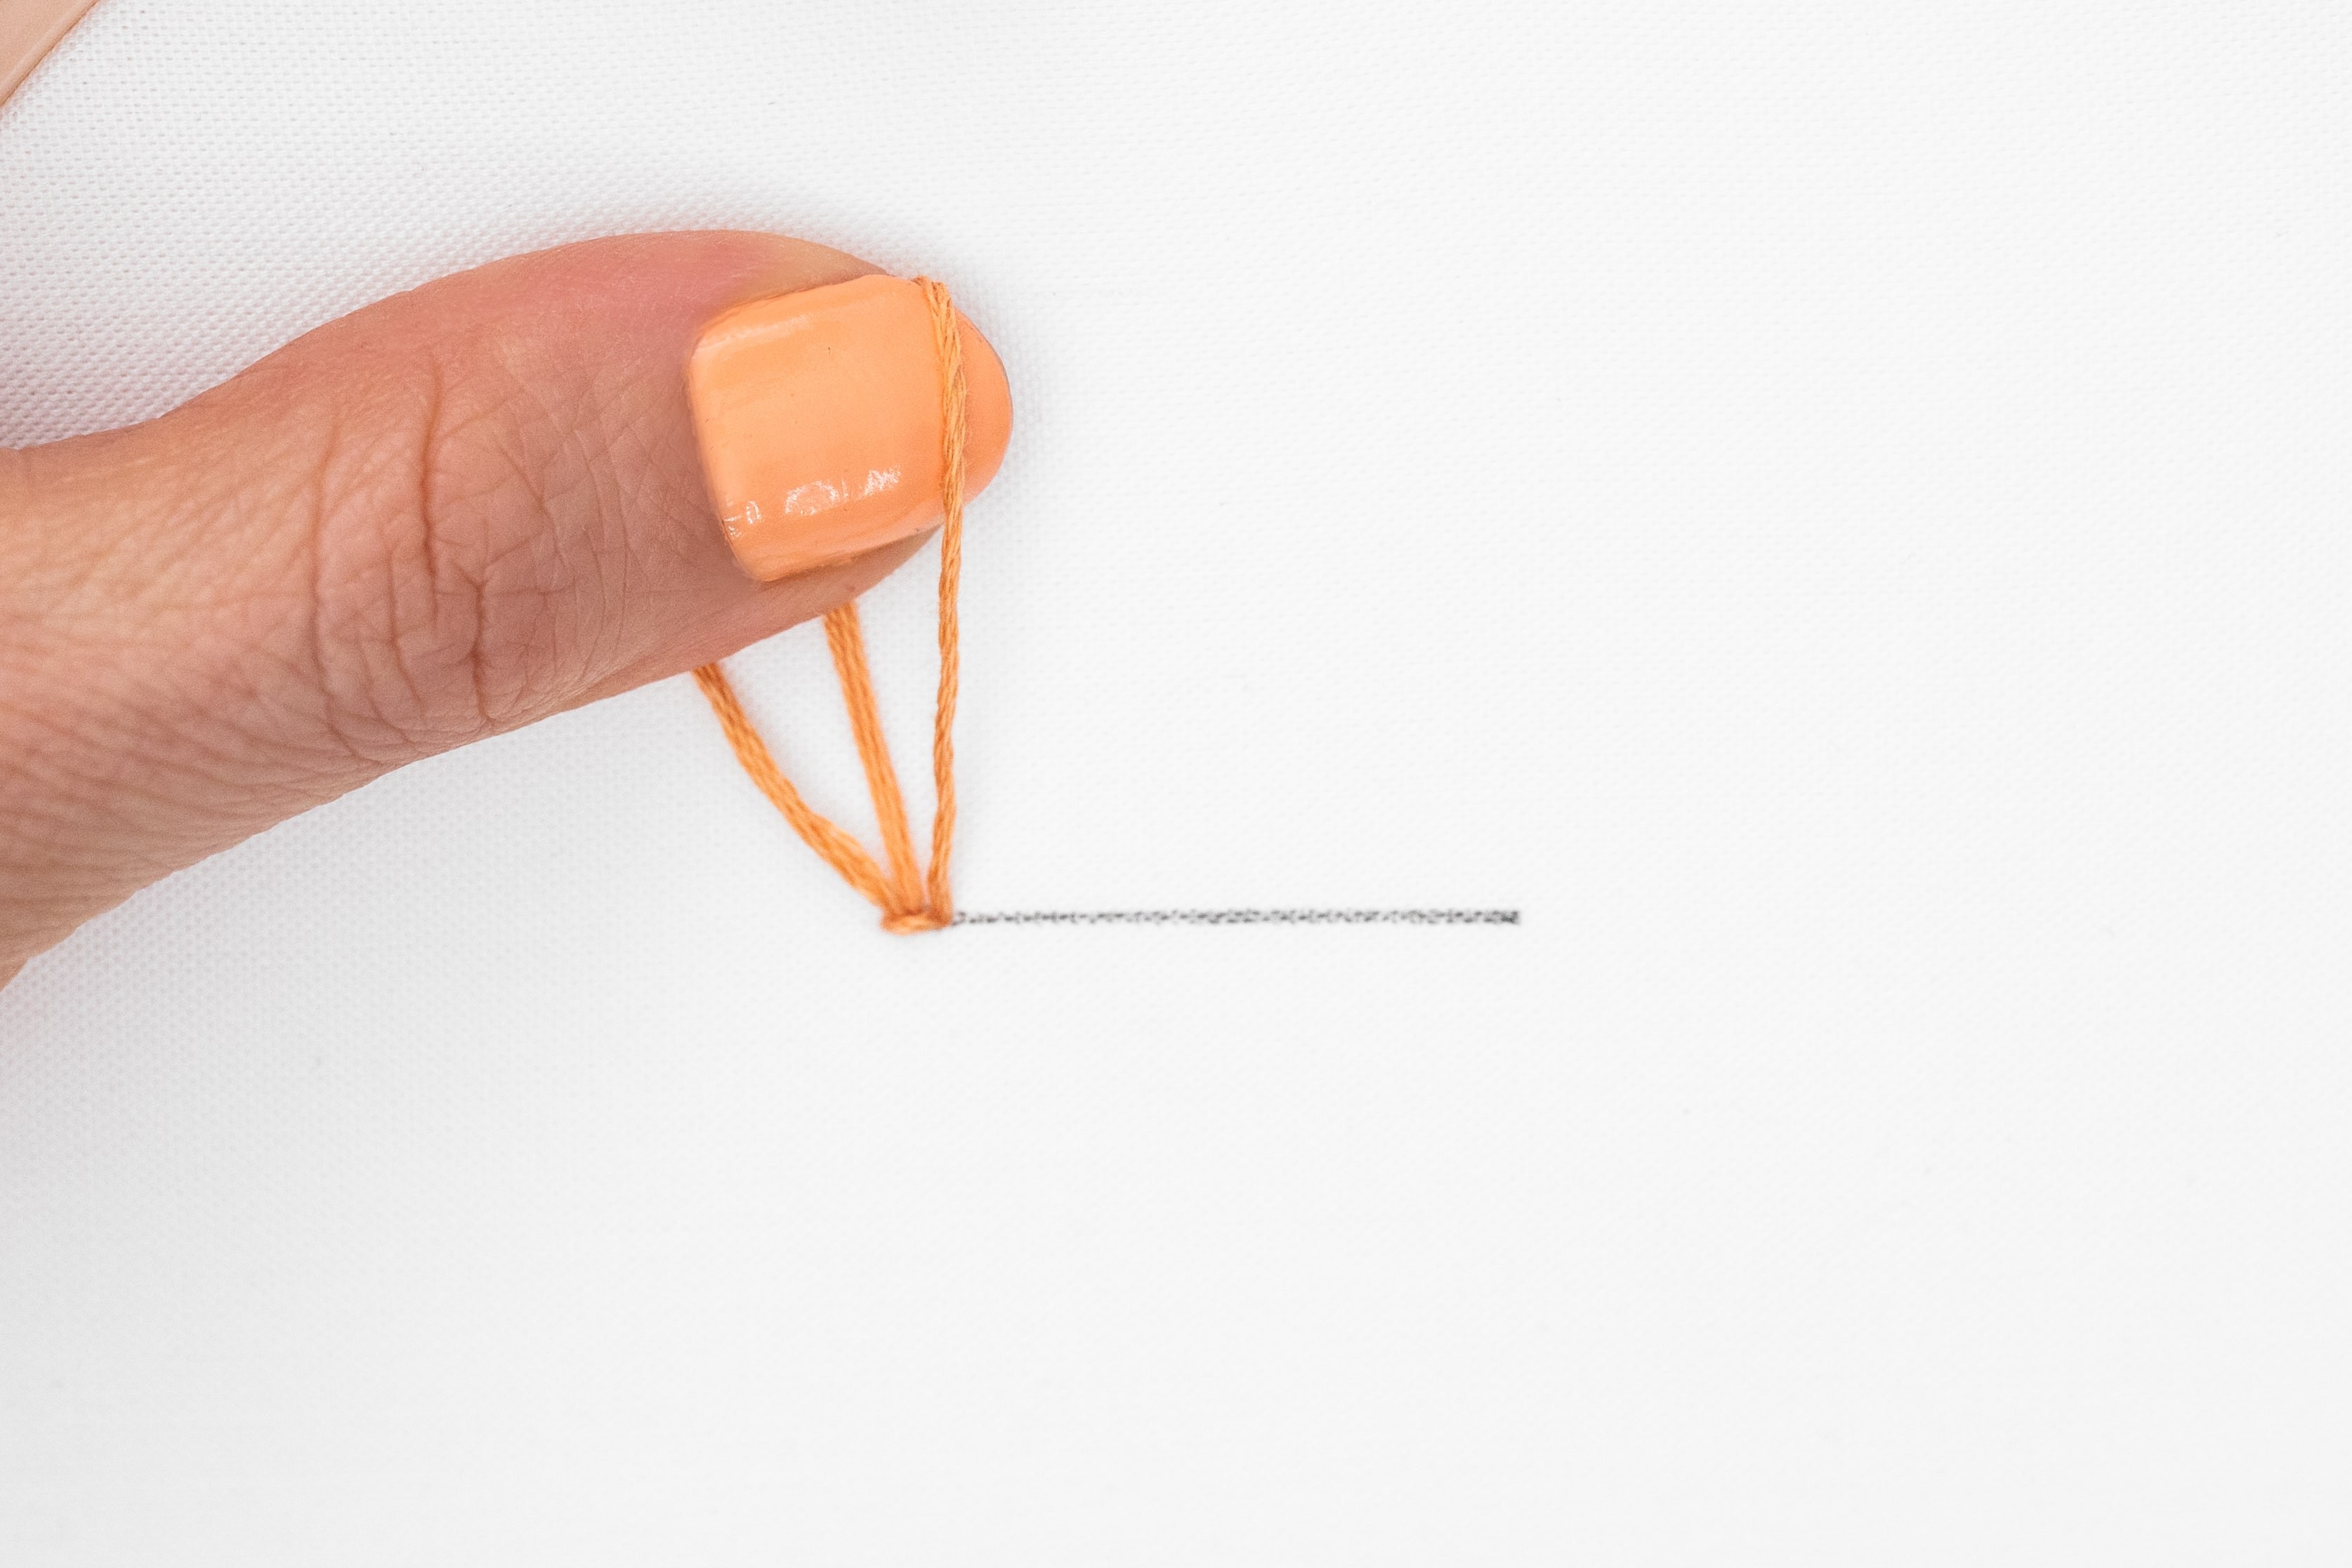
Step 6.
Now bring your needle back up to the right-hand side of the loop, once again leaving a little gap that’s just a bit wider than your thread. Pull through all the slack, holding the loop in place with your thumb.
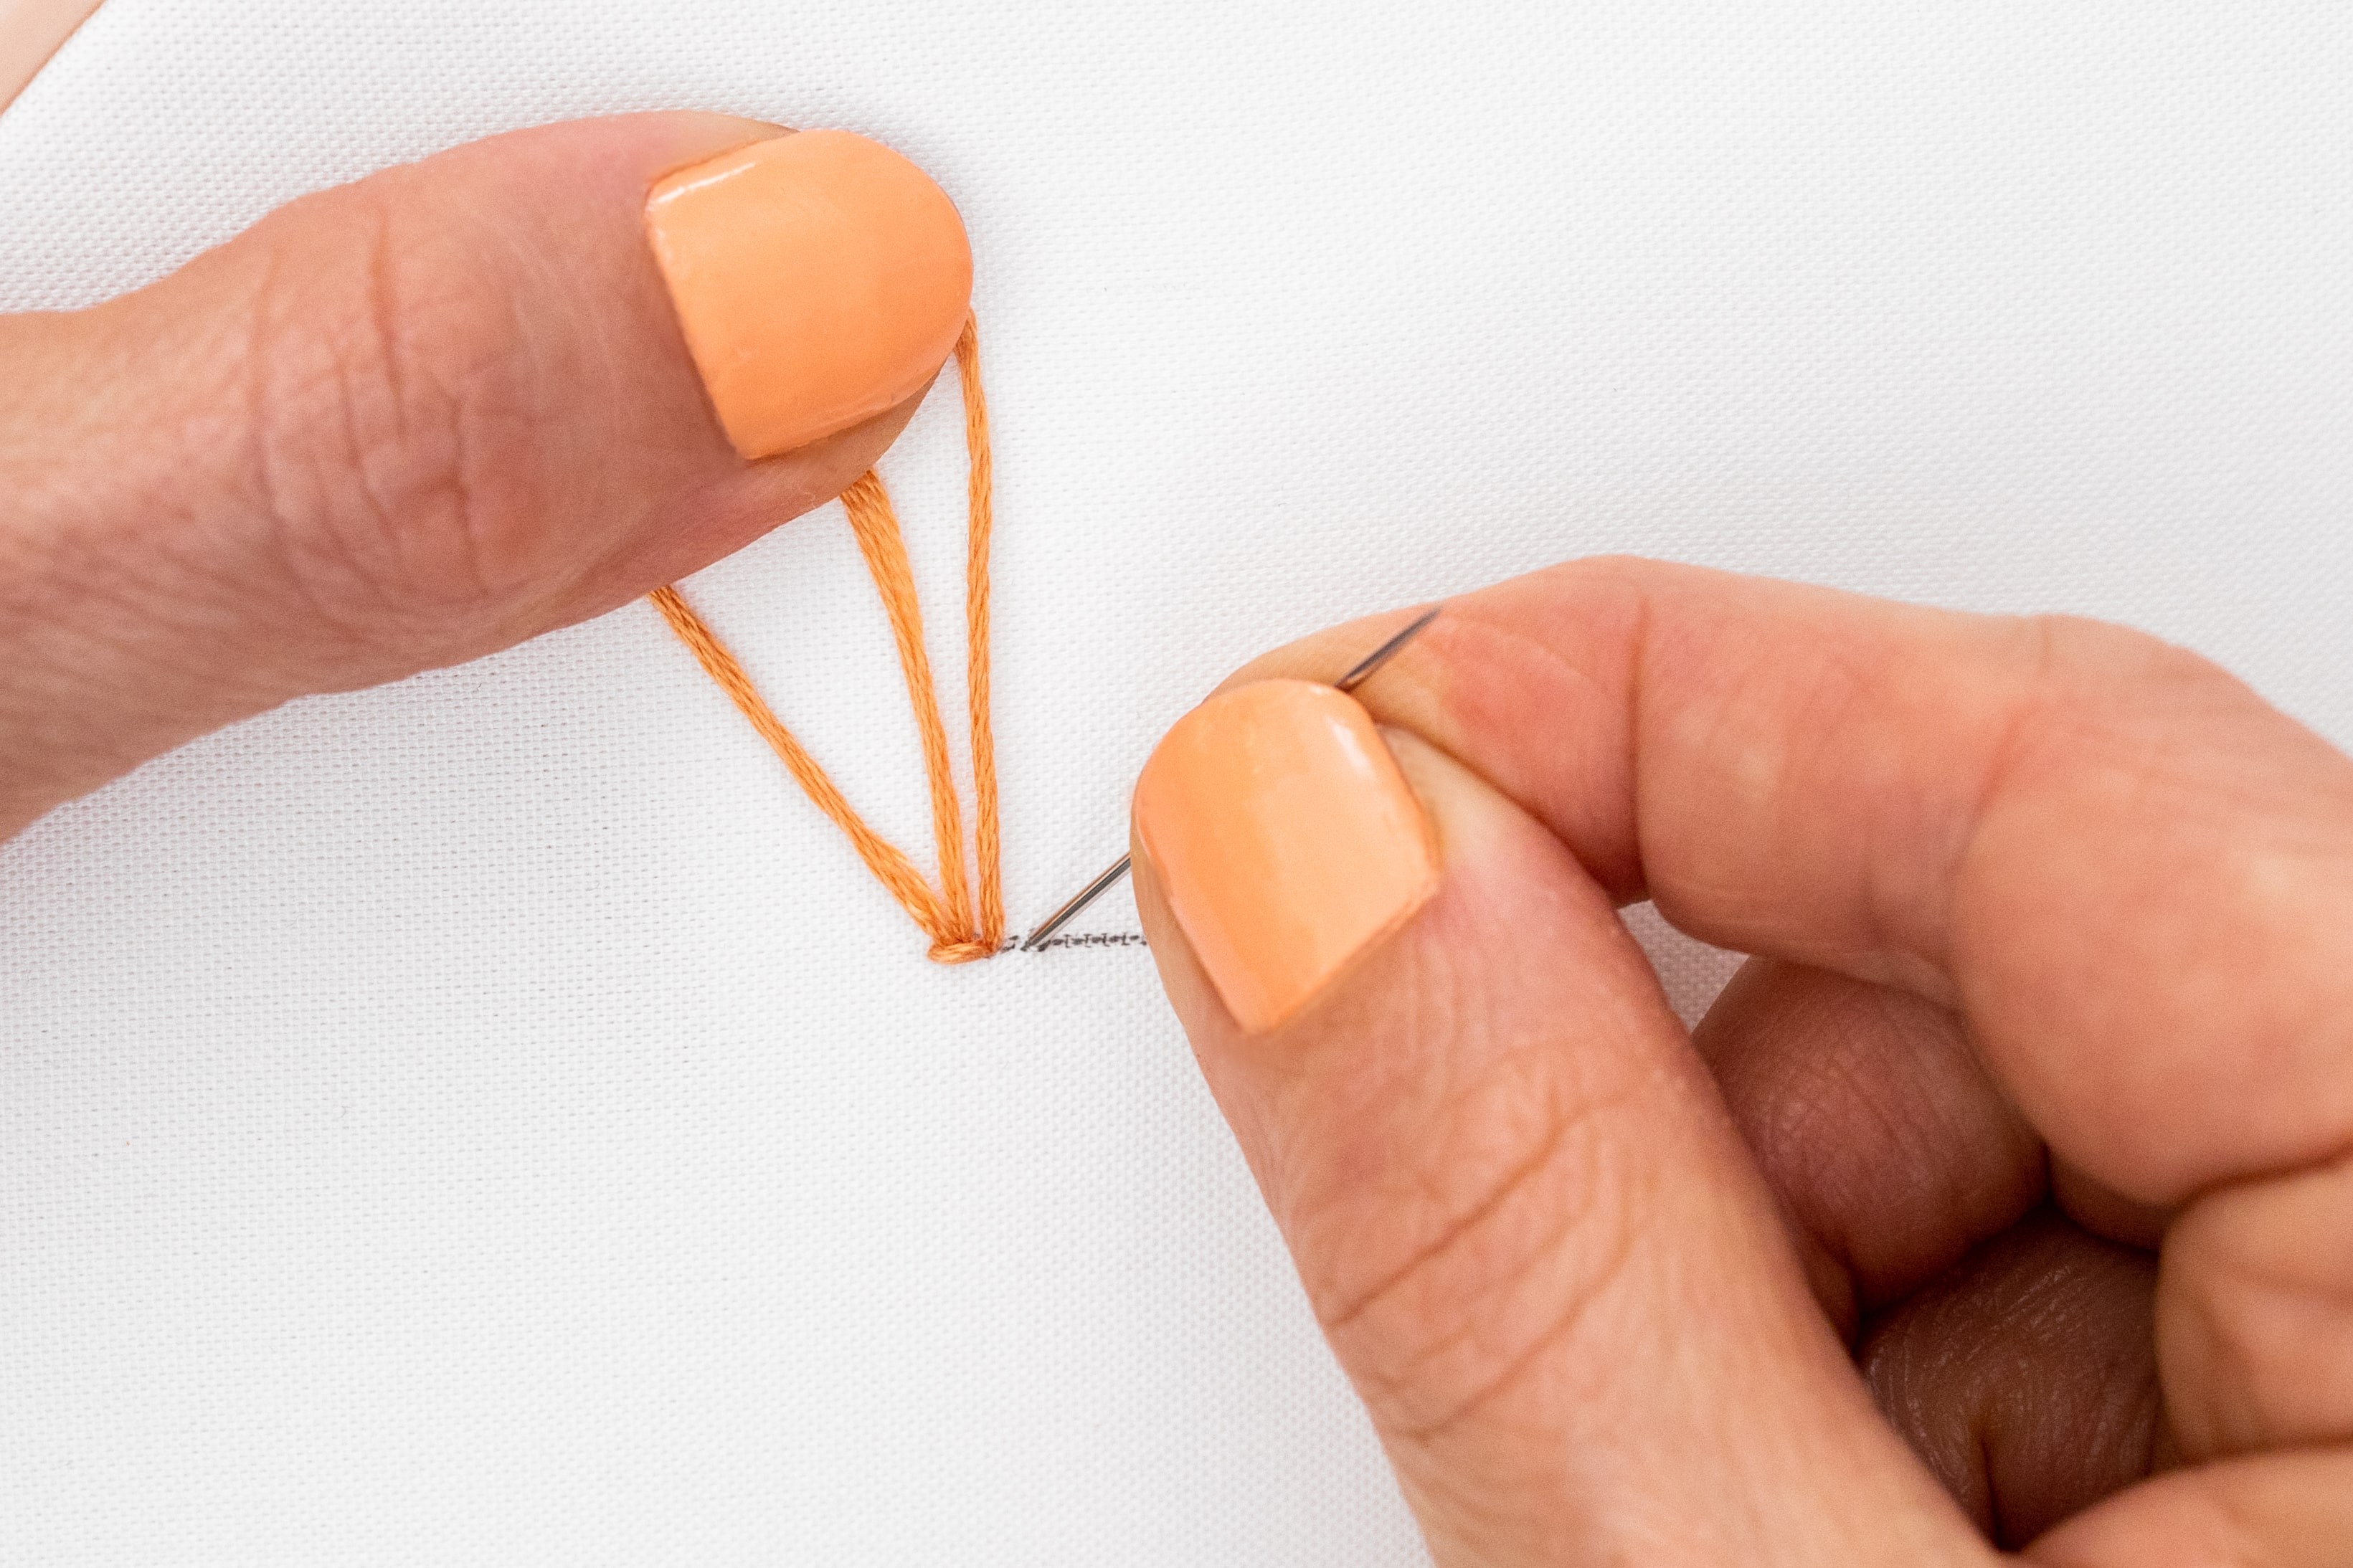
Step 7.
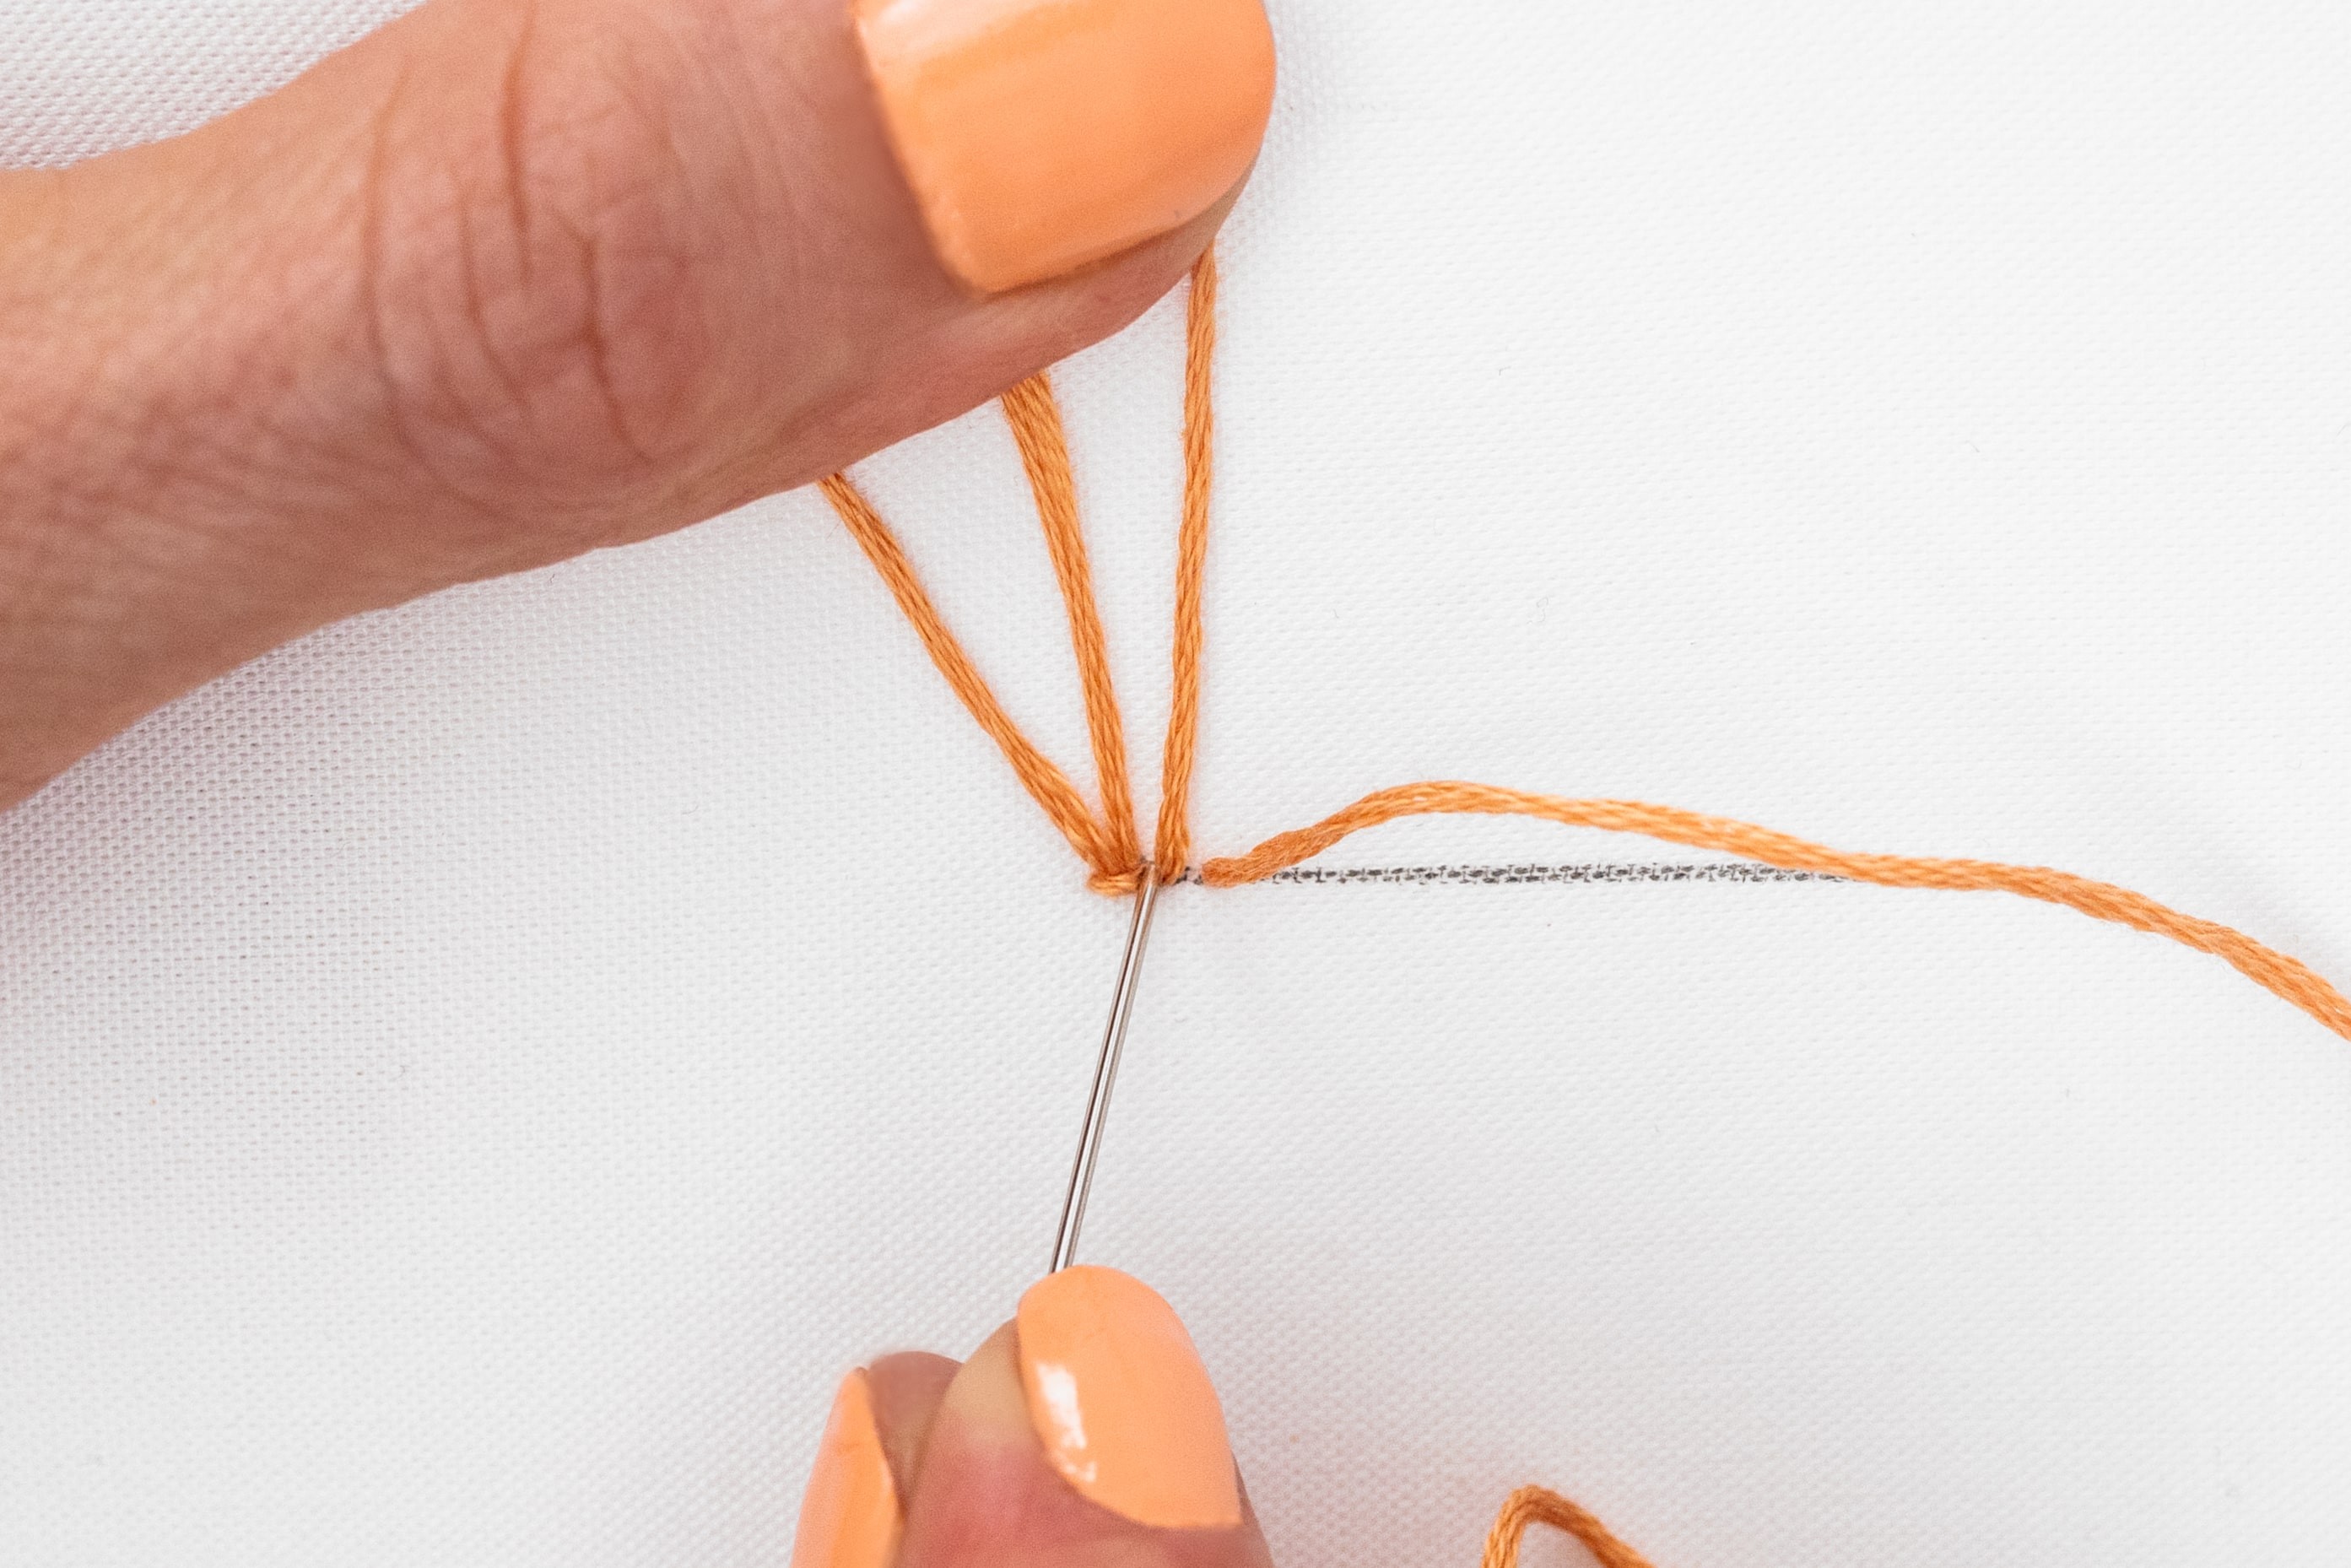
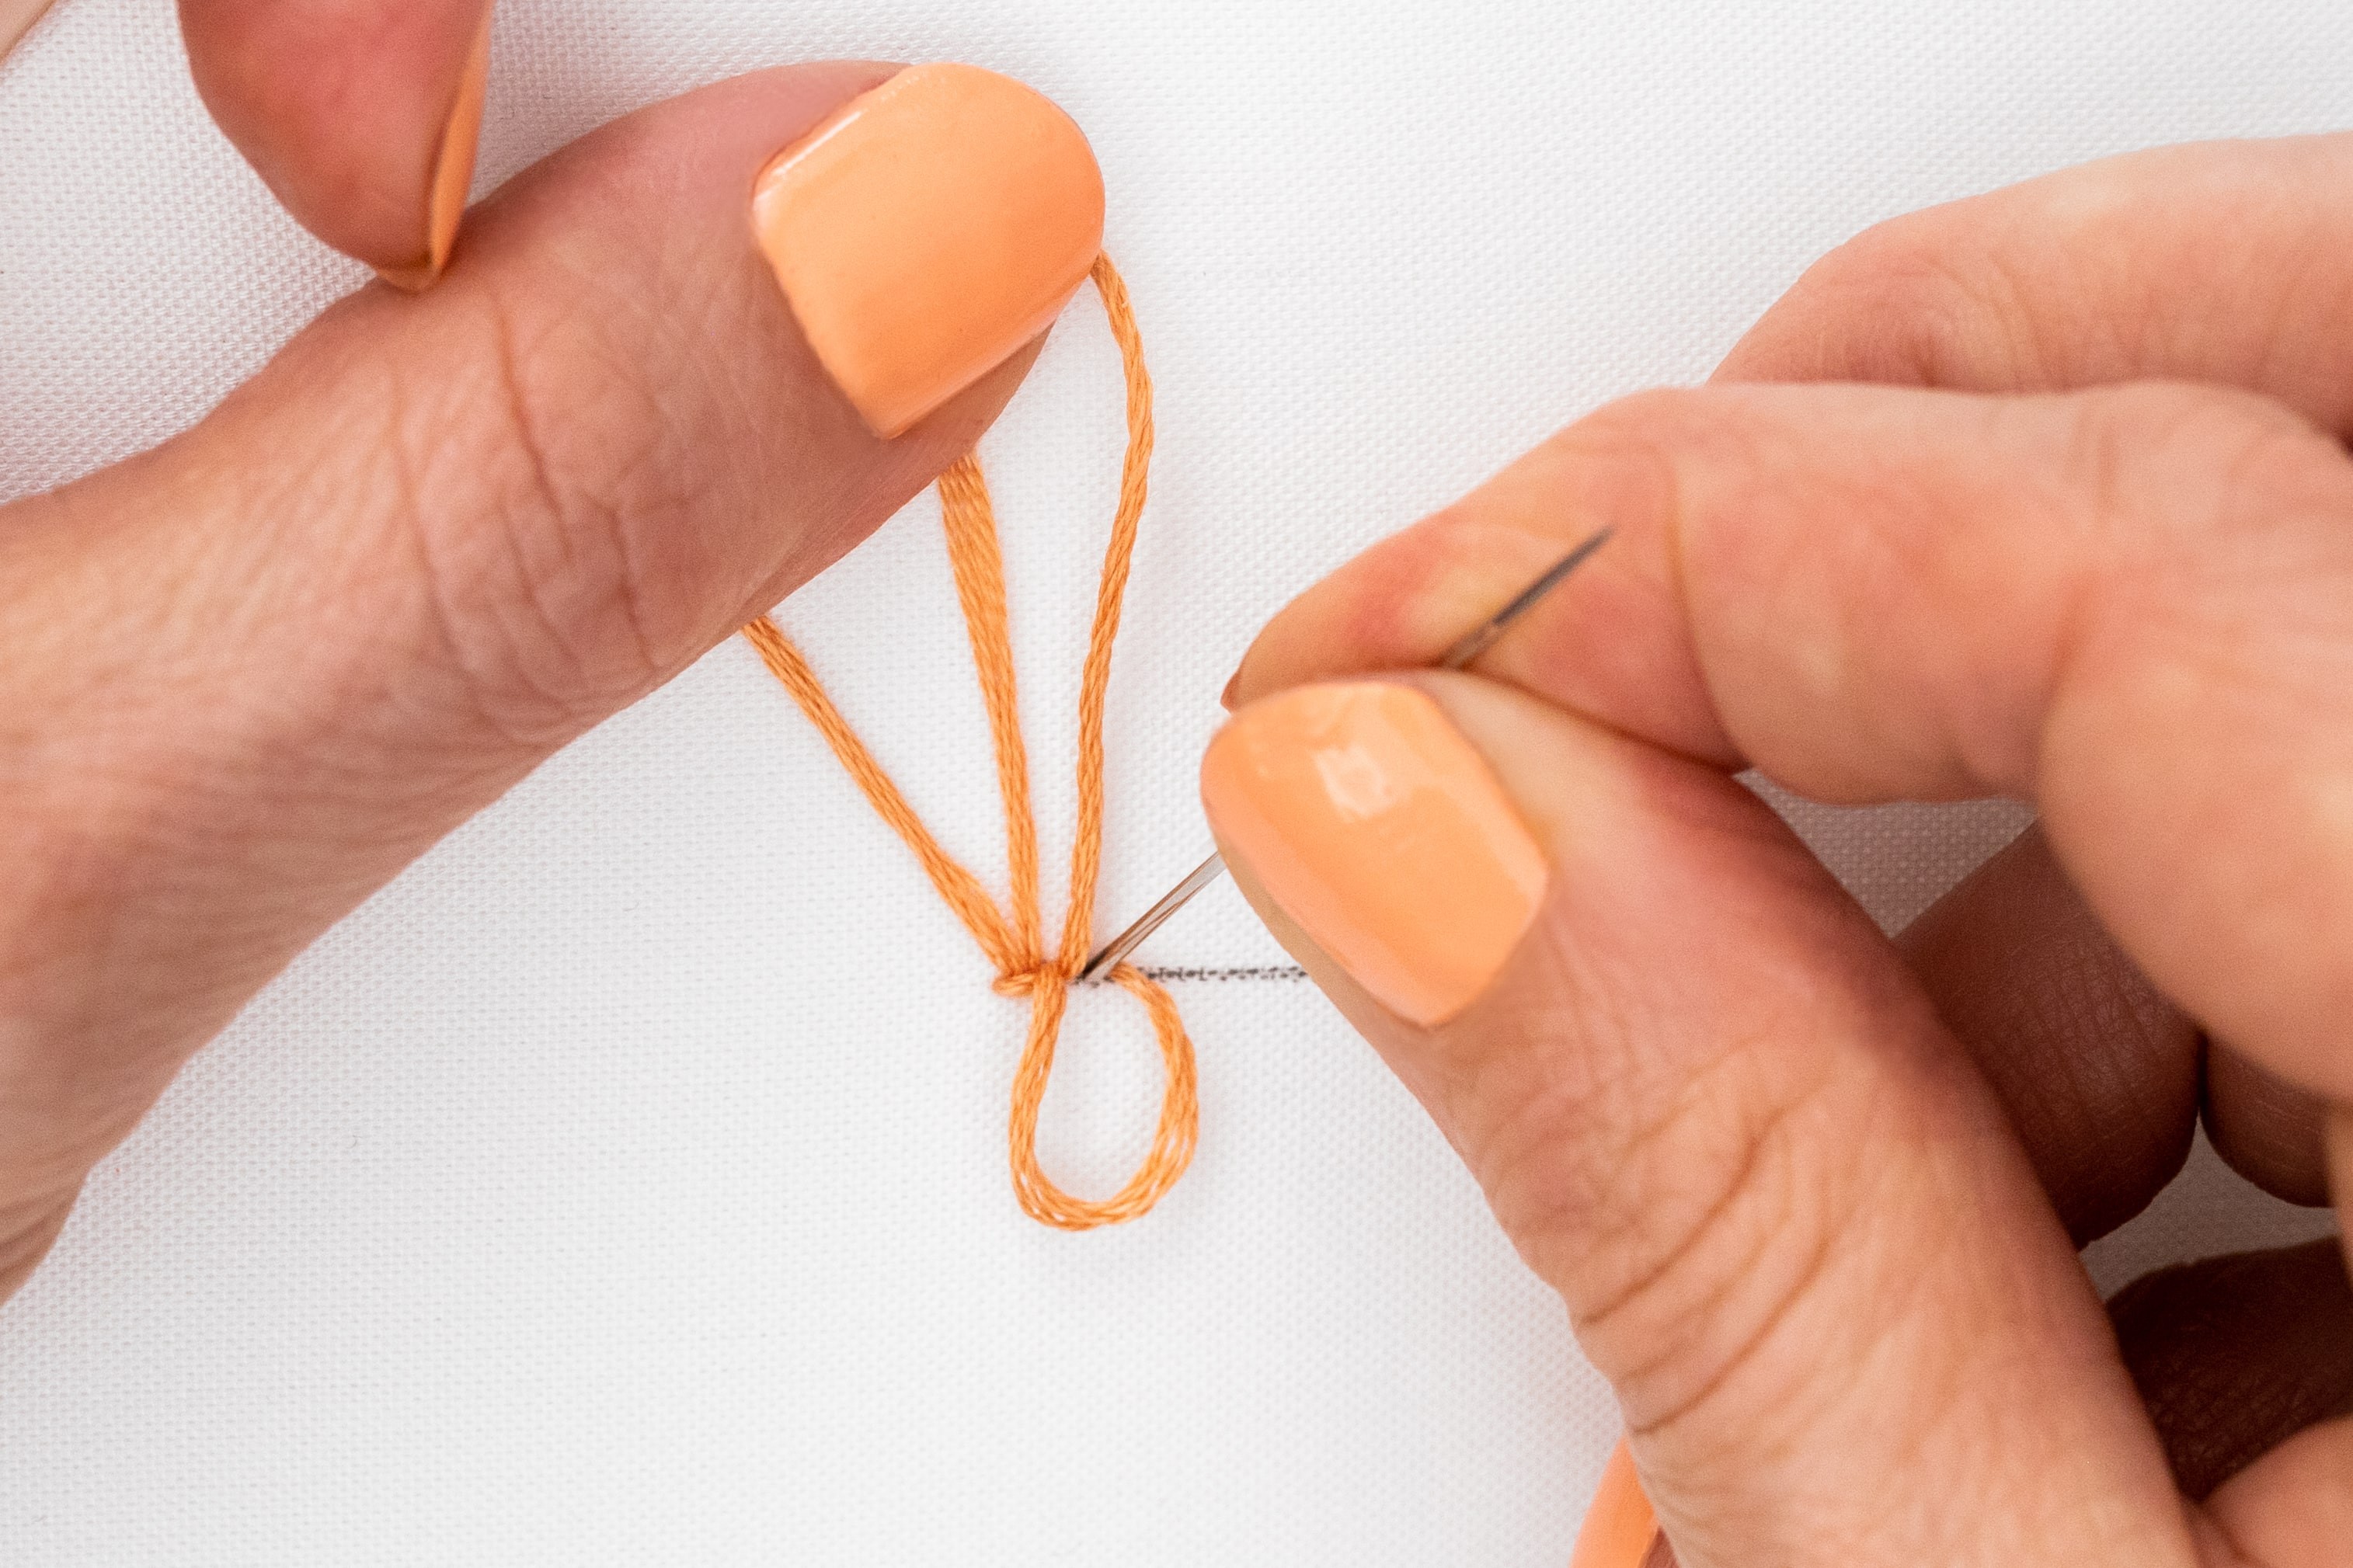
Next, do your securing stitch, but this time just stitch back over the right-hand ‘leg’ of the previous loop (the left-hand leg should already be secured in place).
Just like before, go gently as you make this stitch, to leave some slack on the top side of your fabric, which you can nudge down in order to see the line. Bring your needle back up on the line inside the securing stitch (aim for that little gap you made on the right-hand side of the previous loop).
Make sure that your needle is above the working thread, and gently draw through all of the slack, to complete the securing stitch.
Take another look, and as you’ll see you’ve created your first loop, secured it into place, and started on your second loop.
TIP – splitting stitches: If your stitches are quite close, you’ll find you end up splitting the stitches as you work your way along the line. Don’t worry this shouldn’t be a problem, but you might need to give your needle quite a bit of oomph to draw it through the fabric.
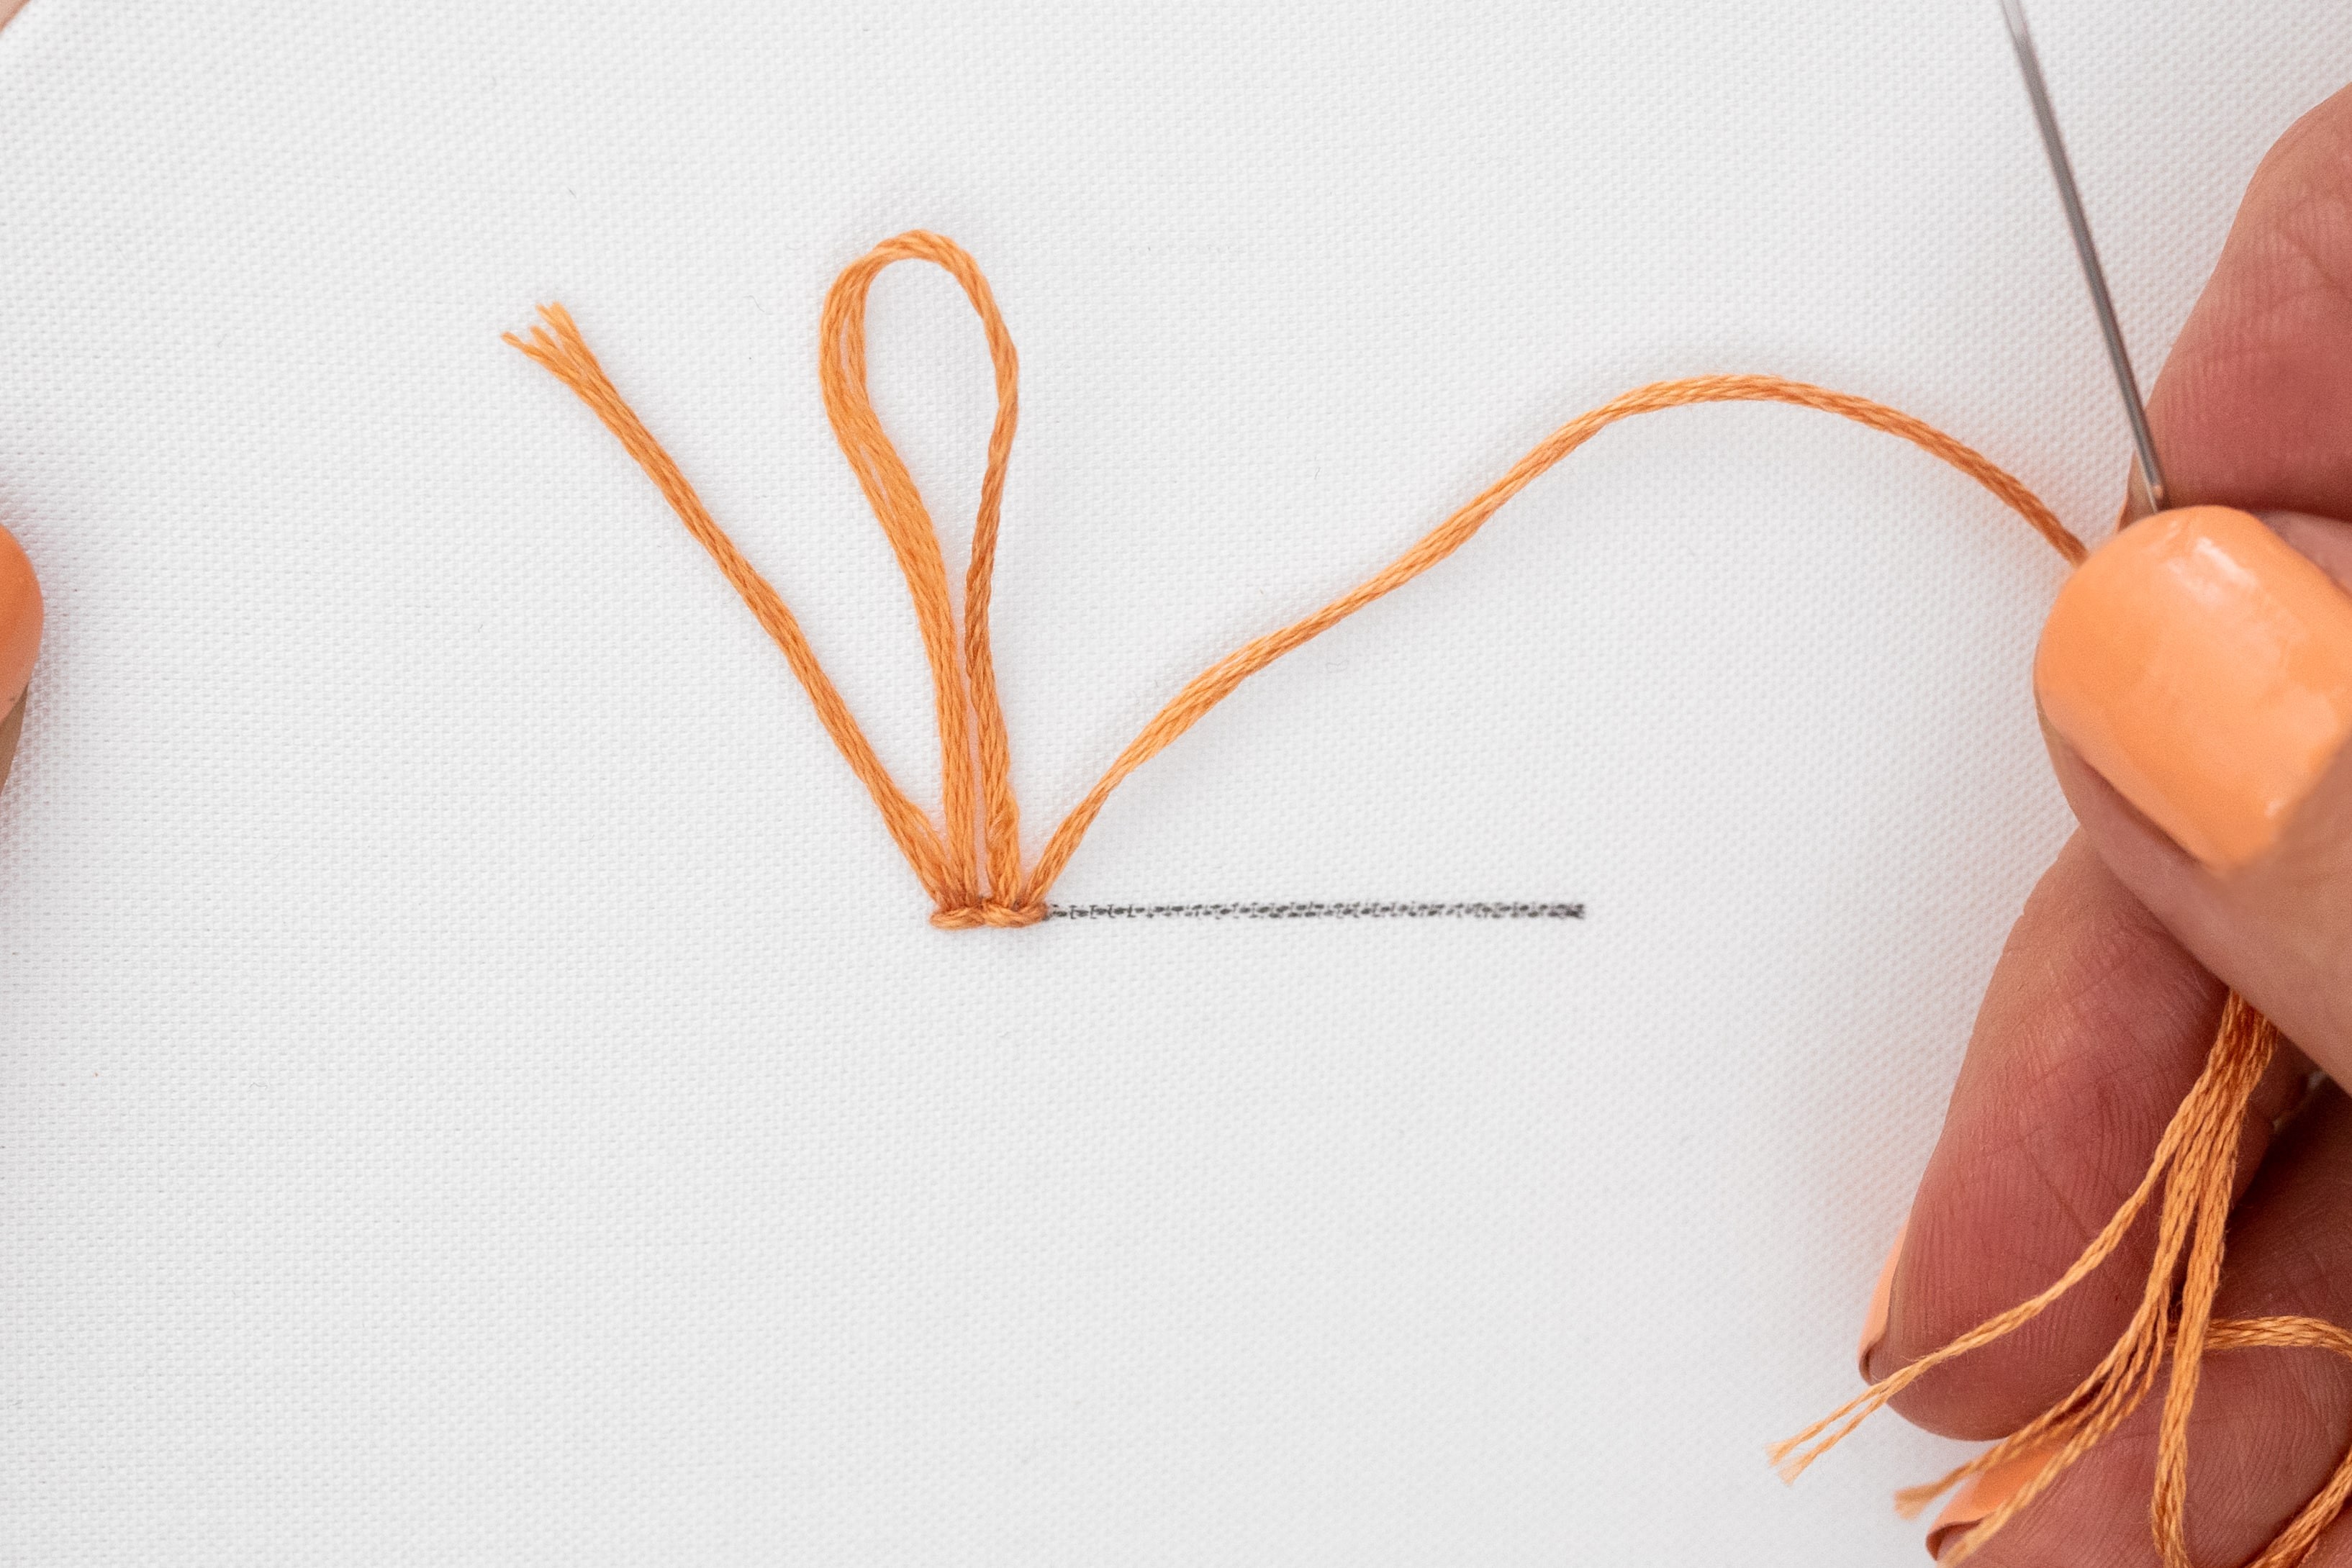
Step 8.
Ok, so now it’s a case of following this same method, to complete loop after loop along your line. This technique definitely takes a lot of thought while you are learning, but it will become second nature once you have some practice under your belt.
You basically repeat steps 5-7, but here’s a quick-reference guide to this process:
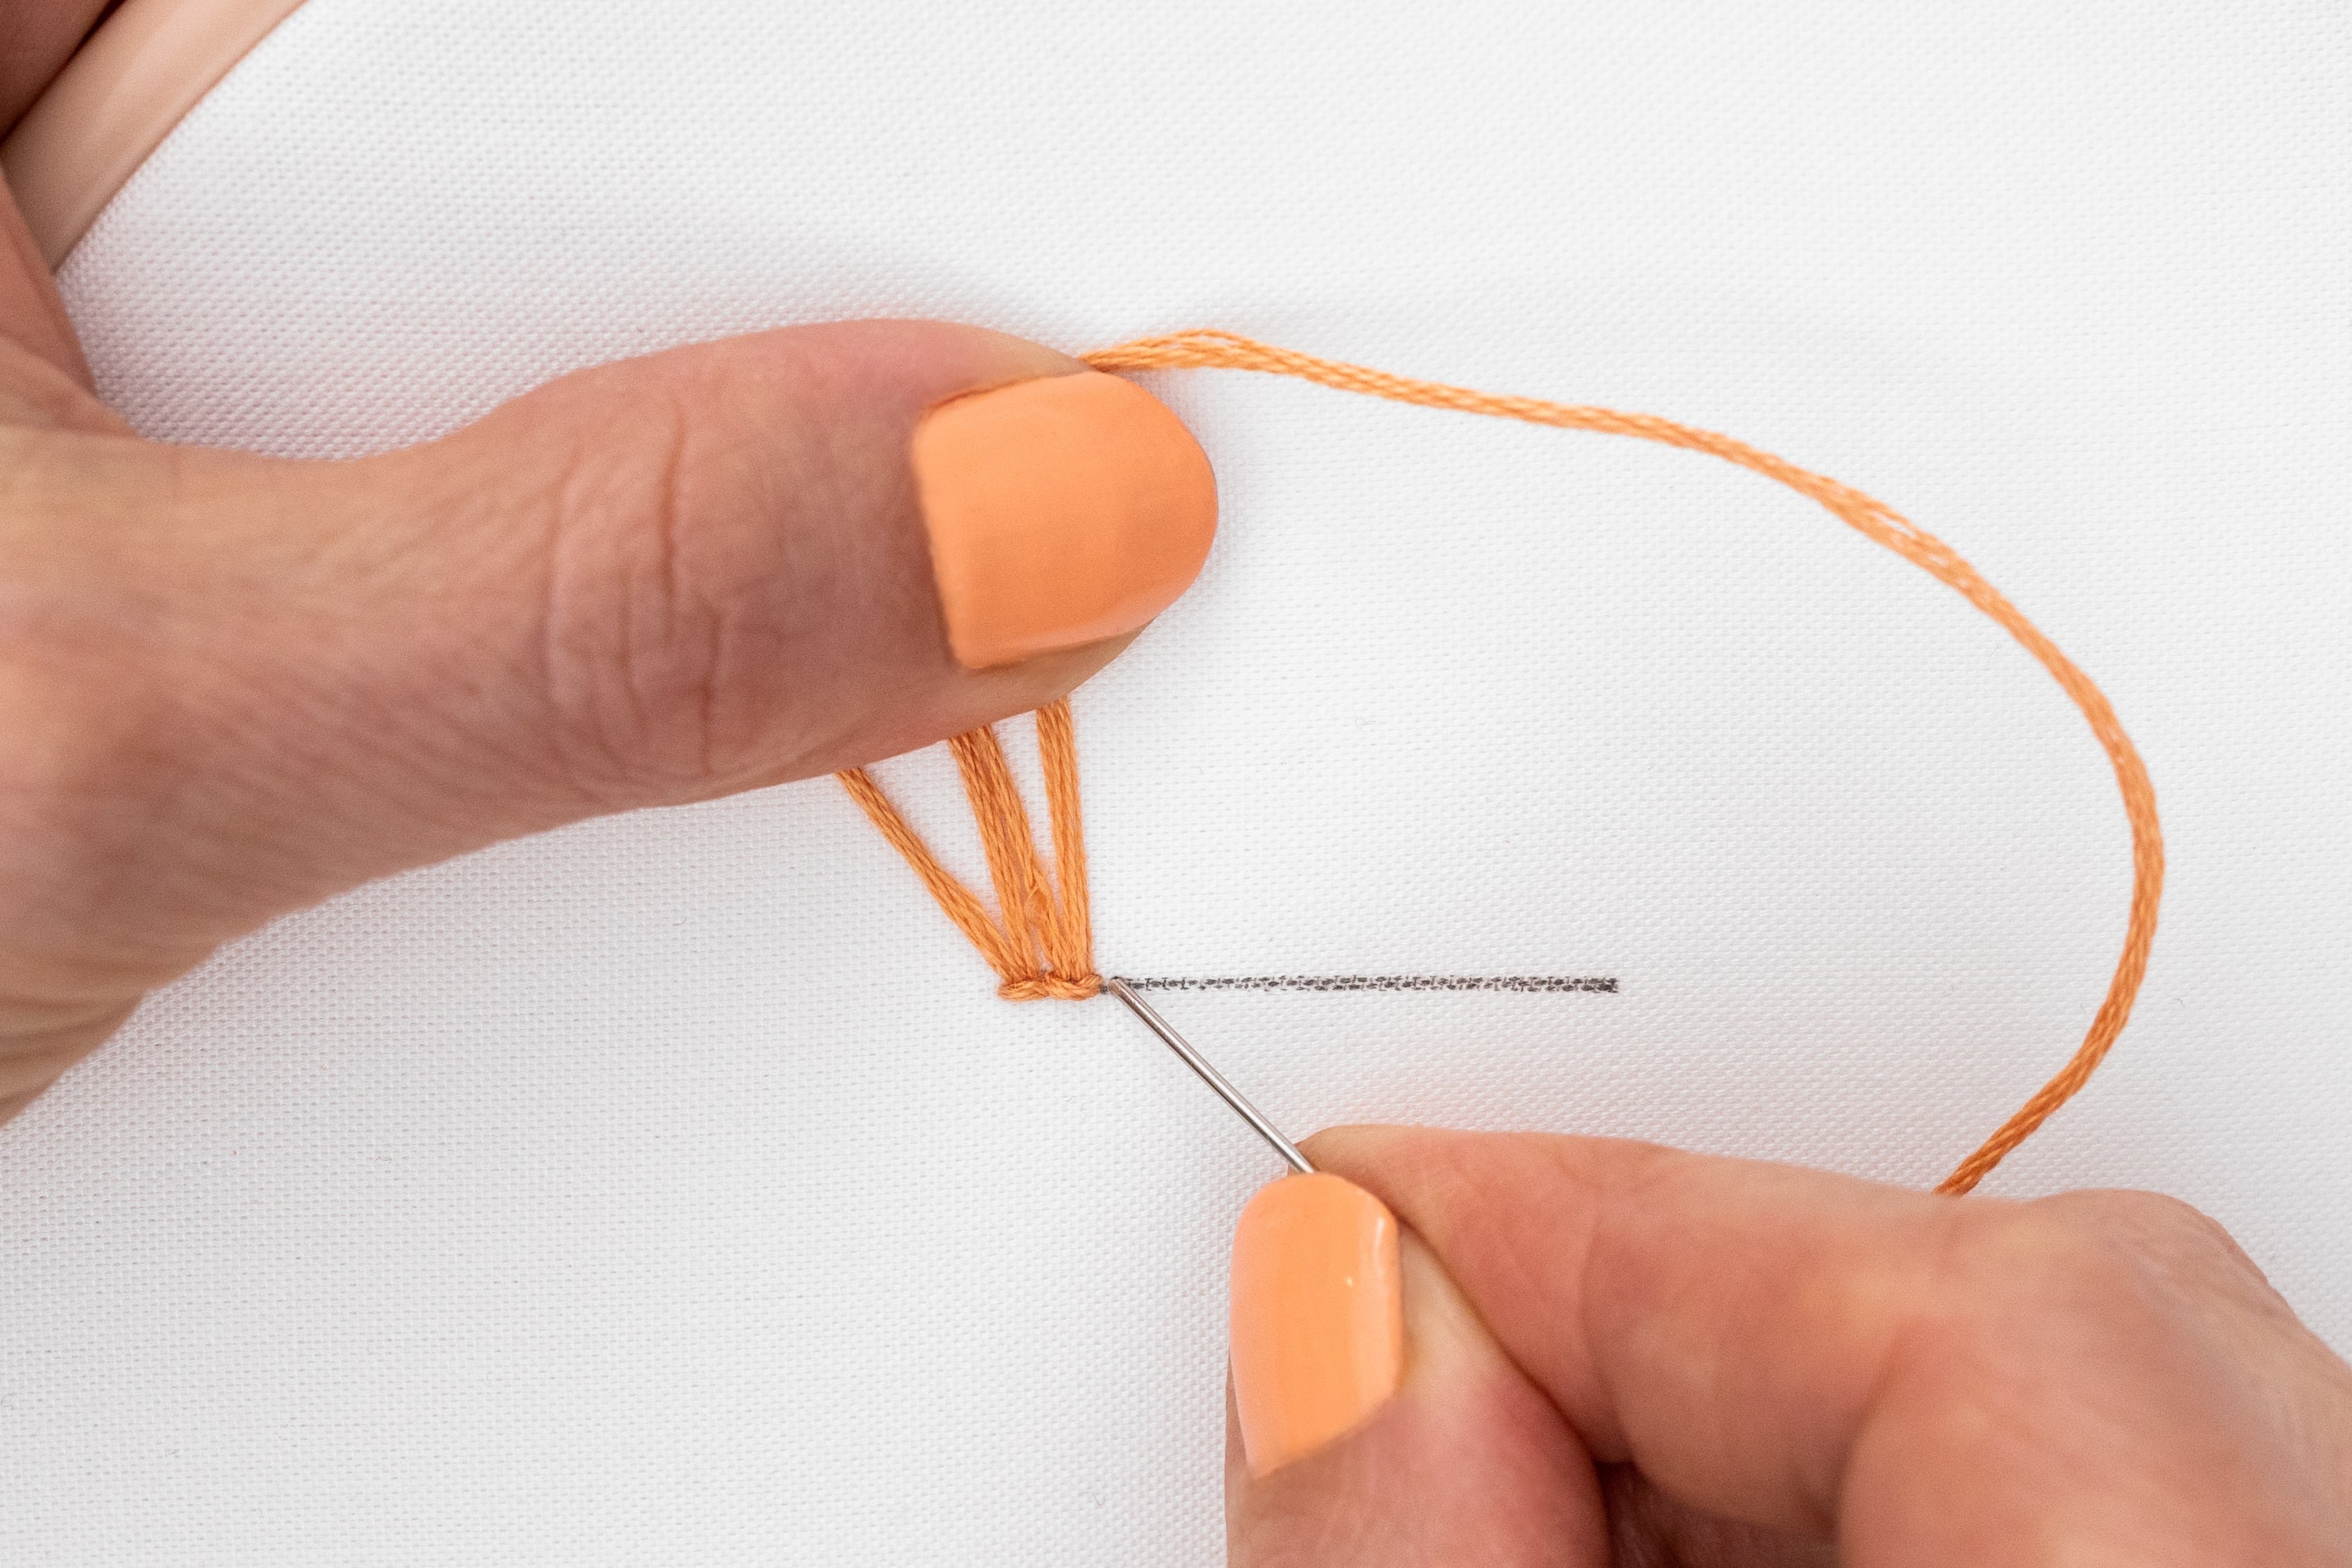
A. Lay out the working thread above the line, and poke your needle back down to the right of the previous securing stitch.
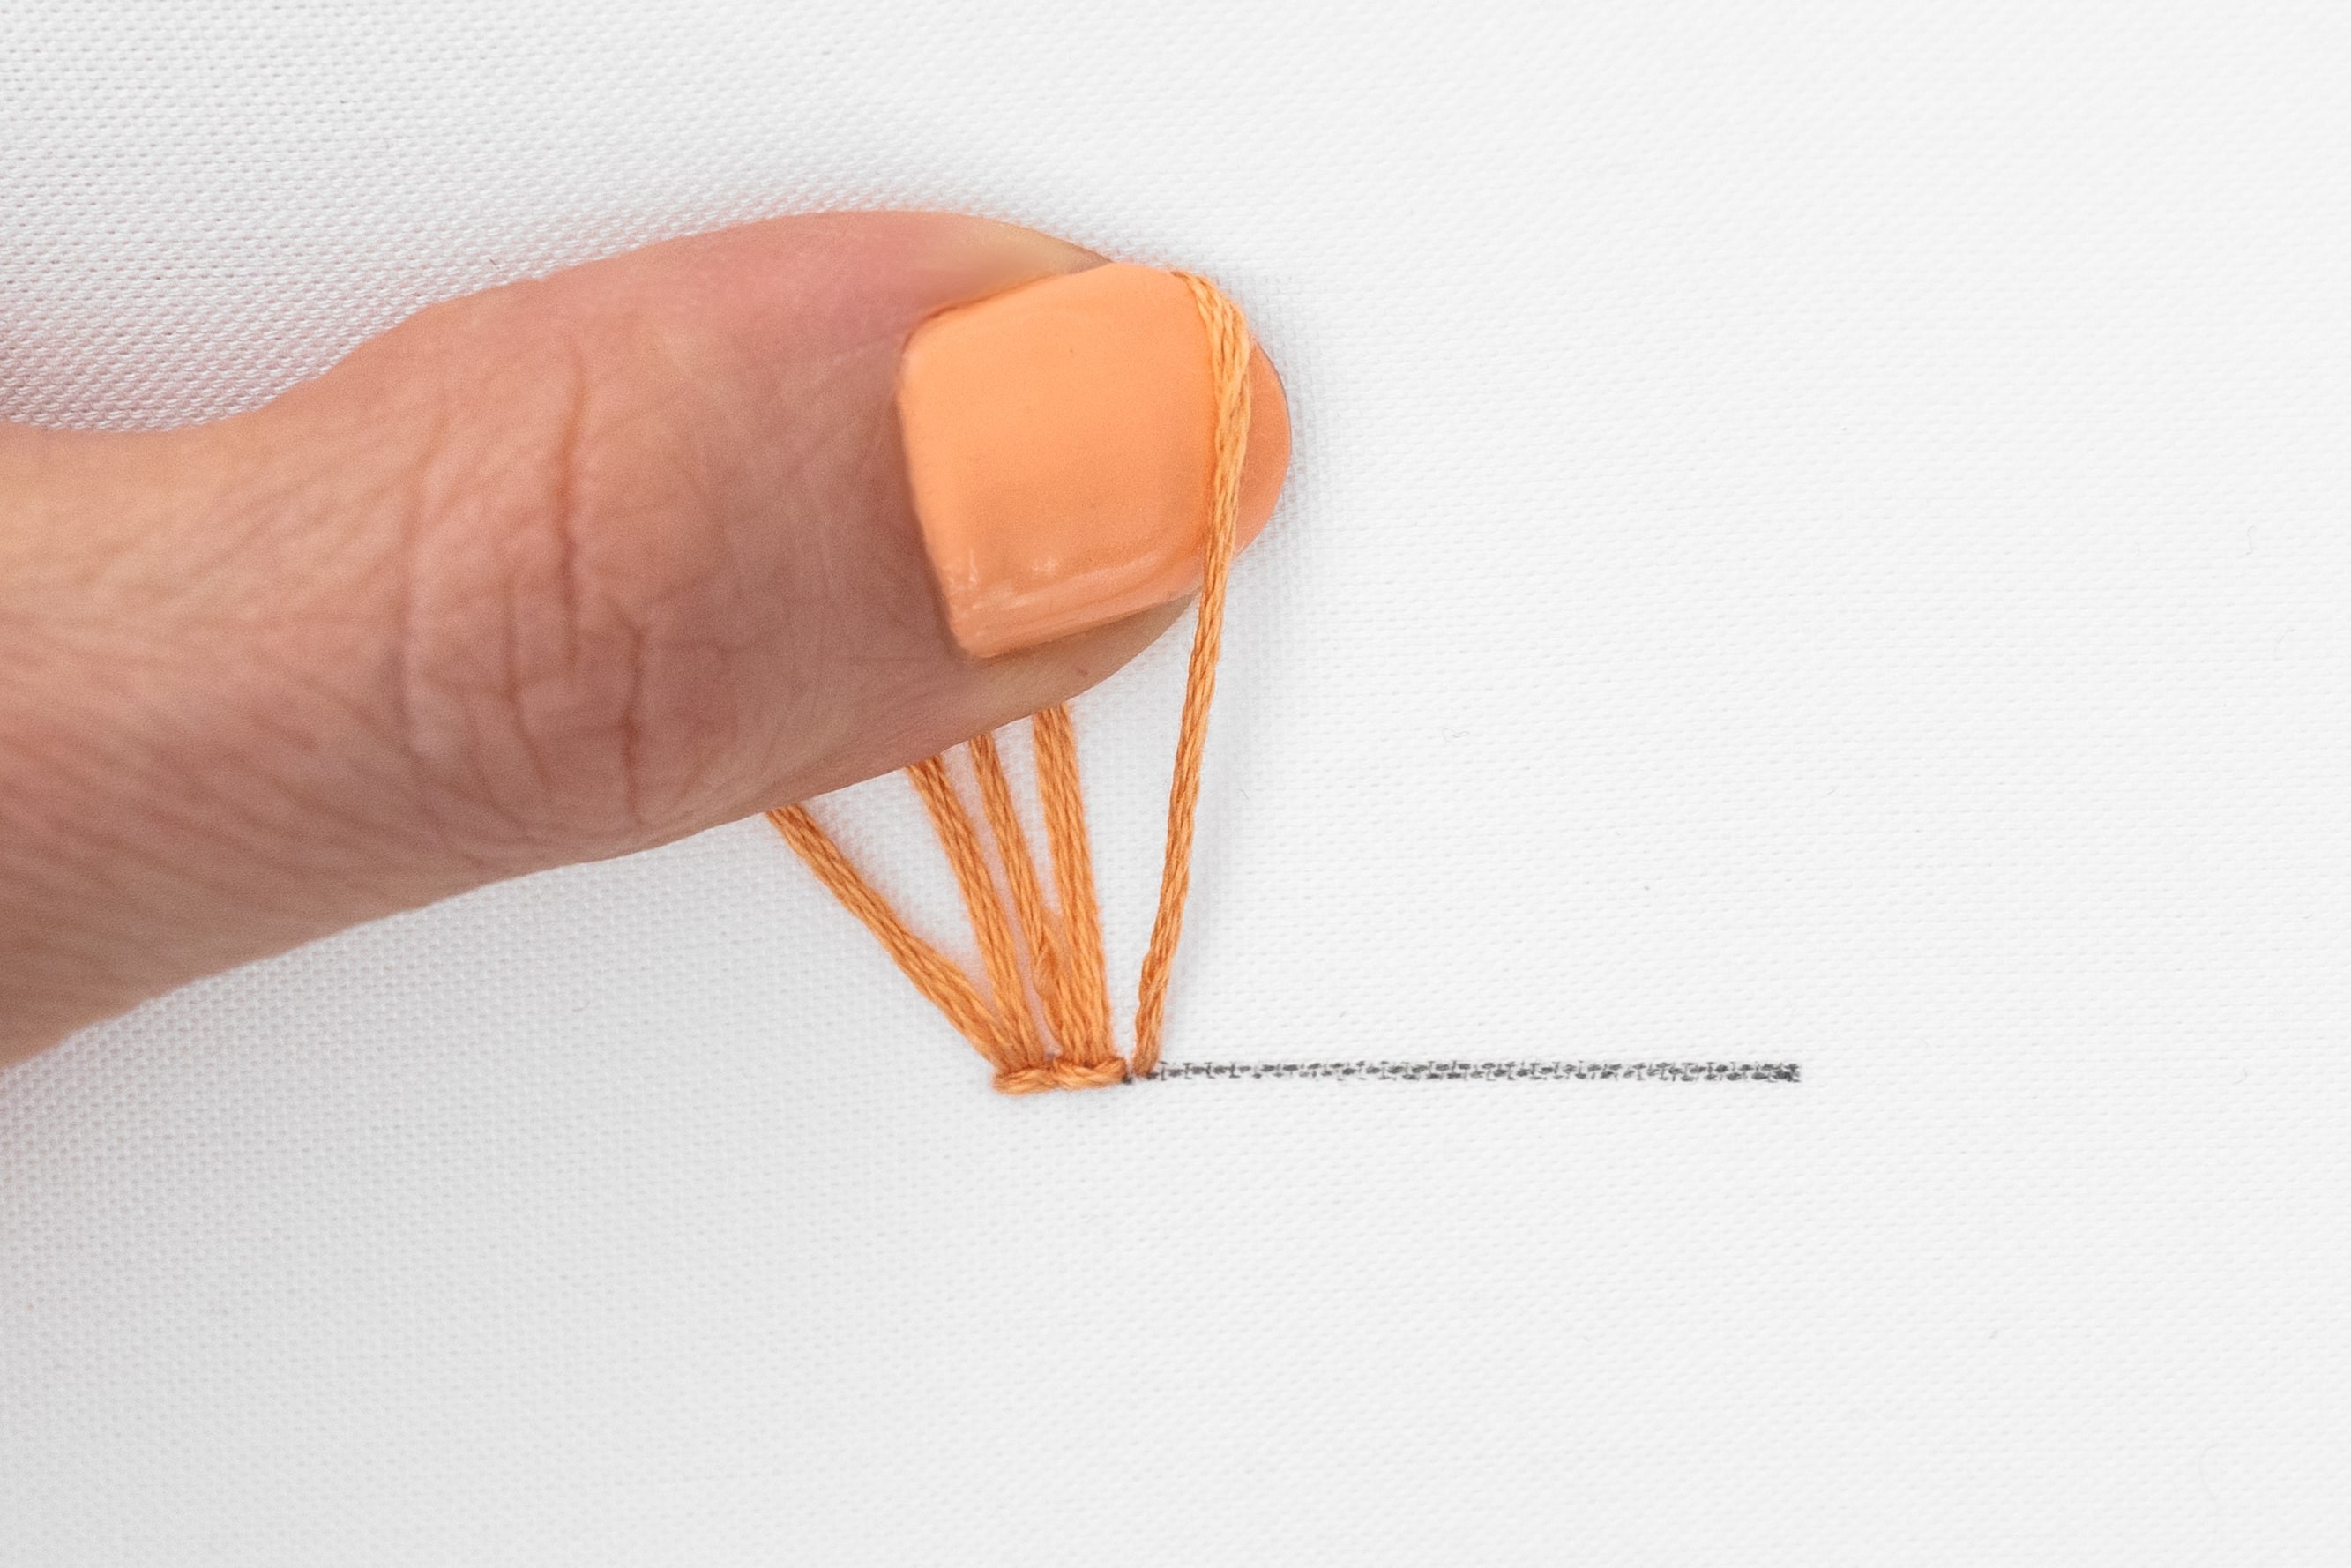
B. Pull down the slack, using your thumb to create the loop.
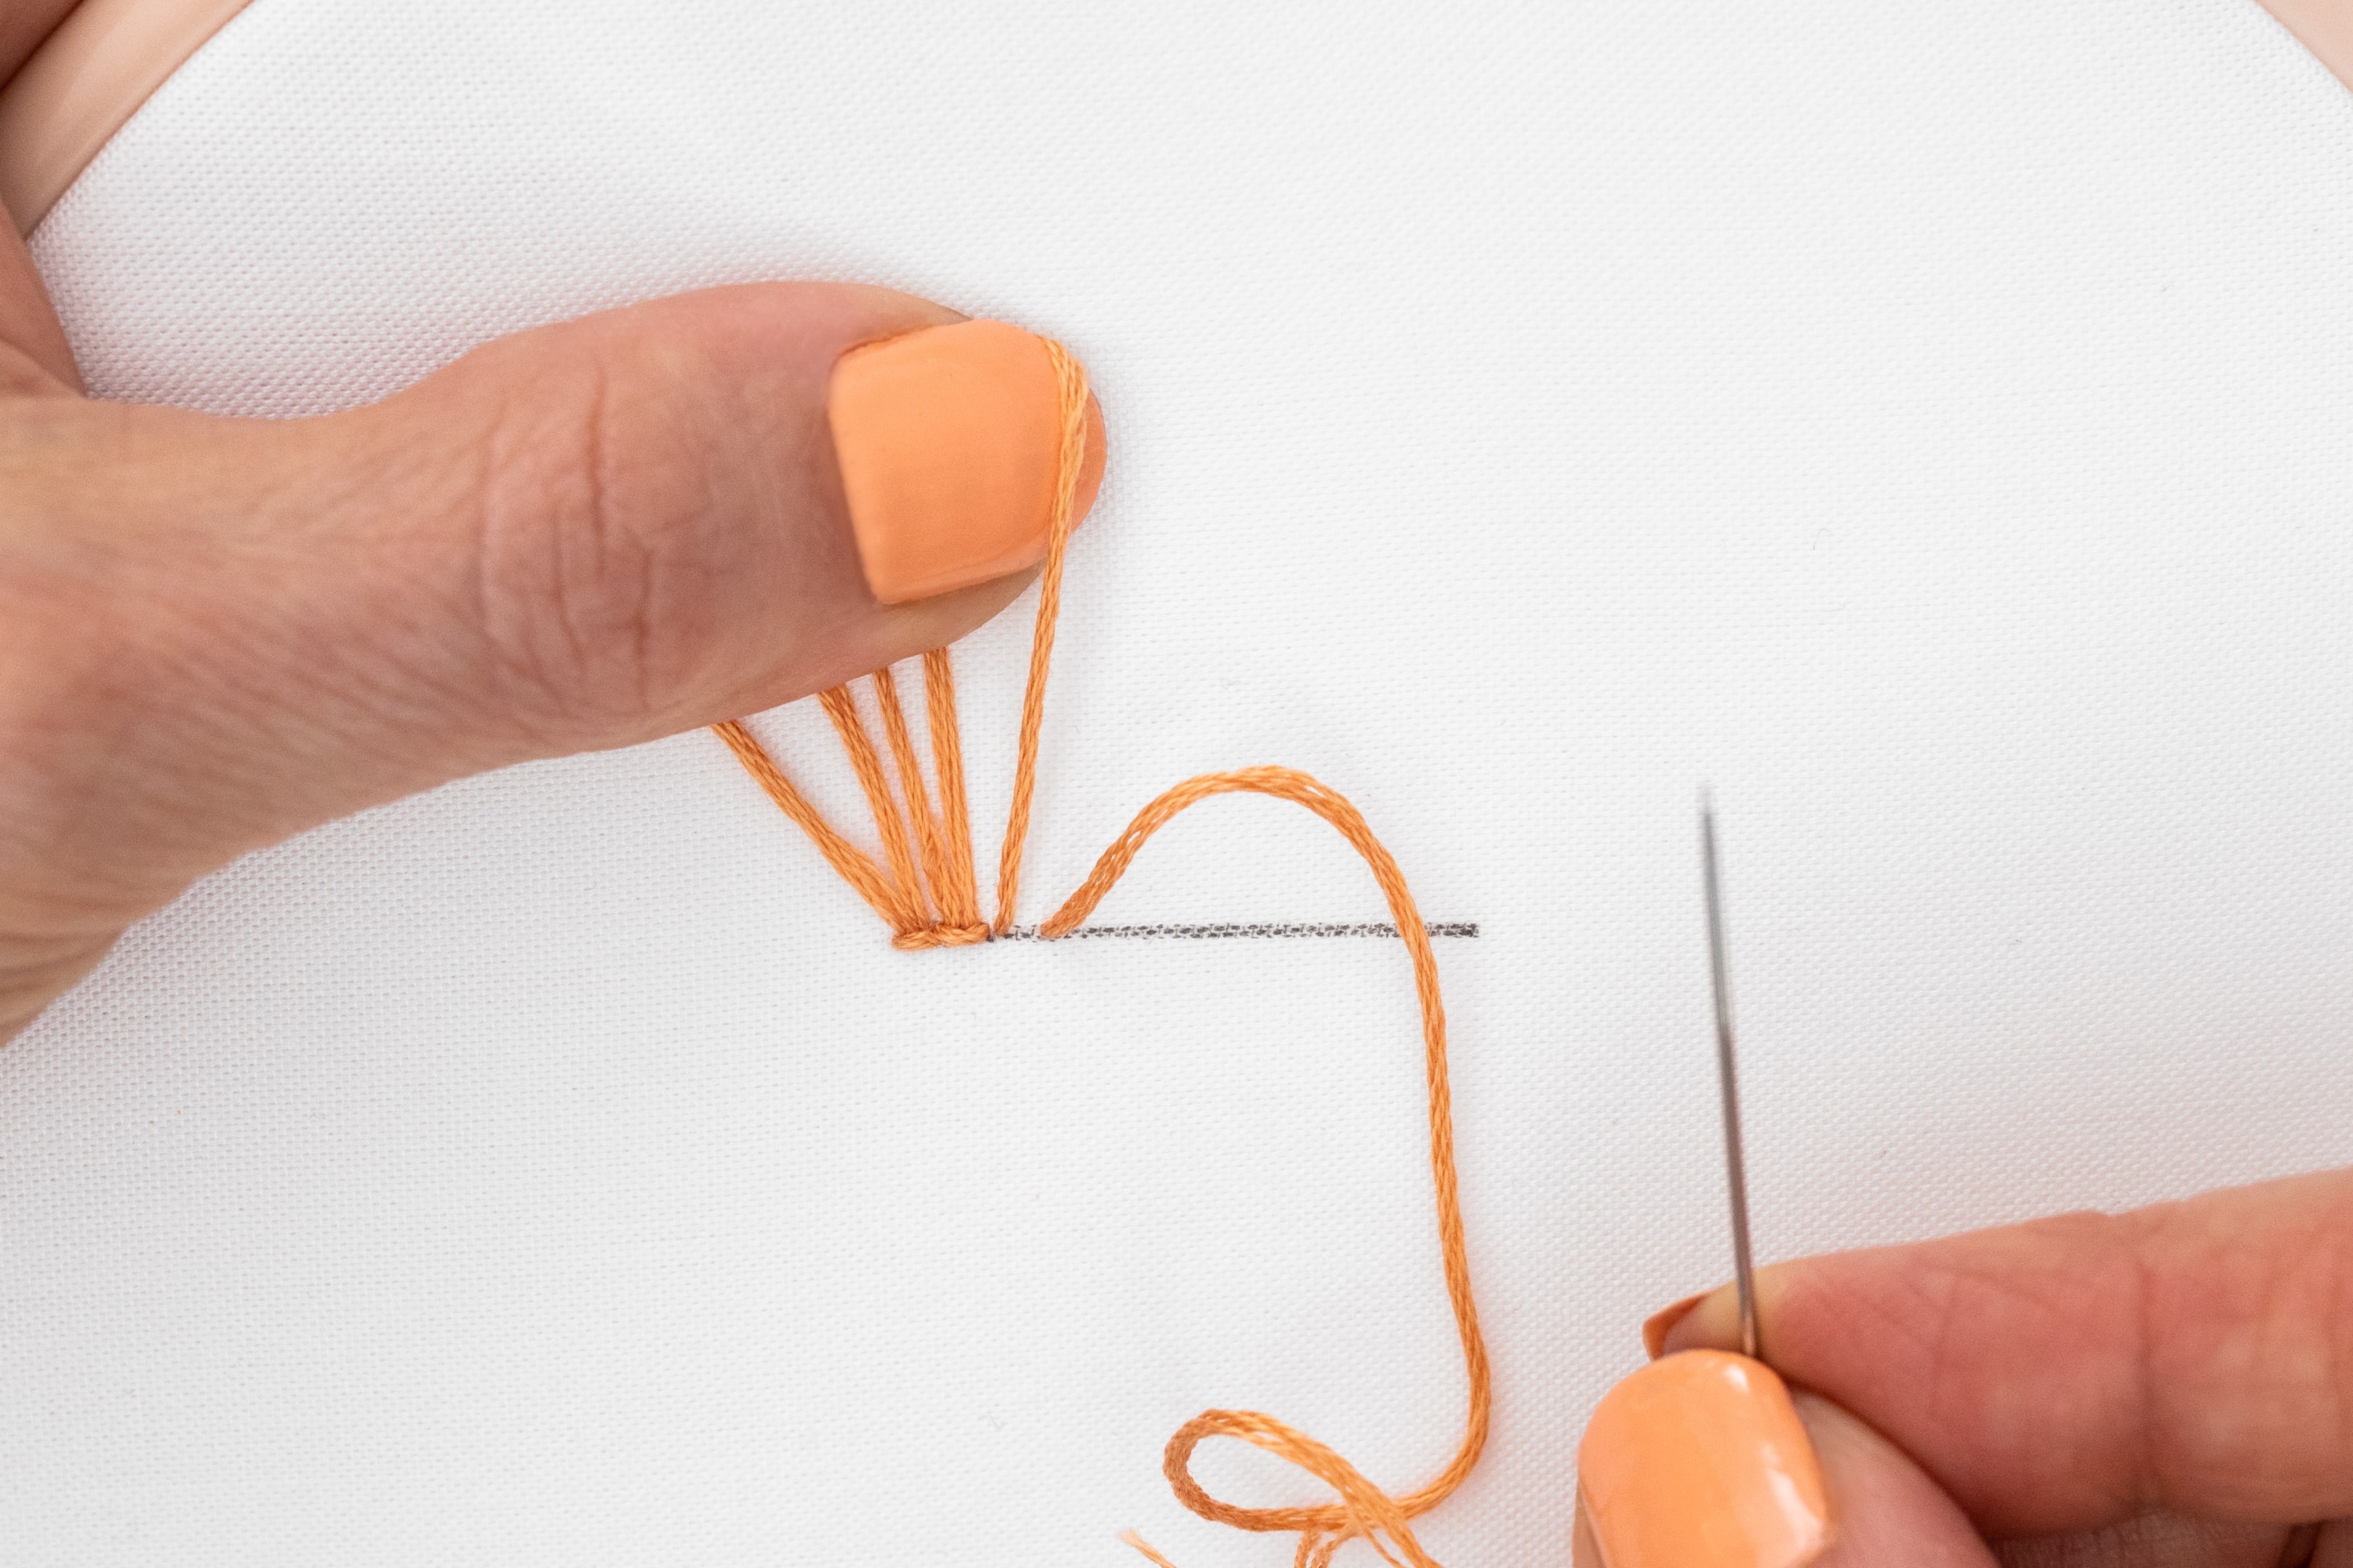
C. Bring your needle upon the line to the right, leaving a little gap.
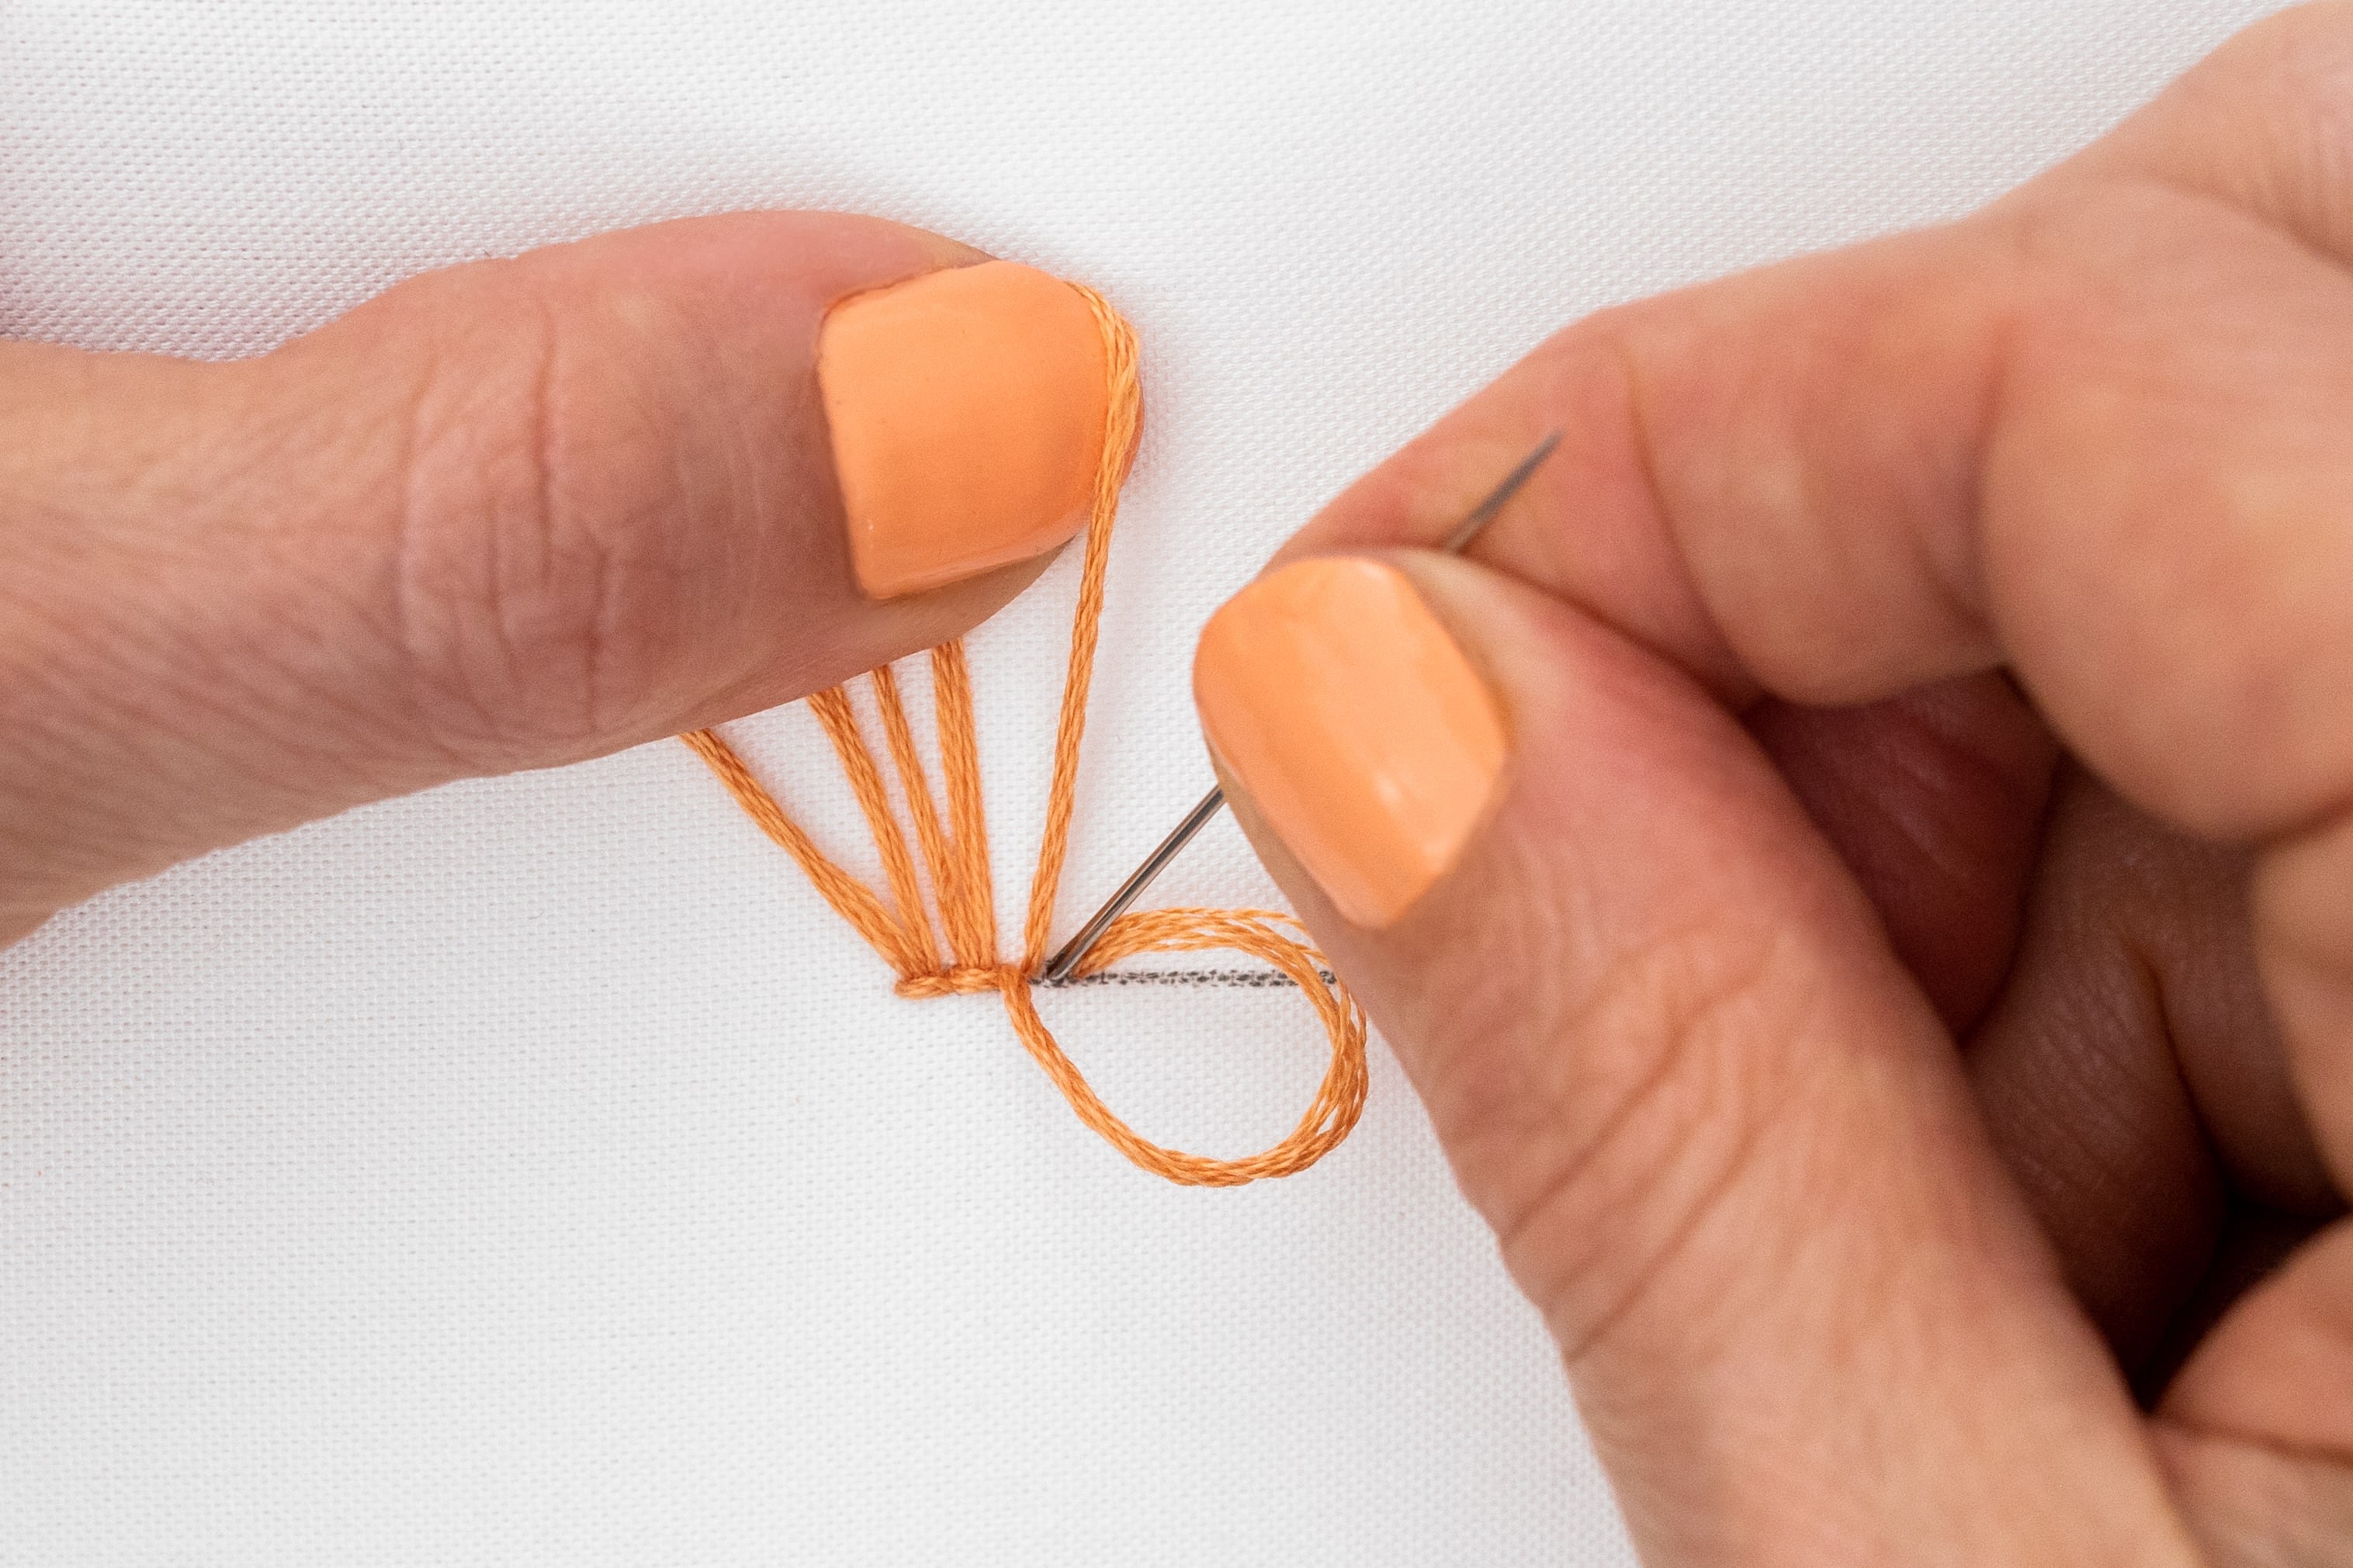
D. Do a securing stitch back over the right-hand leg of the previous loop – but leave some slack and bring your needle up in the gap.
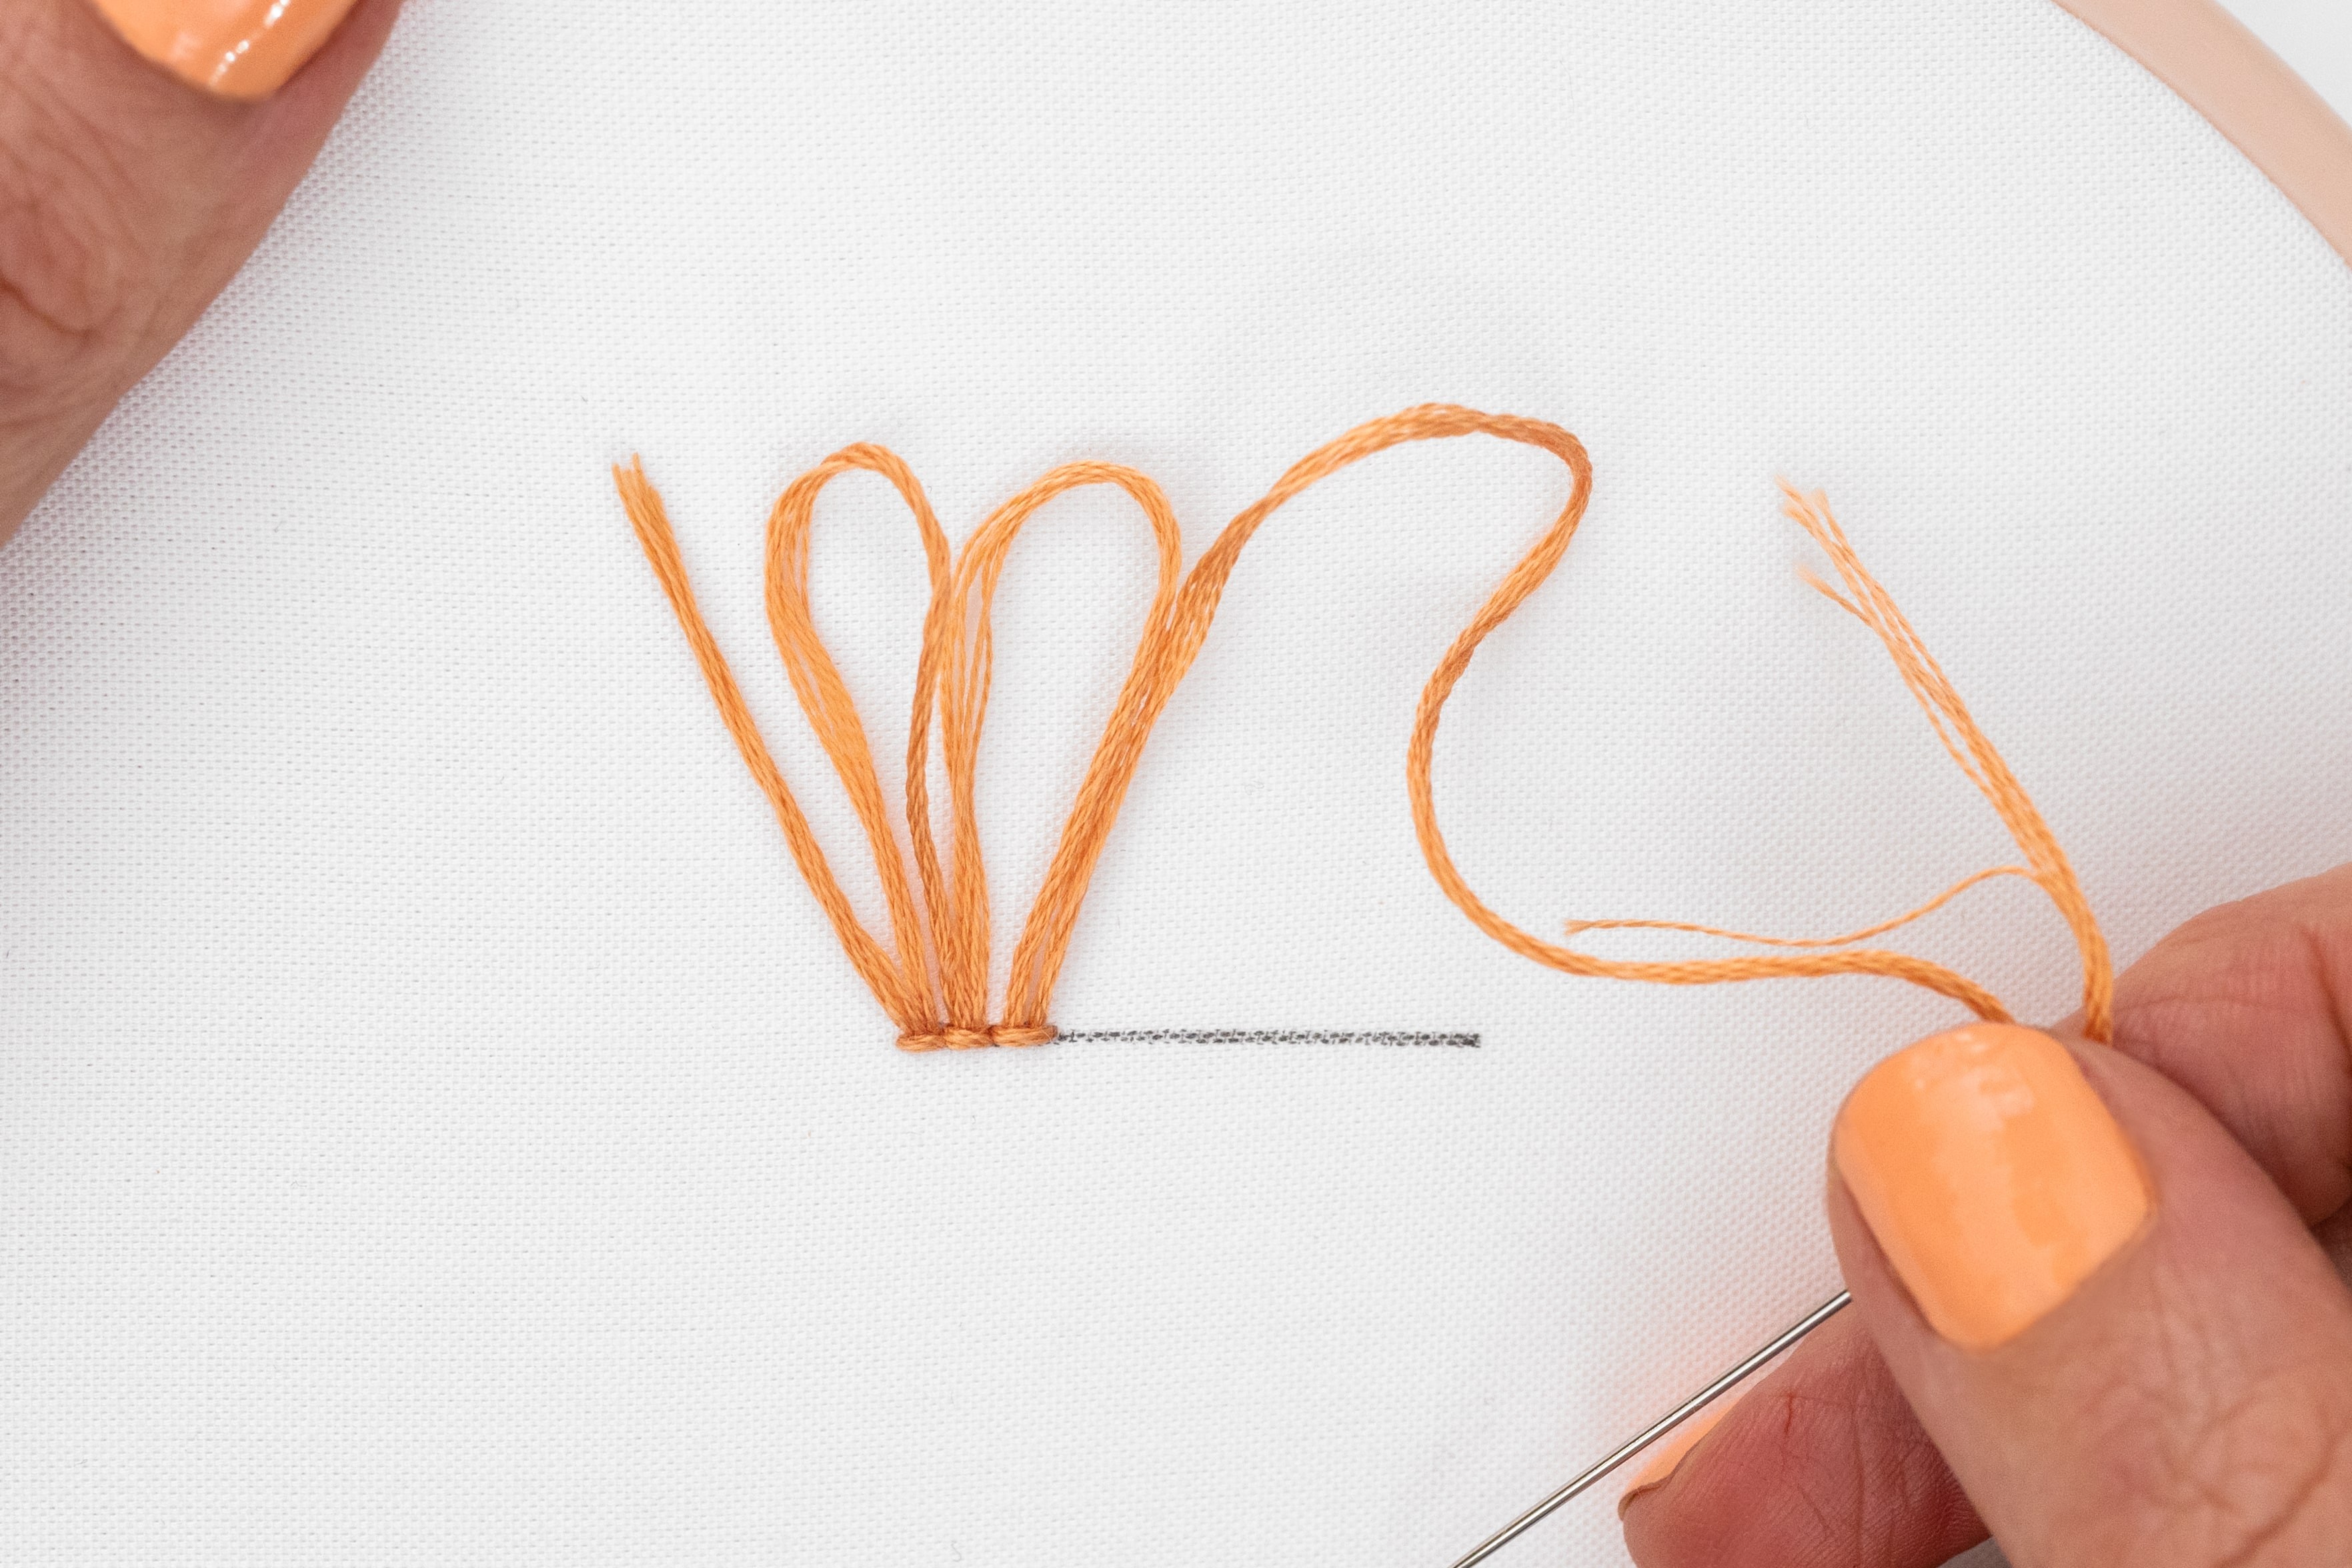
E. Pull through the slack to complete the securing stitch.
TIP – Direction of Tails: You can position your loops above or below the securing stitch, depending on the design of your piece. This will affect whether the row of securing stitches is hidden or not. E.g. for an embroidered hairstyle, you want the securing stitches to be on the inside edge of the hairline.
Step 9.
Finishing a thread: Continue with this method until your thread starts to run out. When this happens, you have a couple of options:
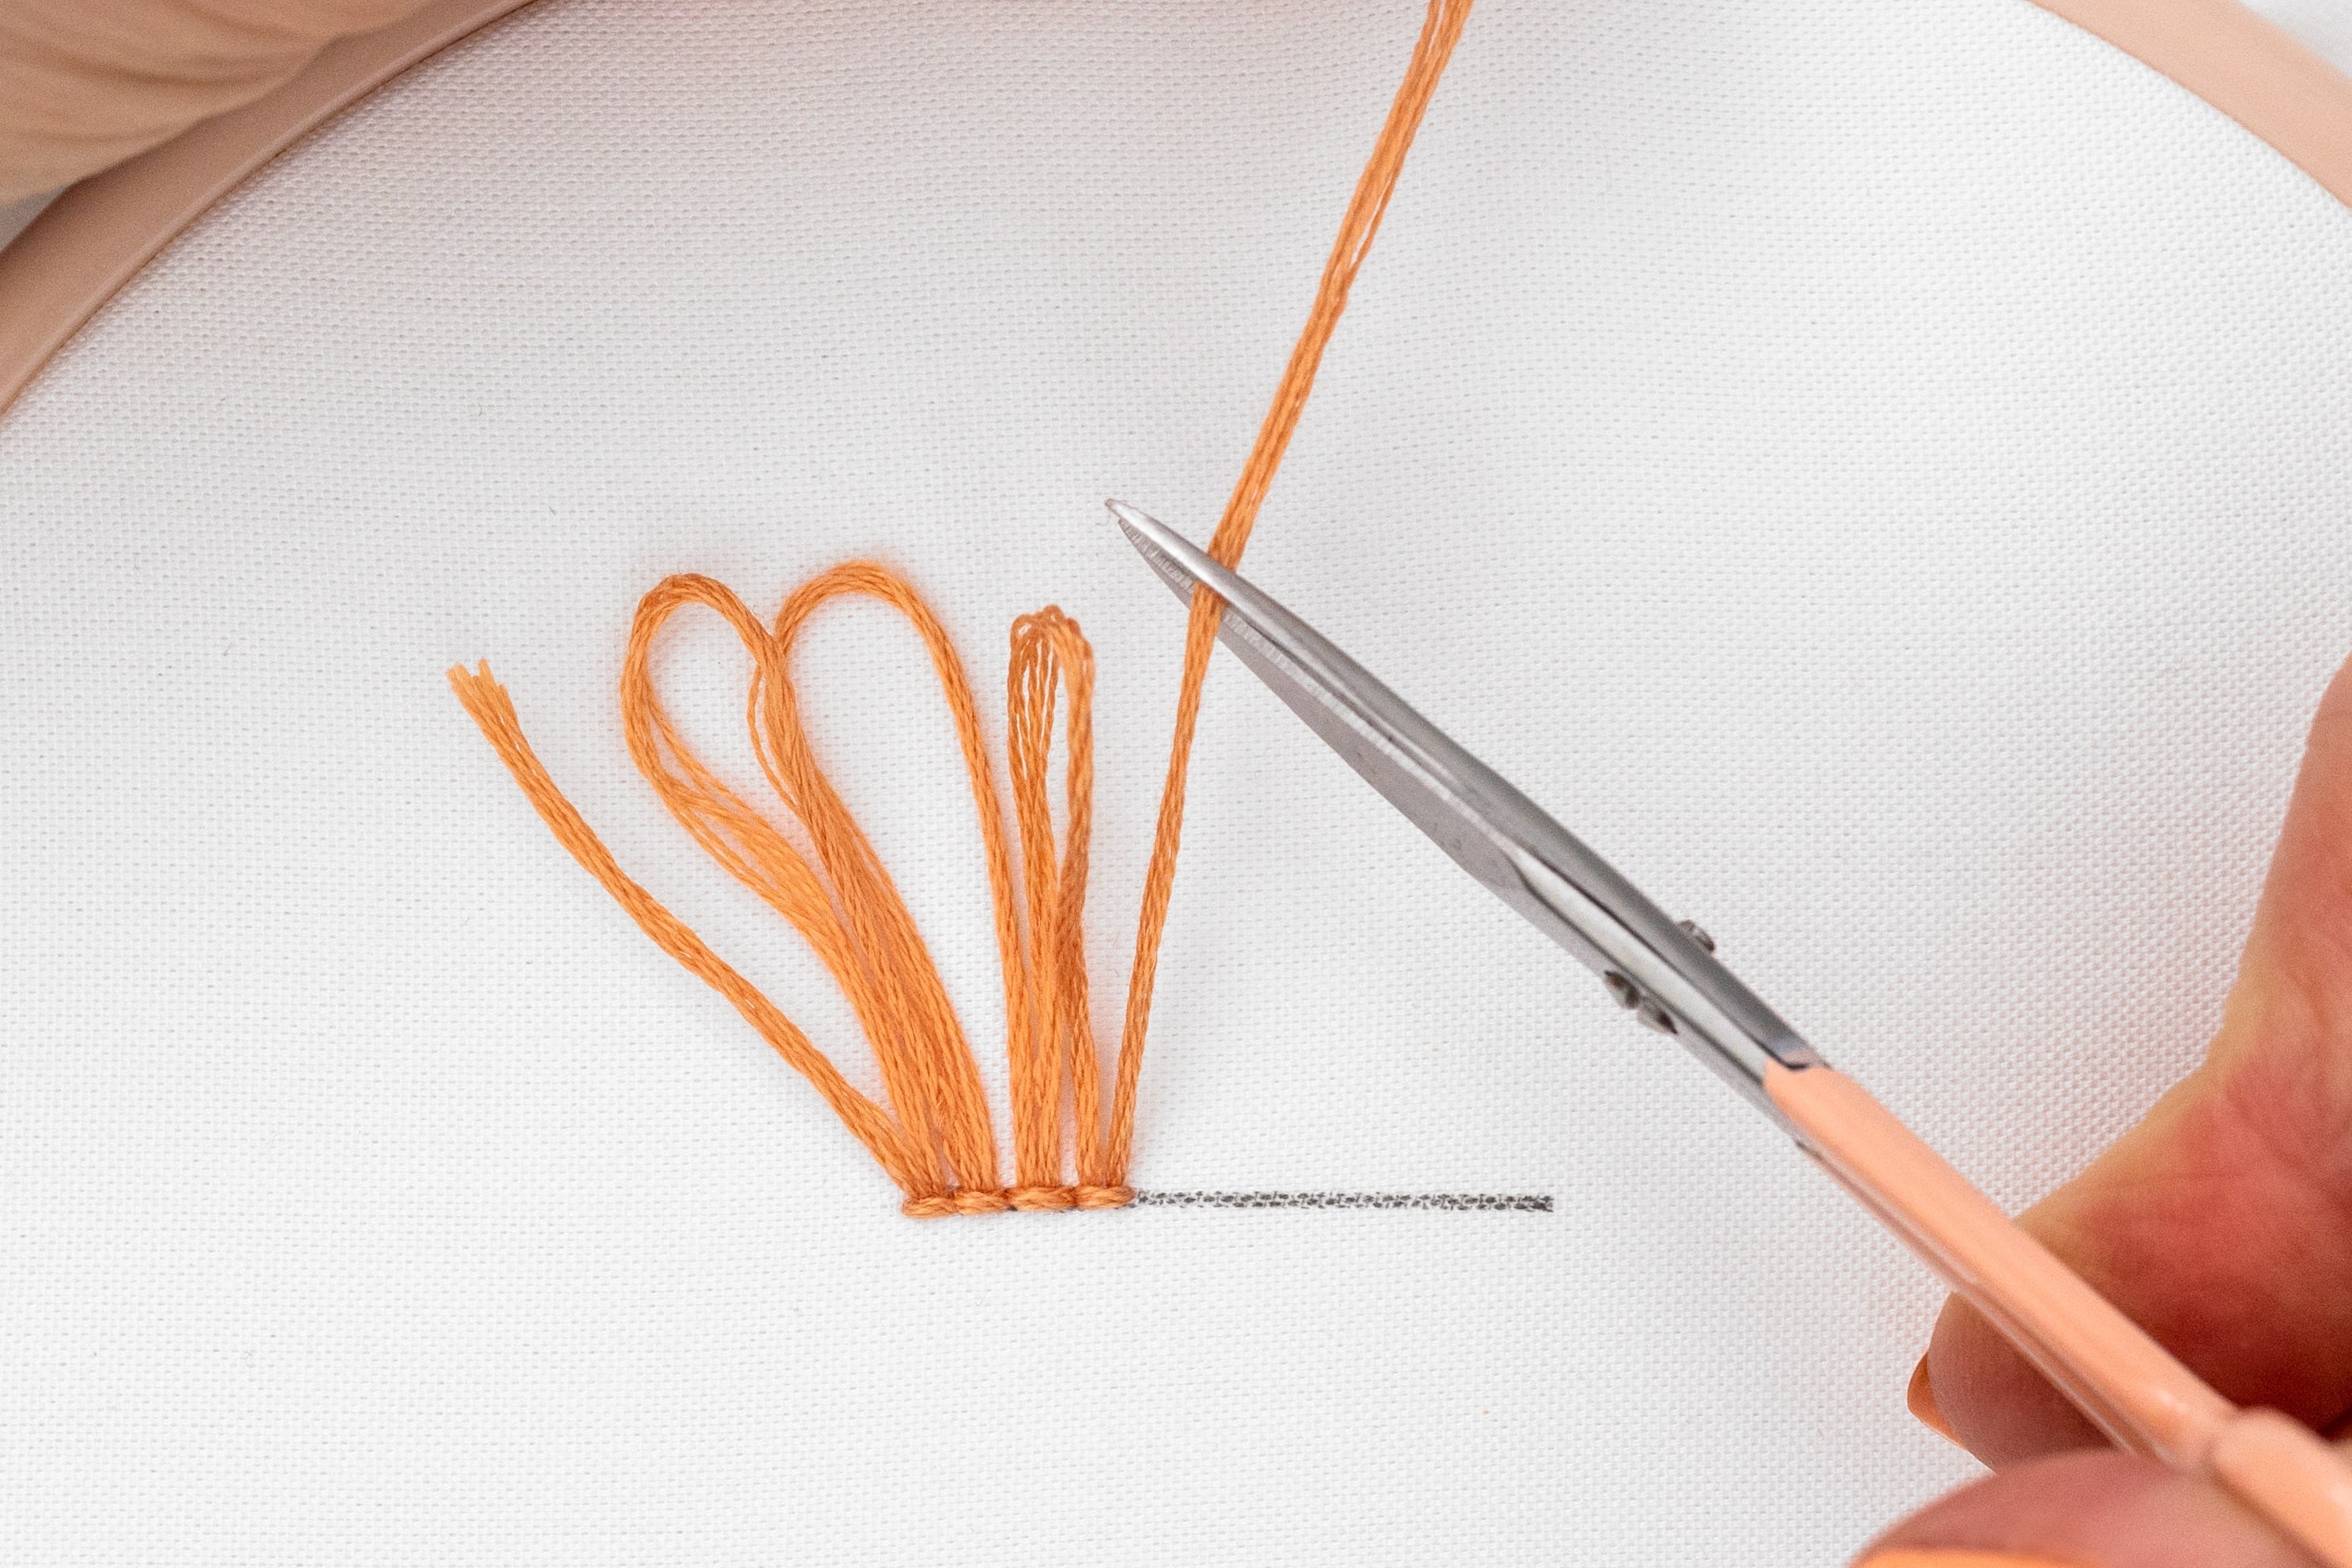
A. You can do a final securing stitch, bringing the tail up to secure it into place on the top side of your fabric.
Then cut the tail to match the length of the rest of your loops.
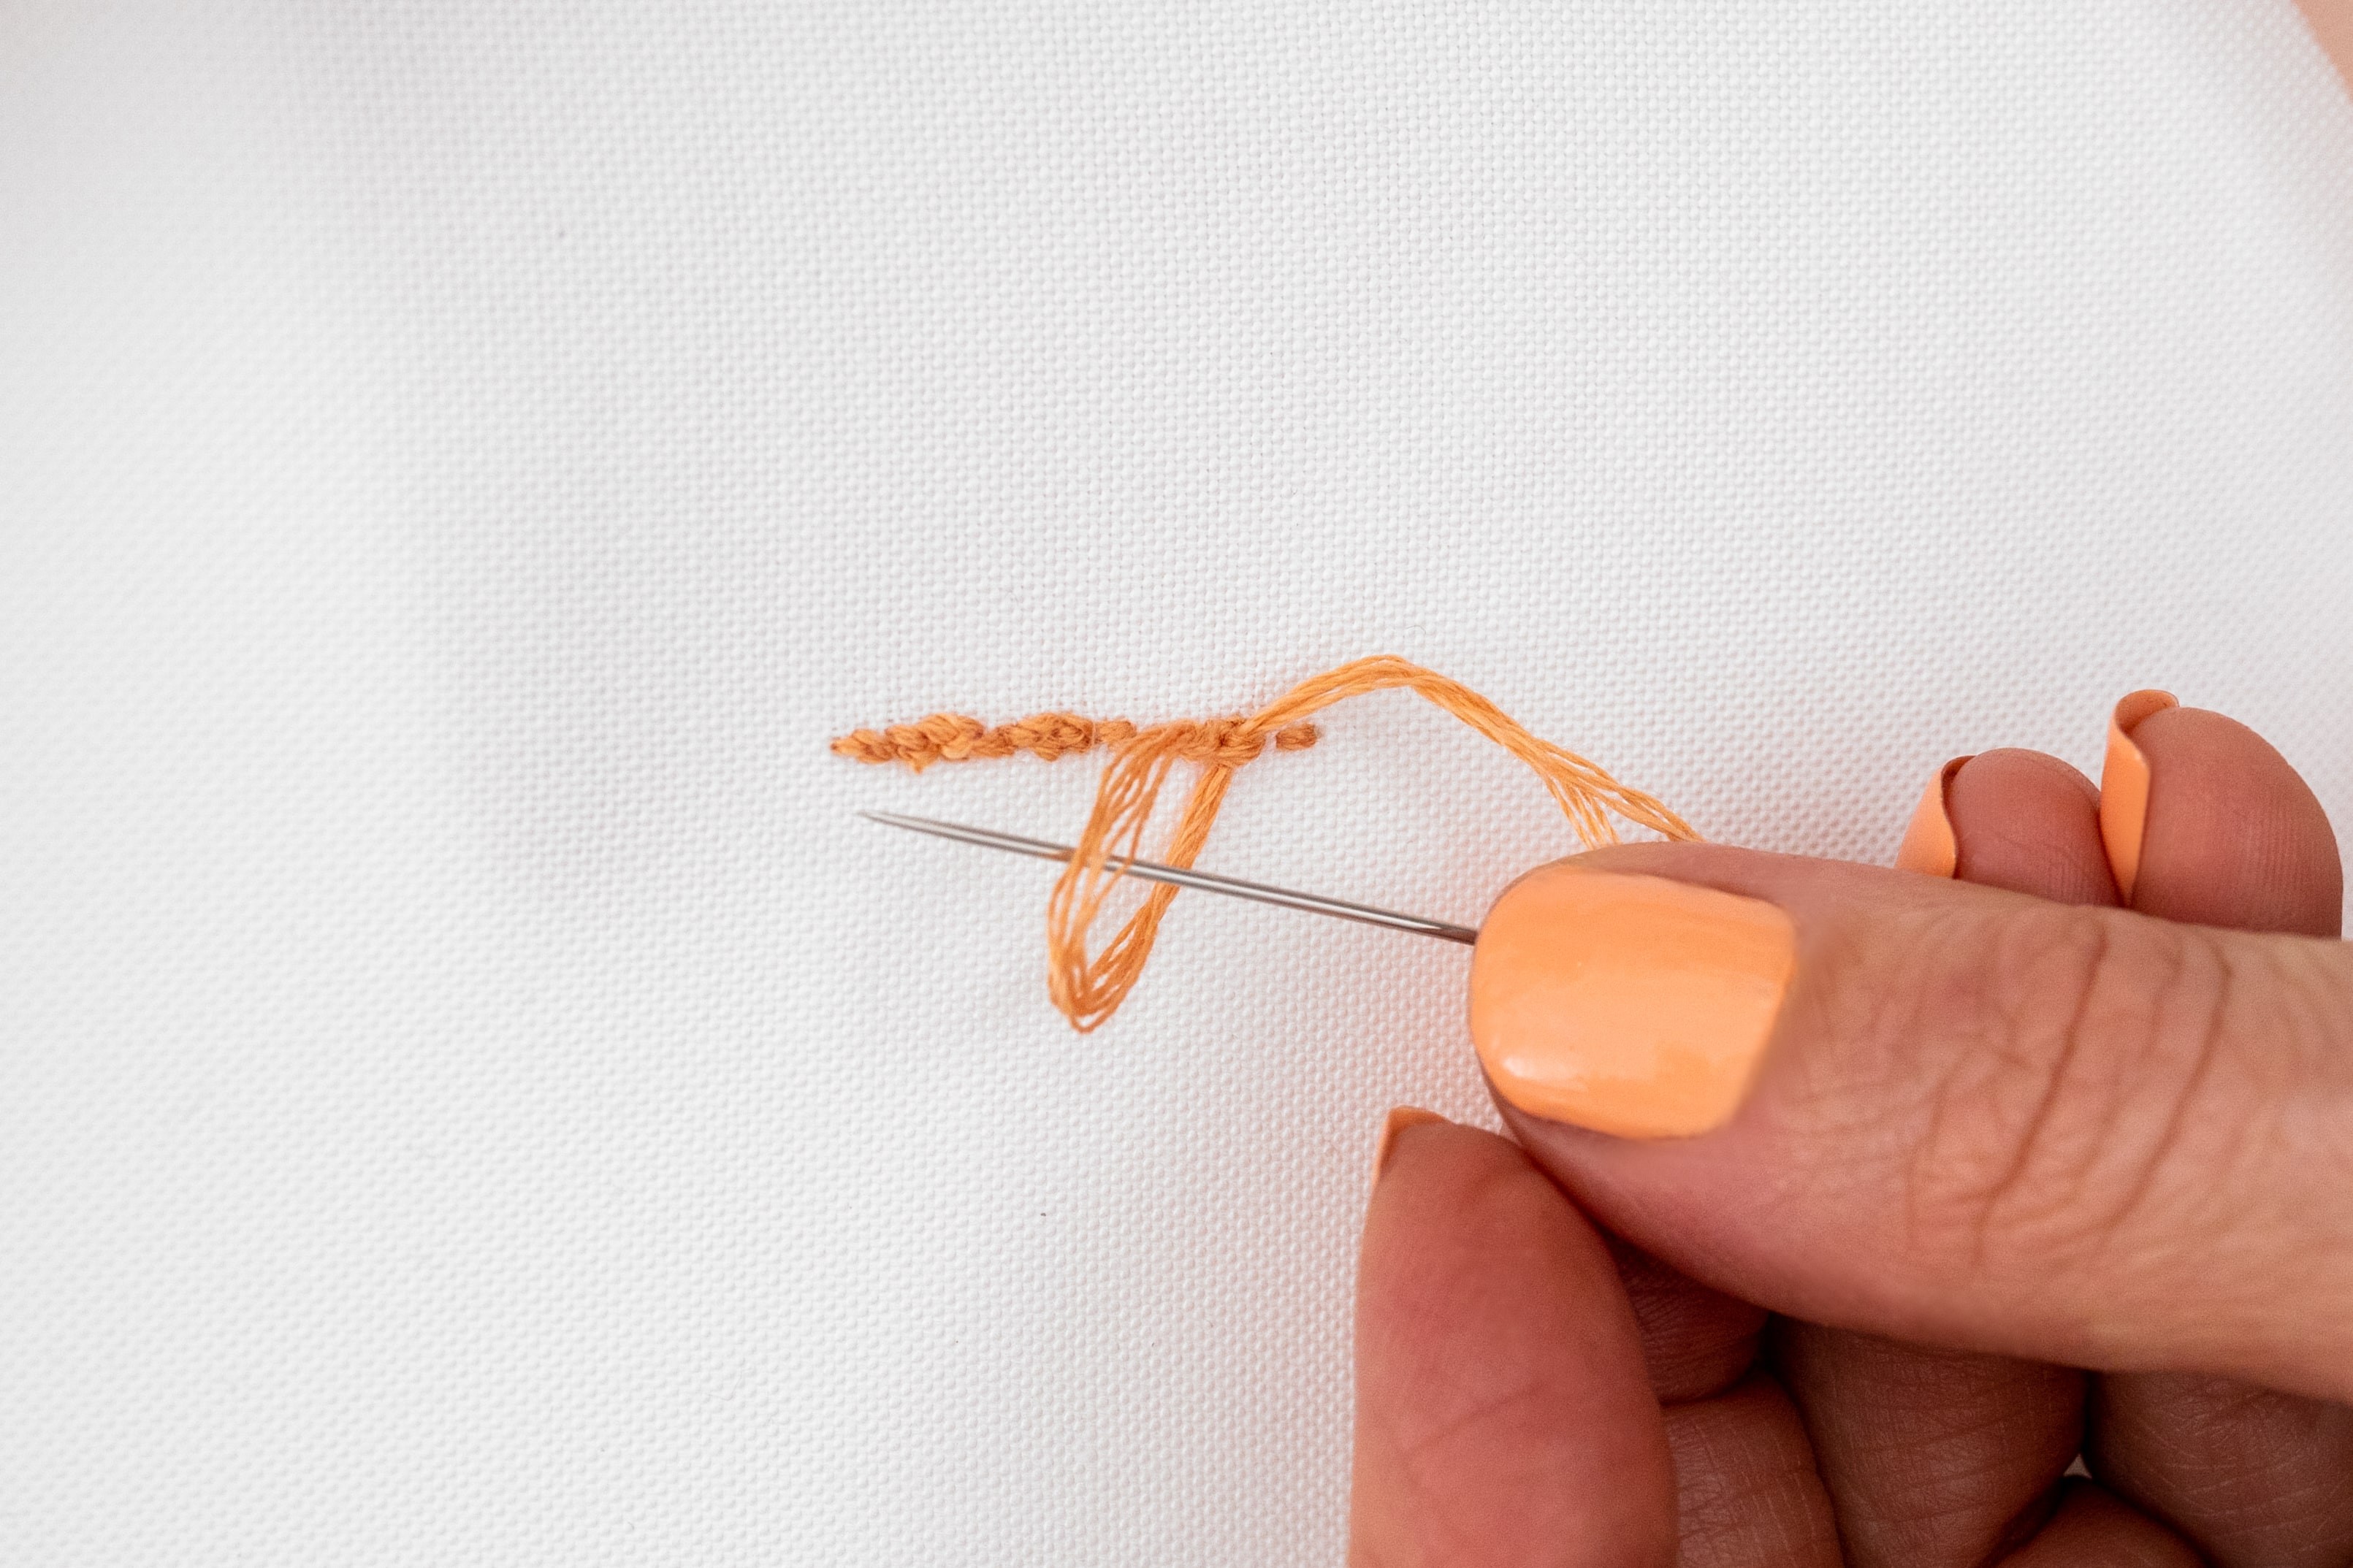
B. Or do your final securing stitch, and keep your needle on the underside of the fabric, and tidy away the tail underneath.
TIP – Loops only: If you want to create an effect that entirely loops (with no single tails), then you can start by knotting your thread and bringing it up from underneath. Make a loop first, rather than a tail, and then continue on from step 6.
To finish a thread, do option B (see above).
Step 10.
Then begin again from step 1, working Turkey Stitch along the line.
And that’s how I like to work the Turkey Stitch technique!
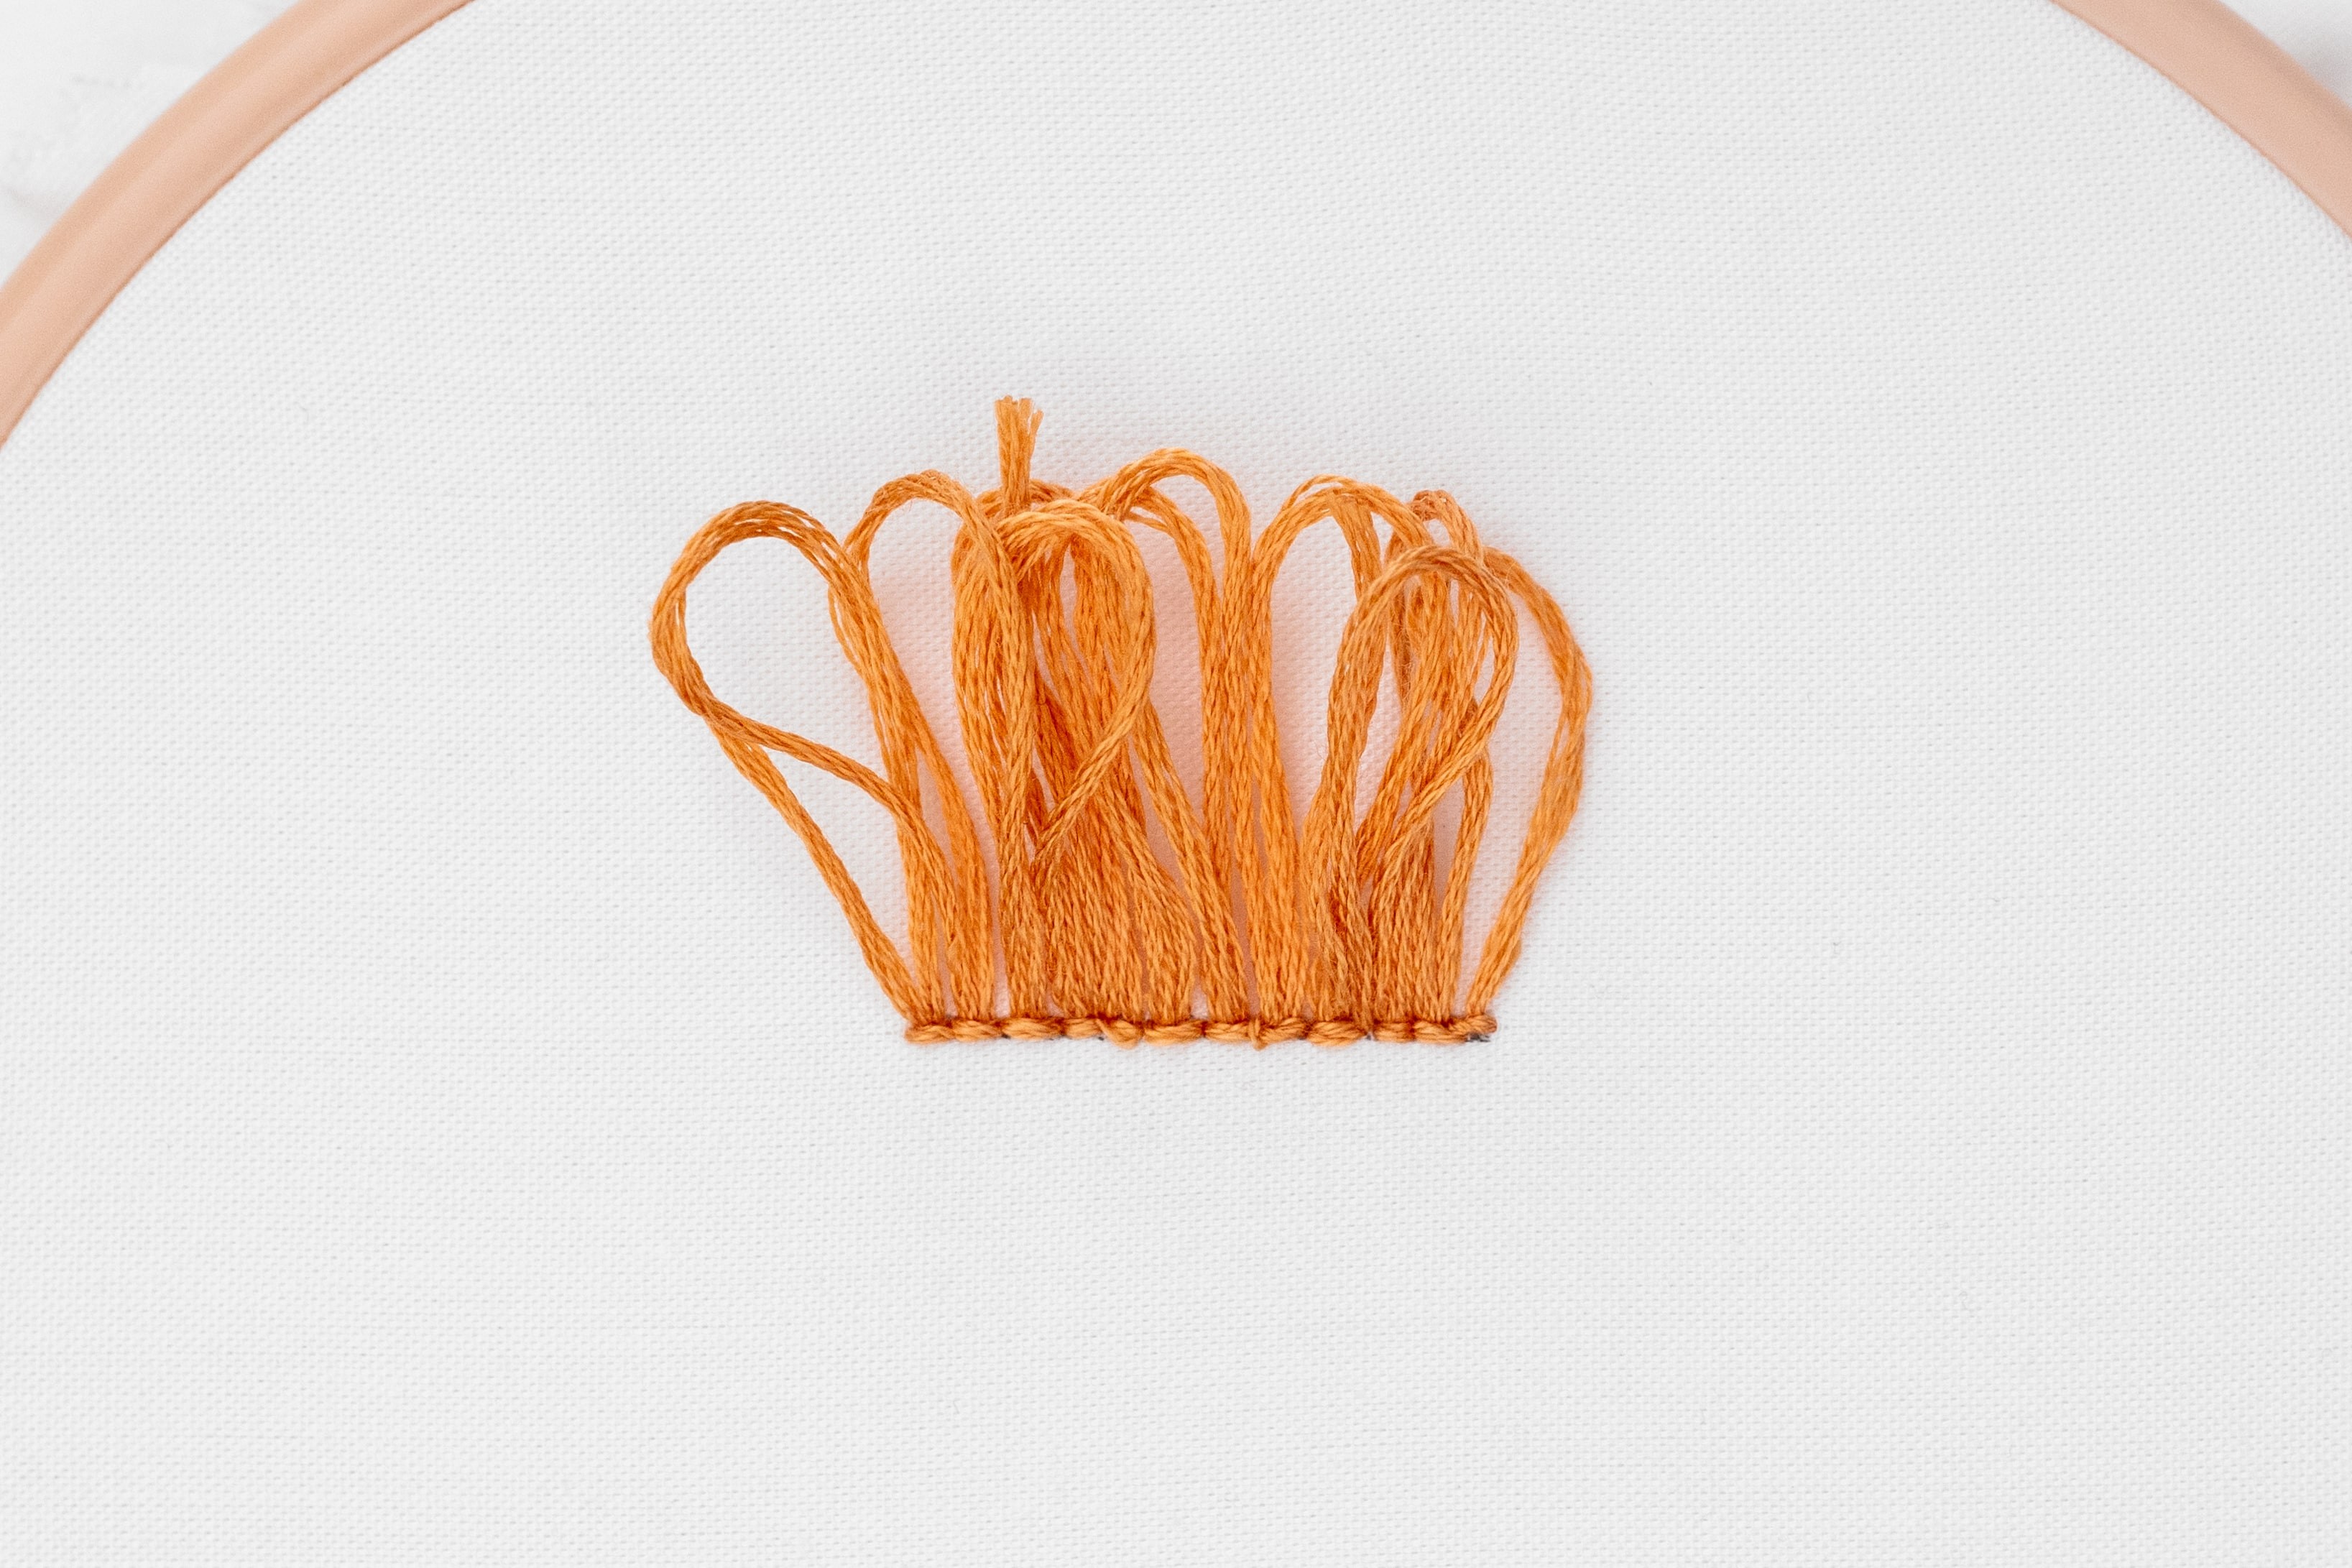
Once the area is completed, you can leave the loops as-is, or snip them off to create a different effect (see below).
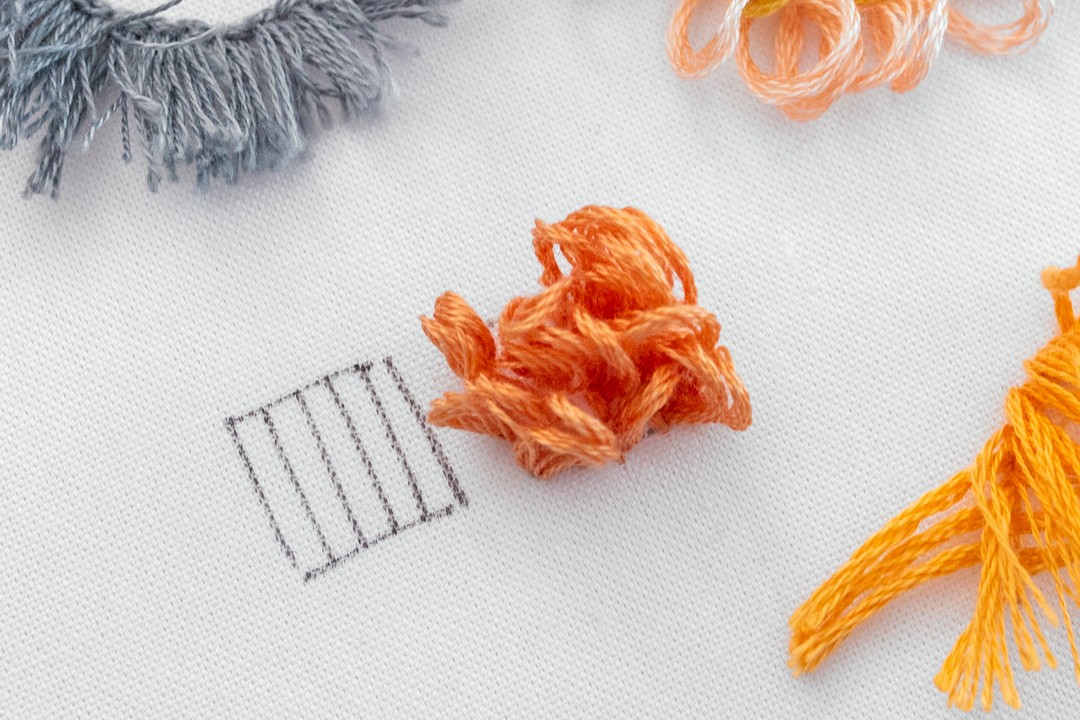
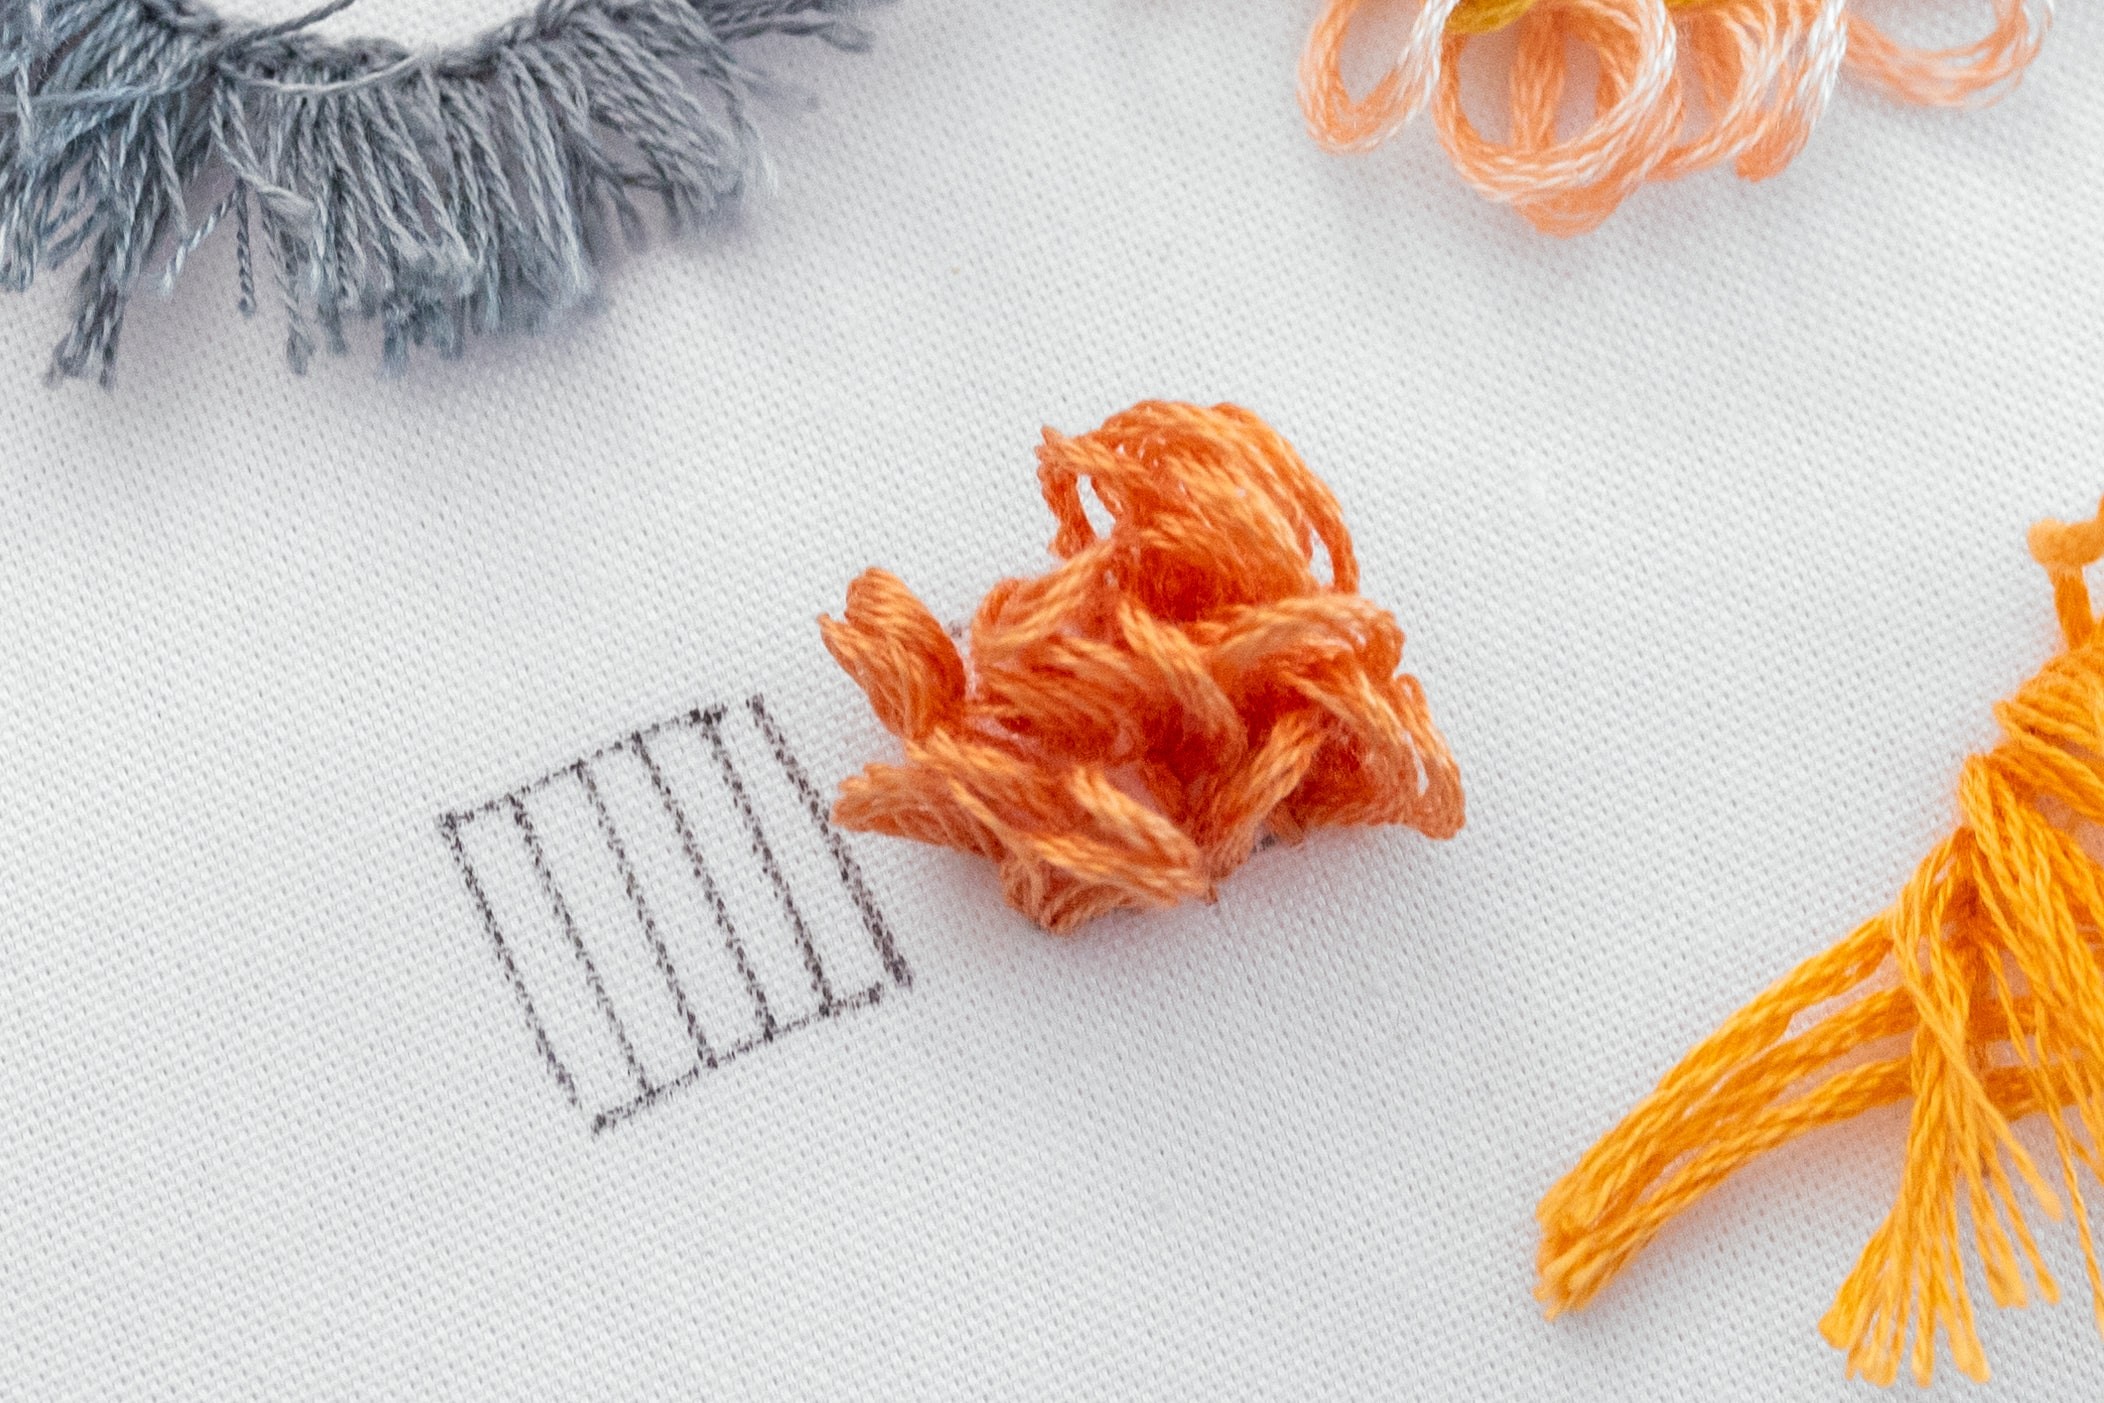
You can also have a play with the length and density of your stitches. For example, to fill a square shape, you can work rows of Turkey Stitch across the shape. And depending on how close together the rows are, you’ll have a sparser or denser effect.
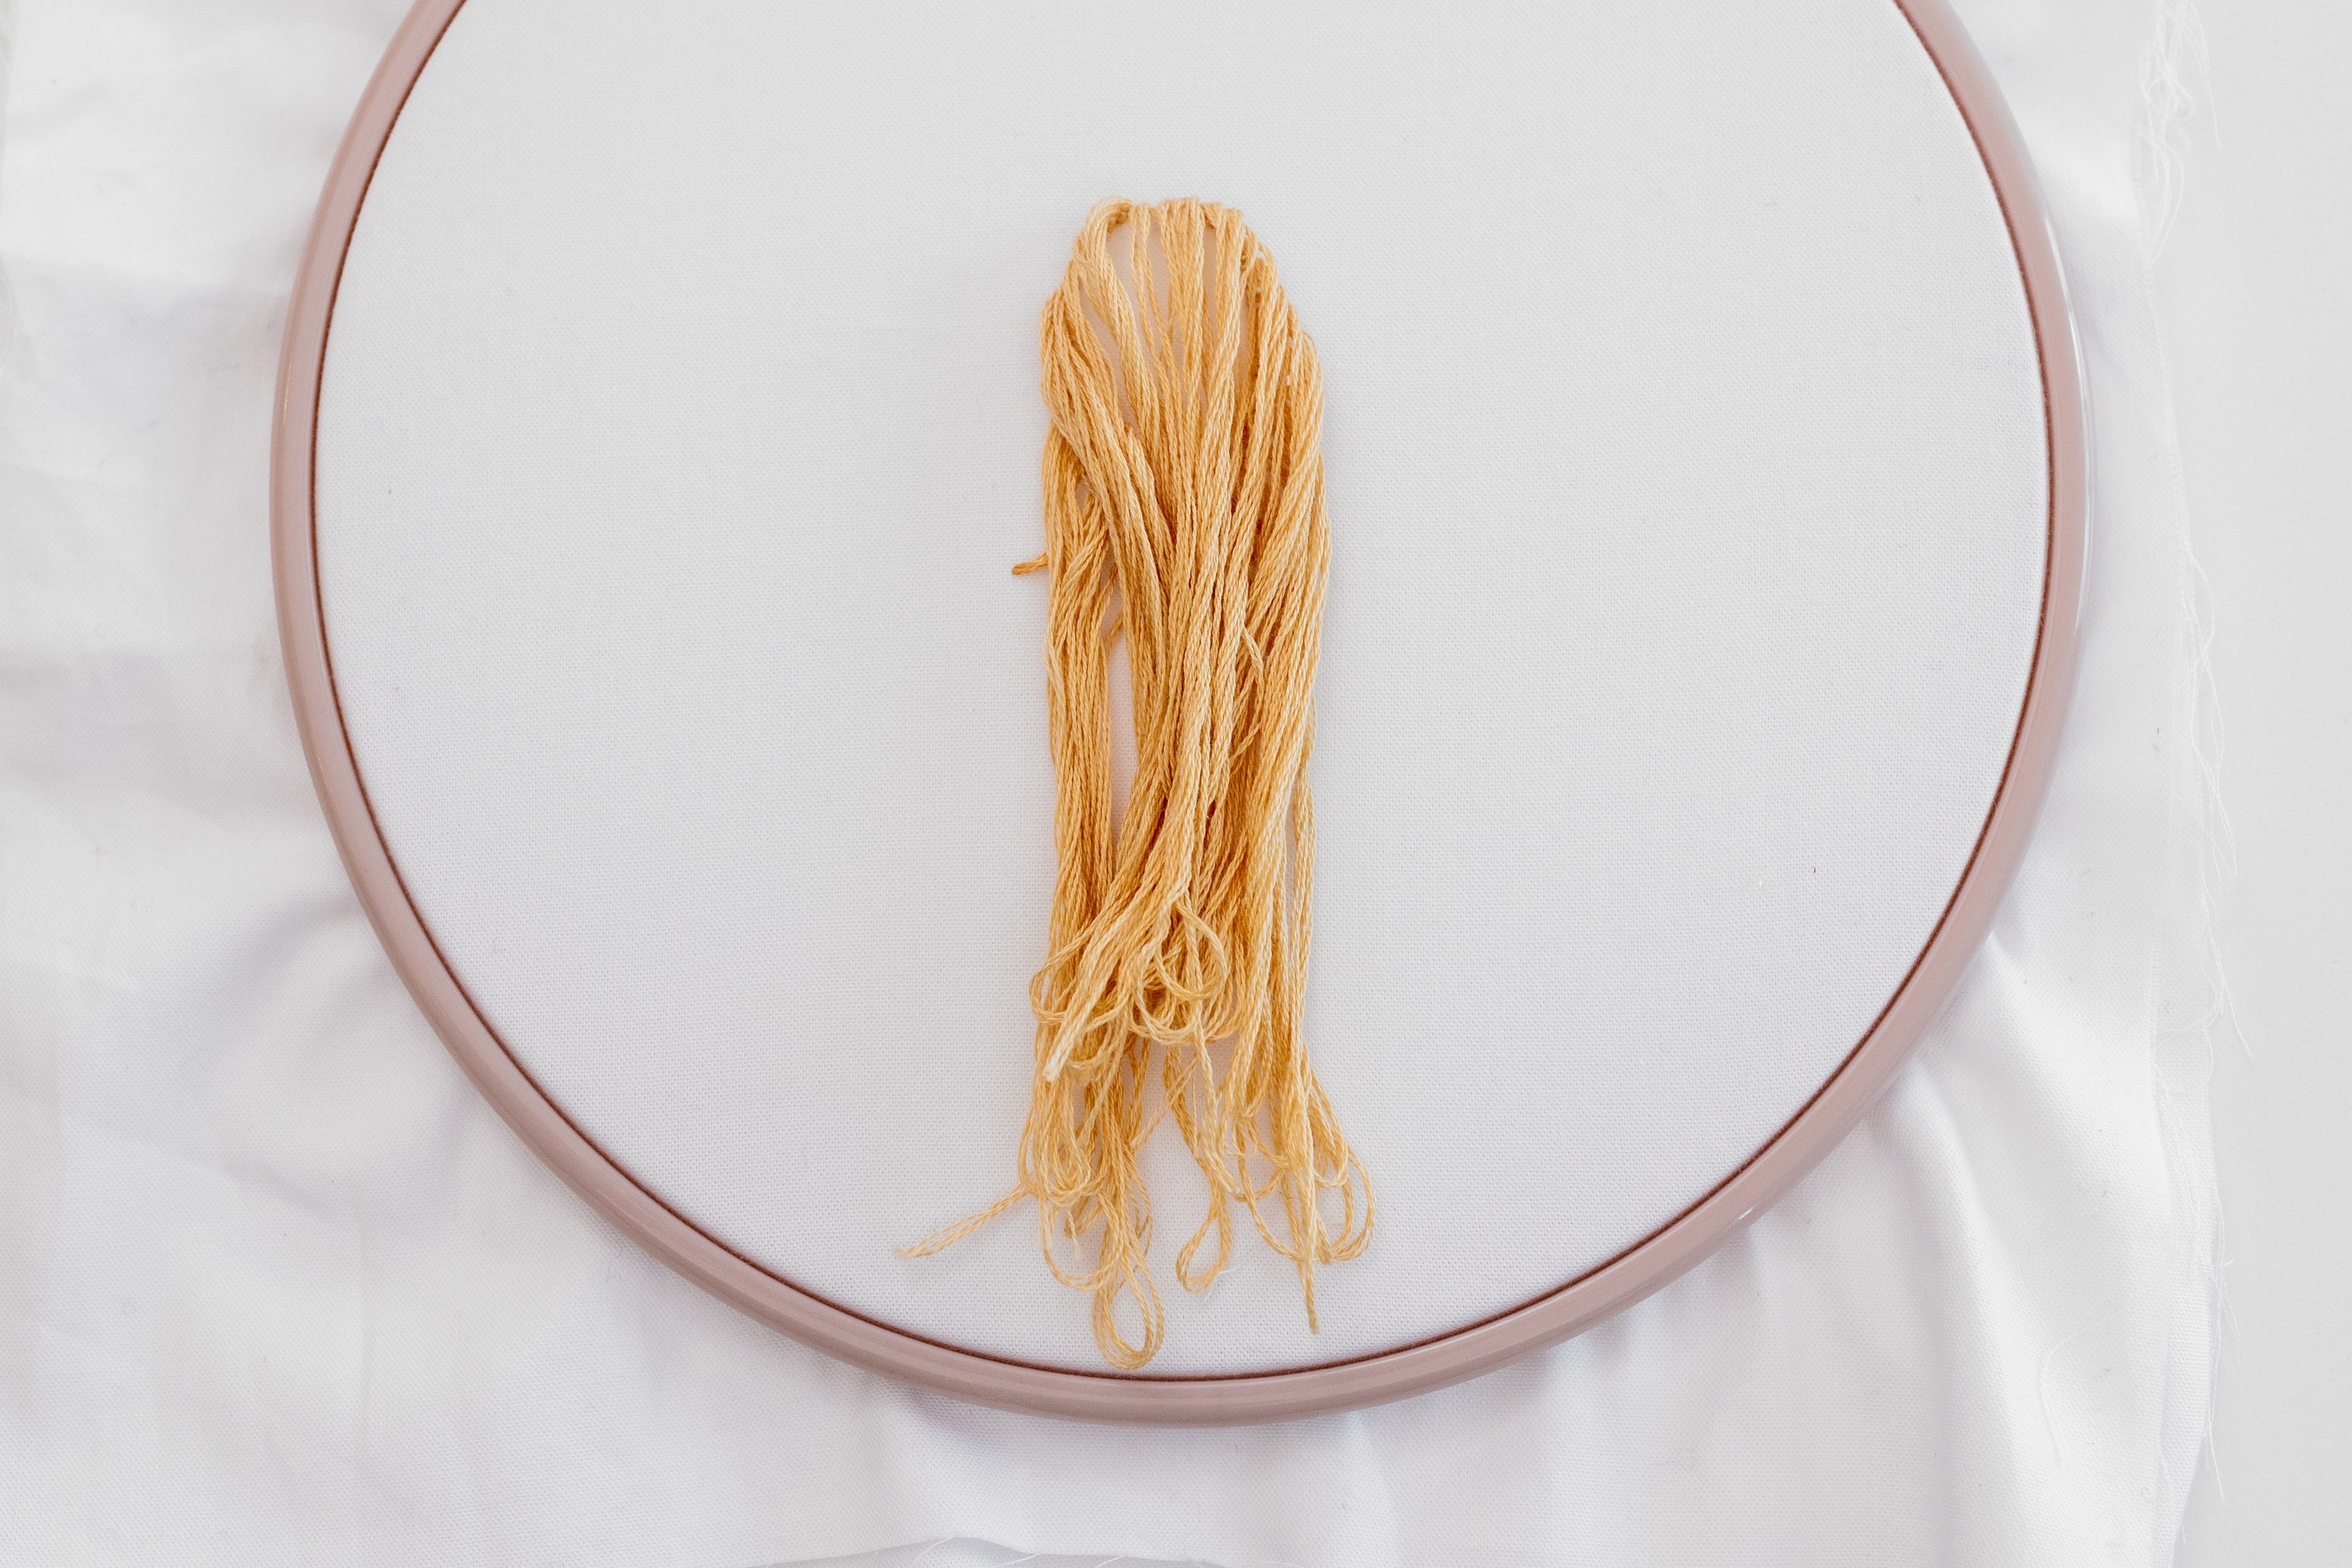
Or to create an embroidered hair style, you might want quite long tails.
Variations on the Turkey Stitch method
As mentioned earlier, there are other ways to work this technique, and I’ve outlined some options below:
-
For the securing stitch, you can work a forward stitch rather than a Back Stitch.
-
You can do the securing stitch and the tail that follows as two separate steps (as opposed to bringing up the next tail inside the slack of the securing stitch). For example:
Step 1
Complete the securing stitch (drawing through all the slack so that it’s locked in place).
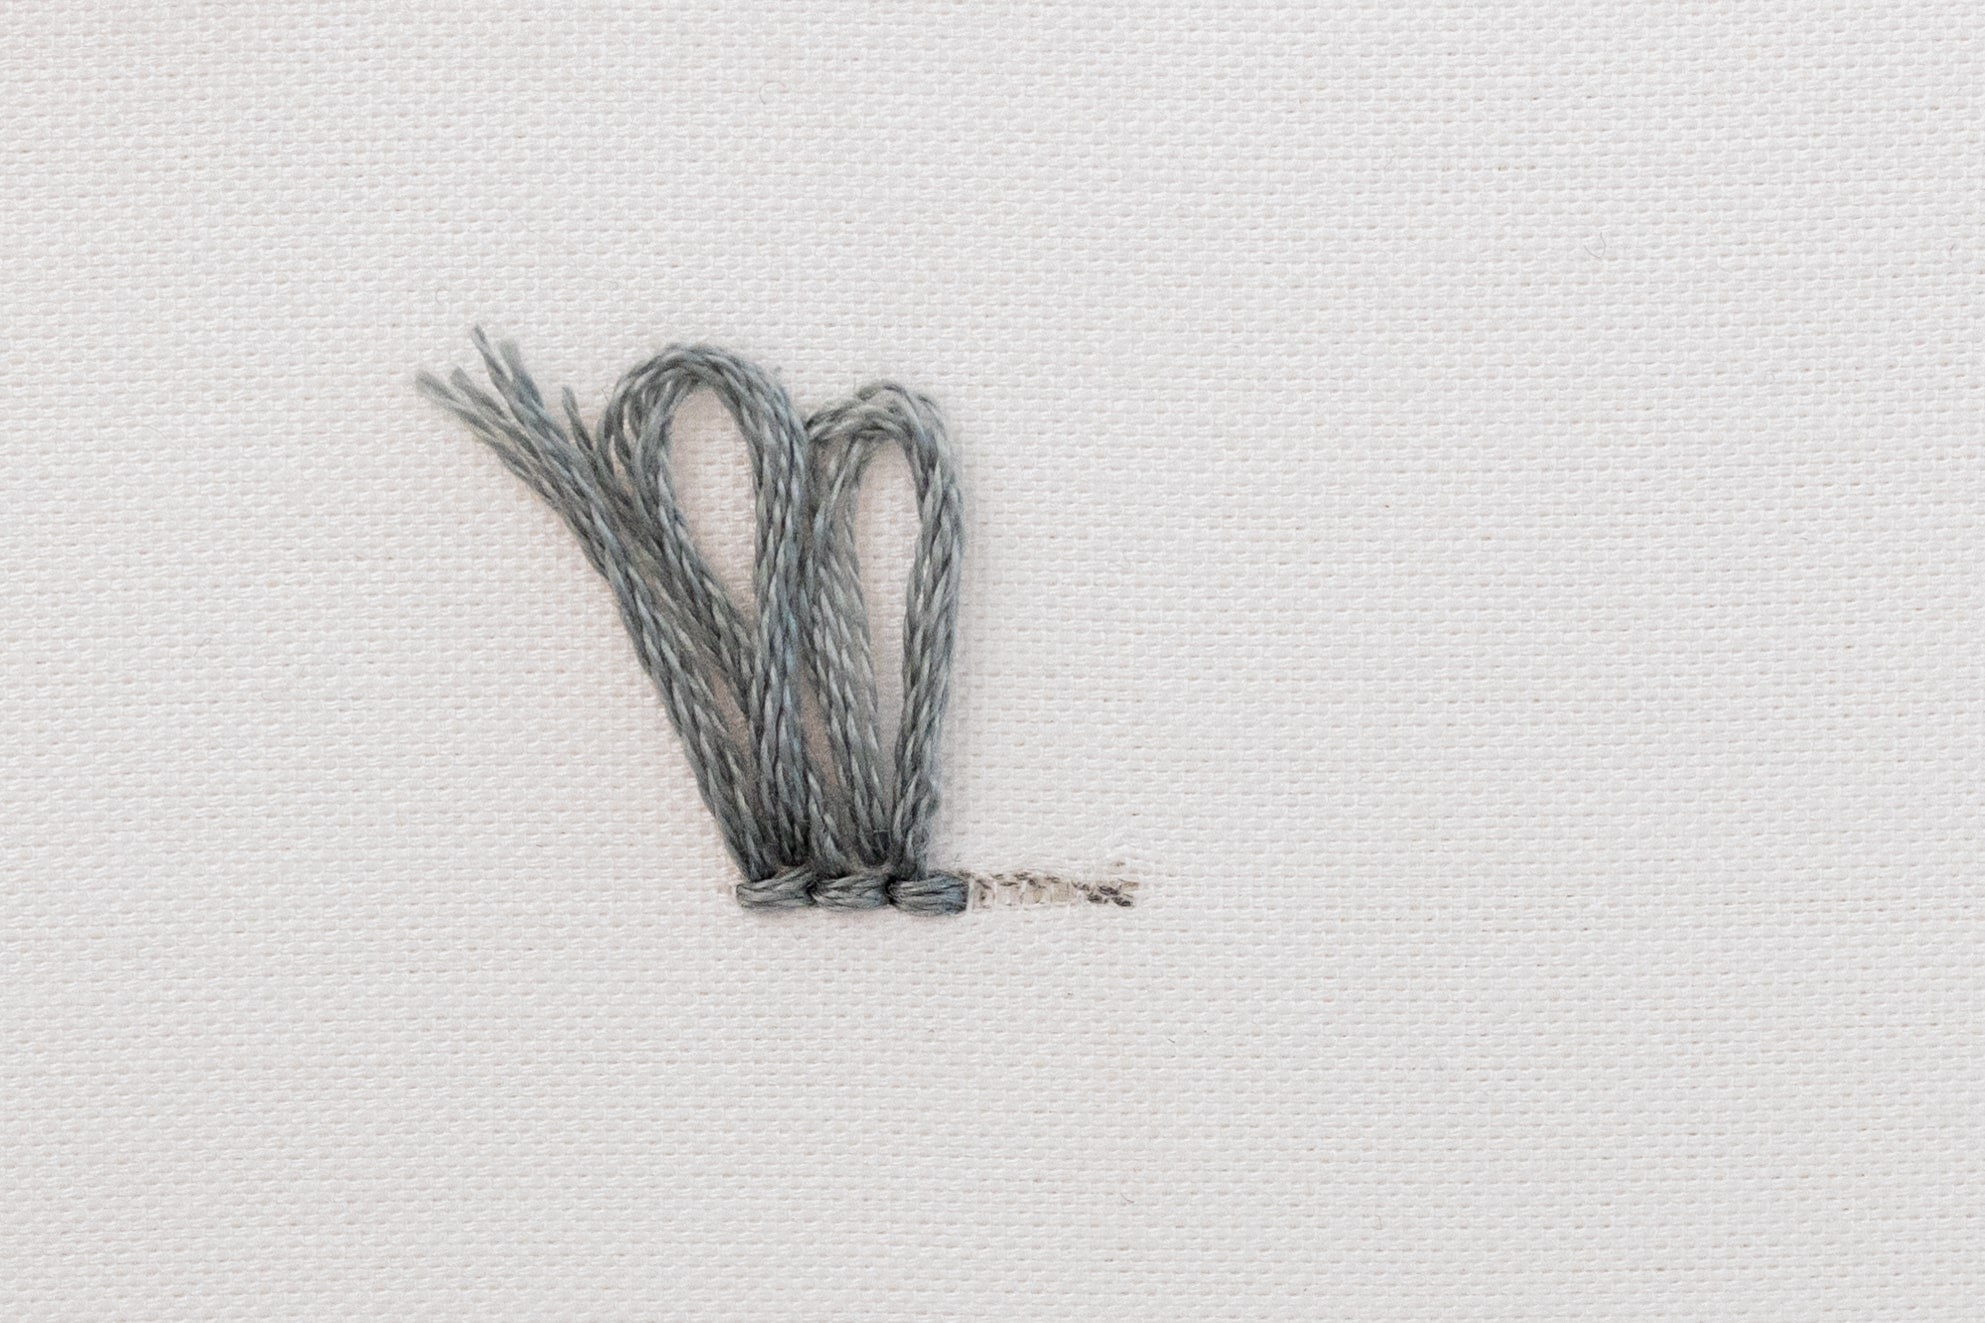
Step 2
Stitch the first leg of the next loop. Just like usual, you want to position it just to the right of the previous loop, but this means you’ll need to either poke your needle up just above the securing stitch, or actually split the securing stitch (see below). Either is fine.
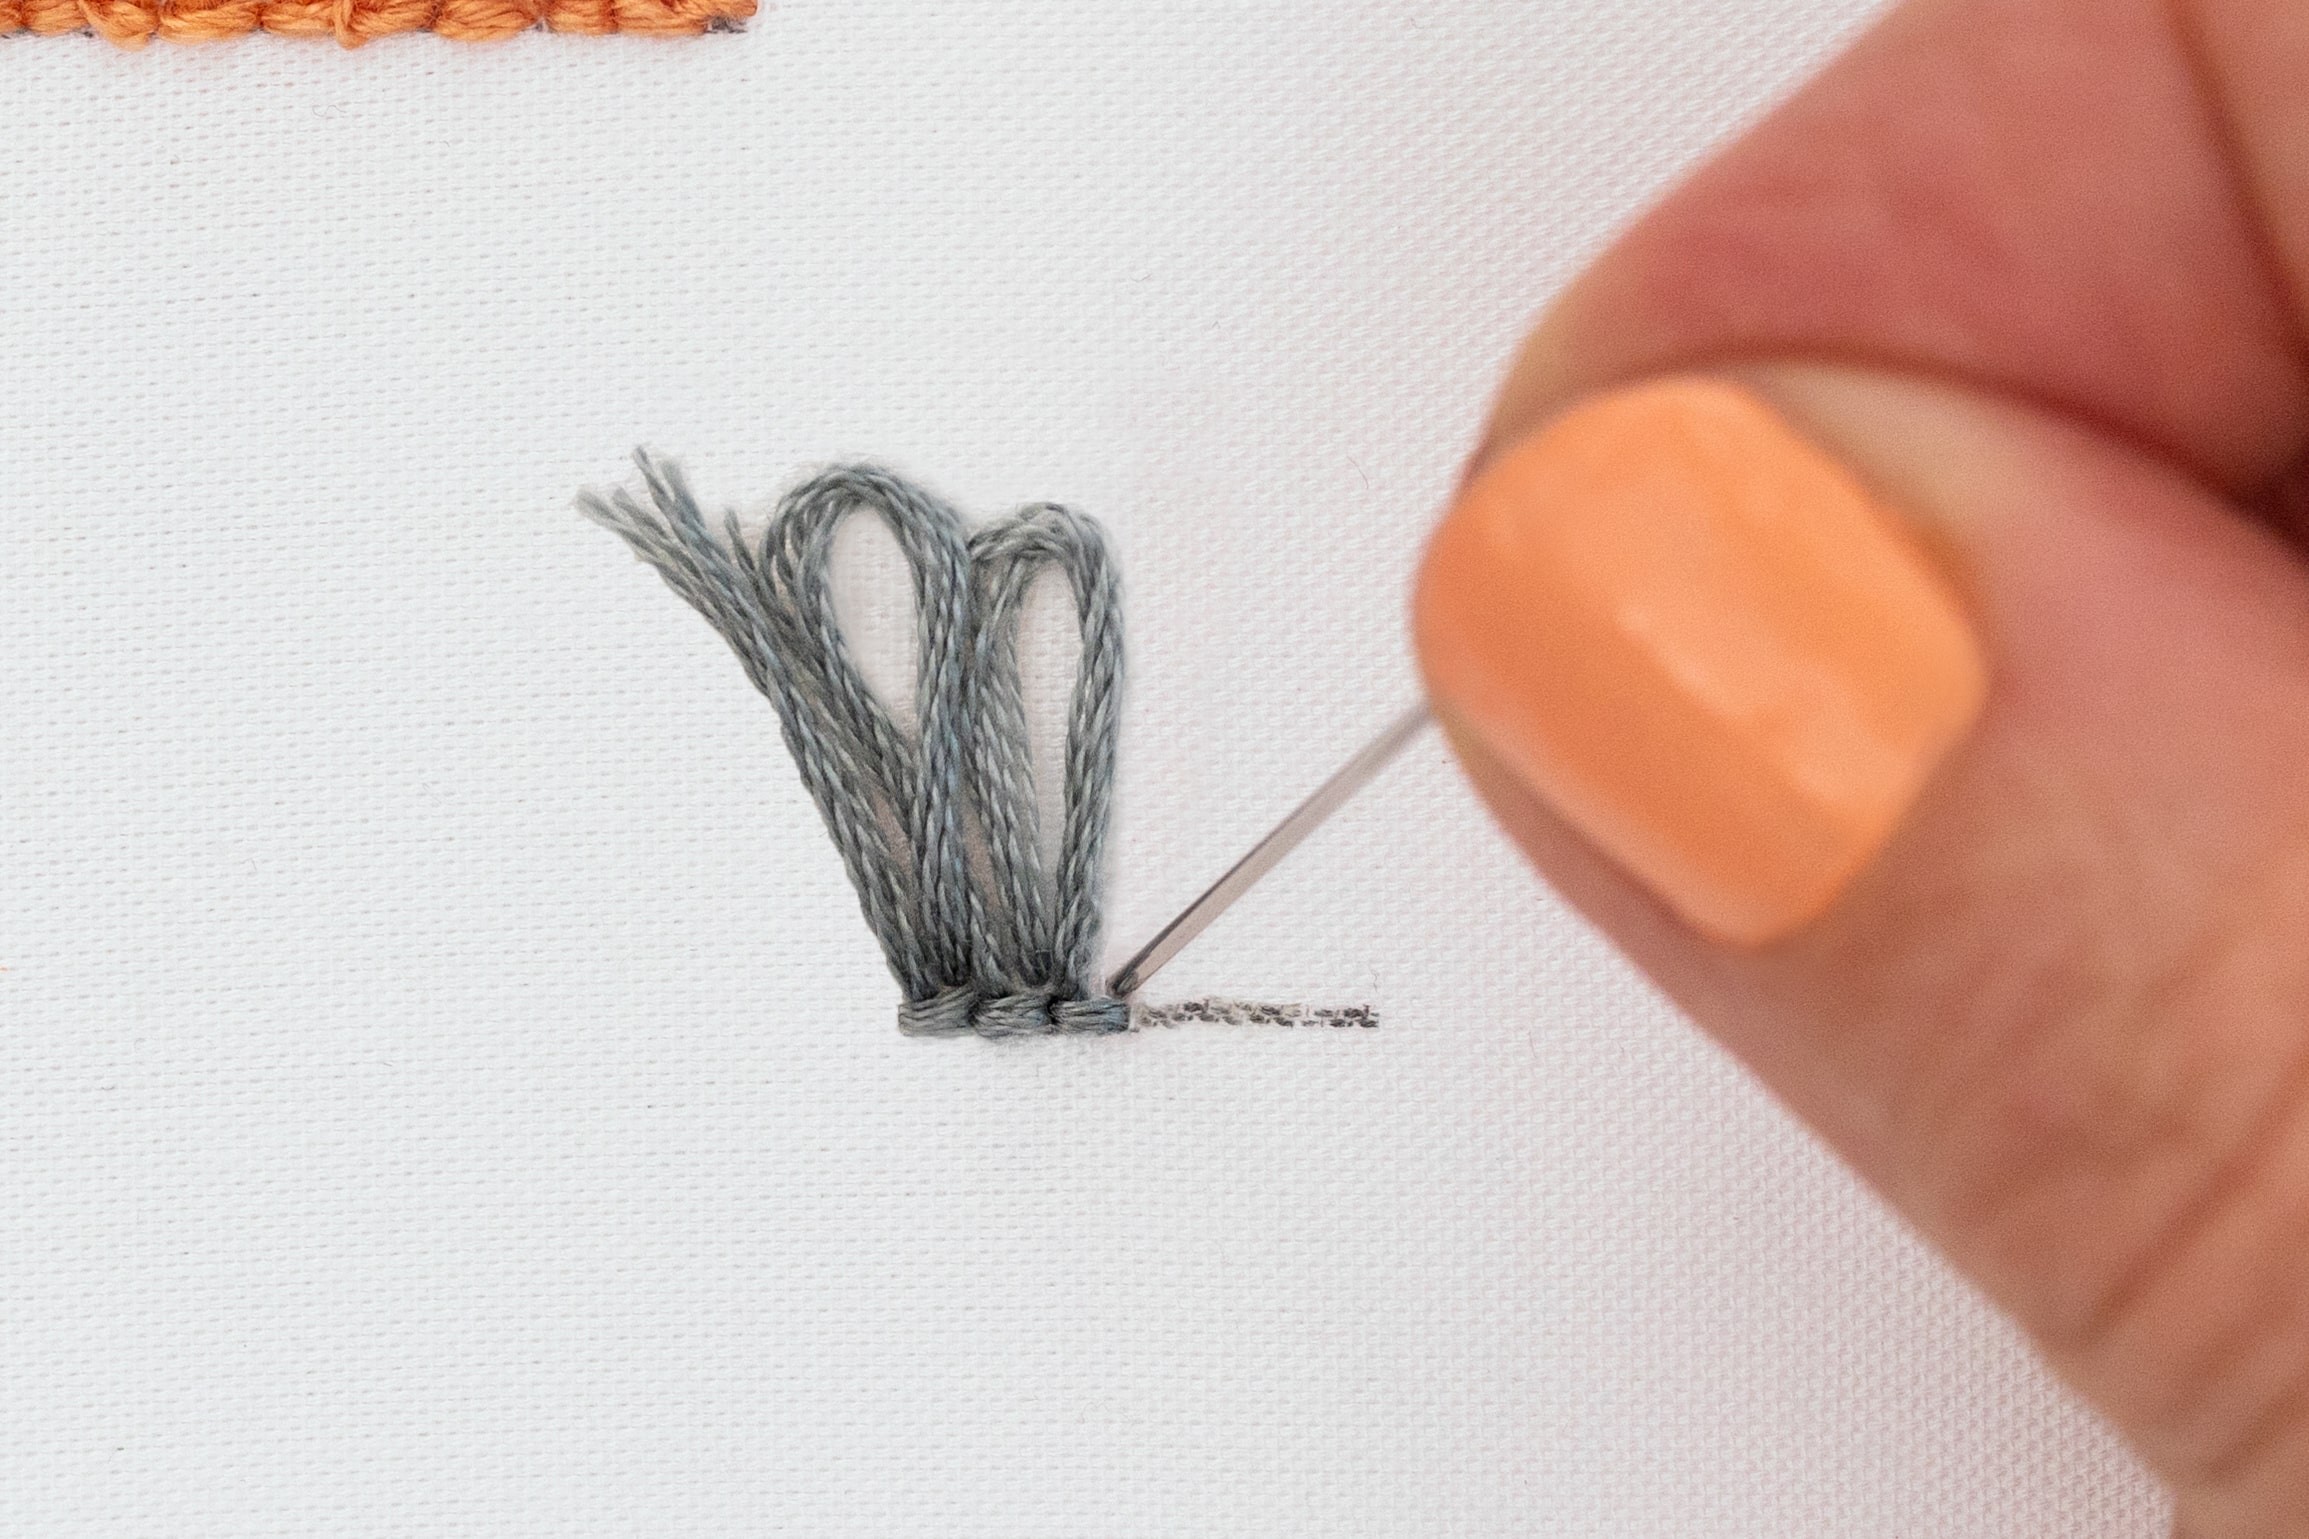
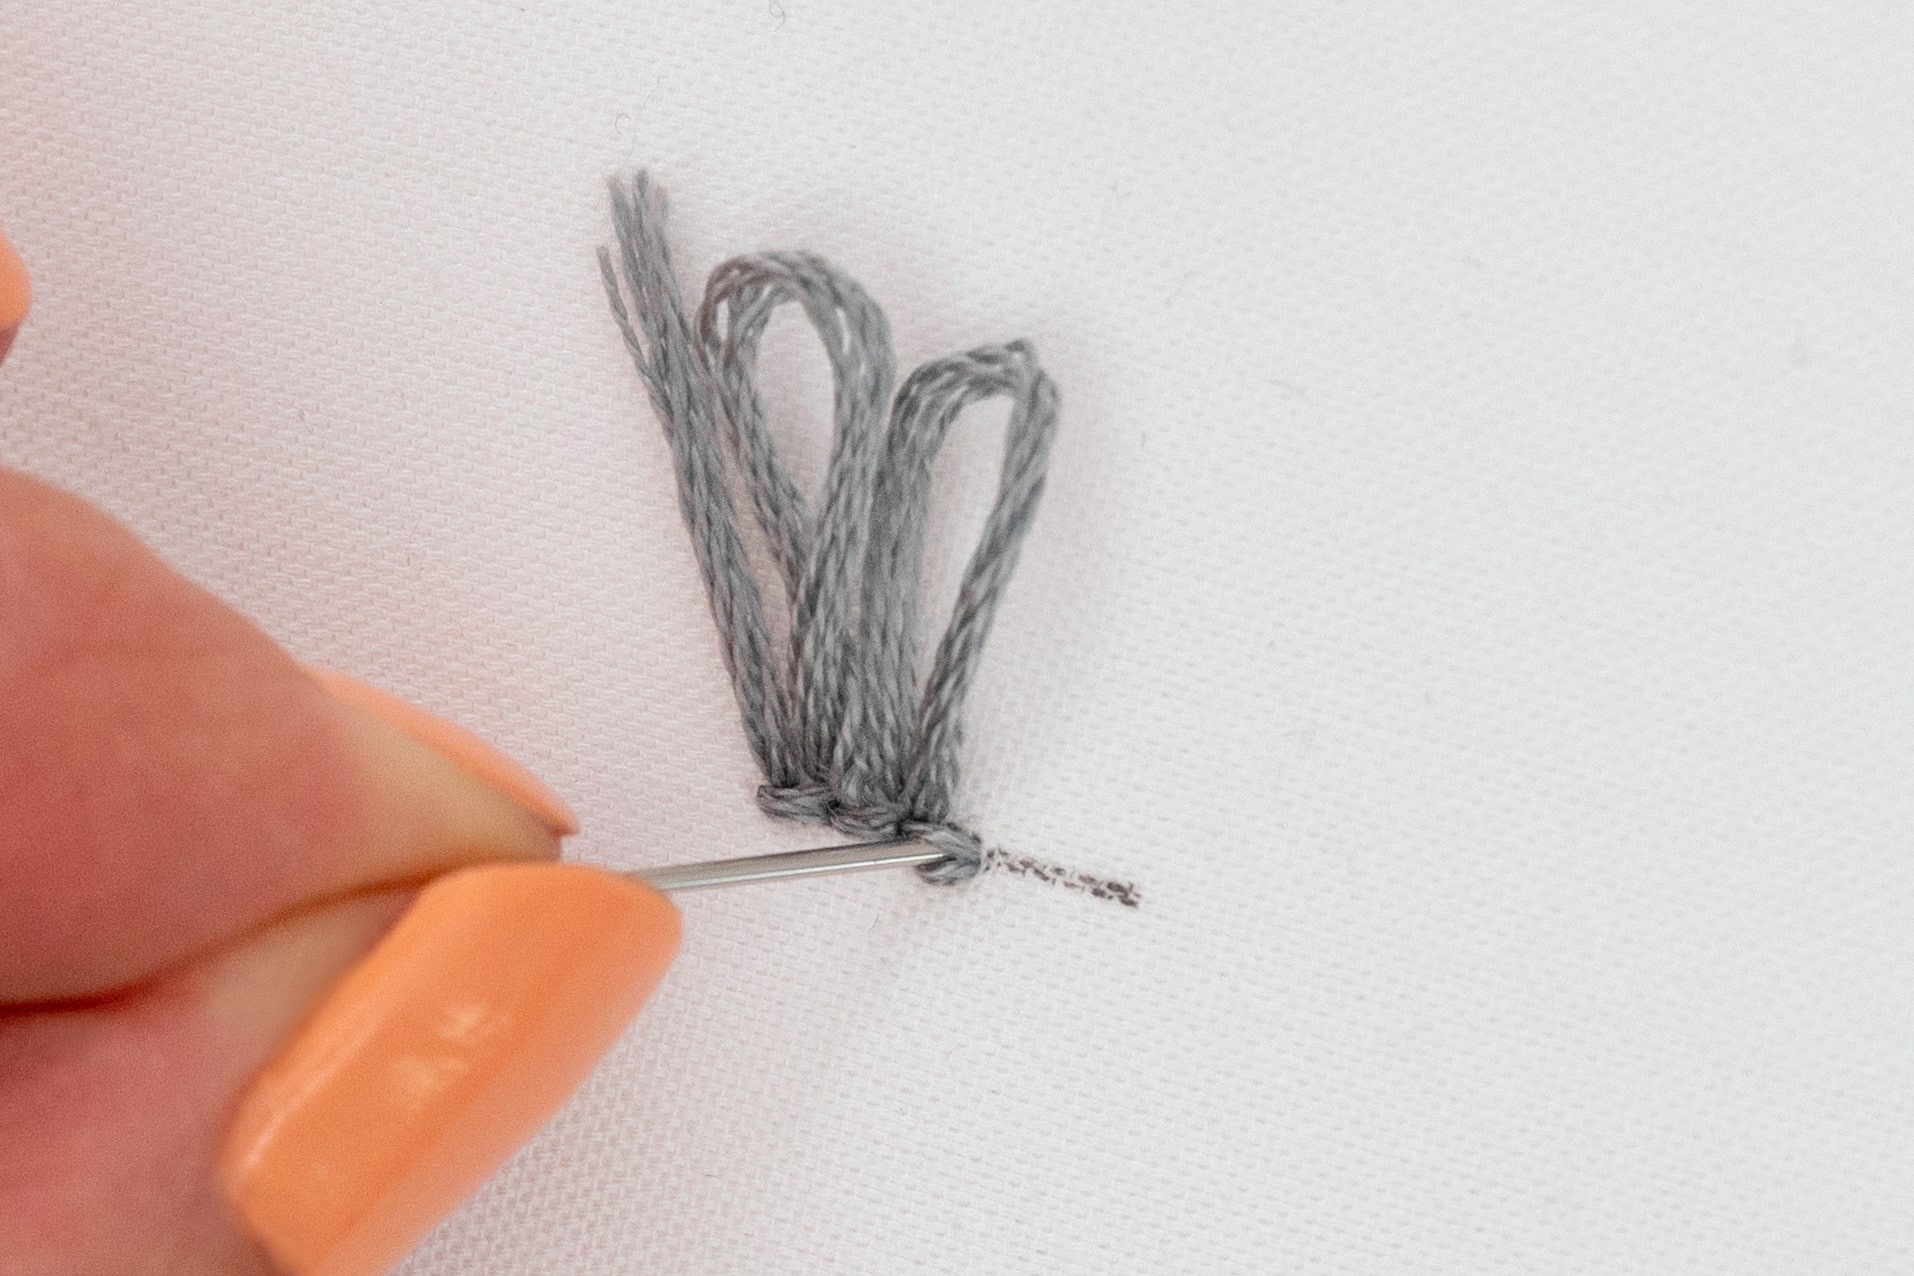
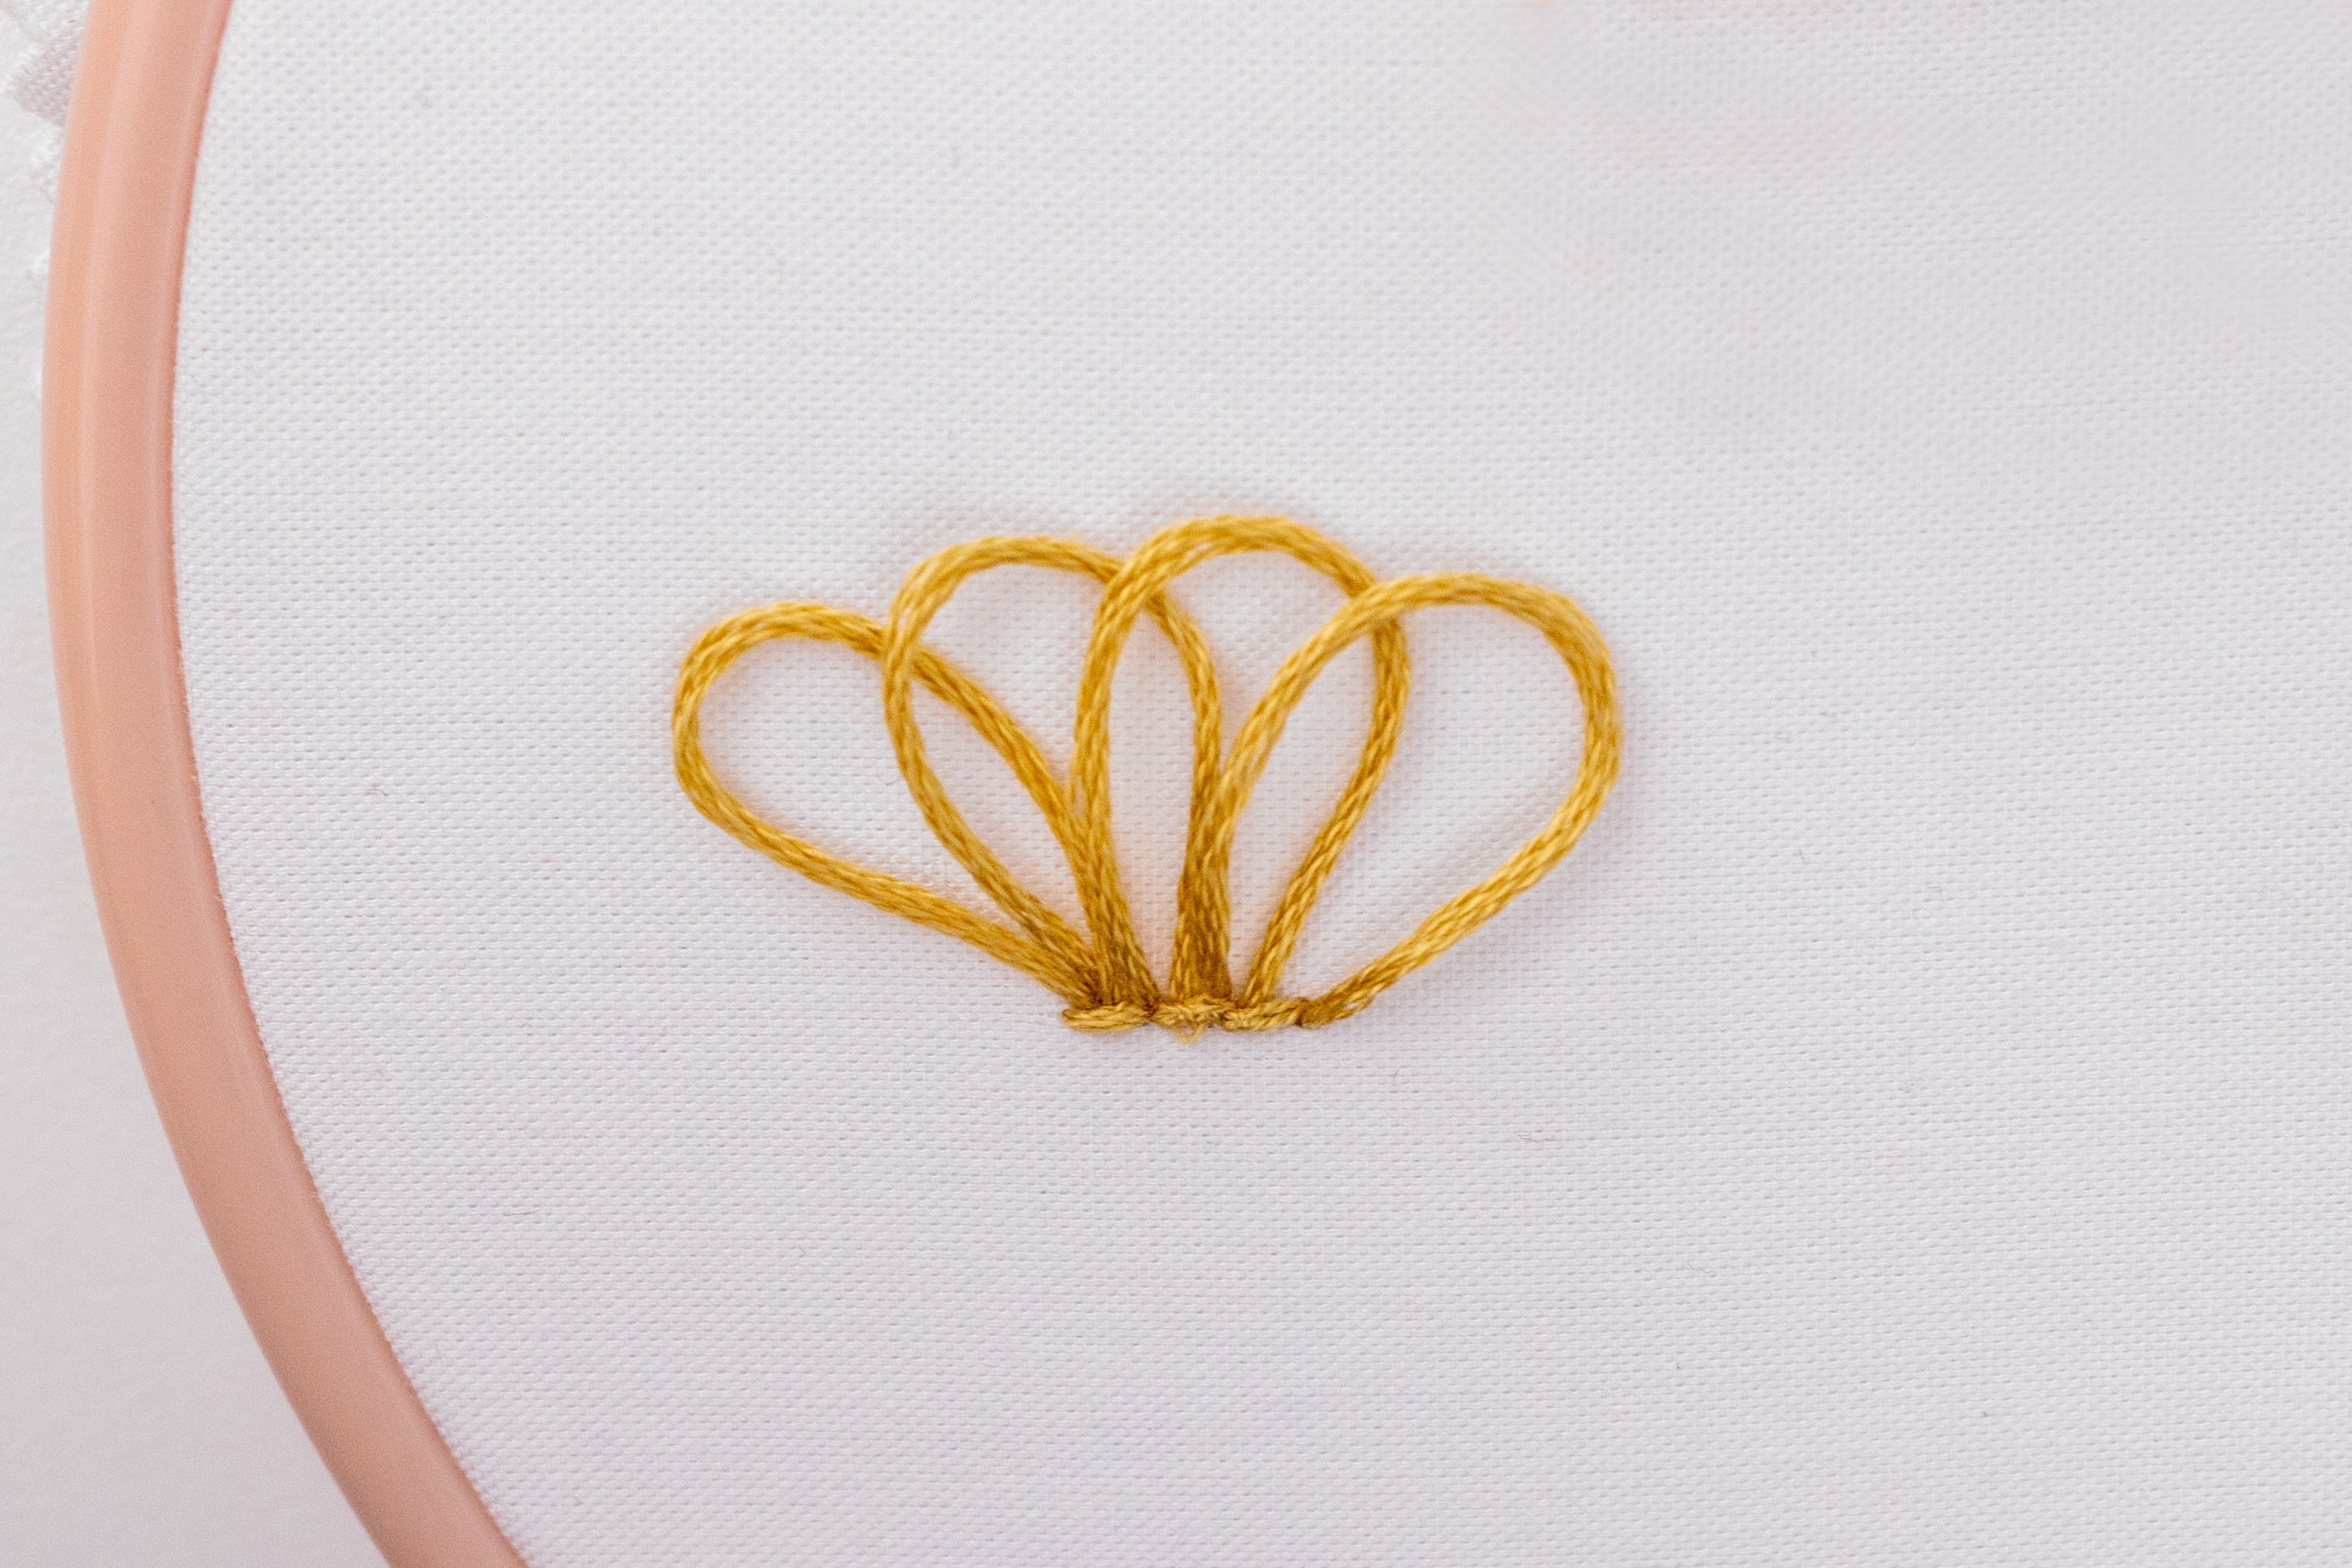
You can actually stagger the loops as you make them, by bringing up the start of each loop in the middle of the previous loop. I find that this works better if you work your securing stitch forwards, rather than backwards.
Go with the flow
While you’re learning, you may find you end up doing a bit of all of these variations as you go! Especially if you complete your securing stitch before you remember to start the next loop (gosh I do this all the time!). Or if you are trying to go back and fill in gaps. So don’t worry, it’s fine to mix it up, and likeI said, I found this to be a really forgiving technique. So long as you’ve created the look you want in the end, then that’s the main thing!
The Snipped Effect
The loops of Turkey Stitch are often snipped off tocreate quite a cool, shaggy effect. Here’s some tips:
-
I recommend you work the loops a bit longer than required to begin with, to give yourself a buffer when it comes to snipping them down.
-
Snip carefully, and don’t go crazy on your first go! You can always snip them down more, but once they’re cut, there is no going back.
-
It will help if your scissors are really sharp, and small enough to be quite precise. Embroidery scissors are great!
-
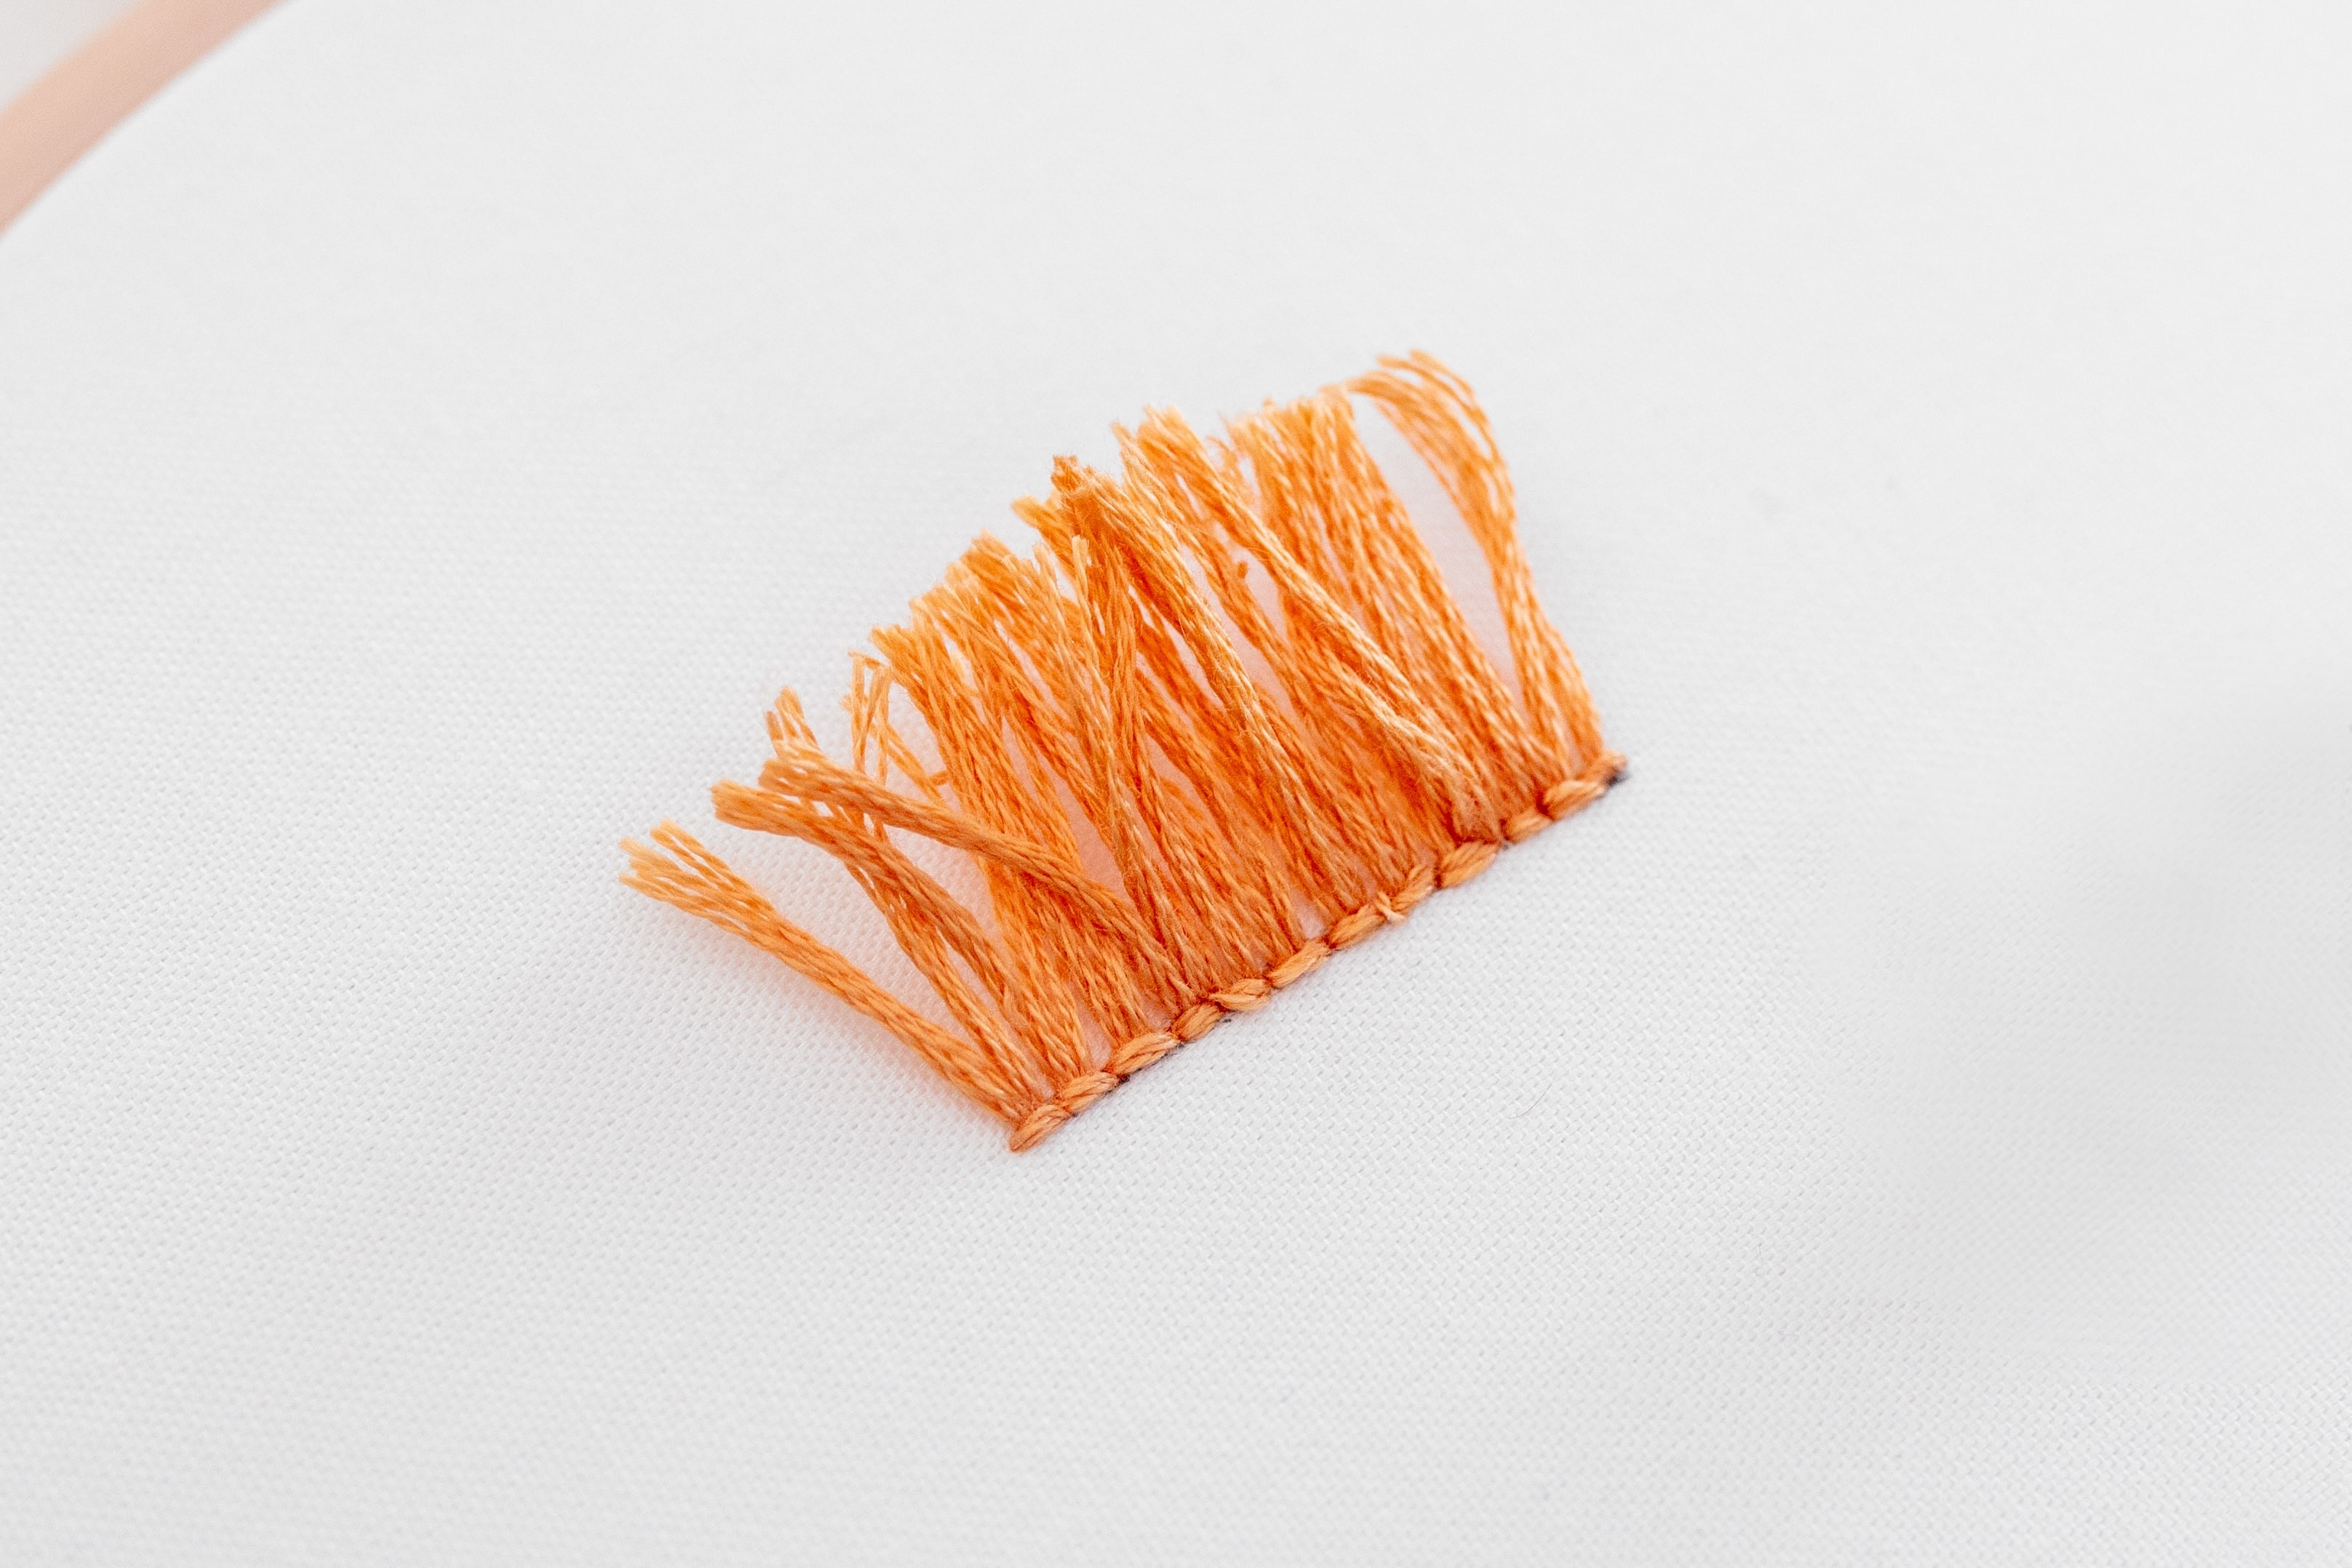
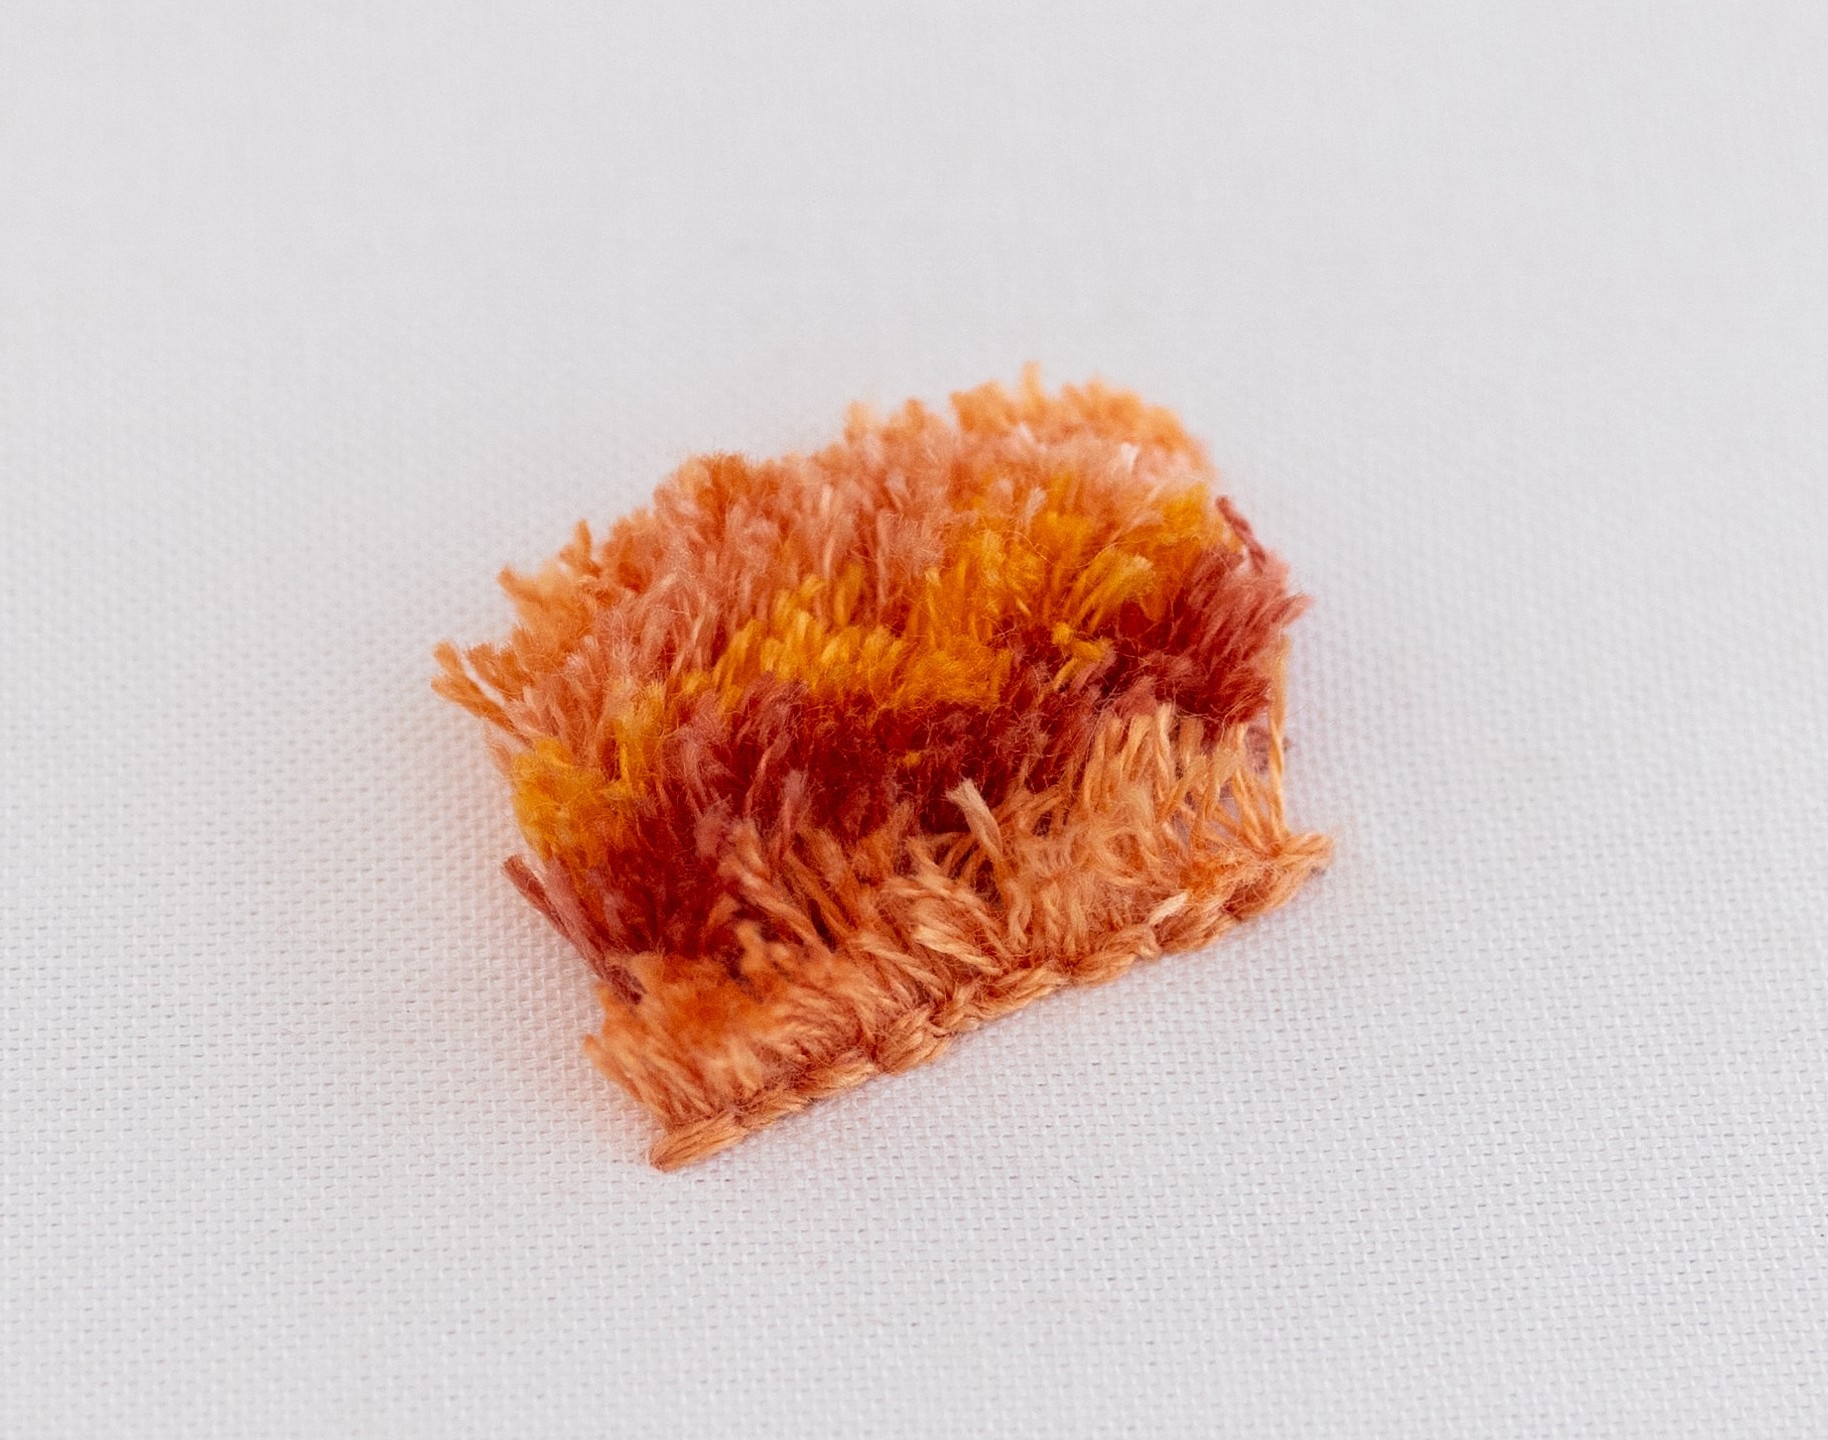
The length of your snipped tails will affect the final look. For example, if you snip a dense area of tails down quite short, you’ll end up with a short rug style effect. Whereas if the tails are snipped so that they are a bit longer, it might be more of a wavy grass effect.
Shorter:
Longer:
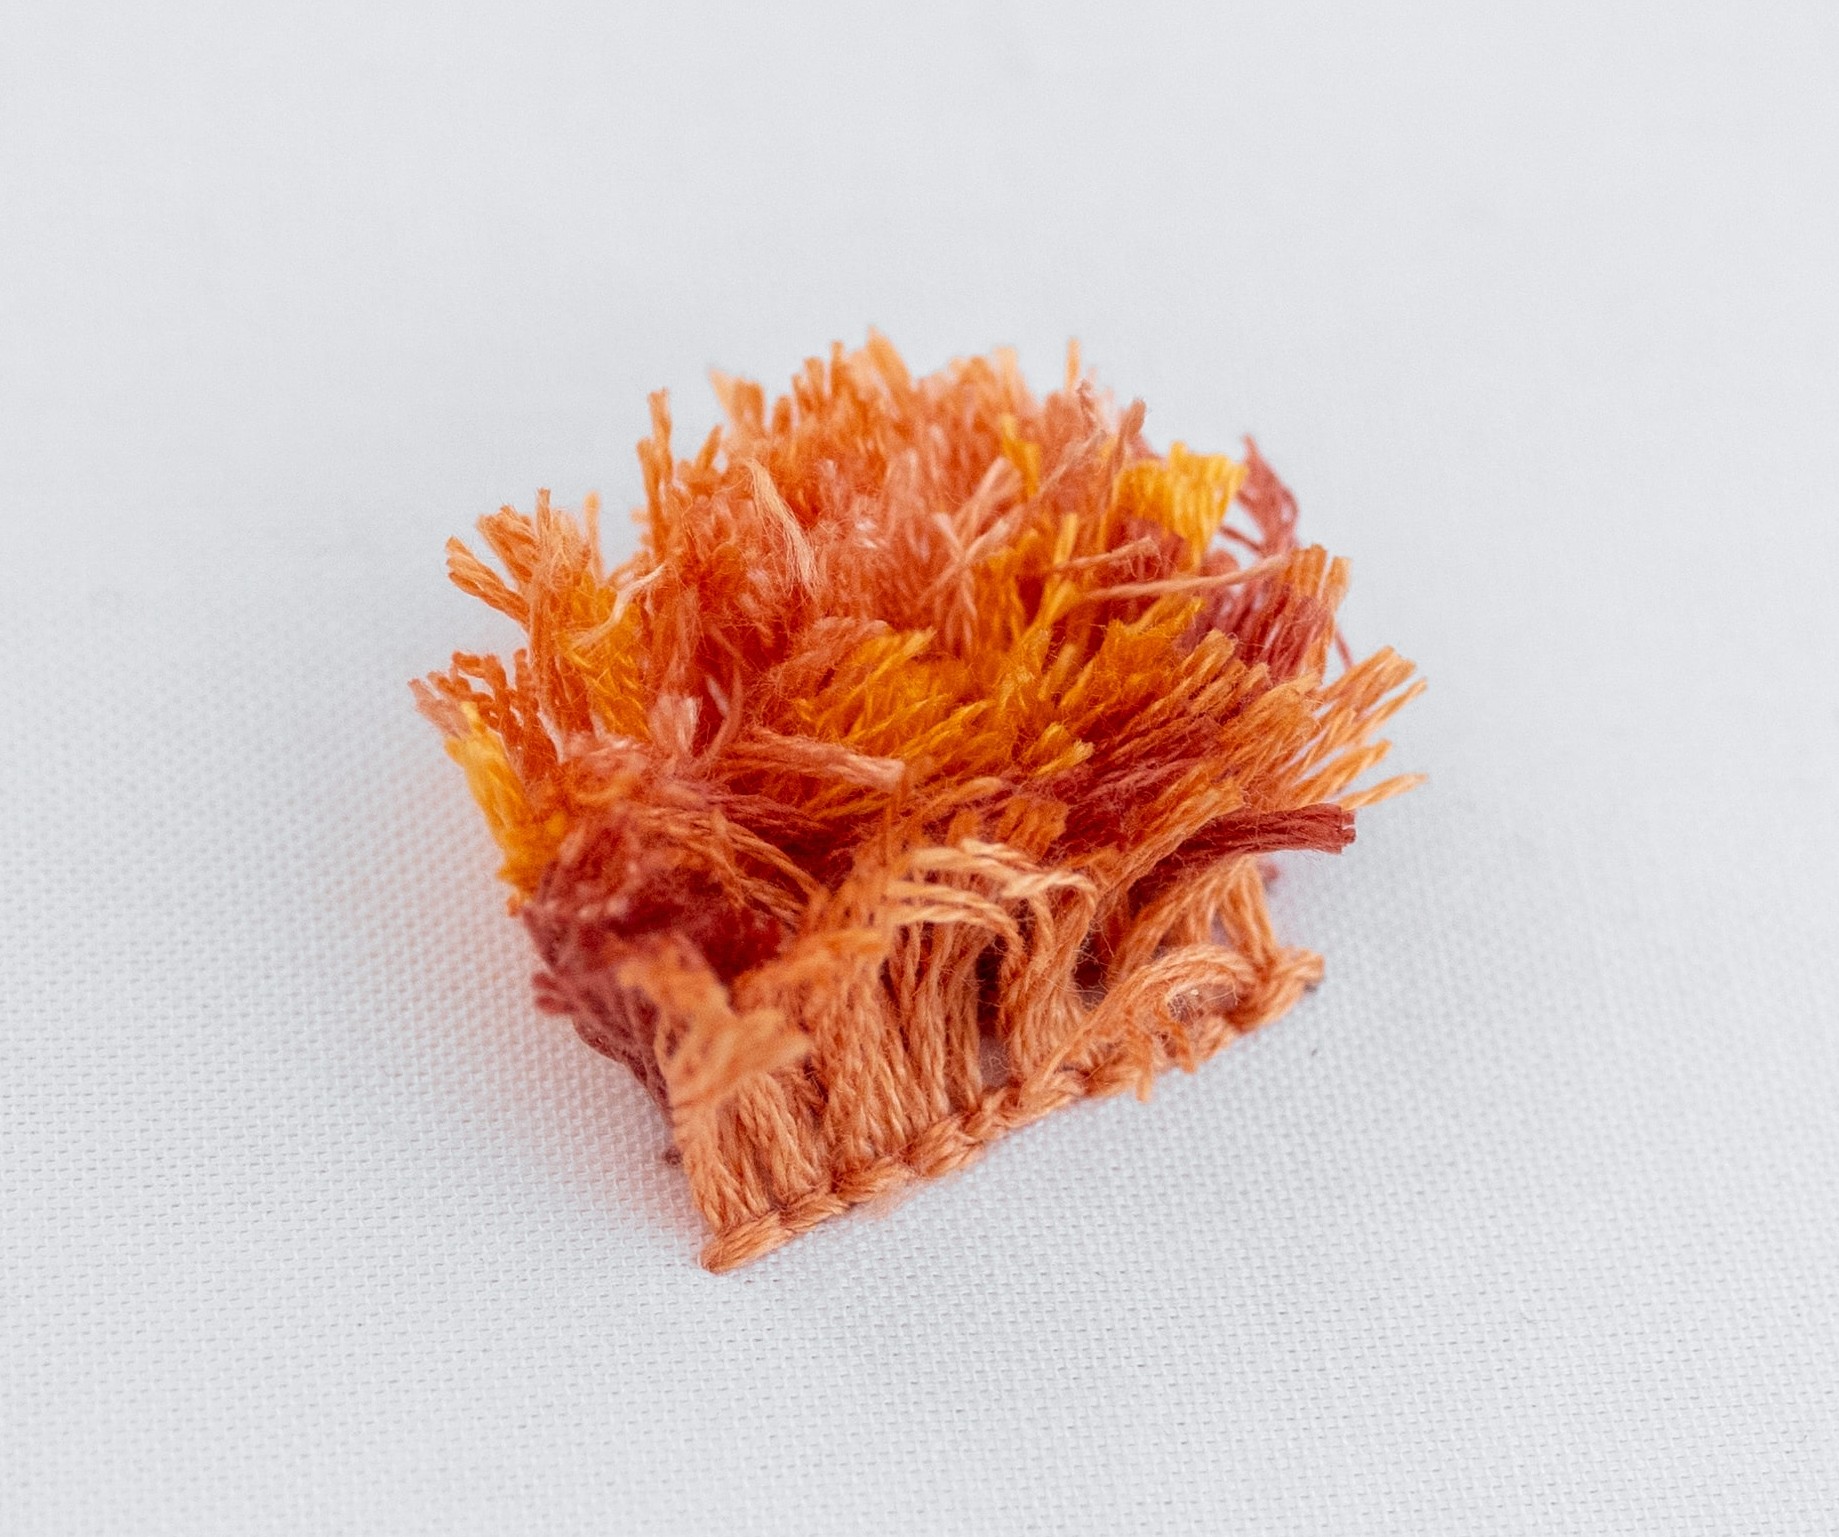
Once the tails have been snipped, you can use the blunt end of your needle to separate out the threads and fluff them up a bit. This will make the effect look more densely packed.
You can use sticky tape to mop up the leftover bits of thread, it’s really helpful!
I hope you really enjoy this tutorial and learning all about Turkey Stitch.
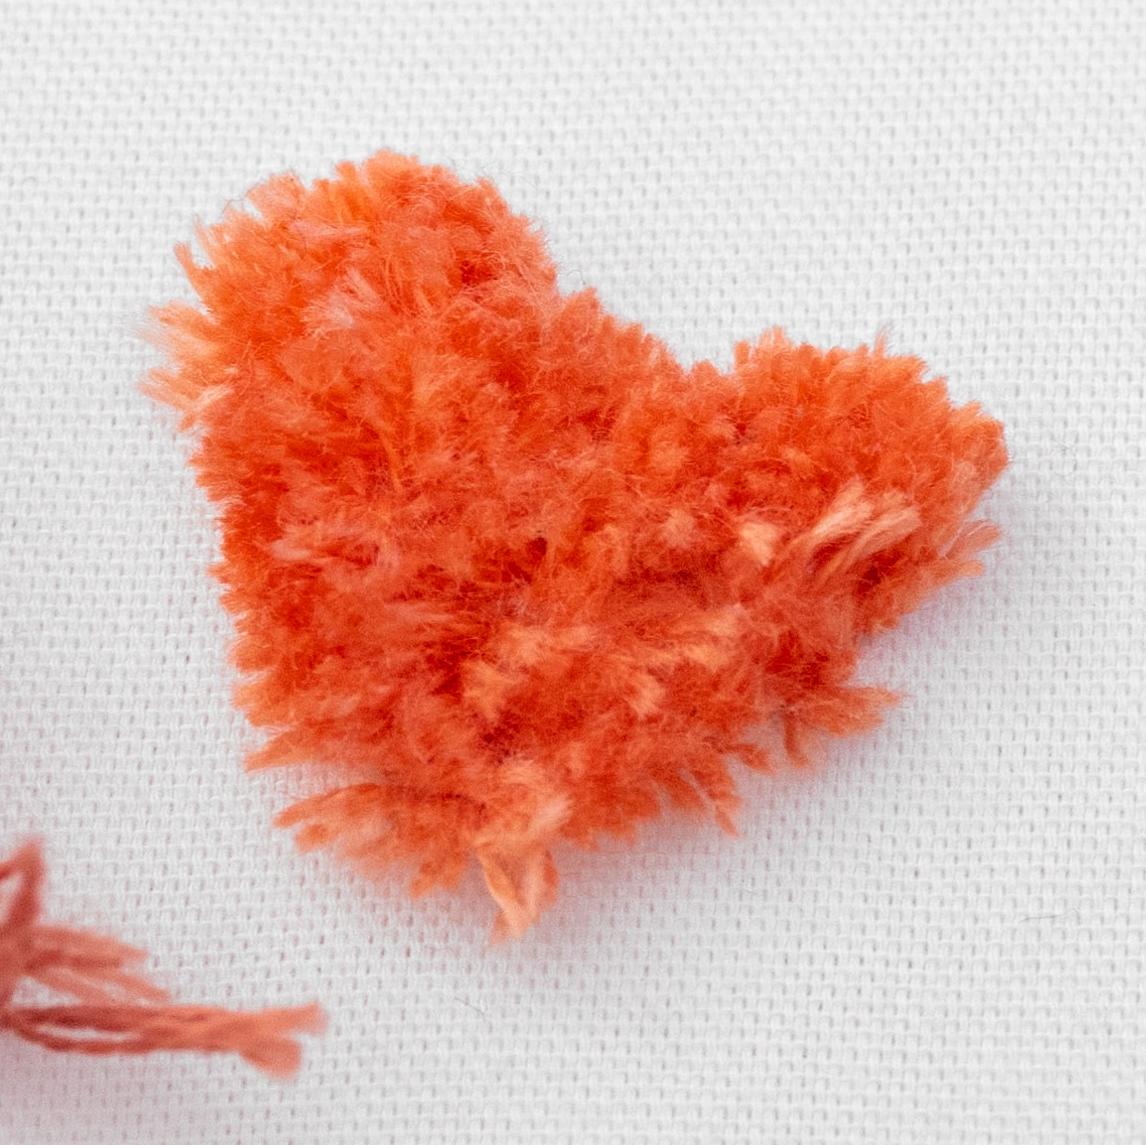
Examples of Turkey Stitch
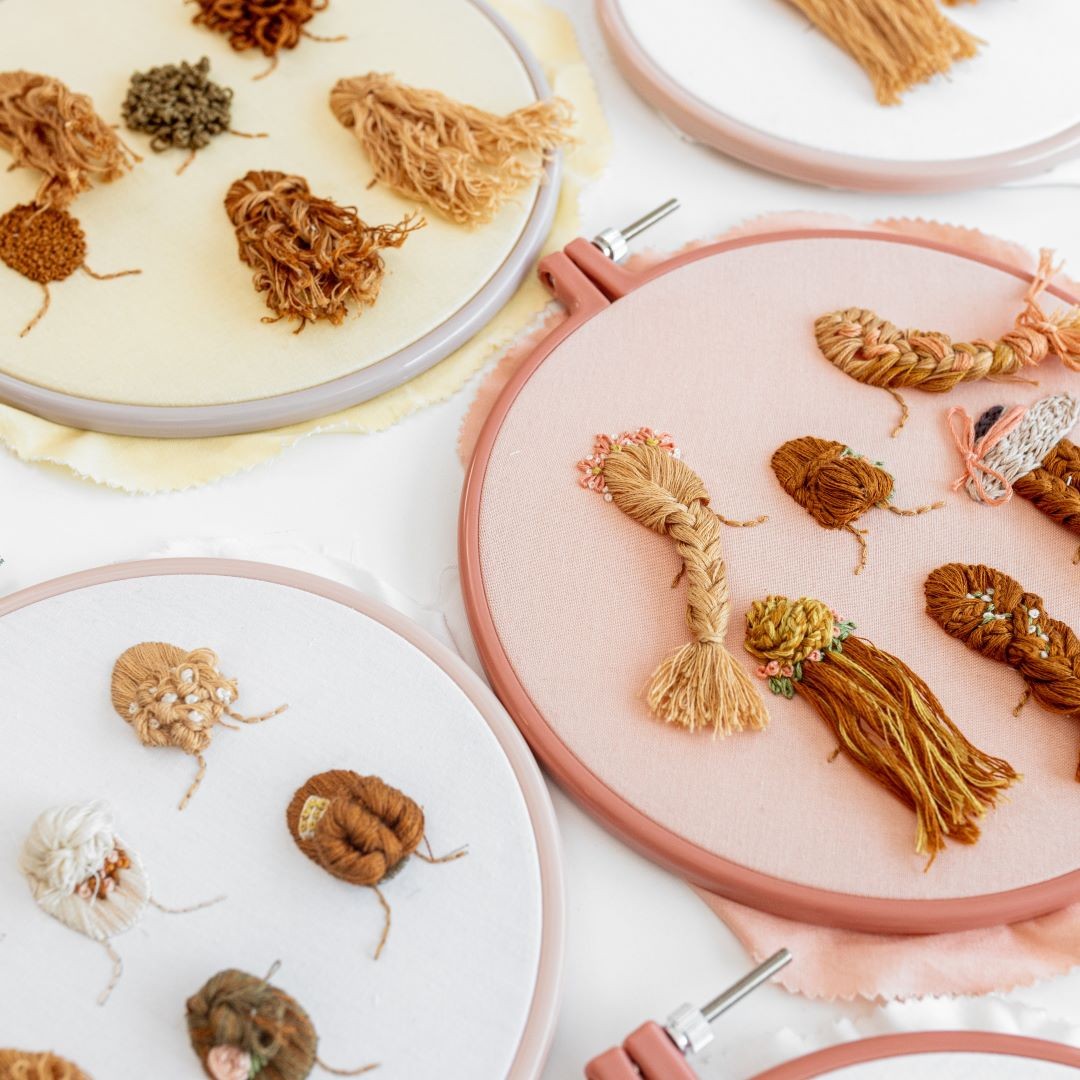
Turkey Stitch has been used to create lovely long hair in this gorgeous pattern, Soul Sisters.
Each person's hair has been made using turkey stitch, and then fashioned into different hairstyles. If you want to learn 7+ hairstyles including:
- Standard Braid
- French Braid
- Fancy Low Bun
- Messy High Bun
- Curly Hair
Conclusion
So there you have it, all the beginner knowledge you need to do Turkey Stitch. This stitch is difficult to get right at first, but after some practice, you'll be fantastic at it.
If you liked this article, then you may also like this one, French Braid - Learn This Modern Embroidery Hairstyle.
So, are you excited to use Turkey Stitch in your patterns?
What's next?
If you're looking for a simple and beginner-friendly way to try embroidered hairstyles, my Daphne Beginner Hairstyle Kit is a great place to start! This kit is perfect for building your confidence with hair embroidery while creating a lovely design.


