Learn Modern Embroidery for Beginners with this FREE Pattern
Introduction
Have you noticed so many beautiful embroidery creations popping up on Instagram and Pinterest and thought oooh I’d love to try that but it looks too hard?
Well, you’ll be pleased to know that it’s totally achievable to stitch beautiful things, even as a beginner!
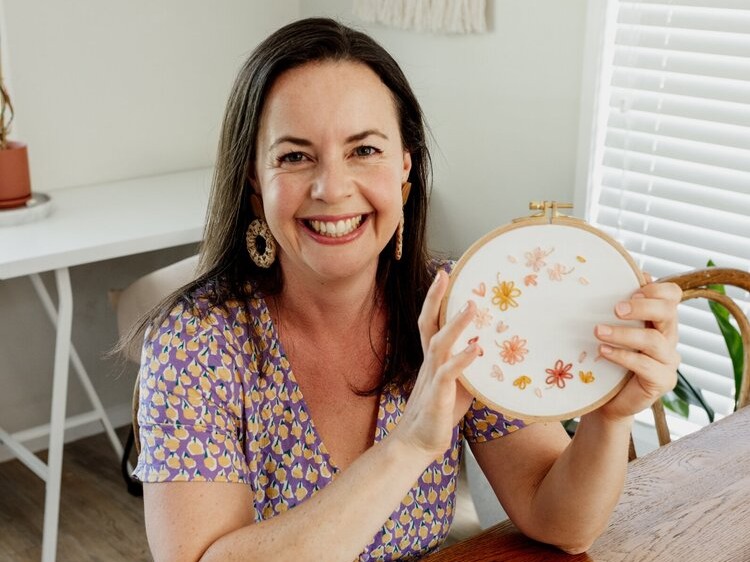
I’ve taught hundreds of lovely women how to embroider since I opened the Maker’s Academy earlier this year.
Most of these women were beginners when we started, and they’ve transformed into confident makers and made hundreds of amazing pieces. And just like me, so many of them have fallen head over heels in love with this amazing craft.
Hand embroidery is a slow craft, which is still practiced by many people worldwide, in many different forms, including modern embroidery. I think of modern embroidery as a form of embroidery that is more accessible and enjoyable for us in our busy day and age. And, of course, creating patterns with a modern flair!
So why do people love modern embroidery so much? A recent survey of our Maker’s Academy members found that the overwhelmingly main reason they enjoy making our crafts is for the mental health benefits.
As Luxury embroidery makers Hand and Lock say, these mental health benefits include alleviating stress, lowering blood pressure, decreasing heart rate, being mindful, and expressing yourself.
Plus, it’s so lovely to have beautiful works of art to display around your home and gift to friends and family.
I have noticed lots of benefits in my time spent embroidering, and you are bound to see these benefits as well if you give it a go.
Modern embroidery is actually a lot easier than you think, and I’m sure you’ll feel the same way after reading this blog!
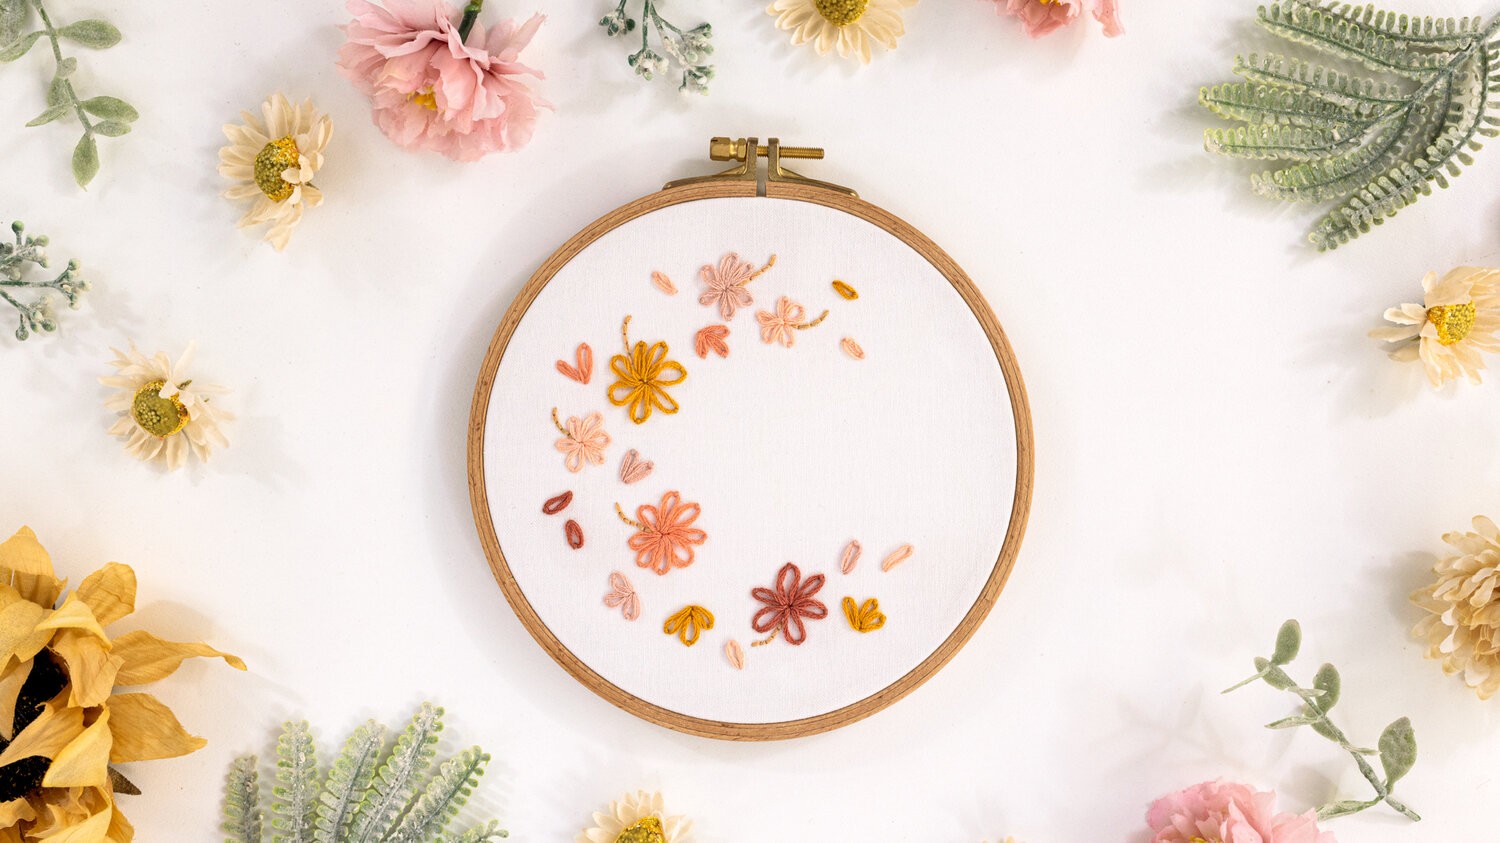
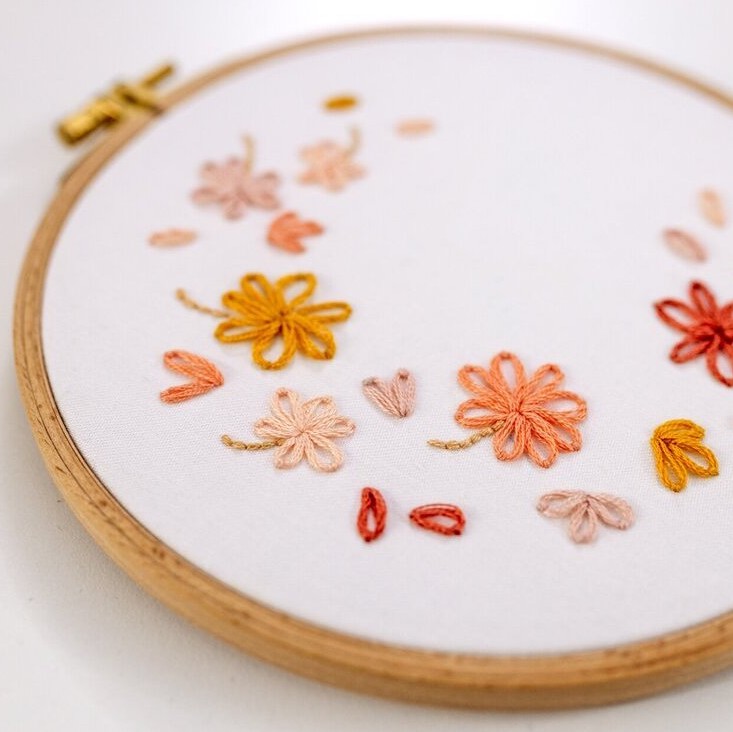
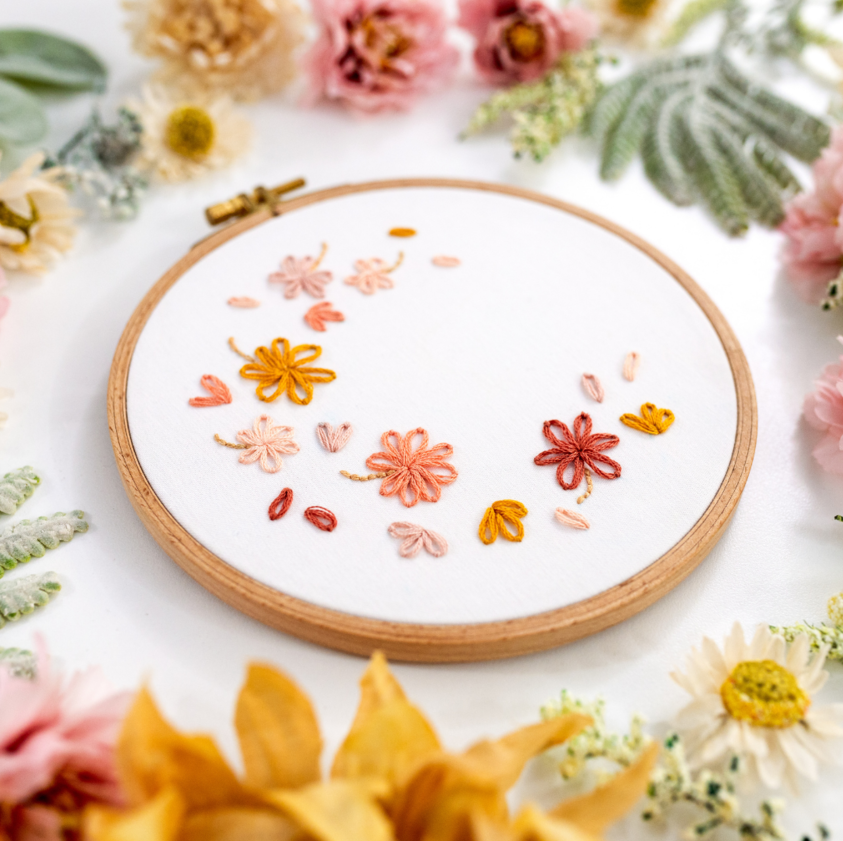
Plus, after reading this blog, you will have all the basic beginner knowledge and techniques needed to make your first FREE modern embroidery pattern, Petal Breeze.
This pattern is simple, gorgeous, and a great way to get started on your embroidery journey!
Without further ado, let’s jump into everything you need to get started in the world of modern embroidery.
Grab your FREE Petal Breeze Pattern
Just pop your email in the form below and hit 'submit' and I'll send your free pattern straight to your inbox:
Dressing Your Hoop
First things first, let's go over how to dress your hoop!
Step 1.
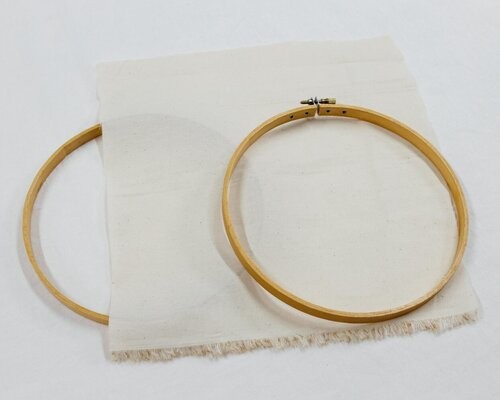
To do this, unscrew your hoop and pull the two parts of the hoop apart.
Step 2.
Then grab the smaller piece of your hoop, place it on your work surface and lay your fabric on top, around about in the centre.
Step 3.
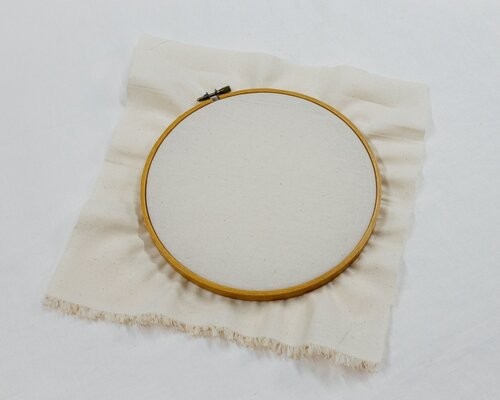
Then, place the larger part of the hoop over the fabric so it slots over the smaller part (you’ll probably need to unscrew it a bit so that it fits over, now that the fabric is in the mix too).
Step 4.
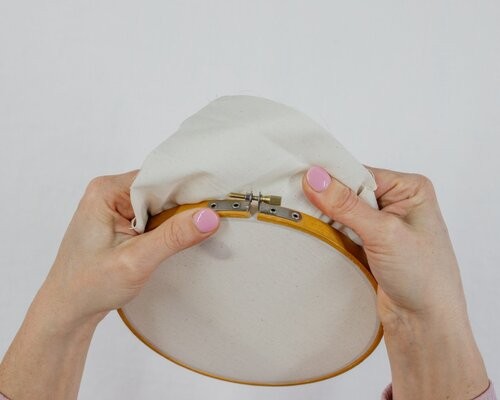
Then you can start pulling your fabric around the outside of your hoop to get it tight. And tighten up the screw closure a little bit at a time as you go.
Step 5.
Keep doing this, alternating between pulling your fabric tight and tightening the hoop to keep your fabric taut.
The goal here is to get your fabric as tight as possible in the hoop so that when you touch it, the fabric is tight as a drum. So keep screwing the top of the hoop and carefully pulling the fabric tighter until you’ve got it fairly taut.
Step 6.
Then once the fabric is as tight as possible, screw the hoop as tight as it will go. If your hoop can be tightened with a screwdriver, it’s worth doing that now as the finishing touch.
Step 7.
Now, have a look at how much excess fabric is hanging out from the hoop. About 50mm works well, trimmed in a circle around your hoop.
So if you’ve got too much excess fabric or it’s not in a nice circular shape, go ahead and trim it down now. You’ll find this super handy because if there is too much fabric it can sneak under and get caught in your stitches, which isn’t fun!
Transferring Your Embroidery Pattern
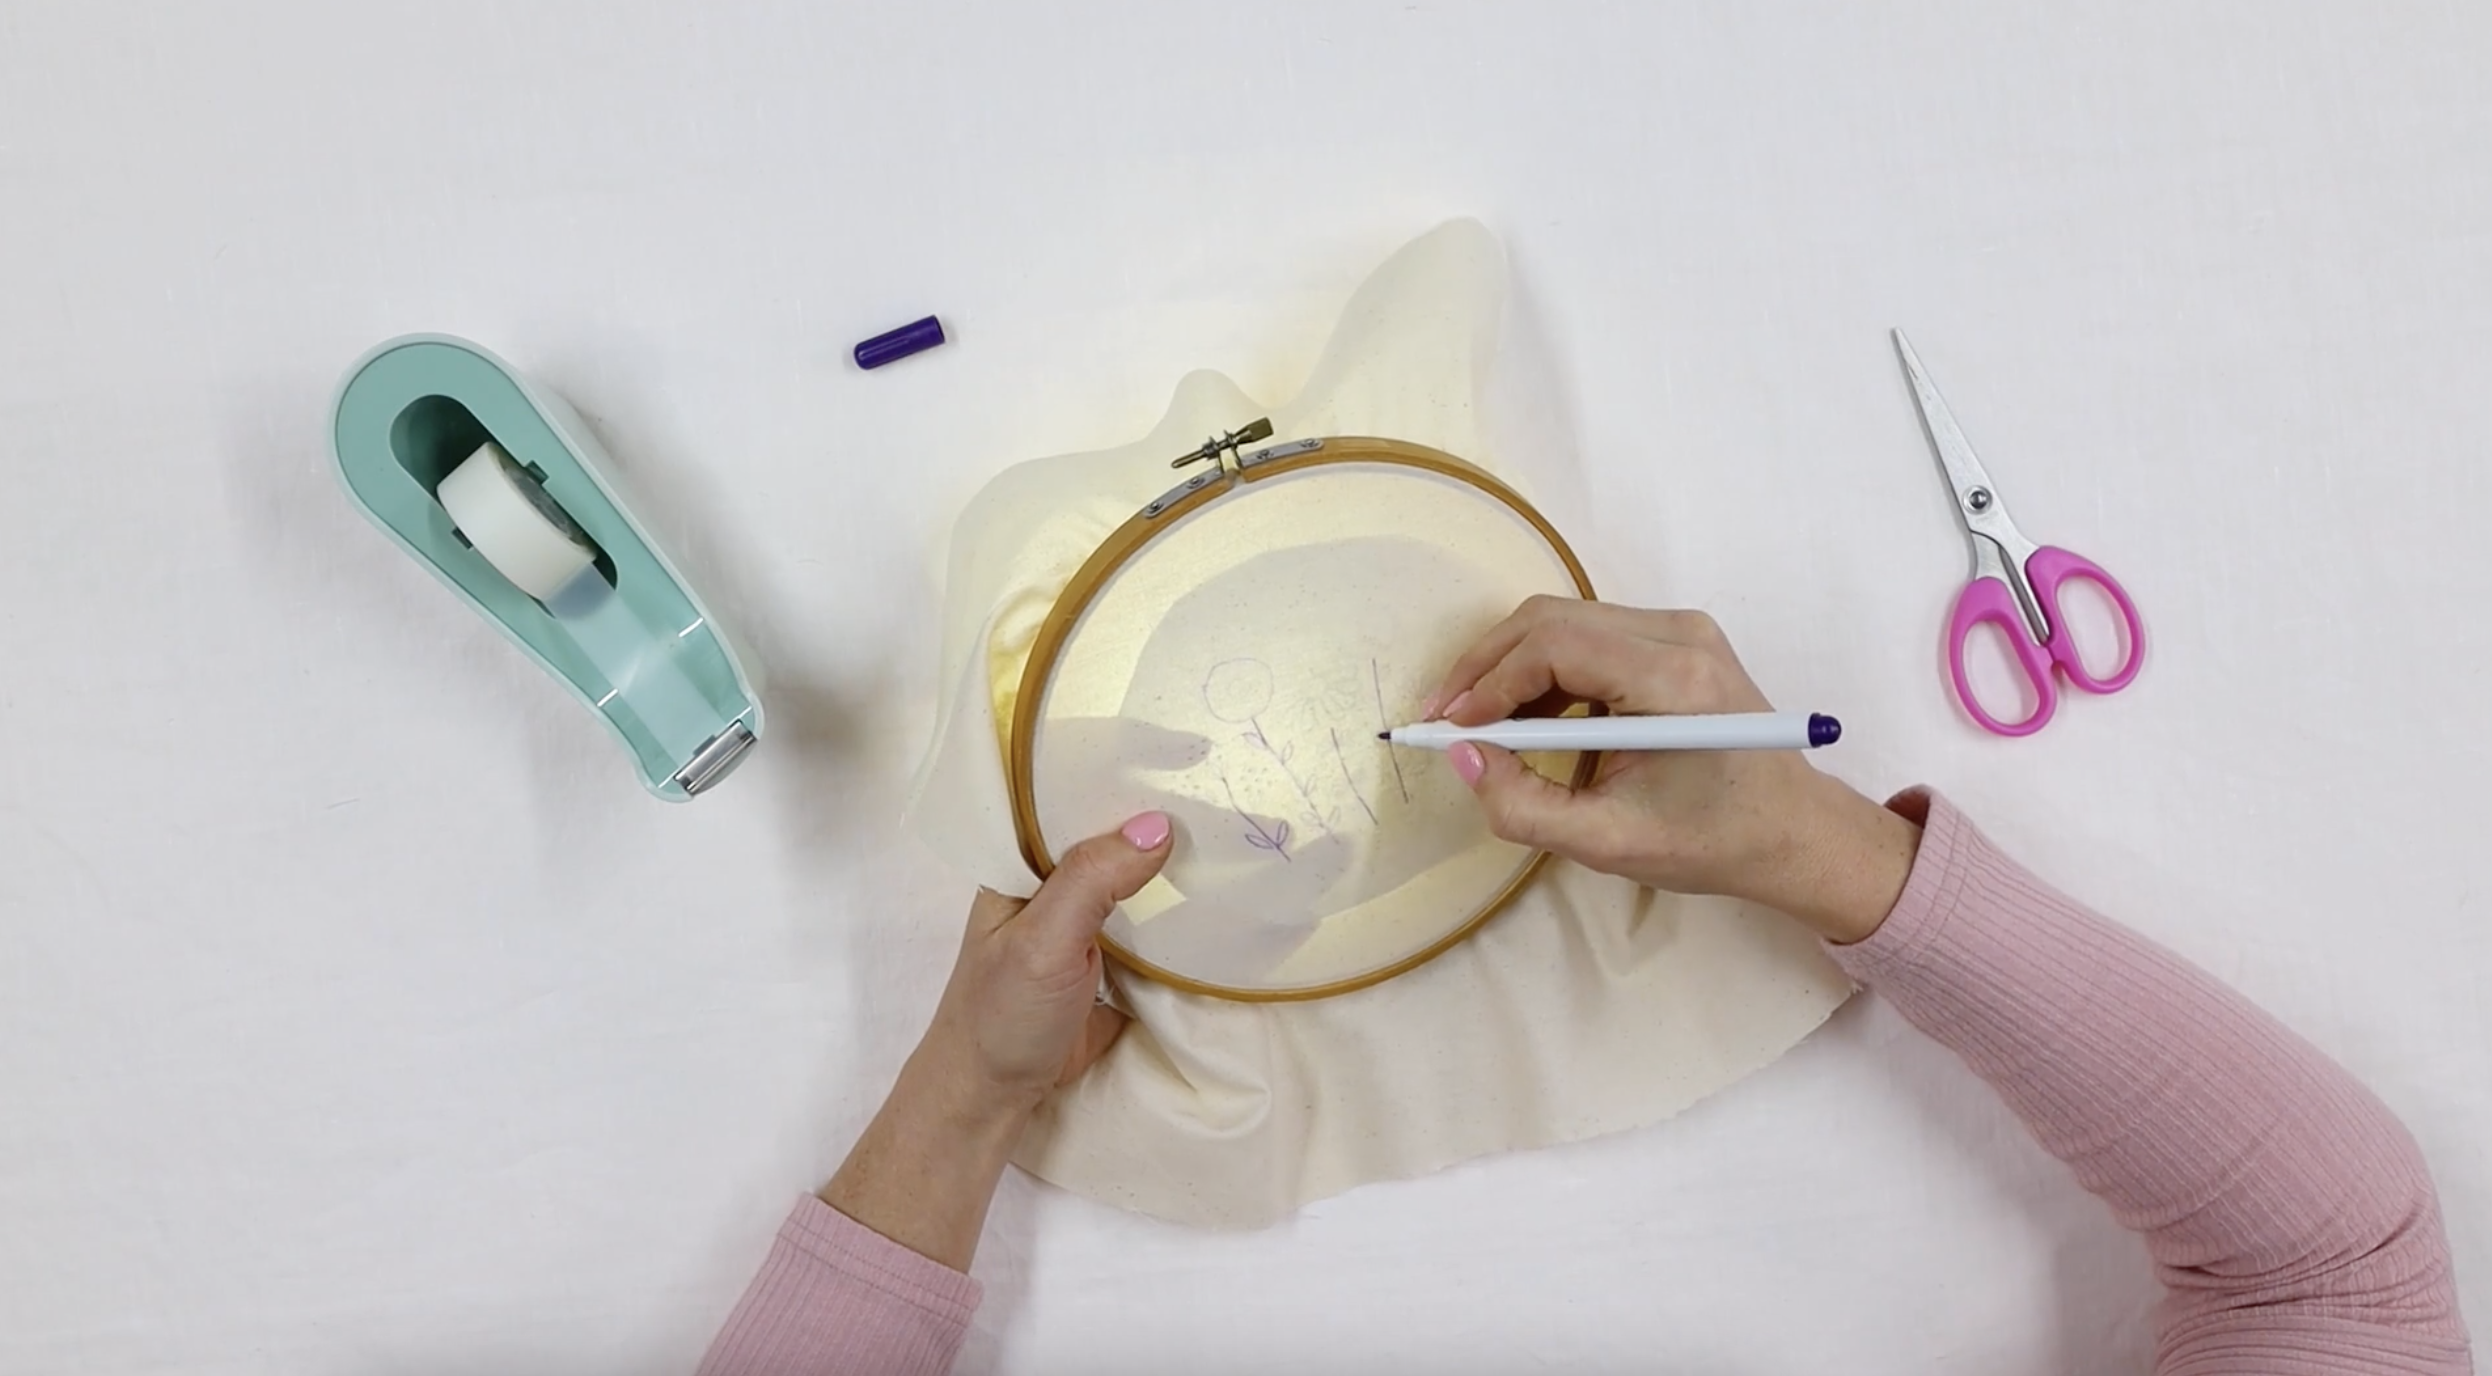
The next step in the embroidering process is tracing your pattern on your material. There are a bunch of different methods, but the one I use 99% of the time is to print and trace my pattern, so let’s go over that one first!
Step 1.
So print out your pattern, then cut it out so that it will fit on the underside of your hoop.
Then secure it to the underside of the hoop using either tape or pins. I also like to make sure that the top of the pattern is facing the top in the middle near the hoop clasp.
Step 2.
Now hold the hoop with the front side facing you up to a light source, and you should be able to see the design showing through from the back, to trace it on.
TIP: If you’re doing some late-night crafting (like I always do), the light will probably be too dim for you to see the pattern through the fabric. So in this case, you can use the flashlight on your phone as the light source. Just pop your flashlight underneath your hoop, and you should see your pattern shining through.
Step 3.
Ok, now go ahead and trace the pattern onto the front of your fabric.
As you draw each section, you might need to push your pattern up firmly against the fabric at the back, and hold that part right over your light source, so that you can see the design to trace.
And just do a nice light line with your pen (rather than tracing on a super thick outline), because this means it will be easier to remove (or less visible) later once the stitching is done.
What Embroidery Pen Should You Use to Draw Your Pattern?
You might be wondering what pen to use for this step?
It’s great if you can use a pen that you can easily remove after all the stitching is done. This is because any pen that you don’t cover up with stitches will show.
Lots of the techniques we use in modern embroidery are a bit free and less structured, like lazy daisy petals, so chances are whatever you stitch won’t 100% cover up the pattern you’ve drawn on.
So, if you can use a removable pen that means you can remove the pattern outline at the end, and your stitched design will be displayed in all its glory.
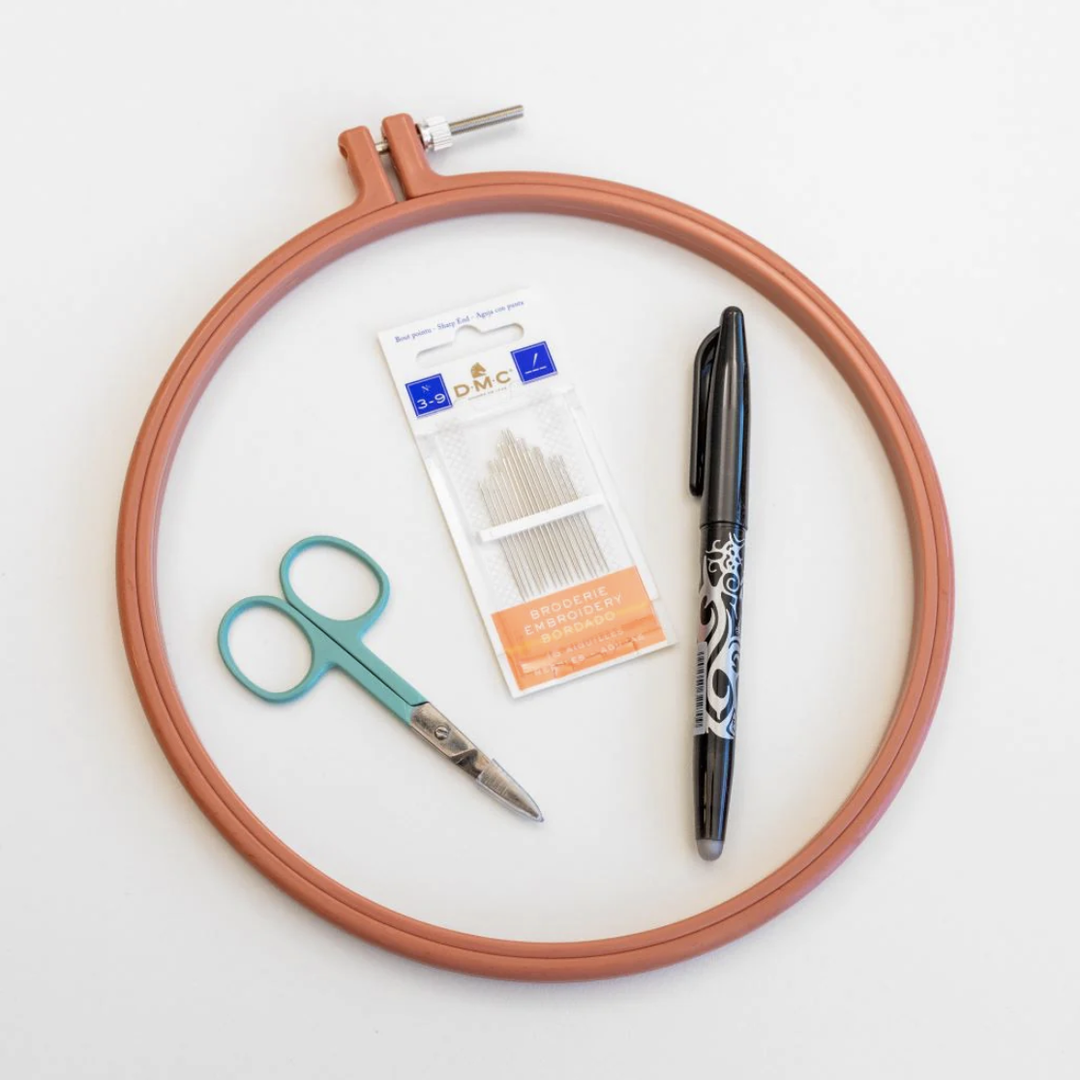
My fave embroidery pens are the Pilot Frixion Pen (it comes off with the heat of a hairdryer) or the DMC Embroidery Pen (it comes off with water).
But if you don’t have one of these specialist pens, don't fret! You can use a regular pen or pencil. Just go lightly, and bear in mind that any marks you don’t cover with the thread will be visible in the finished creation.
So, if you’re using a regular pen/pencil, trace the design with a light touch so that it’s not as visible if any marks aren't covered.
Preparing Your Embroidery Thread
We’re almost ready to thread your needle. But first, I really think it’s worth taking a moment to prepare your thread!
Don’t worry, this will save you time later because you’ll be less likely to get in a tangle.
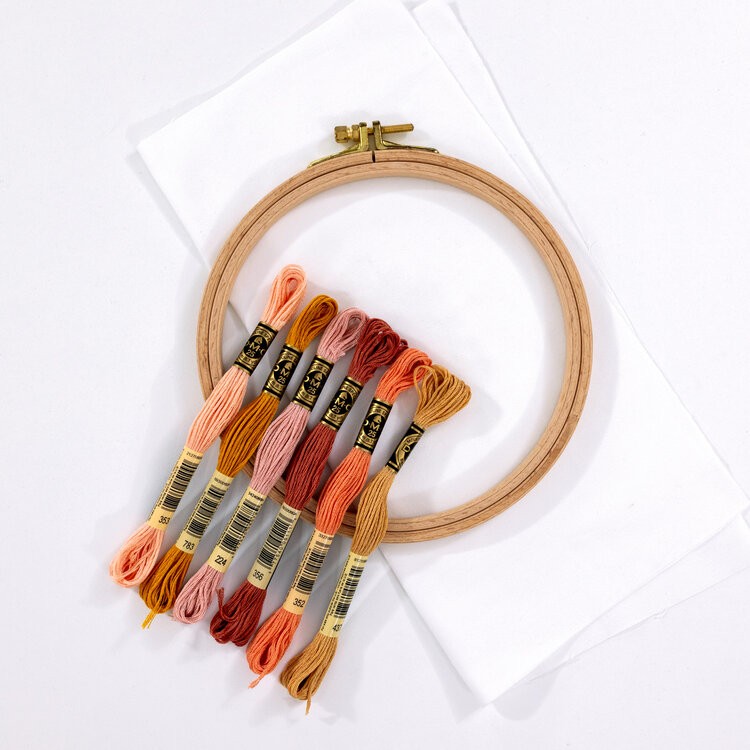
I’m assuming that you’re using stranded embroidery floss, most likely by DMC (that’s what I use). You see, DMC Embroidery Floss looks like one single thread from afar, but it actually comes in six strands that are twisted together, to make the one ‘floss’.
This means you can choose how many strands to work with, and mix it up with how fine or chunky your stitches are.
Ok, Let’s Prepare Our Threads!
Step 1.
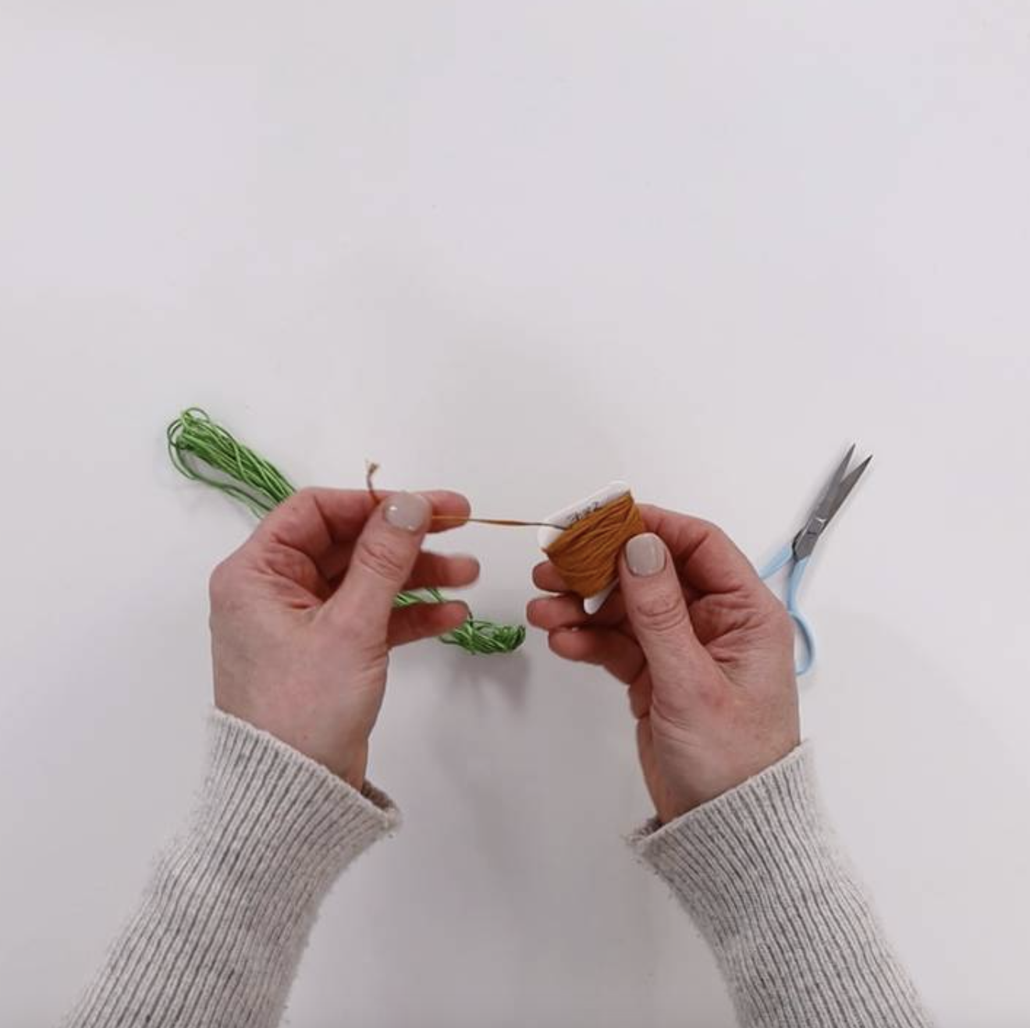
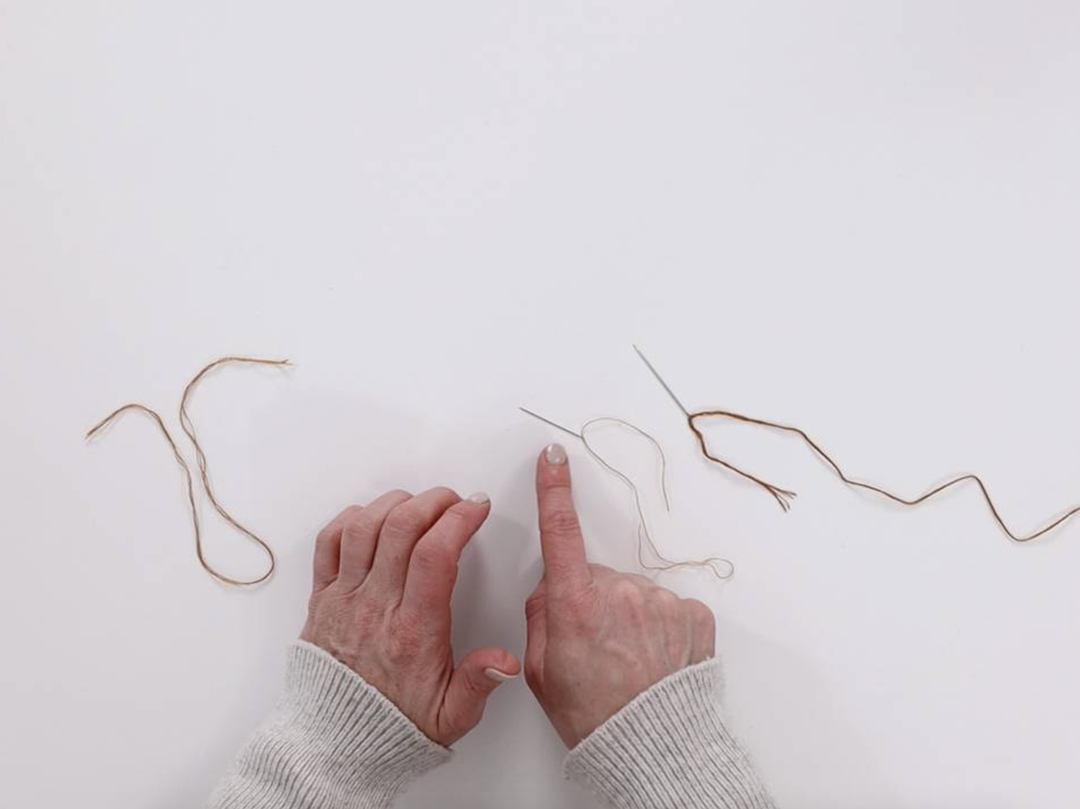
To do this, grab your embroidery thread and cut it into a workable length. I would recommend about 30cm for beginners.
Step 2.
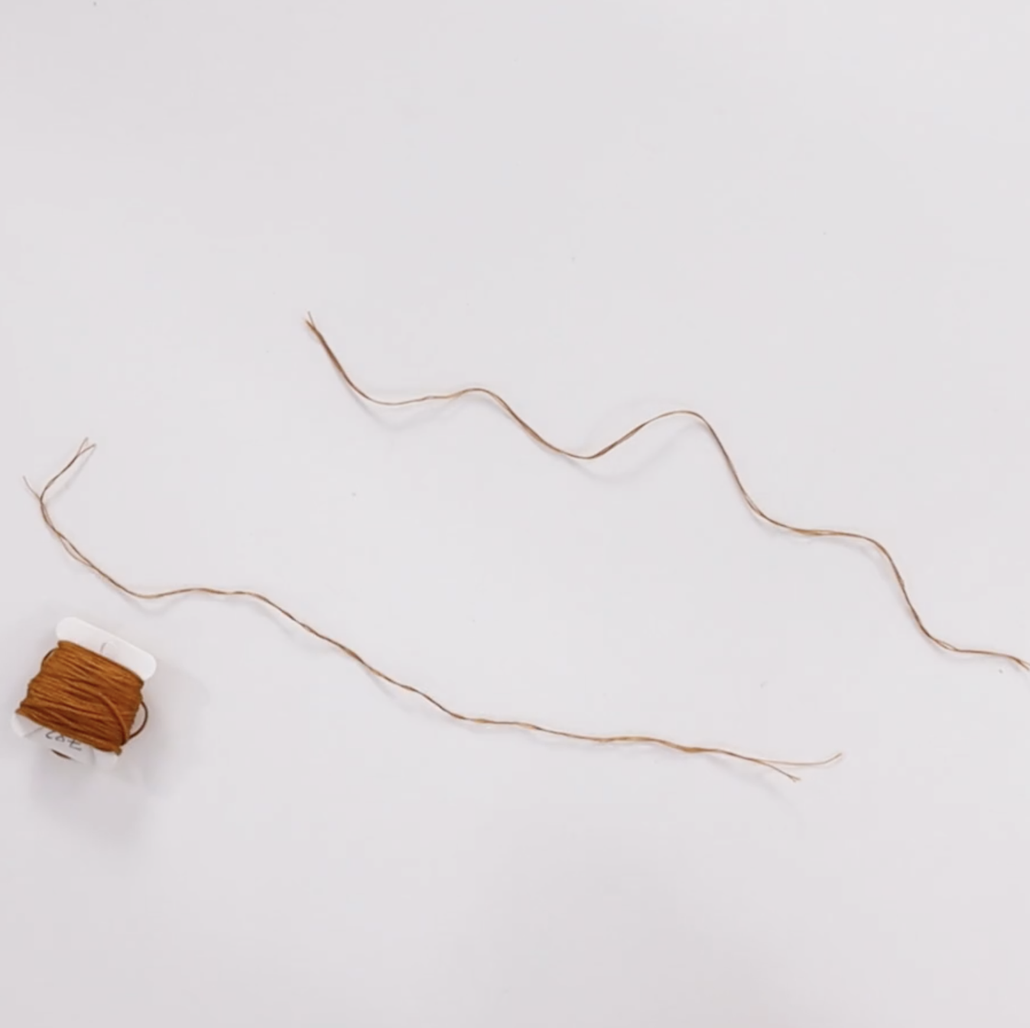
Then unwind and pull apart the 6 twisted strands of thread that make up your embroidery floss.
Step 3.
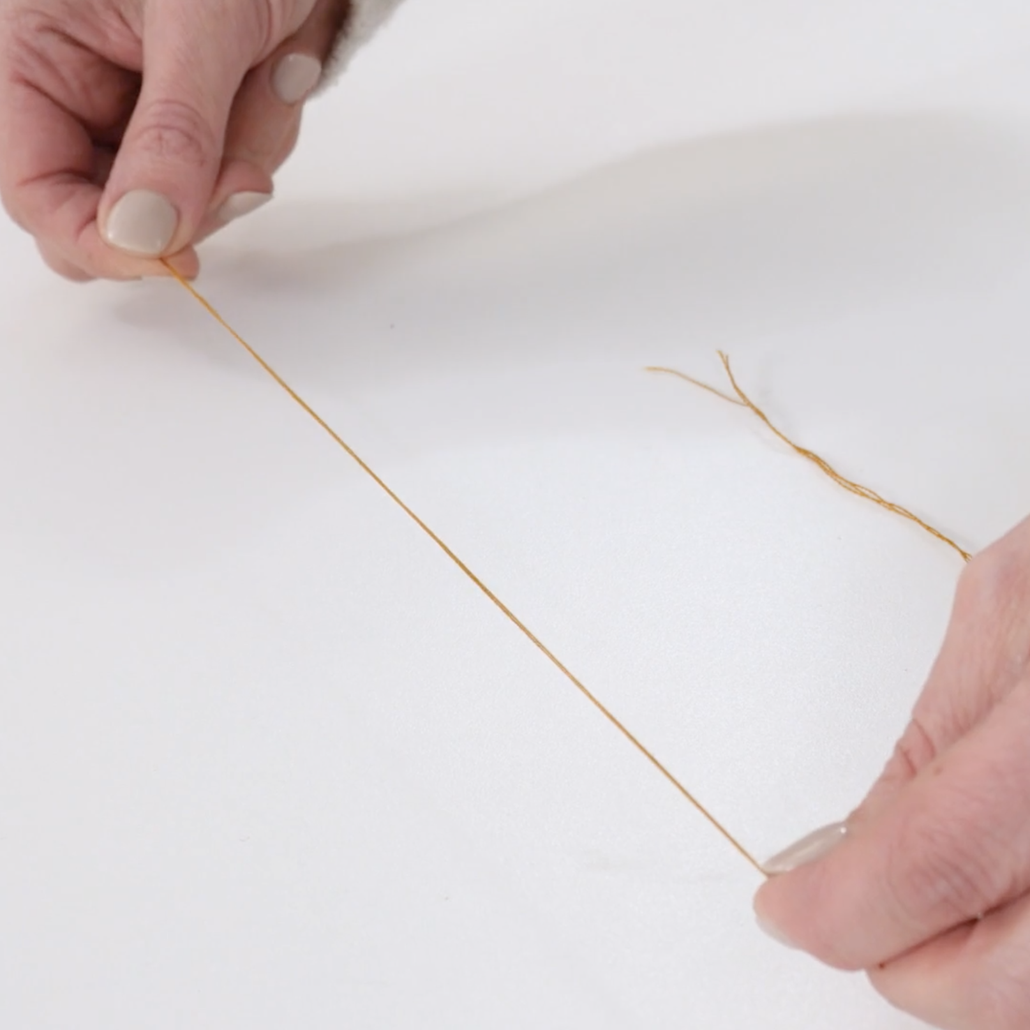
Once these strands are separated, lay them flat in a group, smooth them out, and group them back together. This will look similar to what you started with but without the twist.
How Many Strands Should I Use?
When you are working on your Petal Breeze pattern, you’ll notice that I ask you to use 6 strands of thread. This means that this pattern uses all the strands that make up a piece of floss.
However, other patterns may ask you to use 3 strands, 2 strands, or even 1 strand of thread (I don’t tend to use 1 or 2 strands much in my beginner patterns, it’s pretty laborious and takes a lot longer to build up the pattern on your fabric).
Why Would I Unwind My Thread?
The reason I would recommend unwinding these strands first is so you can avoid the thread knotting and tangling as you work. This is because when you stitch with floss that hasn’t been unwound, it can get quite twisted up as it passes back and forth through the fabric, and before you know it… you’ve got a tangle, nooooo!
I get that it's annoying having to stop and do this when all you want to do is stitch! But I find that this step saves so much time (and frustration) overall - you can thank me later.
Threading Your Embroidery Needle
We’re almost at the fun part, the making! But first, you’ll need to learn how to thread your needle, I generally use needle sizes 3 and 5.
This step can take a bit of practice, especially if the light is dim.
Step 1.
To begin, grab the threads you have separated and then grouped back together, in the step before.
Step 2.
Then give the tip of your floss a nice snip to create a sharper edge. I also usually lick the ends of the thread to bunch them together too (yep, it works, even if it might be frowned upon by embroidery traditionalists, ha!).
Step 3.
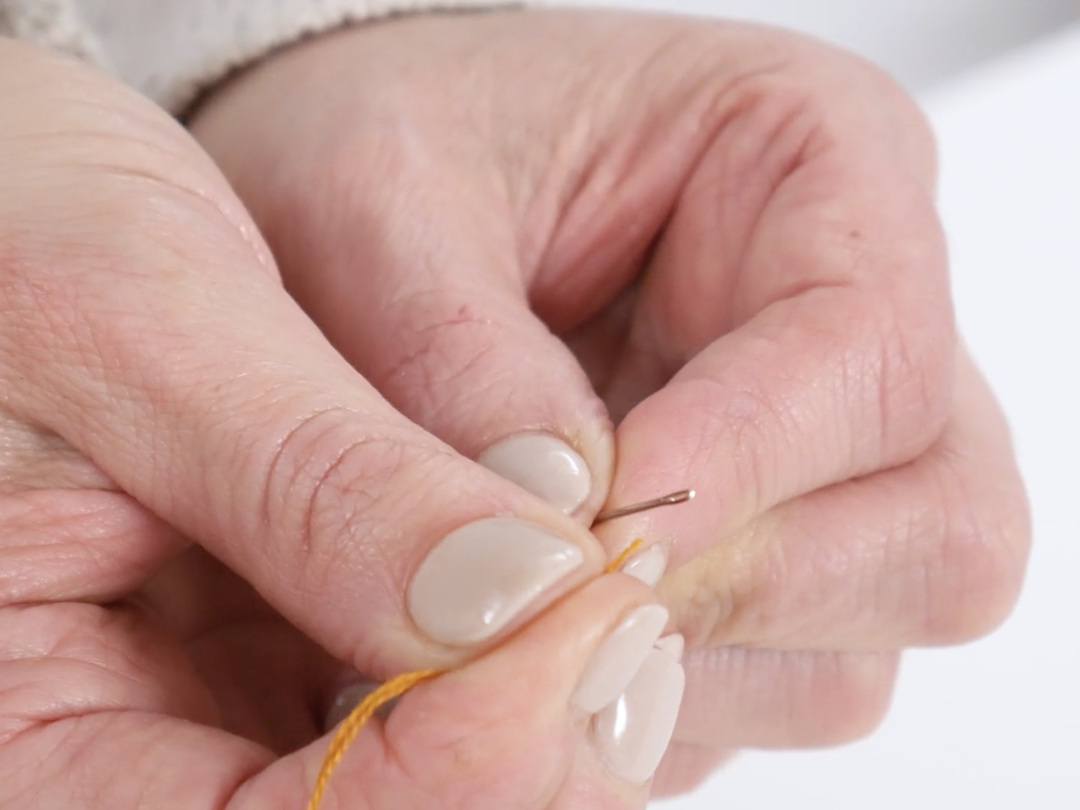
Then hold the thread right near the tip, so that just a small section is poking out from your fingers (this helps keep the thread as stable as possible). Now, carefully thread it through the eye of your needle, making sure that all the strands come through.
Are you finding that a bit tricky? Don’t worry, you’re not alone!
Threading your needle takes a bit of practice, and once you’ve made a few patterns (or loads, like me), then you’ll get it right on the first go more often than not!
Here are Some Tips if You are Finding This Super Tricky:
- Are you using the right needle? Embroidery needles range in size, and some have a bigger eye than others, which makes it easier to thread the floss through. If your needle is on the smaller size, chances are it will only fit a couple of strands, not the full 6. I love using needles on the larger size, like sizes 3 and 5 - these work well when you’re stitching with 3+ strands.
- Turn up the lights baby! It’s amazing how much some decent light can help with this delicate step.
- Do a fresh snip! After multiple tries the thread can get a bit out of shape, so give it a fresh snip to create a nice sharp end.
- Use fewer strands of floss. It’s totally ok to drop down the number of strands that you’re using, to suit what feels comfortable for you and allow you to easily thread your needle. It means your stitches will be a bit finer, and you might need to accommodate this on whatever pattern you’re working on. But overall, just go for it!
- You can buy simple needle threading tools (you know the ones that sometimes turn up in a Christmas cracker)? I don’t tend to use these, it’s just another thing to bother about. But lots of our members swear by them, so it’s worth a shot if you’re struggling.
- Do you need glasses? I’m not kidding, there are so many of our members who have posted to say that getting some reading glasses has helped their embroidery journey so much. It’s totally a personal thing, but worth noting in case it helps you too.
Starting Your Threads with Knots
You might be wondering how to secure your threads as you stitch along? I believe the best way to do this as a beginner is to use knots to start and end your stitches.
There are other ways that you can start and end your stitches. But I think as an embroidery beginner, it’s best to ease yourself into this craft and actually make something, rather than getting bogged down in the details.
Then later in your hand embroidery journey, you can learn how to start your stitches without knots! That is if you wish (let’s be honest, I still use knots as my main method and it works absolutely fine).
It's also worth noting that you can do this step before or after you've threaded the needle.
Step 1.
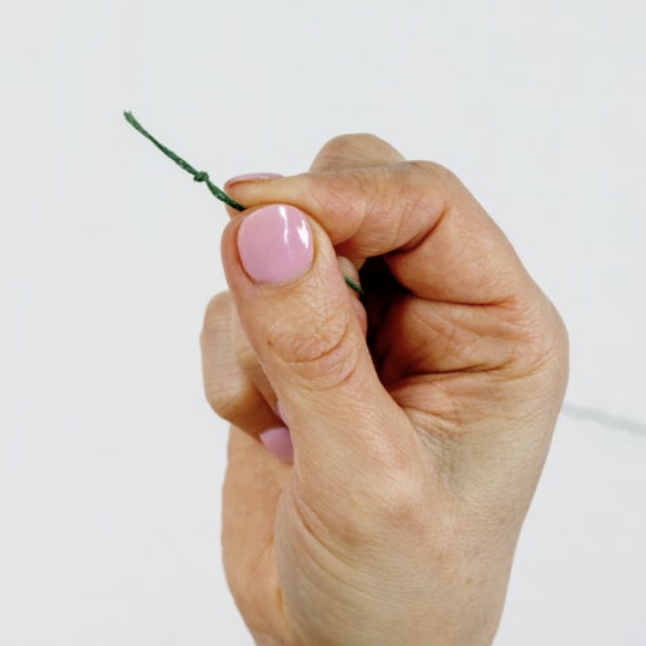
So to start your stitches using knots, grab the tail end of your thread and then tie a knot near the bottom of your thread. I then usually do a double knot so that’s it's a bit chunkier for a good hold.
Step 2.
And how does this knot work? When you poke your needle up from the back of the fabric, pull all the slack through to the front. See how your knot secures your thread in place at the back of the fabric, by stopping it from pulling right through? It’s so easy, right?
If your knot pops through to the front when you start your first stitch, don’t worry, that just means you need to do a chunkier knot. So do that, then try again. And be a bit more gentle when you pull your thread through.
And that’s how you start your embroidery pieces. All sounds pretty straightforward now that you know more about it, right?!
Ending Your Threads with Knots
We’re nearly ready to start the fun part, stitching! But before we do, let’s quickly cover how you end a section of stitching with a simple knot.
Once you have completed a section of your pattern (or your thread has become too short to stitch with), you will need to end your thread with a knot. This helps keep your stitches in place so that they don’t unravel over time (nooo)!
So when you finish off a section of stitching (or when your piece of thread has got too short to continue stitching), poke your needle through to the back of the fabric, and pull any slack through as well.
Now you just need to create a little knot. Here’s what I think is the easiest way to do this:
Step 1.
Tuck the needle under a nearby stitch (you don’t actually pierce the fabric, you just weave the needle under the stitch).
Step 2.
Go slowly as you pull the slack through, and see how it creates a little loop of thread?
Step 3.
Now duck your needle back through that loop, and pull it tight. You can hold your finger on top of the stitches at the front, to help keep them in place and not be affected as you tighten the knot.
Step 4.
Duck your needle under a couple more stitches, then snip off the excess tail, leaving a few mm.
As you’ll see, that has created a little secure knot! And it’s nicely hidden away on the back of the hoop.
If you don’t have any handy stitches nearby to use as the anchor for your knot, you can scoop up a tiny piece of fabric to use instead. Just try to do it right underneath your stitches so it’s hidden.
But like I said earlier, please don’t be too picky with starting and ending your threads at this stage. Just knot off on the back however you can, and don’t worry the back won’t be on display, no one is going to care what it looks like, especially as you’re learning.
You can refine your knots (or learn about ways of working without knots) later in your embroidery journey!
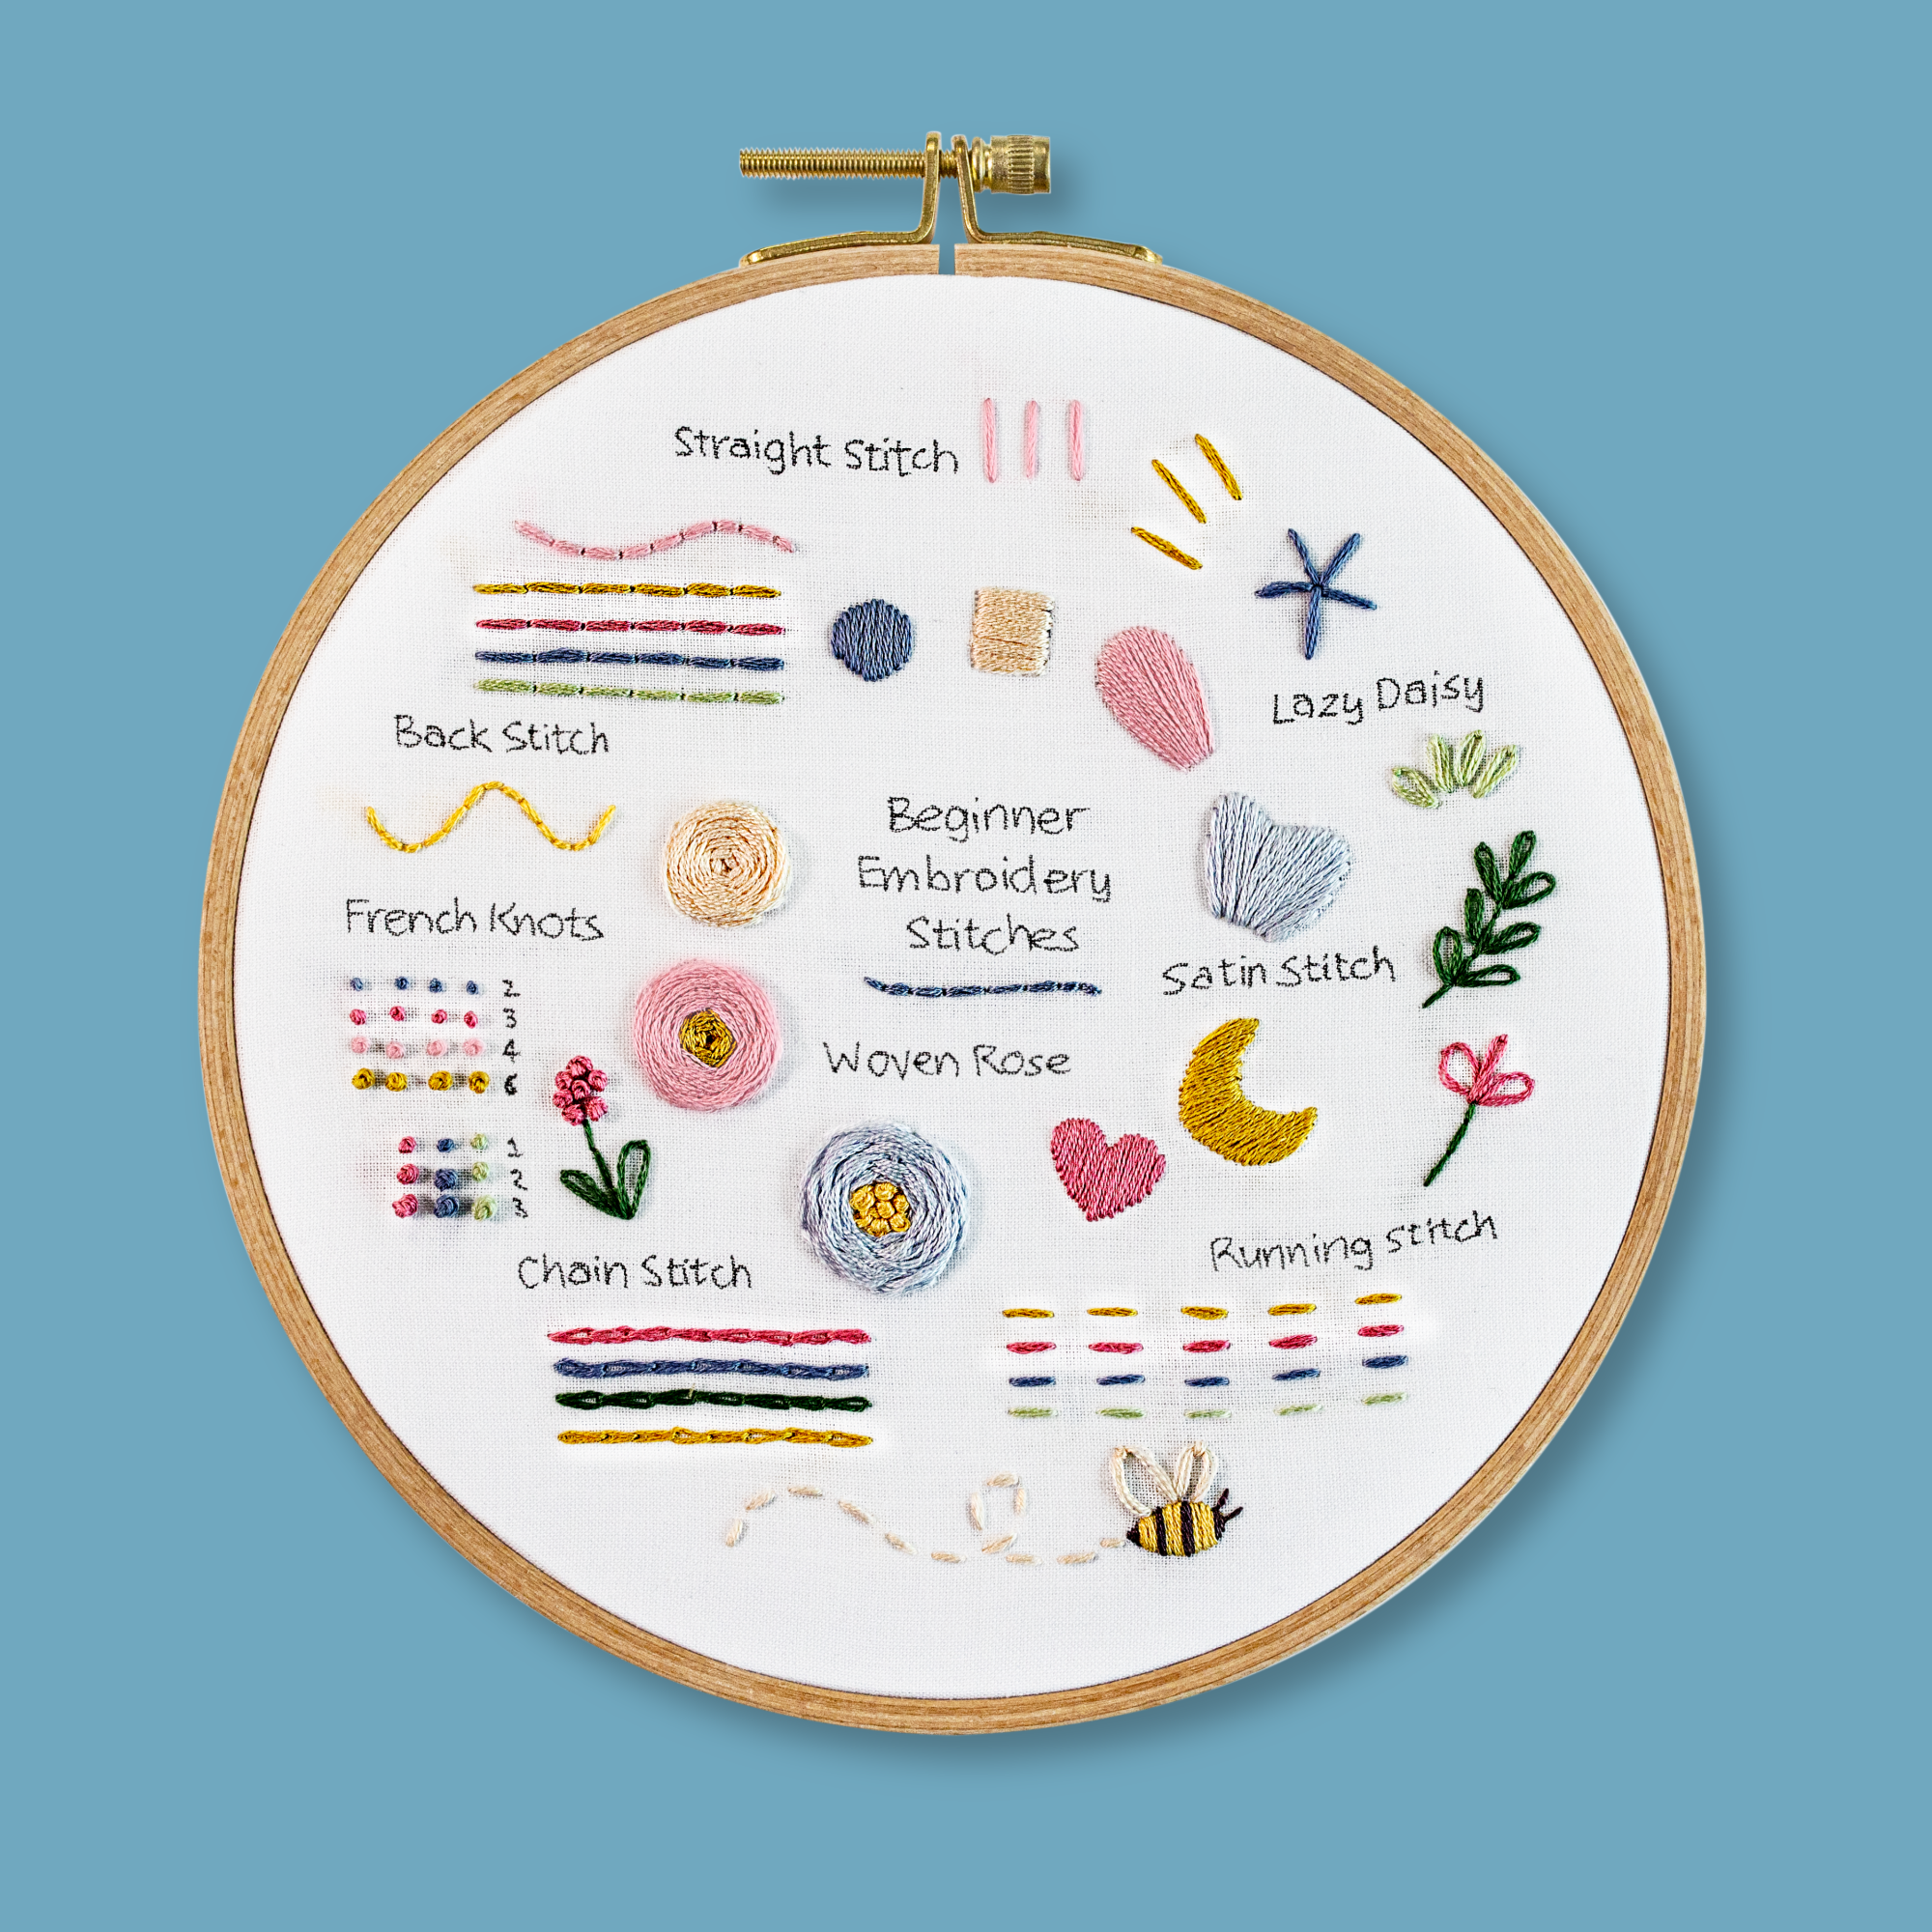
Back Stitch
Guess what time it is? You got it. It’s time to begin stitching, woohoo! So grab your supplies, and cosy up on the couch. It’s back stitch time baby!
This is a wonderful technique to make lines or curves. It’s super simple, methodical, and beginner-friendly, so I think it’s the perfect place for you to start. Plus, I love using back stitch on plant stems, tree trunks, and shape outlines.
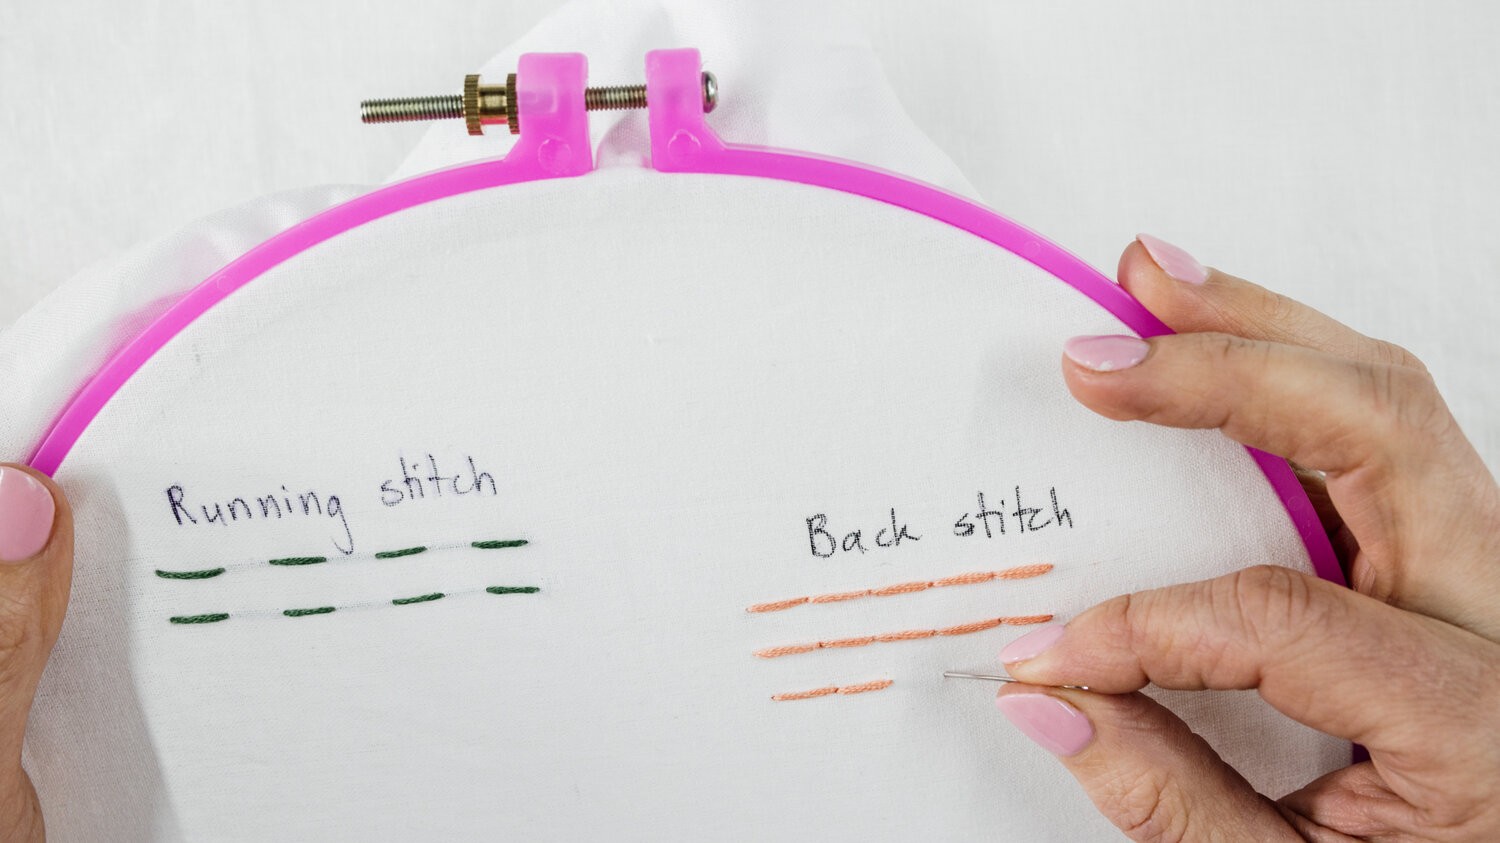
Step 1.
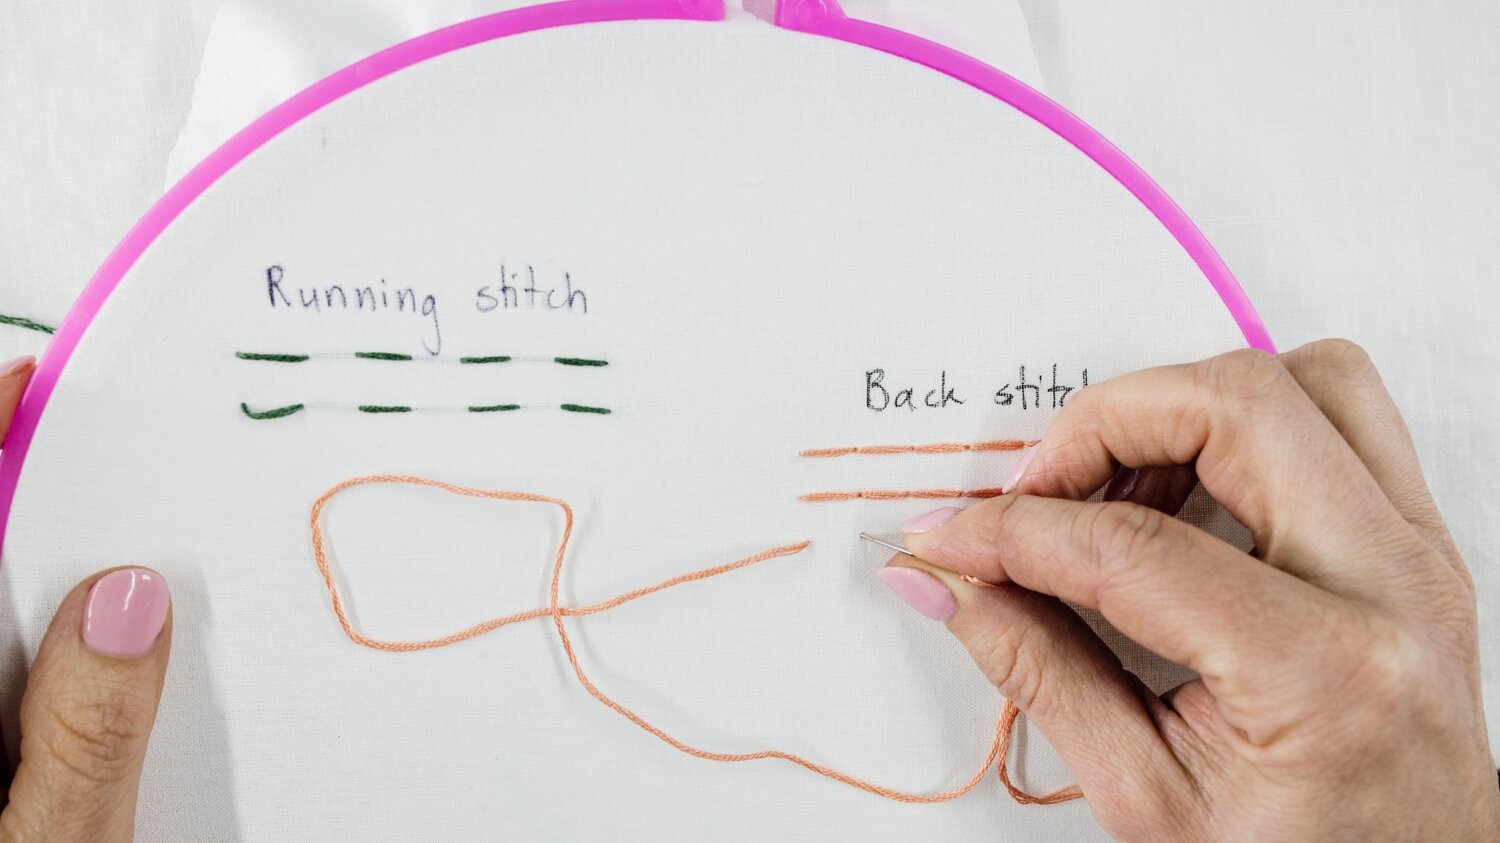
Let’s start on the left of your line, and do a single straight stitch, about 3mm long.
To do this, bring your needle up from the back at the beginning of the line (your knot will hold it in place on the underside). Then poke your needle down through the fabric about 3mm along, and pull all the slack through, so that your first stitch lies nice and flush against the fabric.
Step 2.
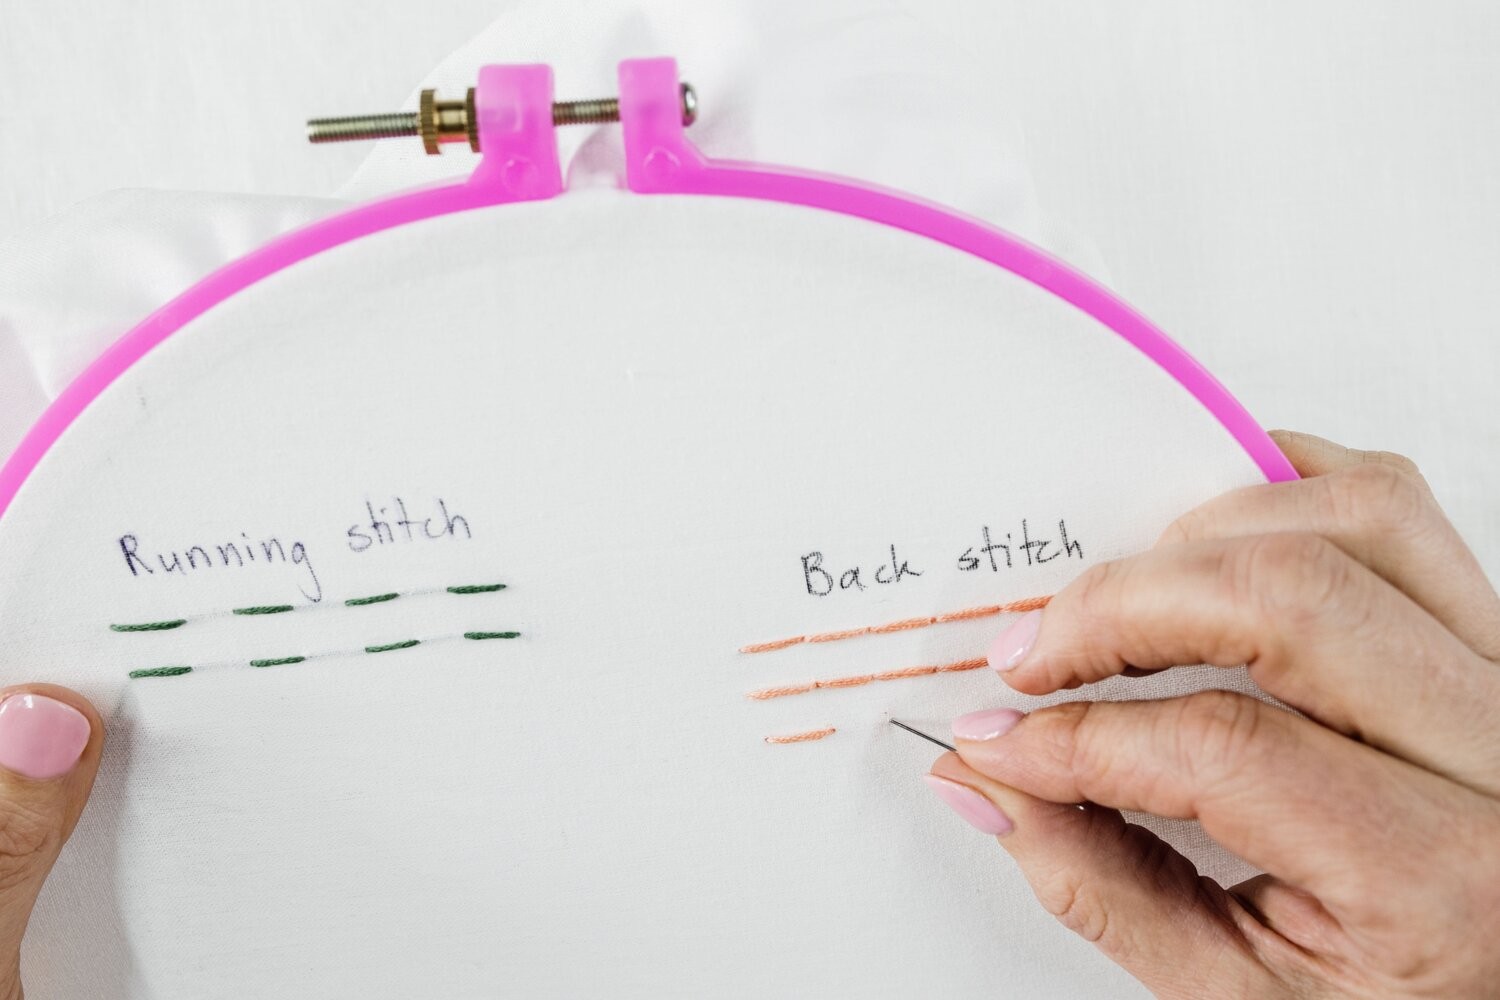
Ok, so now your needle will be on the underside of your fabric.
Bring your needle up again about 3mm along the line, and gently pull all the slack through. You’ll see you’ve now made 2 stitches, one on the front of your fabric and one on the underside.
Step 3.
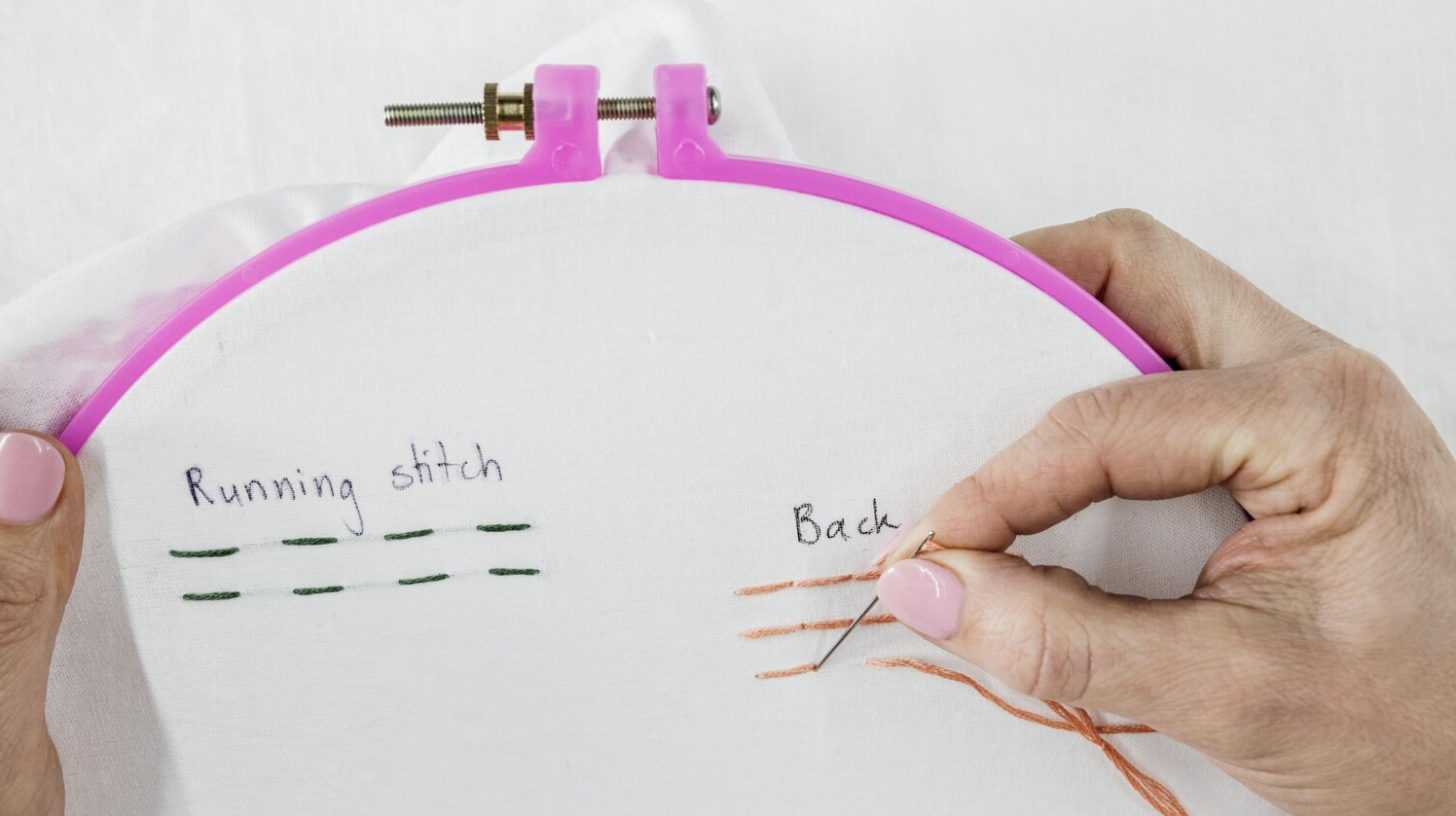
Your needle is now on the top of the fabric, after coming up from the second stitch (which will be a stitch on the underside of your fabric). Here’s the kicker - instead of continuing forwards (which would create what is known as a running stitch), turn back and do a stitch over the gap.
So to do this, just poke your needle back down into the same hole as you just came from (hello, again)!
See how that has created two stitches on the front of your fabric, which form the start of a solid line? Now you can see why it’s called back stitch, huh?
Step 4.
At this point, your needle is once again hanging out on the underside of the fabric. So bring your needle up 2 stitch lengths ahead.
This means your needle will pop up at the end of what will be the third stitch on the front.
Step 5.
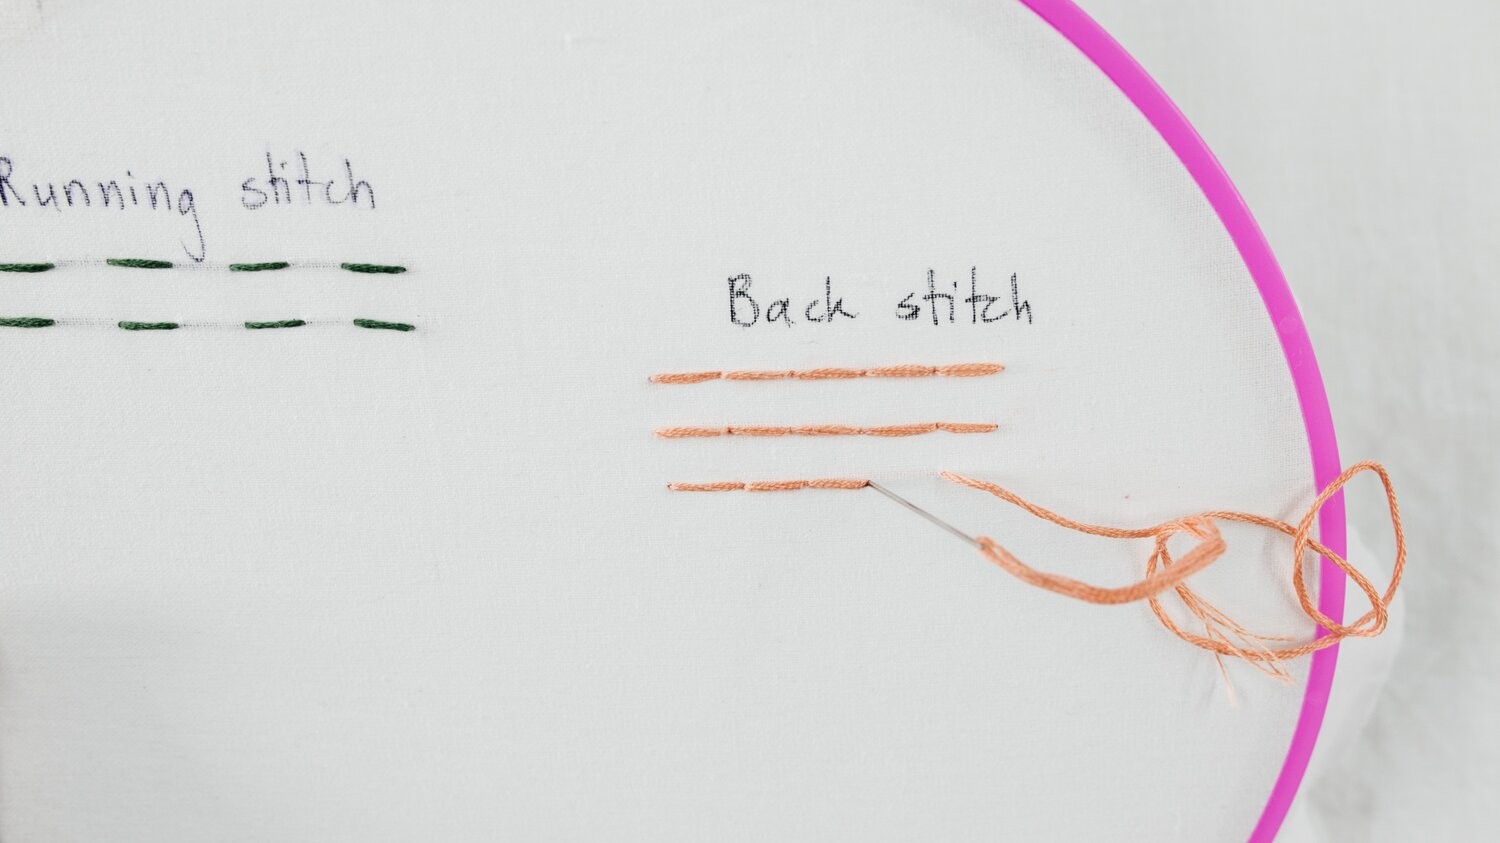
Once again, turn back and fill in the gap with a stitch.
Now, all you need to do is to keep doing this, and you’ll make a steady solid line of stitches. Before you know it, this stitch will be like second nature, and you won’t even think about the technique.
Here are Some Tips to Make Sure Your Back Stitch Looks Great:
You can do the stitches in shorter or longer lengths, but just make sure you’re consistent along the line. By keeping all the stitches a very similar length, it will look super professional.
If you are working back stitch around a curve, you’ll find that shorter stitches are easier. This means that you can more accurately stitch the shape of the curve.
The method I am teaching here is the ‘stabbing method’, which means you do each stitch in 2 parts, pulling through the slack on each side of the stitch.
You can also ‘sew’ this technique, which means you scoop the fabric and create a whole stitch in one motion. More on that later, let’s keep it simple for now!
And that’s all there is to back stitch. Easy peasy!
Lazy Daisy
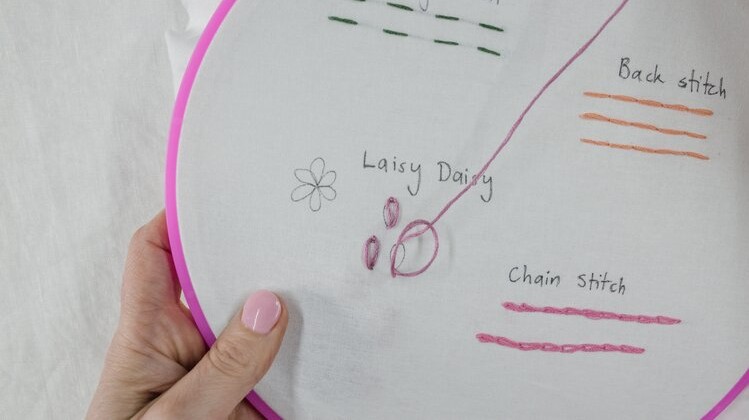
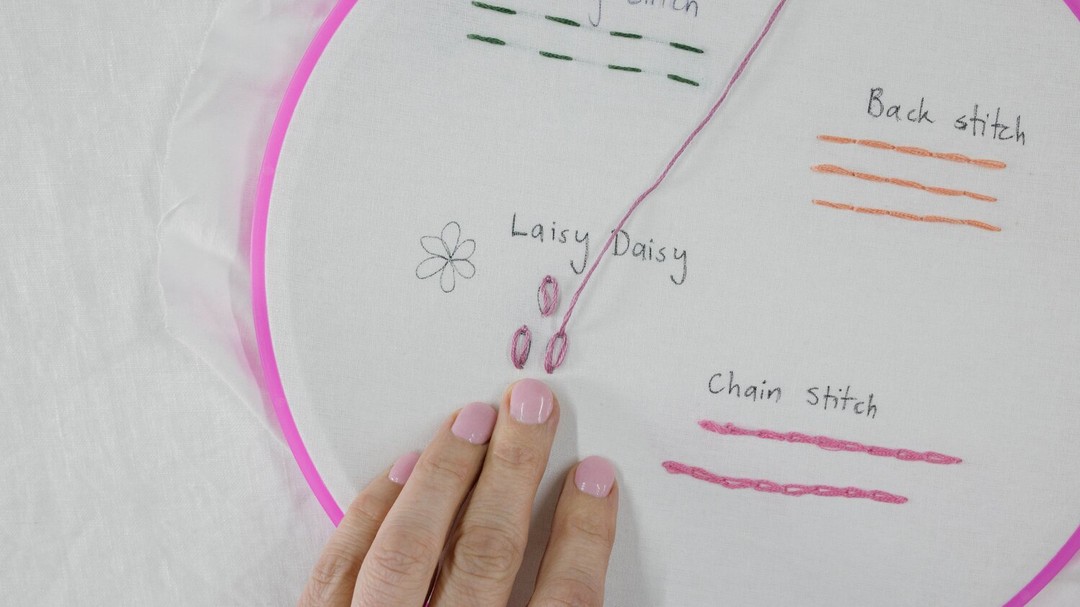
Now it’s time to learn the second stitch of our Petal Breeze pattern, the lazy daisy.
As the name suggests, this stitch is often used for petals in flowers. So it comes as no surprise that this stitch makes up the ‘petal’ part of the FREE embroidery pattern we are going to give you.
This stitch is slightly more technical than back stitch, and takes a bit of concentration to get the hang of. But believe me, it’s worth it because it creates such a pretty effect!
And once it clicks, you’ll be able to do these without thinking too much.
Step 1.
Bring your thread up through the fabric, and pull all the slack through, so that your knot is securing your thread in place on the underside.
Step 2.
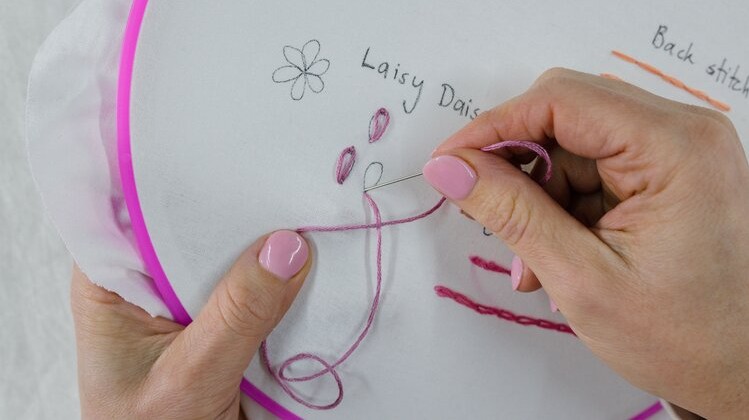
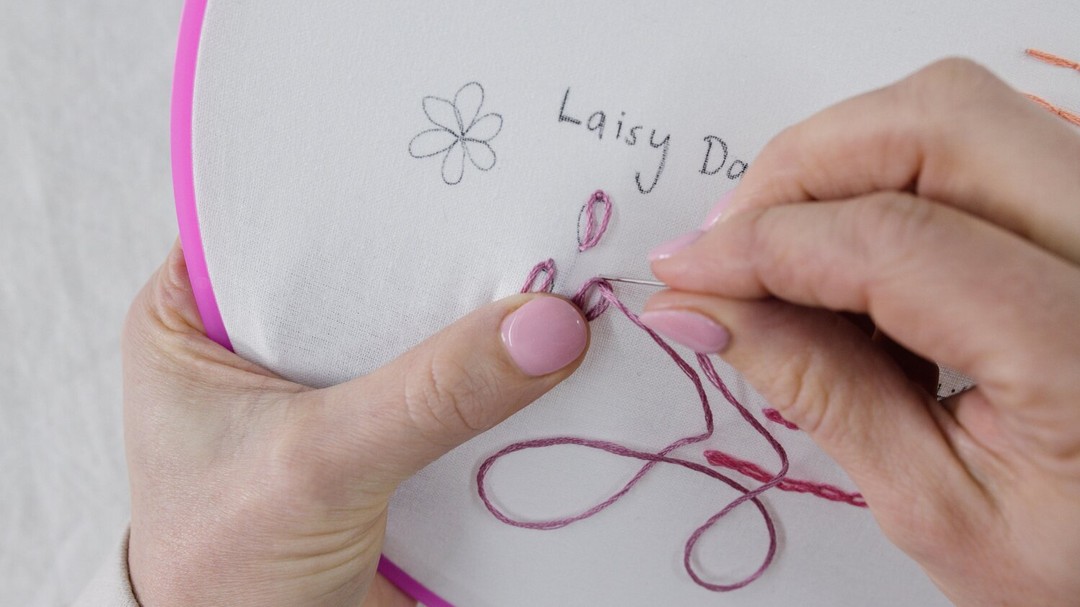
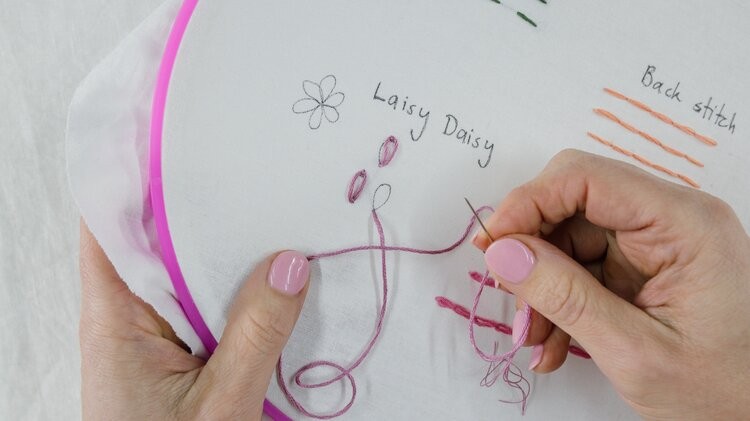
Poke your needle down again through the same hole, but instead of pulling all the slack through, just go slow and only pull the thread partway through, and see how it creates a loop?
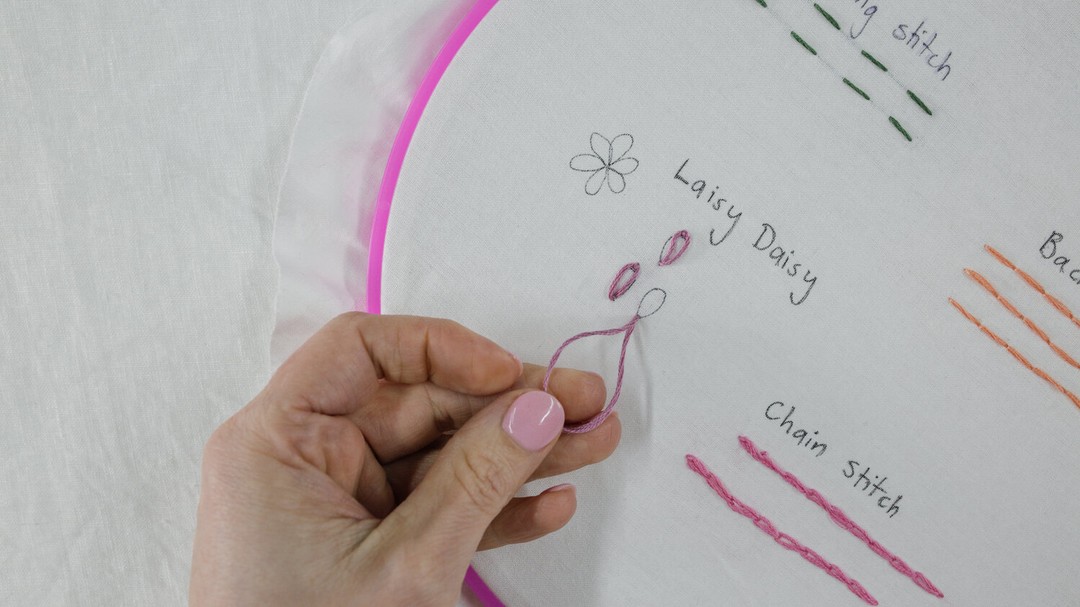
Gently pull through the slack until you have a loop that’s a good cm or so bigger than the size you ultimately want.
Then use your free hand to hold this loop in place, on top of where you want it to sit. You might need to flip the loop over, untwist it, or move it into place at this point, which is all good.
Step 3.
Your needle will be on the underside of the fabric at this point, so turn around and bring the needle back up again, this time at the far point of where the petal needs to sit. But the key is to bring your needle up through the loop you’ve just made.
As you pull the thread through, you’ll see how this shapes and tightens up the loop, so take it slow. It’s a good idea to use your finger to press on the loop as you tighten the thread - this helps keep the rounded shape in the loop.
If you pull too fast and tight, and don’t use your free hand to keep the nice round shape of the loop in place, you’ll end up with a narrow petal. Don’t worry this will totally happen as you’re learning, and practice really helps.
So go slowly, and depending on how tight you pull the thread, you’ll end up with a round shape or a long oval.
I find it also helps if you pull the slack in the same direction as the far point of the petal (e.g. pull away from the base of the petal) because this helps the petal sit nicely on the fabric.
Step 4.
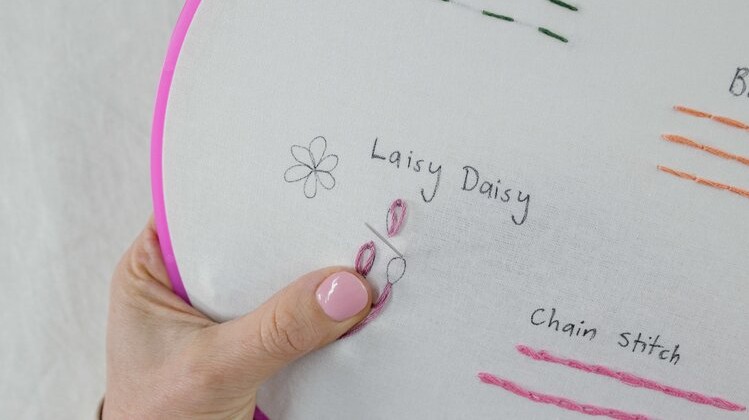
To secure your shape, do a little stitch over the end of the loop to hold it down (make sure to stitch this nice and snug over the loop, it’s just a small stitch).
As you pull this stitch tight, once again use your free hand to press against the loop and hold it in place (otherwise this stitch might pull tight any nice round shape you had created in your loop).
Step 5.
Now you can repeat these steps for all the petals in each flower (like you will do in the Petal Breeze embroidery pattern).
For each of these petals, you will be starting from the middle point of the flower.
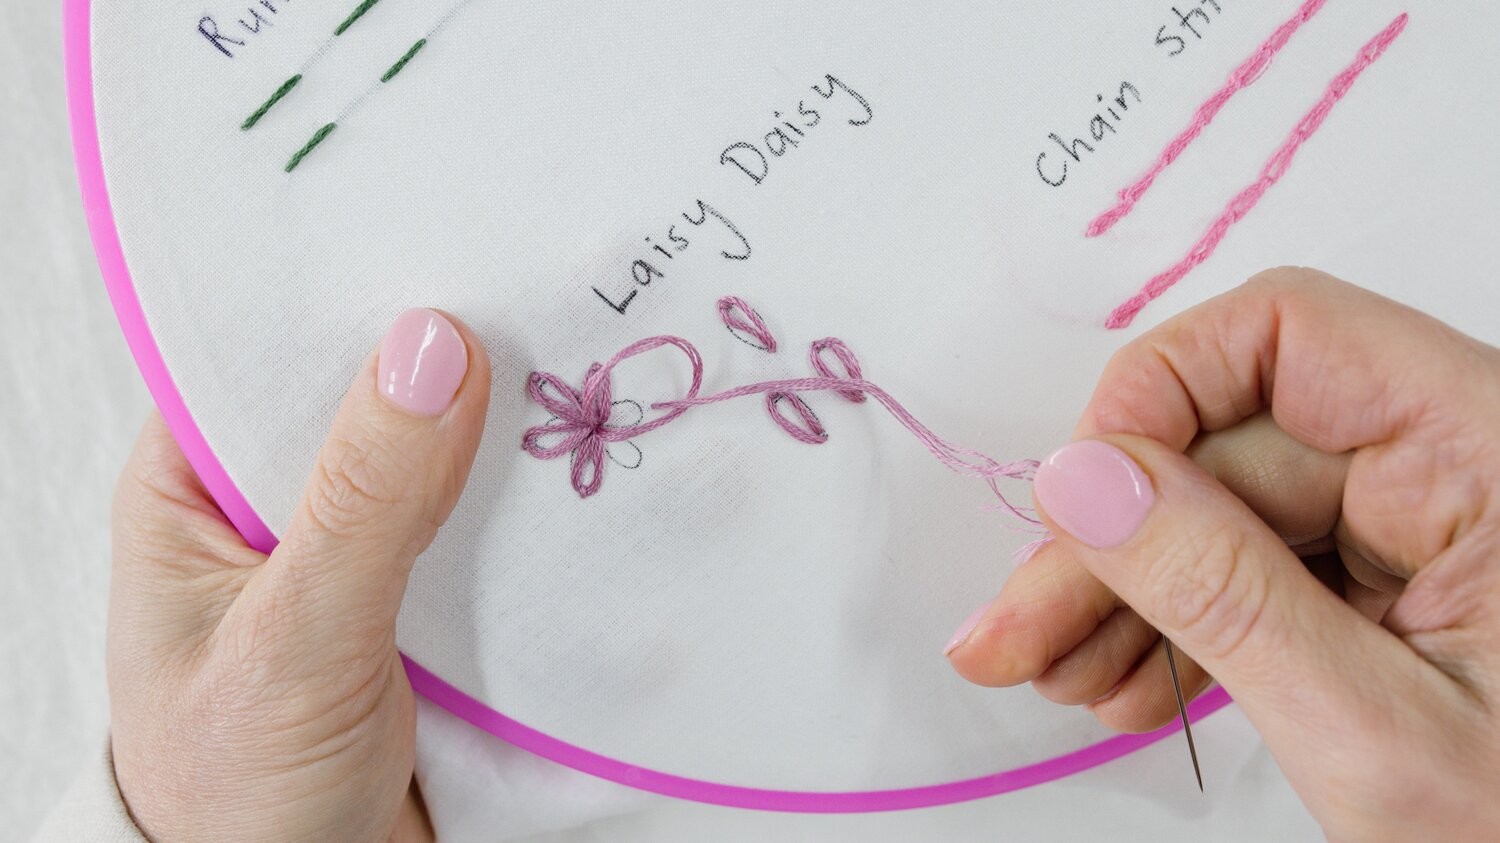
You can also work lazy daisy in different designs, for example, single loops and loops around a shape (rather than all radiating out from a point).
Isn’t this such a fun modern embroidery technique? I just love how it instantly adds so much life, texture, and curvy goodness to your pieces.
I also love how you get quite a good bang for your buck with this stitch - it covers quite a lot of ground, compared to how long it takes to work something like Satin stitch. This is perfect for when you’re wanting to see progress in a short burst of stitching me-time!
Removing Embroidery (When You Make Mistakes)
As with anything new, mistakes are bound to happen.
Even experienced embroidery artists make mistakes, so you’re not alone in this! Believe me, I make them all the time.
What do I mean by a mistake? I mean when your thread tangles, knots up, or your thread becomes generally unworkable. Believe me, you will know the instant this happens. The words ‘birds nest’ spring to mind.
So, how do we fix up a mistake right away when it happens, so we can re-stitch and make our creation better?
As a beginner, I would recommend removing this mistake entirely, rather than fixing it up. This is the easiest way to fix up your mistakes as a beginner, and it’s pretty impossible to untangle knotted embroidery floss. Believe me, I’ve tried.
Step 1.
To do this, snip off the knot securing the thread at the back of the fabric (if you have knotted it off first). Then slowly and carefully pull out the thread from the top side of the fabric using your fingers or a needle.
Step 2.
If you want to remove multiple stitches or a whole section of embroidery, you can snip away the stitches on the top and underside, until they all pull free. This is where embroidery scissors come in handy - they get in nice and close to the stitches.
Just take care you don’t snip your fabric, oops!
Step 3.
But above all, make sure you remove these pesky stitches slowly and carefully, as you don’t want to ruin any of your other stitches in the process.
Once the tangled floss has been removed, you're ready to start stitching again.
On this note, I really want to encourage you not to worry about any stitching you’ve done that’s not perfect. Or that turns out… how can I put it… quite ‘unique’.
You can spend ages removing stitches, reworking them, doing that over and again. And is that going to be enjoyable for you?
If yes, then totally cool, go for it, and you’ll get the satisfaction at the end of seeing stitches that are just right.
But otherwise, embrace learning, and the mistakes that come with it. No piece of embroidery is perfect, and it doesn’t need to be to bring joy!
It’s the process of creating, making something with your hands, and stitching with love, that makes modern embroidery so special.
How to Remove Transfer Pen From Your Finished Design
There are many different types of transfer pens, and they all have different ways to remove them. So I'll cover some of the most common types below.
Water-soluble Pens
If you have a water-soluble pen, like the DMC Embroidery Transfer Pen, then all you need to do is add water to your design, and the marks will disappear almost immediately.
You don't need to be precious about adding water to your design, it doesn't matter if it's soaking wet!
I would avoid just dabbing water over the marks on your design, as I've found that sometimes when your design dries, you may notice blue smudges where you have dabbed and just moved around the pen, rather than washed it away.
What I do instead is hold my hoop under the tap with lukewarm water gently pouring directly on the pattern. This washes away the pen, you’ll see it instantly happen! If any markings are still visible, I just get my finger and gently rub at them while the water is running over the area, and the marks should disappear.
After I've got the pen off with water, I place my design on the bench and very gently pat it dry with a clean towel. Then I just leave it to dry overnight, and ta-da, your pattern is ready for some finishing touches!
Heat Erasable Pens
When it comes to heat erasable pens such as the Pilot Frixon Pen, removing pen marks is as easy as blowing a hairdryer over your pattern or ironing it.
Sometimes the pen reappears after you’ve gone over it with the heat source – just keep persevering and it should disappear properly. These pens can sometimes leave a faint line if you’ve drawn quite hard with them, but I’m sure it won’t be noticeable if you take a step back.
Air Erasable Pens
If you're using an air erasable pen, you'll just need to check what the instructions are for removing this pen. Most likely, you'll find that all you need is hot air and the pen marks should disappear!
Framing Your Embroidery
Once you've completed your first work of embroidery art, you’re going to want to frame it for all your friends and family to see!
But before you do this, you'll need to tidy up the fabric.
I love the look of displaying embroidery in a pretty plastic or classic wooden hoop, so here’s a simple hand sewing technique to tidy up that mischievous fabric at the back.
Step 1.
Embroidered patterns look best when the fabric is lovely and tight and smooth in the hoop. And it’s super tricky to do this once you’ve done the finishing steps we go over here.
So go around the entire hoop, pulling any slack in the fabric out, and tightening the screw as you do.
If your hoop can be tightened with a screwdriver, do this now.
Step 2.
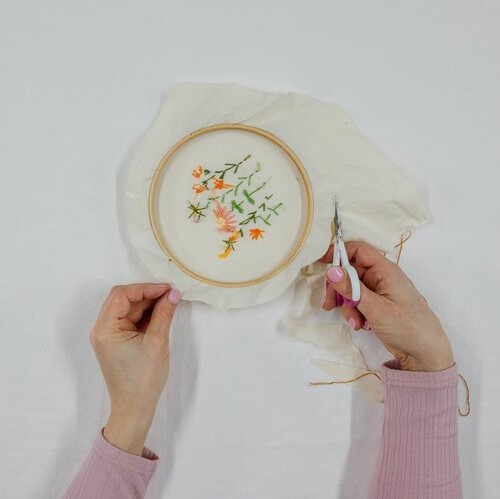
Flip your hoop over so that your design is face-down, then trim the fabric hanging outside the hoop, so it’s about 30mm wide.
Step 3.
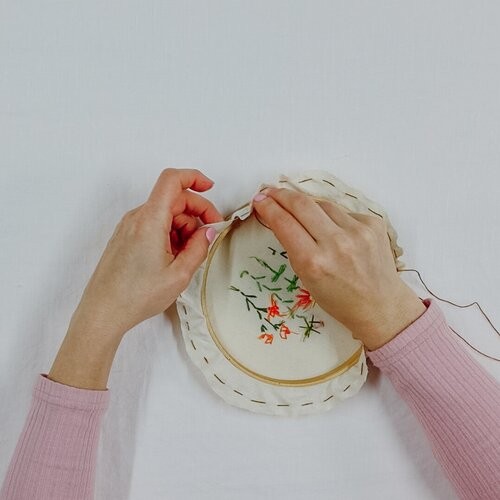
Take some spare thread, and cut it to a length that's easily longer than the circumference of your hoop.
Starting at the top of the hoop near the clasp, bring your needle through the fabric to the underside of the hoop. And pull through the slack so that there’s a tail of about 5cm or more hanging out on the outer side of the fabric.
Step 4.
Now do a simple running stitch around the circumference of the hoop. Running stitch is one of the most basic embroidery techniques, which involves stitching the thread up and down through the fabric at even intervals as you go.
When you do come back around to where you started, leave the tail once again on the outer side of the fabric, near your starting tail.
Step 5.
Now you can pull both ends of the thread together tightly (but not too tight, as you don’t want your thread to snap), and you’ll see how the fabric comes together and bunches on the underside. Isn’t that cool? You can now see how the excess fabric will be hidden away at the back when your hoops are on display.
Step 6.
All you need to do now is to tie your two ends of the thread together tightly. Try to keep as much tension on as you can when you do this. I just do a couple of simple square knots, then trim the tails. It’s just that easy!
If you find that the fabric is pushing against the front (display side) of your hoop once you’ve finished, then you have a couple of options. Both involve redoing your running stitch, but if it’s bugging you then go for it!
1. First, you can cut the excess fabric shorter (which is a bit trickier to do the running stitch around, but totally doable).
2. Or second, place a round piece of cardboard on the inside of the hoop.
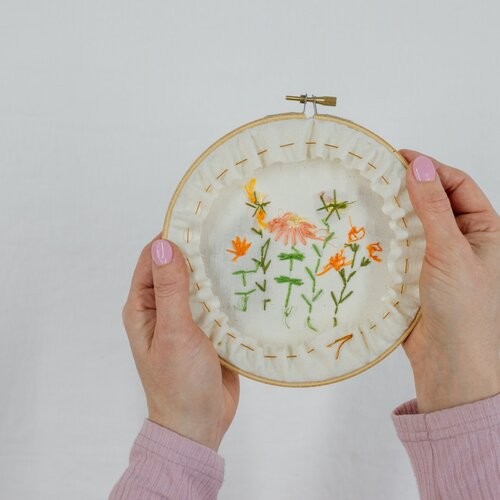
Your hoop is now ready to be put on display or gifted to a loved one, and it will look super neat and tidy on the wall.
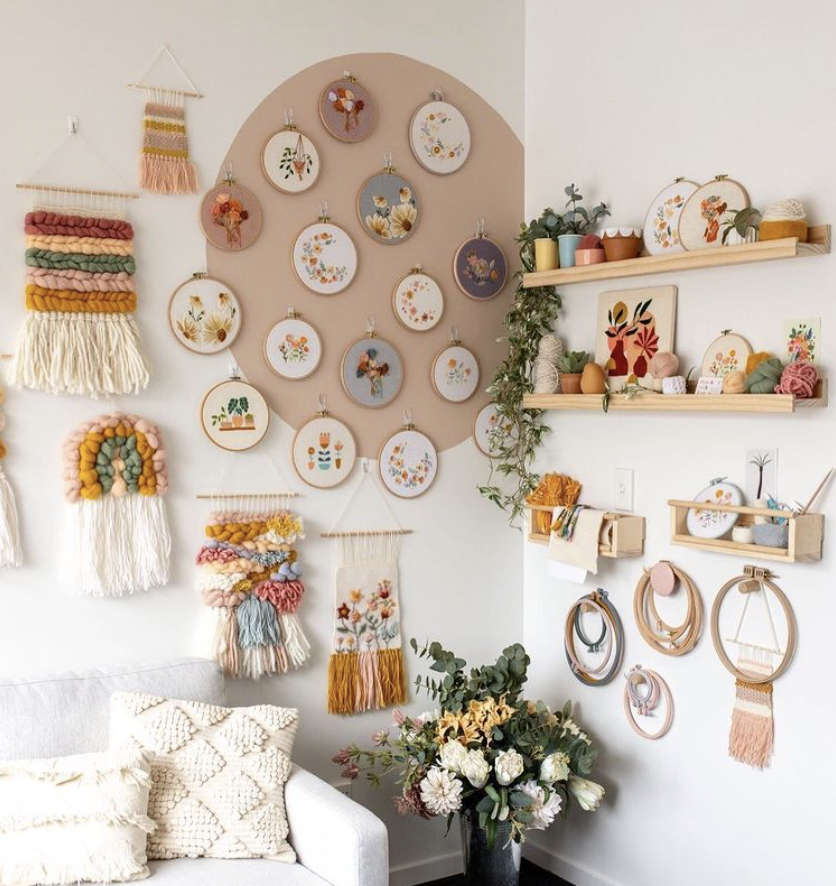
FREE Petal Breeze Embroidery Pattern
Now that you’ve patiently read this entire article, it’s time for your reward. This FREE modern embroidery pattern!
If you did just skip to this pattern, then I would totally recommend going back to the beginning and reading this whole article, as it will really help when you are stitching this pattern.
Get out the bubbly because I know you’re going to crush this pattern and have fun while doing it. Cheers to that!
This Petal Breeze pattern is so sweet and whimsical, and I know you’re going to love it.
The downloadable PDF for this pattern is available when you submit your email address below.
Just pop your email in the form below and hit 'submit' and I'll send your free pattern straight to your inbox:
Conclusion
So there you have it, all the beginner techniques and knowledge you need to make your first modern embroidery pattern. And these tips and techniques will be used and built on over and again as you make more patterns on your embroidery journey. I’m so excited for you!
How do you feel? Maybe a little bit overwhelmed? Don’t worry, this might seem like a lot for now, but the more you practice these skills, the better you’ll get.
Who knows, you may have discovered a lifelong passion, and you could be the next Sarah Benning!
Or you might be just like the hundreds of other wonderful women who I’ve introduced to modern embroidery - you’ve taken the first step to reclaiming your me time, and adding a sense of presence and fulfillment to that busy life of yours.
That is SO worth celebrating, and I’m right here cheering you on.
You should be so proud of yourself, that you’ve taken the first step to learning the wonderful craft that is hand embroidery.
And before I sign off, I want to share with you my golden rule: If you put your finished piece on the wall, then take a big step back, does it bring you joy? Then that’s a win!
Don’t be a perfectionist or get up close to try and spot any imperfections, no one else will.
If you liked this article, then you may also like this one,
What Essential Supplies do You Need to Get Started in Modern Embroidery?
So, are you excited to start on your modern embroidery journey?
What's next?
Our beginner embroidery kits are a favourite among new stitchers for their simple, step-by-step instructions and beautiful designs that make learning easy and fun. Whether you’ve been wanting to learn embroidery or are just searching for your next creative hobby. These kits are the perfect introduction to embroidery.
Why people love our beginner kits:
-
Everything you need is included: fabric, thread, hoop, and more!
-
Clear instructions to guide you every step of the way.
-
Gorgeous designs you’ll be proud to display.
Our most popular beginner kits


