Skip to content

Your cart is empty

Continue shopping

Have an account?

Log in to check out faster.

Your cart

  • Free domestic shipping for orders over $70
0 7000

Loading...

Order special instructions

Subtotal:

$0.00 USD

Taxes, Discounts and shipping calculated at checkout
Continue shopping

Complete your order with our best sellers!

upsell_ajax

Bee Happy Beginner Kit

$40.00

upsell_ajax

Bees & Blossoms Magnetic Needle Minder

$14.00

upsell_ajax

Bees and Florals Stick and Stitch Pack

$19.00

upsell_ajax

Flora the Cat Beginner Kit

$40.00

upsell_ajax

Stitch Sampler Beginner Kit

$40.00

upsell_ajax

Sunset Meadow Beginner Kit

$40.00

upsell_ajax

Teacup Magnetic Needle Minder

$14.00

0 7000

Free shipping on orders over $70

  • Embroidery Kits
    • Beginner
    • Experienced
    • All Embroidery Kits
    • Find your pattern match
  • Needle Minders
  • Stick and Stitch
  • Supplies
  • Bundles
help@cleverpoppy.com
Log in

Country/region

  • AUD $ | Australia
  • CAD $ | Canada
  • NZD $ | New Zealand
  • GBP £ | United Kingdom
  • USD $ | United States
  • Facebook
  • Pinterest
  • Instagram
  • TikTok
  • YouTube
help@cleverpoppy.com
Clever Poppy
  • Embroidery Kits
    • Beginner
    • Experienced
    • All Embroidery Kits
    • Find your pattern match
  • Needle Minders
  • Stick and Stitch
  • Supplies
  • Bundles

Country/region

  • AUD $ | Australia
  • CAD $ | Canada
  • NZD $ | New Zealand
  • GBP £ | United Kingdom
  • USD $ | United States
Log in Cart

9.2 Directional lines for satin stitch

< BACK
NEXT >

> 1.1 Welcome!

> 1.2 Our mantra - progress over perfection

> 2.1 Introduction - dressing your hoop

> 2.2 Dressing your hoop tutorial

> 3.1 Introduction - transferring your pattern

> 3.2 Prepping your template and sorting your light source

> 3.3 Tracing your pattern

> 3.4 The result - your pattern transferred

> 4.1 Introduction - prepping your needle and thread

> 4.2 Prepping your thread and separating your floss

> 4.3 Checking in - prepping your thread

> 4.4 Knotting and unwinding your thread

> 4.5 Threading and gripping your needle

> 4.6 The result - your prepped needle and thread

> 5.1 Introduction to back stitch and starting with a knot

> 5.2 Back stitch tutorial

> 5.3 Knotting off your back stitch

> 5.4 Stitching together

> 5.5 When to finish and restart your thread

> 5.6 Checking in

> 5.7 How to stitch curved lines with back stitch

> 5.8 The result – your finished outlines

> 6.1 Introduction – lazy daisy

> 6.2 Lazy daisy tutorial

> 6.3 Knotting off lazy daisy

> 6.4 Stitching petals together

> 6.5 The result – your finished daisy petals

> 7.1 Introduction - stitching your fronds

> 7.2 The result - your finished fronds

> 8.1 Introduction – french knots

> 8.2 French knot tutorial

> 8.3 Knotting off groups of french knots

> 8.4 Stitching together

> 8.5 The result – your finished daisy centres

> 9.1 Introduction – satin stitch

> 9.2 Directional lines for satin stitch

> 9.3 Filling a circle with satin stitch

> 9.4 Knotting off your satin stitch

> 9.5 Stitching and the result – your rosy cheeks

> 10.1 Introduction and stitching a satin stitch triangle

> 11.1 Introduction – satin stitch petals

> 11.2 Filling a petal with satin stitch

> 11.3 Stitching together

> 11.4 The result – your finished sweet pea petals

> 12.1 Introduction and stitching together

> 12.2 The result – your finished sweet pea bases

> 13.1 Introduction and stitching together

> 13.2 The result – your finished berries

> 14.1 Introduction to woven roses

> 14.2 Woven rose tutorial

> 14.3 Checking in – woven roses

> 14.4 Woven rose with french knot centre

> 14.5 The result – your finished rose

> 15.1 Introduction – straight stitch

> 15.2 Straight stitch tutorial

> 15.3 Knotting off straight stitch

> 15.4 Stitching together

> 15.5 The result - your finished whiskers

> 16.1 Introduction – finishing steps

> 16.2 Removing your pen marks

> 16.3 Adding a backing card (optional)

> 16.4 Tightening and trimming your fabric

> 16.5 Finishing your hoop with the gathered fabric method

> 16.6 Optional - running stitch tutorial

> 16.7 The result – your finished hoop

> 16.8 Congratulations

FAQ & Help:

Don’t worry, it can be challenging while you’re learning, you’re not alone! Make sure you’re focusing on progress over perfection, and accept that mistakes are all part of the learning process. You've got this!


For lots of helpful videos about troubleshooting, tips and tricks head to this page here:


CLICK HERE: Troubleshooting page


Plus, I'm here to help - just email me: julie@cleverpoppy.com with your question and I'll get you sorted.

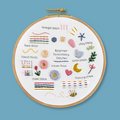
You have as long as you need, just take your time. But if possible, we recommend trying to to make a little bit of progress each day, until your pattern is finished. You will feel such a wonderful sense of accomplishment! And it will get you in the habit of taking some time to ‘fill your cup’ each day. You deserve it.


Subscribe to our newsletter

Be the first to know about new patterns and exclusive offers.

Contact Us: help@cleverpoppy.com

Shop

  • Beginner Embroidery Kits
  • Experienced Embroidery Kits
  • Embroidery Supplies
  • Bundles
  • Gift Card
  • Find your pattern match

About

  • Blog
  • Home
  • Contact Us
  • About us
  • Maker's Academy Membership
  • Reviews

Customers

  • Search
  • Shipping Policy
  • Refund and returns policy
  • Privacy Policy
  • Terms of Service
  • Account
  • Track Your Order
  • Facebook
  • Instagram
  • YouTube
  • TikTok
  • Pinterest

Country/region

  • AUD $ | Australia
  • CAD $ | Canada
  • NZD $ | New Zealand
  • GBP £ | United Kingdom
  • USD $ | United States
Payment methods
  • American Express
  • Apple Pay
  • Diners Club
  • Discover
  • Google Pay
  • Mastercard
  • PayPal
  • Shop Pay
  • Venmo
  • Visa
© 2025, Clever Poppy Powered by Shopify
  • Choosing a selection results in a full page refresh.
  • Opens in a new window.