


Satin Stitch - Learn How to Do This Modern Embroidery Technique
Introduction
Satin stitch is hands down my favourite embroidery technique! It's like colouring-in with thread. This technique involves covering an area with flat stitches placed closely together, making it look smooth and shiny - like satin. This technique is awesome for adding a pop of colour and texture to your embroidery projects. With a little practice, you'll be crafting beautiful and lively designs in a snap!
Don’t give up: Before we begin, I want to throw it out there that Satin Stitch might sound simple, but for many beginners, it's one of the more challenging embroidery techniques to get the hang of. Getting your stitches to land in the right spots and fit together snugly takes some practice. Trust me, practicing really does make a big difference, and you'll be surprised at how much you improve as time goes on. So, don't hesitate to embrace the learning process and the progress you're making, and don't worry too much about aiming for perfection..
Before we start stitching:
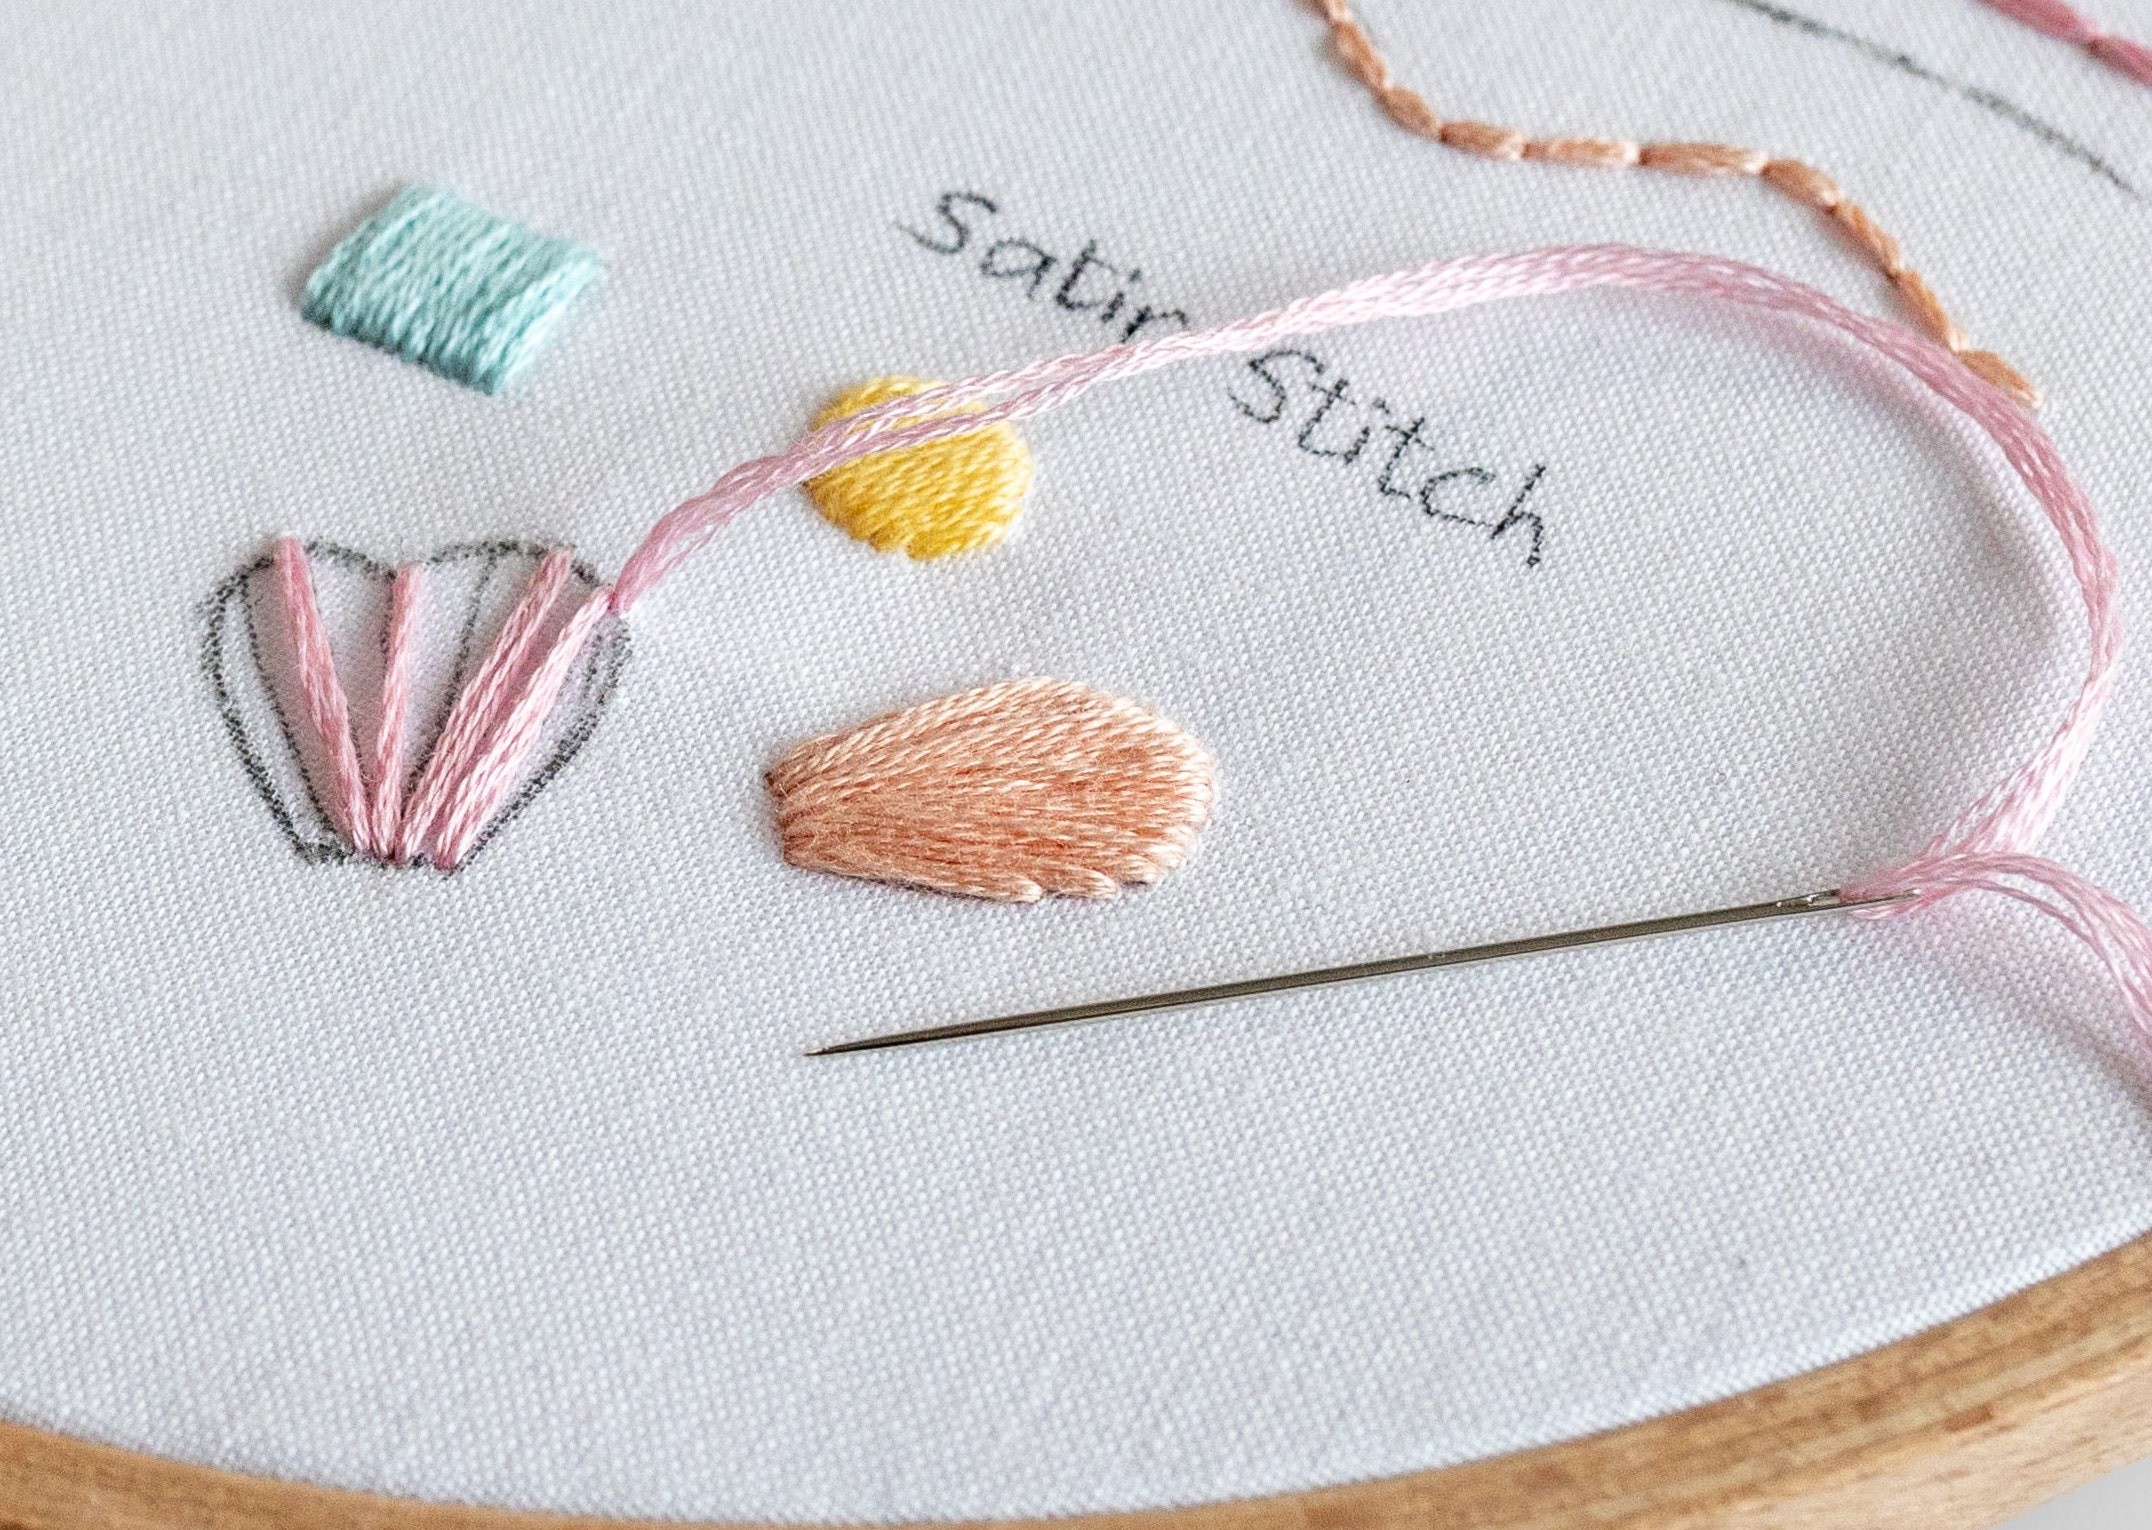
Meet your new best friend – directional lines! Before you jump in, it's a good idea to determine the stitch direction within your shape, and to reflect this with some hand drawn guidelines. These are absolute lifesavers, acting as visual guides to keep your stitch angles on track as you fill the space.
Example # 1: Let’s fill a simple square shape:
In a nutshell: To fill the shape, we will create a series of stitches that come up along the top edge of the square and then go back down along the bottom edge. This one’s pretty simple, because each stitch will be the same the same length and placed on the same angle.
Step 1
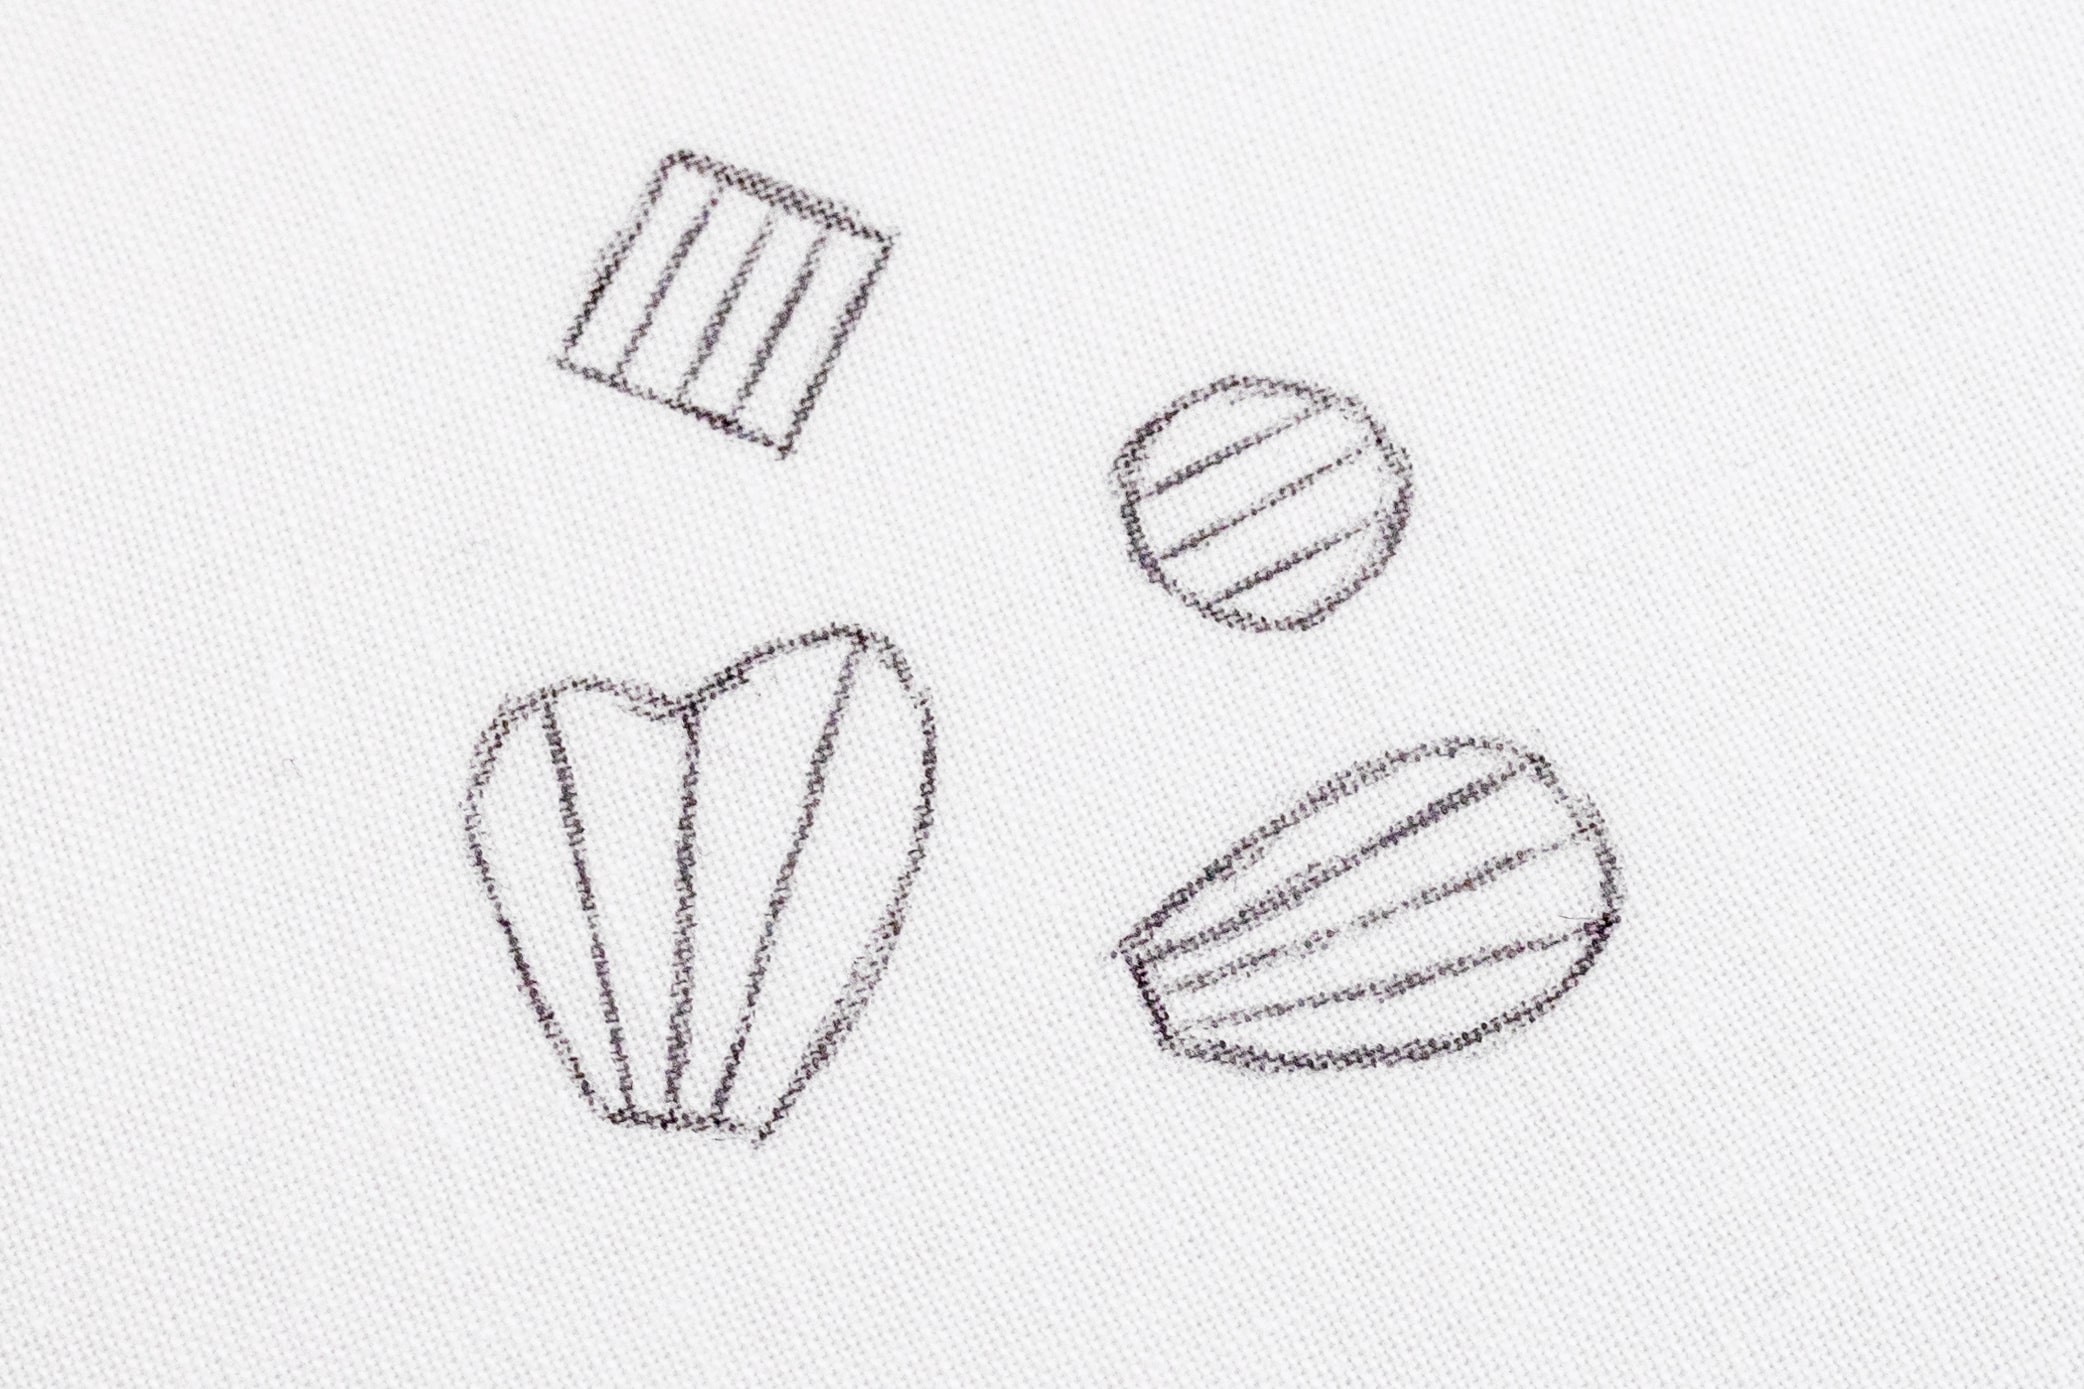
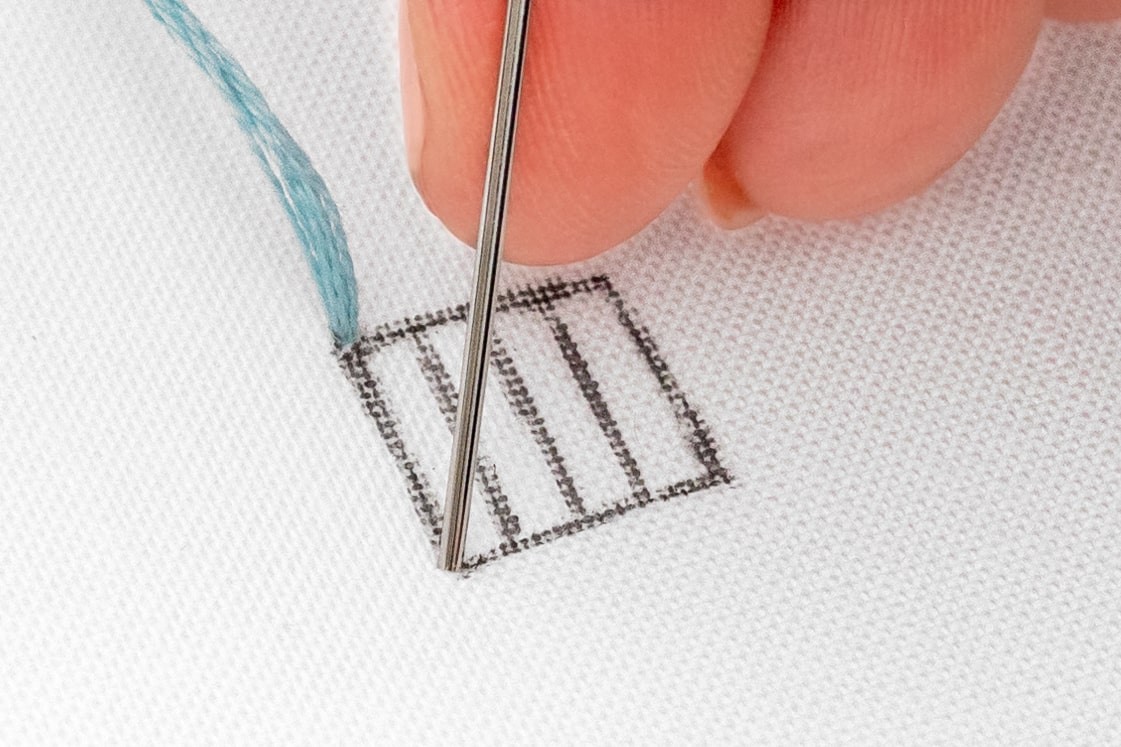
To start, sketch three vertical directional lines which split the shape roughly into quarters.
Step 2
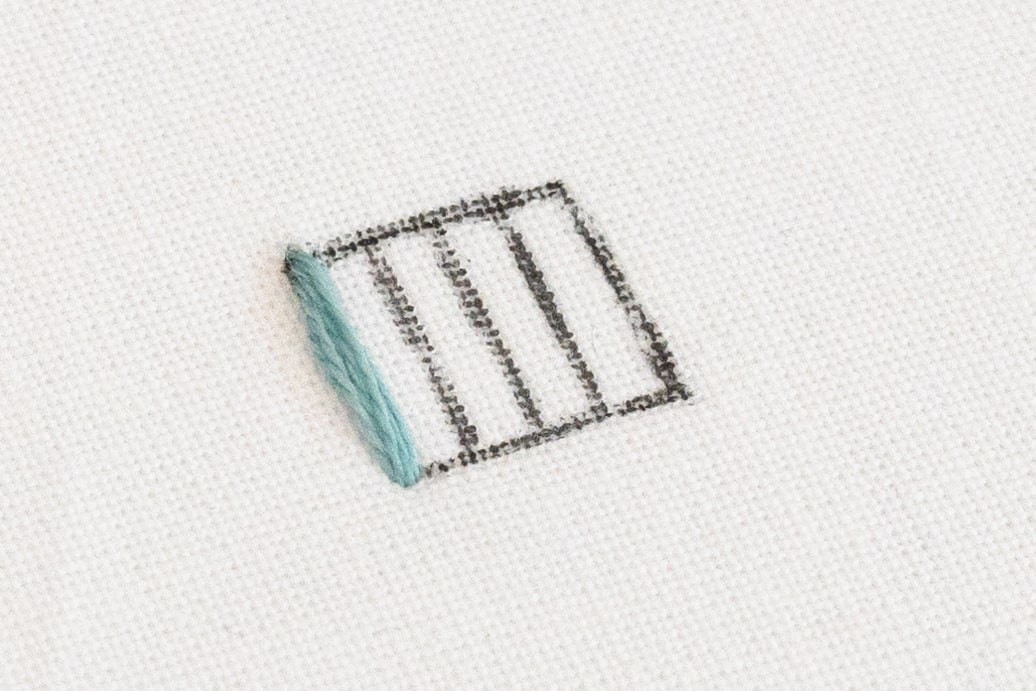
Bring your needle up from the back of the fabric to the front, at the top left corner of the square. Gently pull the working thread through to the front, so that your knot secures the thread at the back.
Step 3
Poke your needle back down, at the bottom left corner of the square, and pull through all of the working thread. This places your first stitch neatly on the left side of the square.
Step 4
Bring your needle and thread back up on the top edge, just to the right of the first stitch.
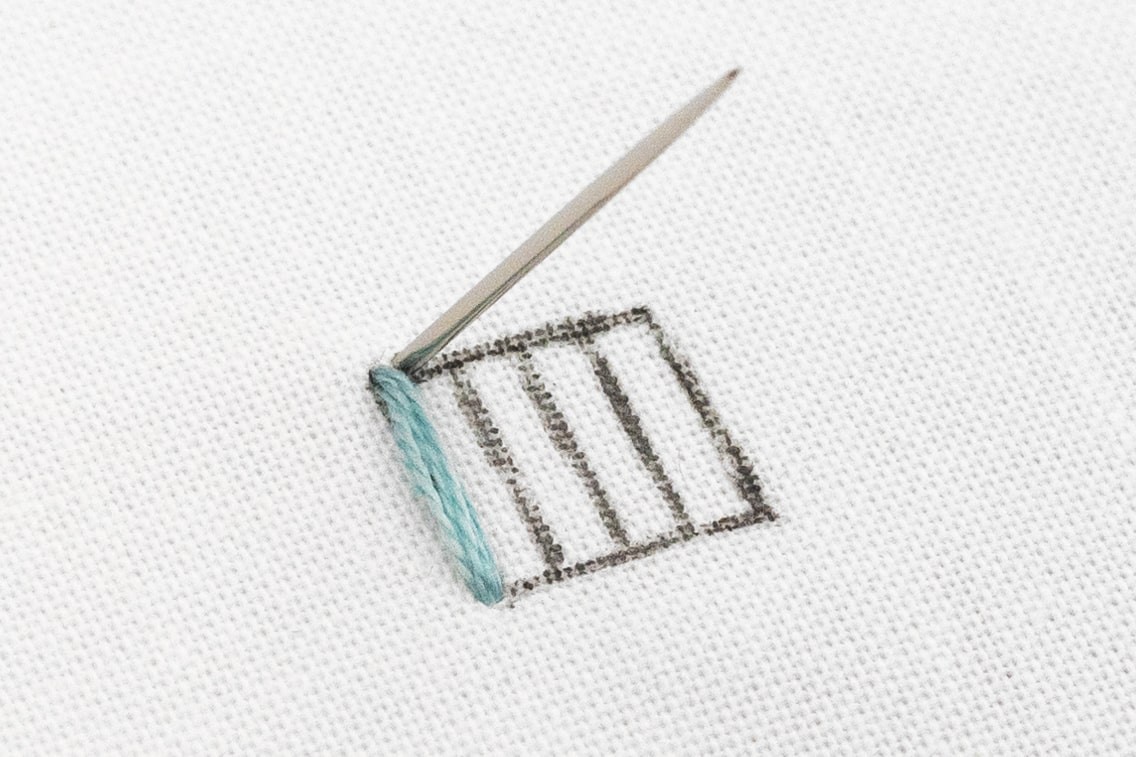
Step 5
Now poke your needle back down at the bottom edge ,just to the right of the first stitch.
Step 6
Draw the working thread through, and see how you’ve now made two stitches which are sitting parallel to each other? Well done, that’s the beginning of your Satin Stitch!
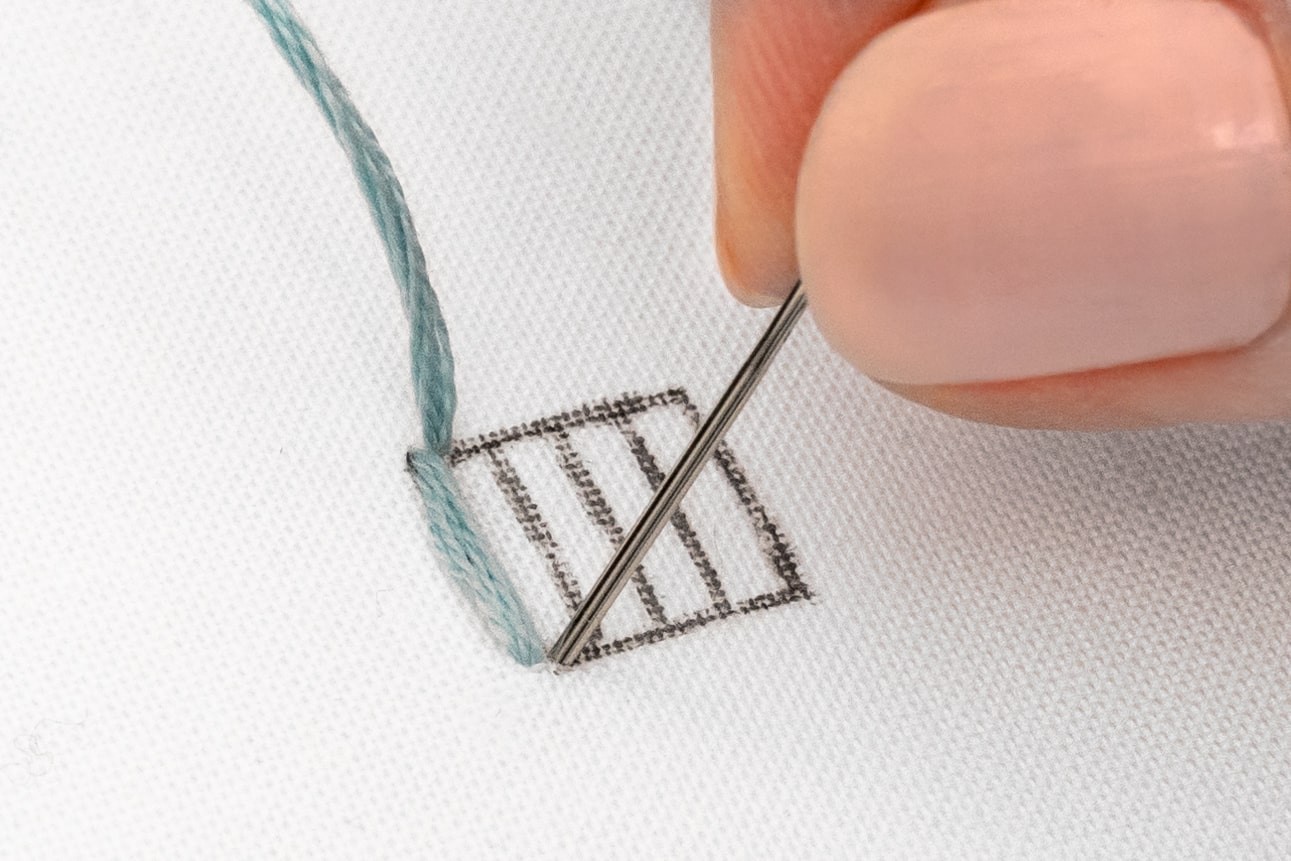
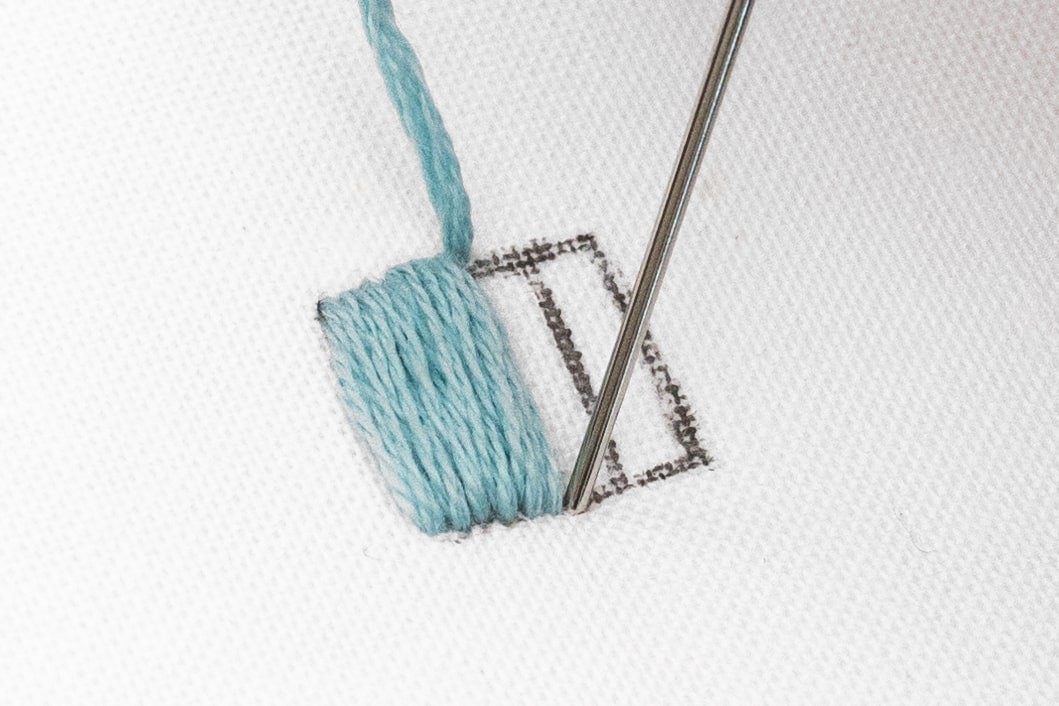
Step 7
Keep following this method: bring your needle upon the top edge of the square, and back down again along the bottom edge. As you fill the shape, aim for your stitches to snugly line up alongside each other. But don’t worry if you find that tricky, you’re totally normal! Don’t pull your stitches super tight, because that can pucker your fabric. Instead, focus on laying each stitch nice and flush with the surface of the fabric.
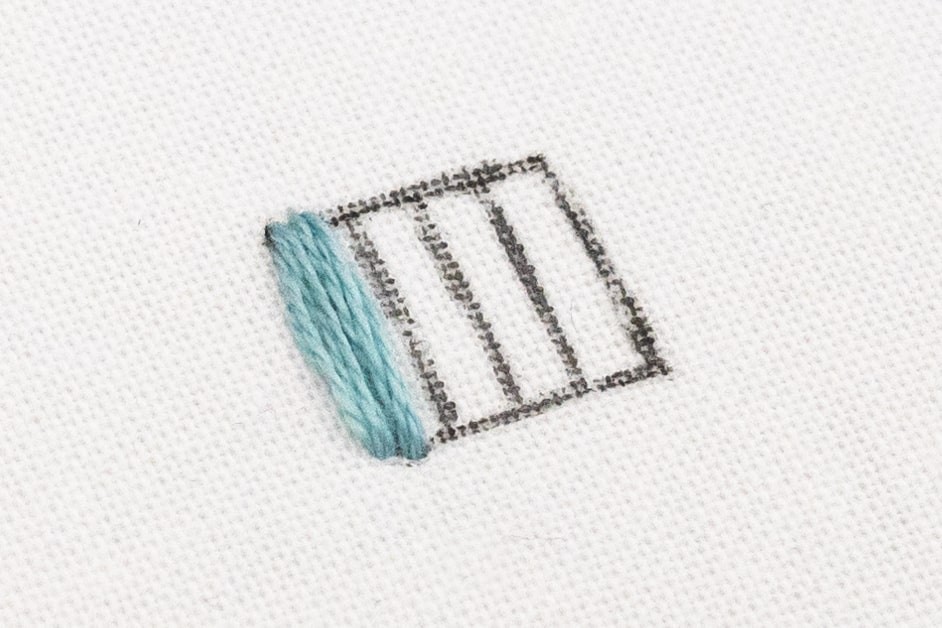
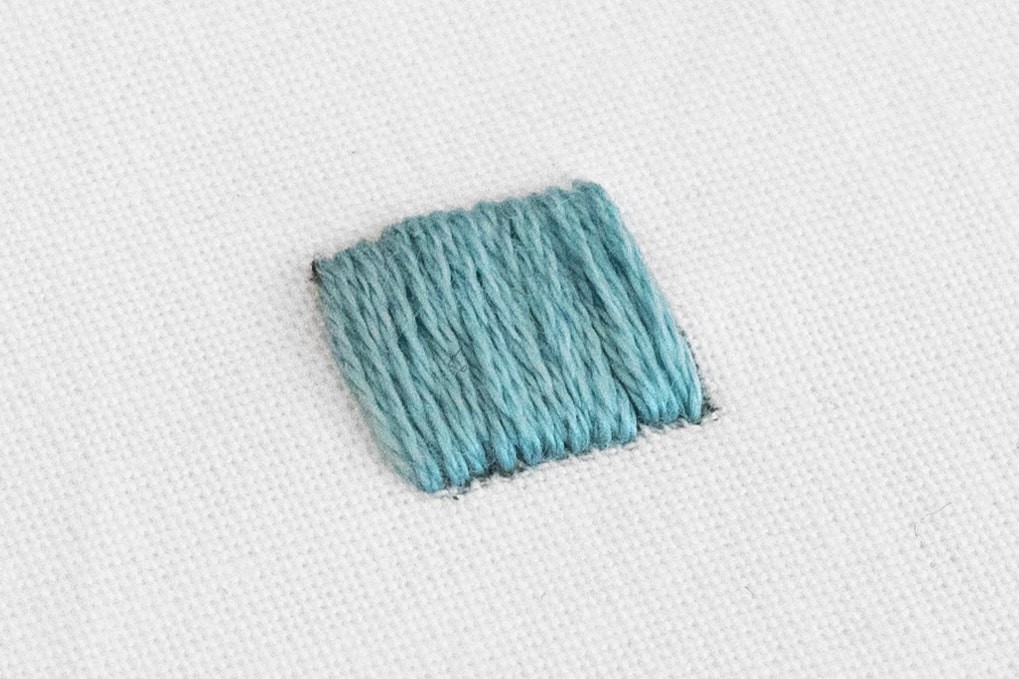
Step 8
Continue working your Satin Stitch until the shape is full. Then secure and tidy away your thread.
General Satin Stitch Tips:
Use your directional lines as guides: As you approach each directional line, you can use it as a guide to keep your stitches nice and straight.
Creating a clean edge: Pay attention to where your needle enters the edge of the shape – because consistency is the key to achieving a nice neat edge! For instance, you can aim to always insert your needle right in the middle of the line, Or always aim for the outer edge of the line. I totally understand that this is easier said than done – but keep it in mind as your learn this technique.
Example # 2: Let’s fill a circle:
In a nutshell: To fill the shape, we will create a series of vertical stitches that come up along the top edge of the square and then go back down along the bottom edge. But this time, we will adjust the stitch lengths to match the curved shape. Also, instead of working from left to right, we'll start in the middle and fill the space section by section.
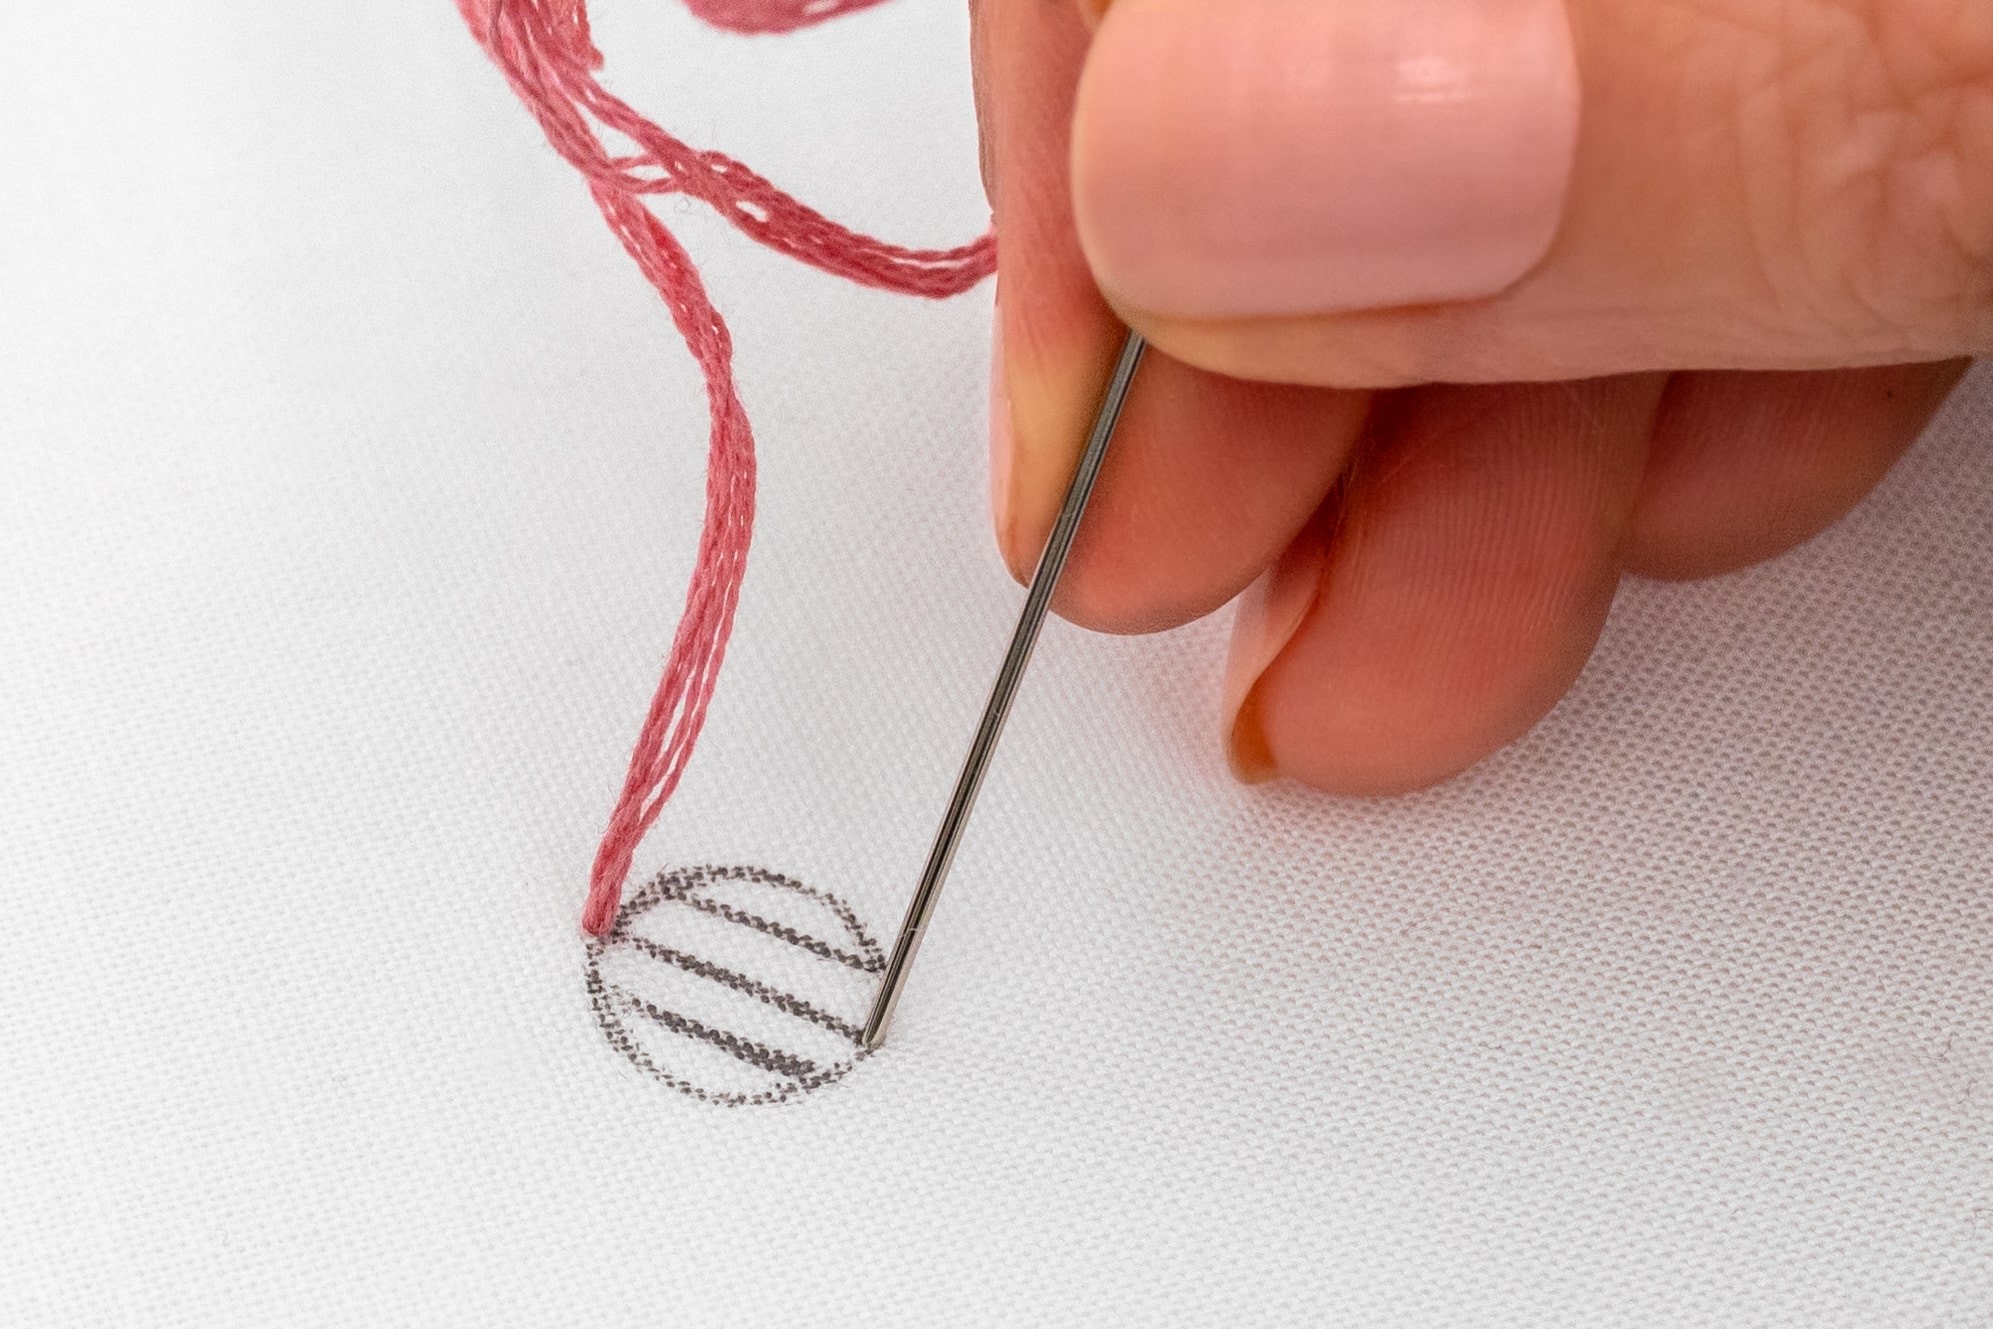
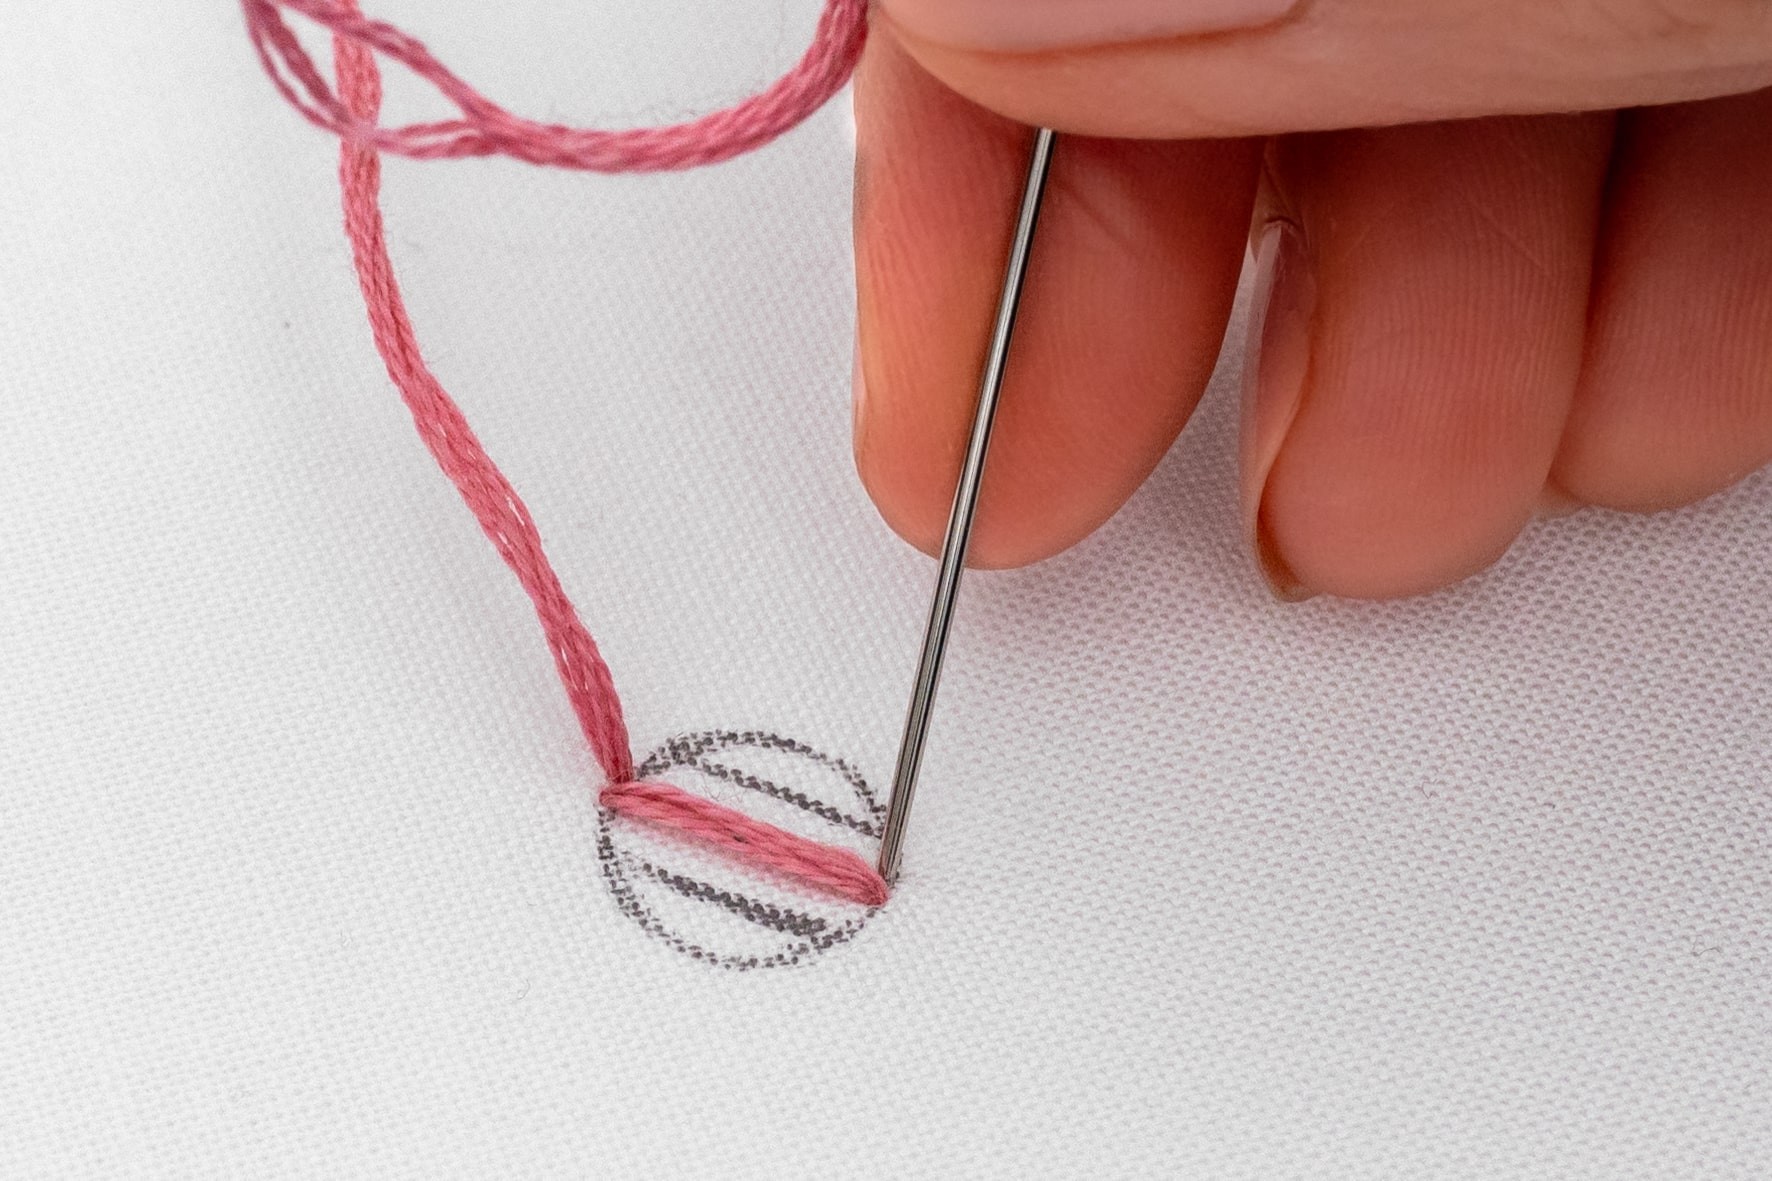
Step 1
To start, sketch three vertical directional lines which split the shape roughly into quarters.
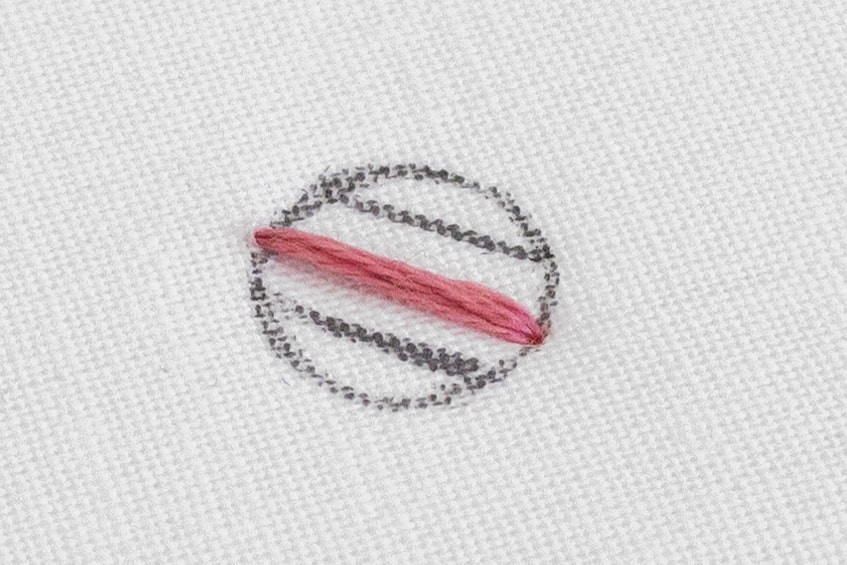
Step 2
Start by bringing your needle up on the top edge of the shape, and work your first stitch down the middle.
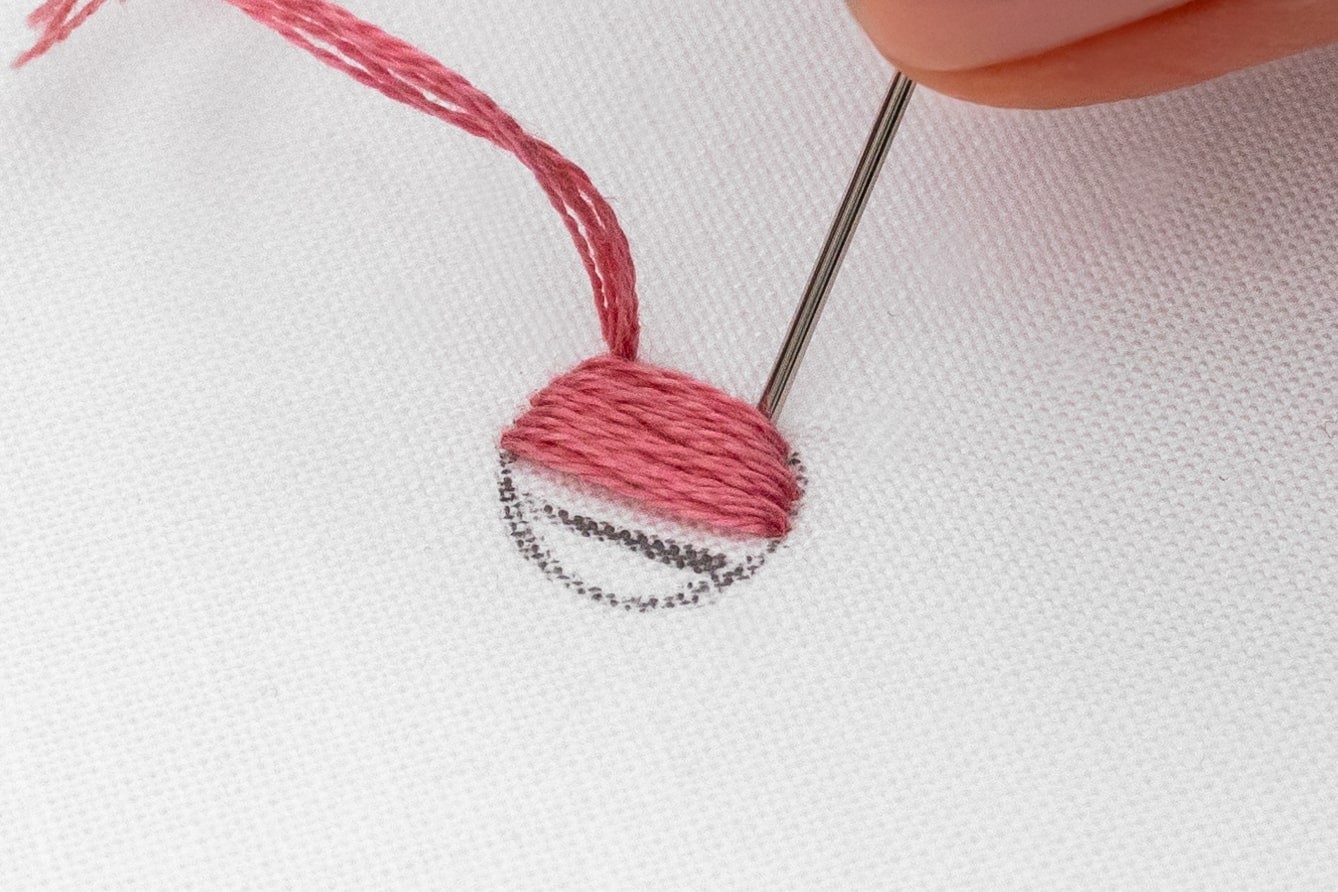
Step 3
Now, head to the right and start filling that first section with vertical stitches. Just like before, bring the needle up on the top edge of the shape, and back down again along the bottom edge. Notice how this results in shorter stitches as you go. Aim to keep your stitches snugly lined up side by side.

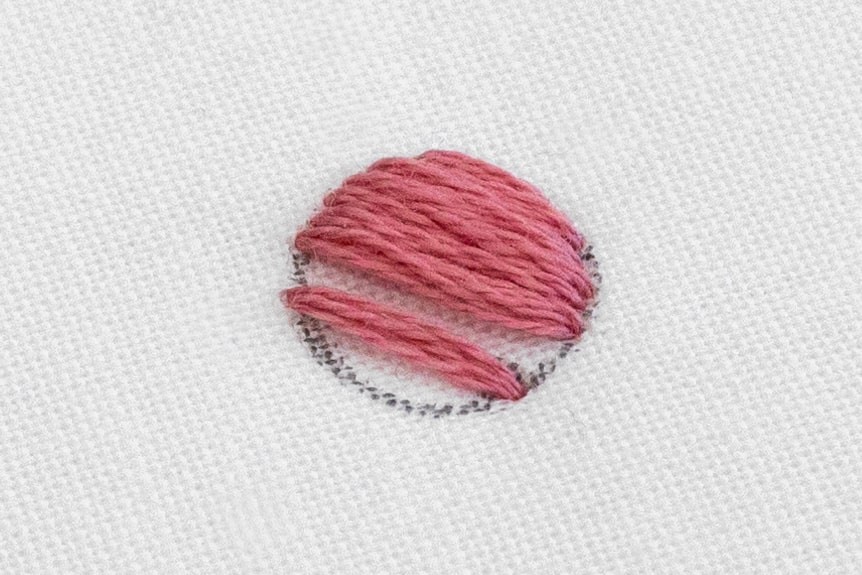
Step 4
Then fill in the right hand section in the same manner, completing it with quite a short final stitch.
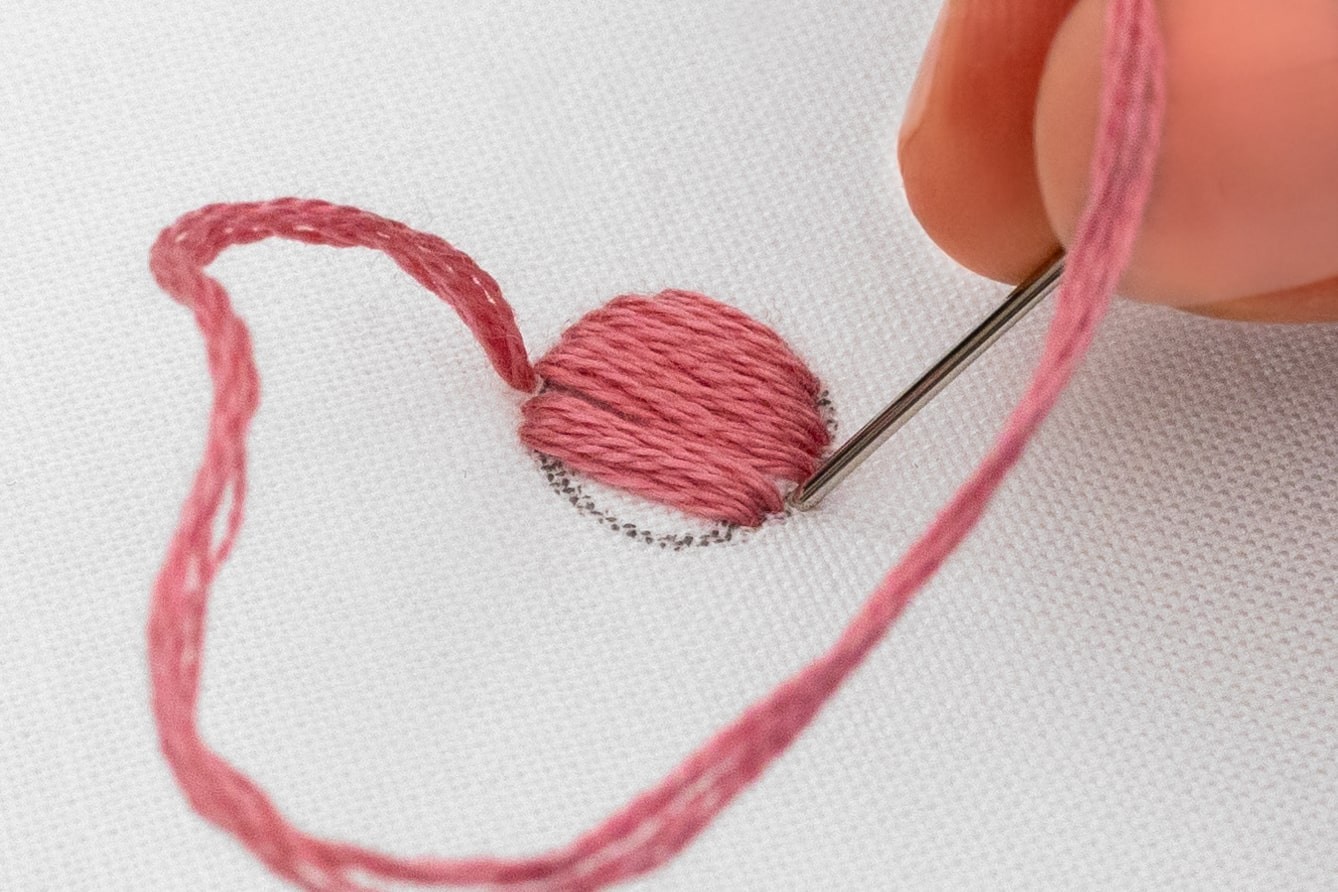
Step 5
Next, work a stitch down the directional line on the left.
Step 6
Then fill the section to the right of that line, moving towards the middle. See how dividing the shape into sections makes it feel more manageable?
Step 7
Last, fill in the final section on the left, but this time work your stitches from right to left (towards the outside). Finish up with quite a short stitch on the far-left side.
Step 8
When you've finished stitching, secure and tidy away your thread.
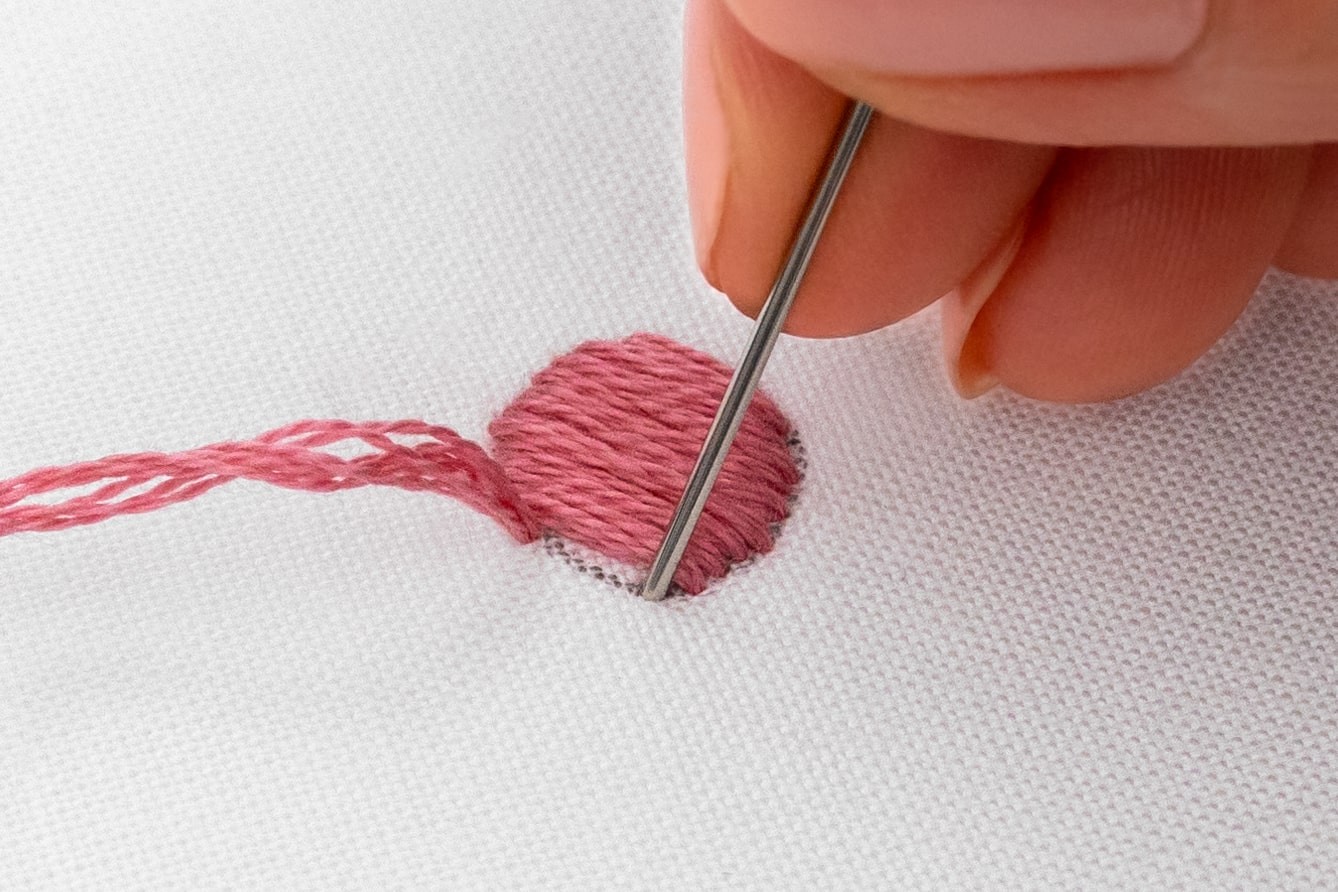
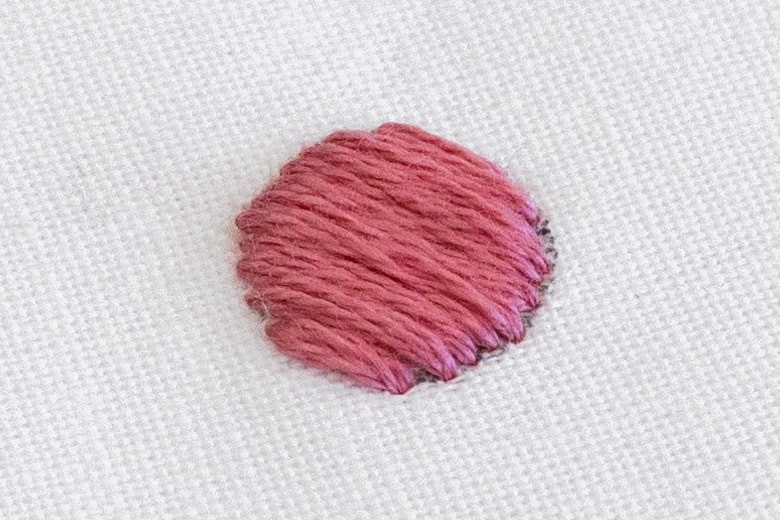
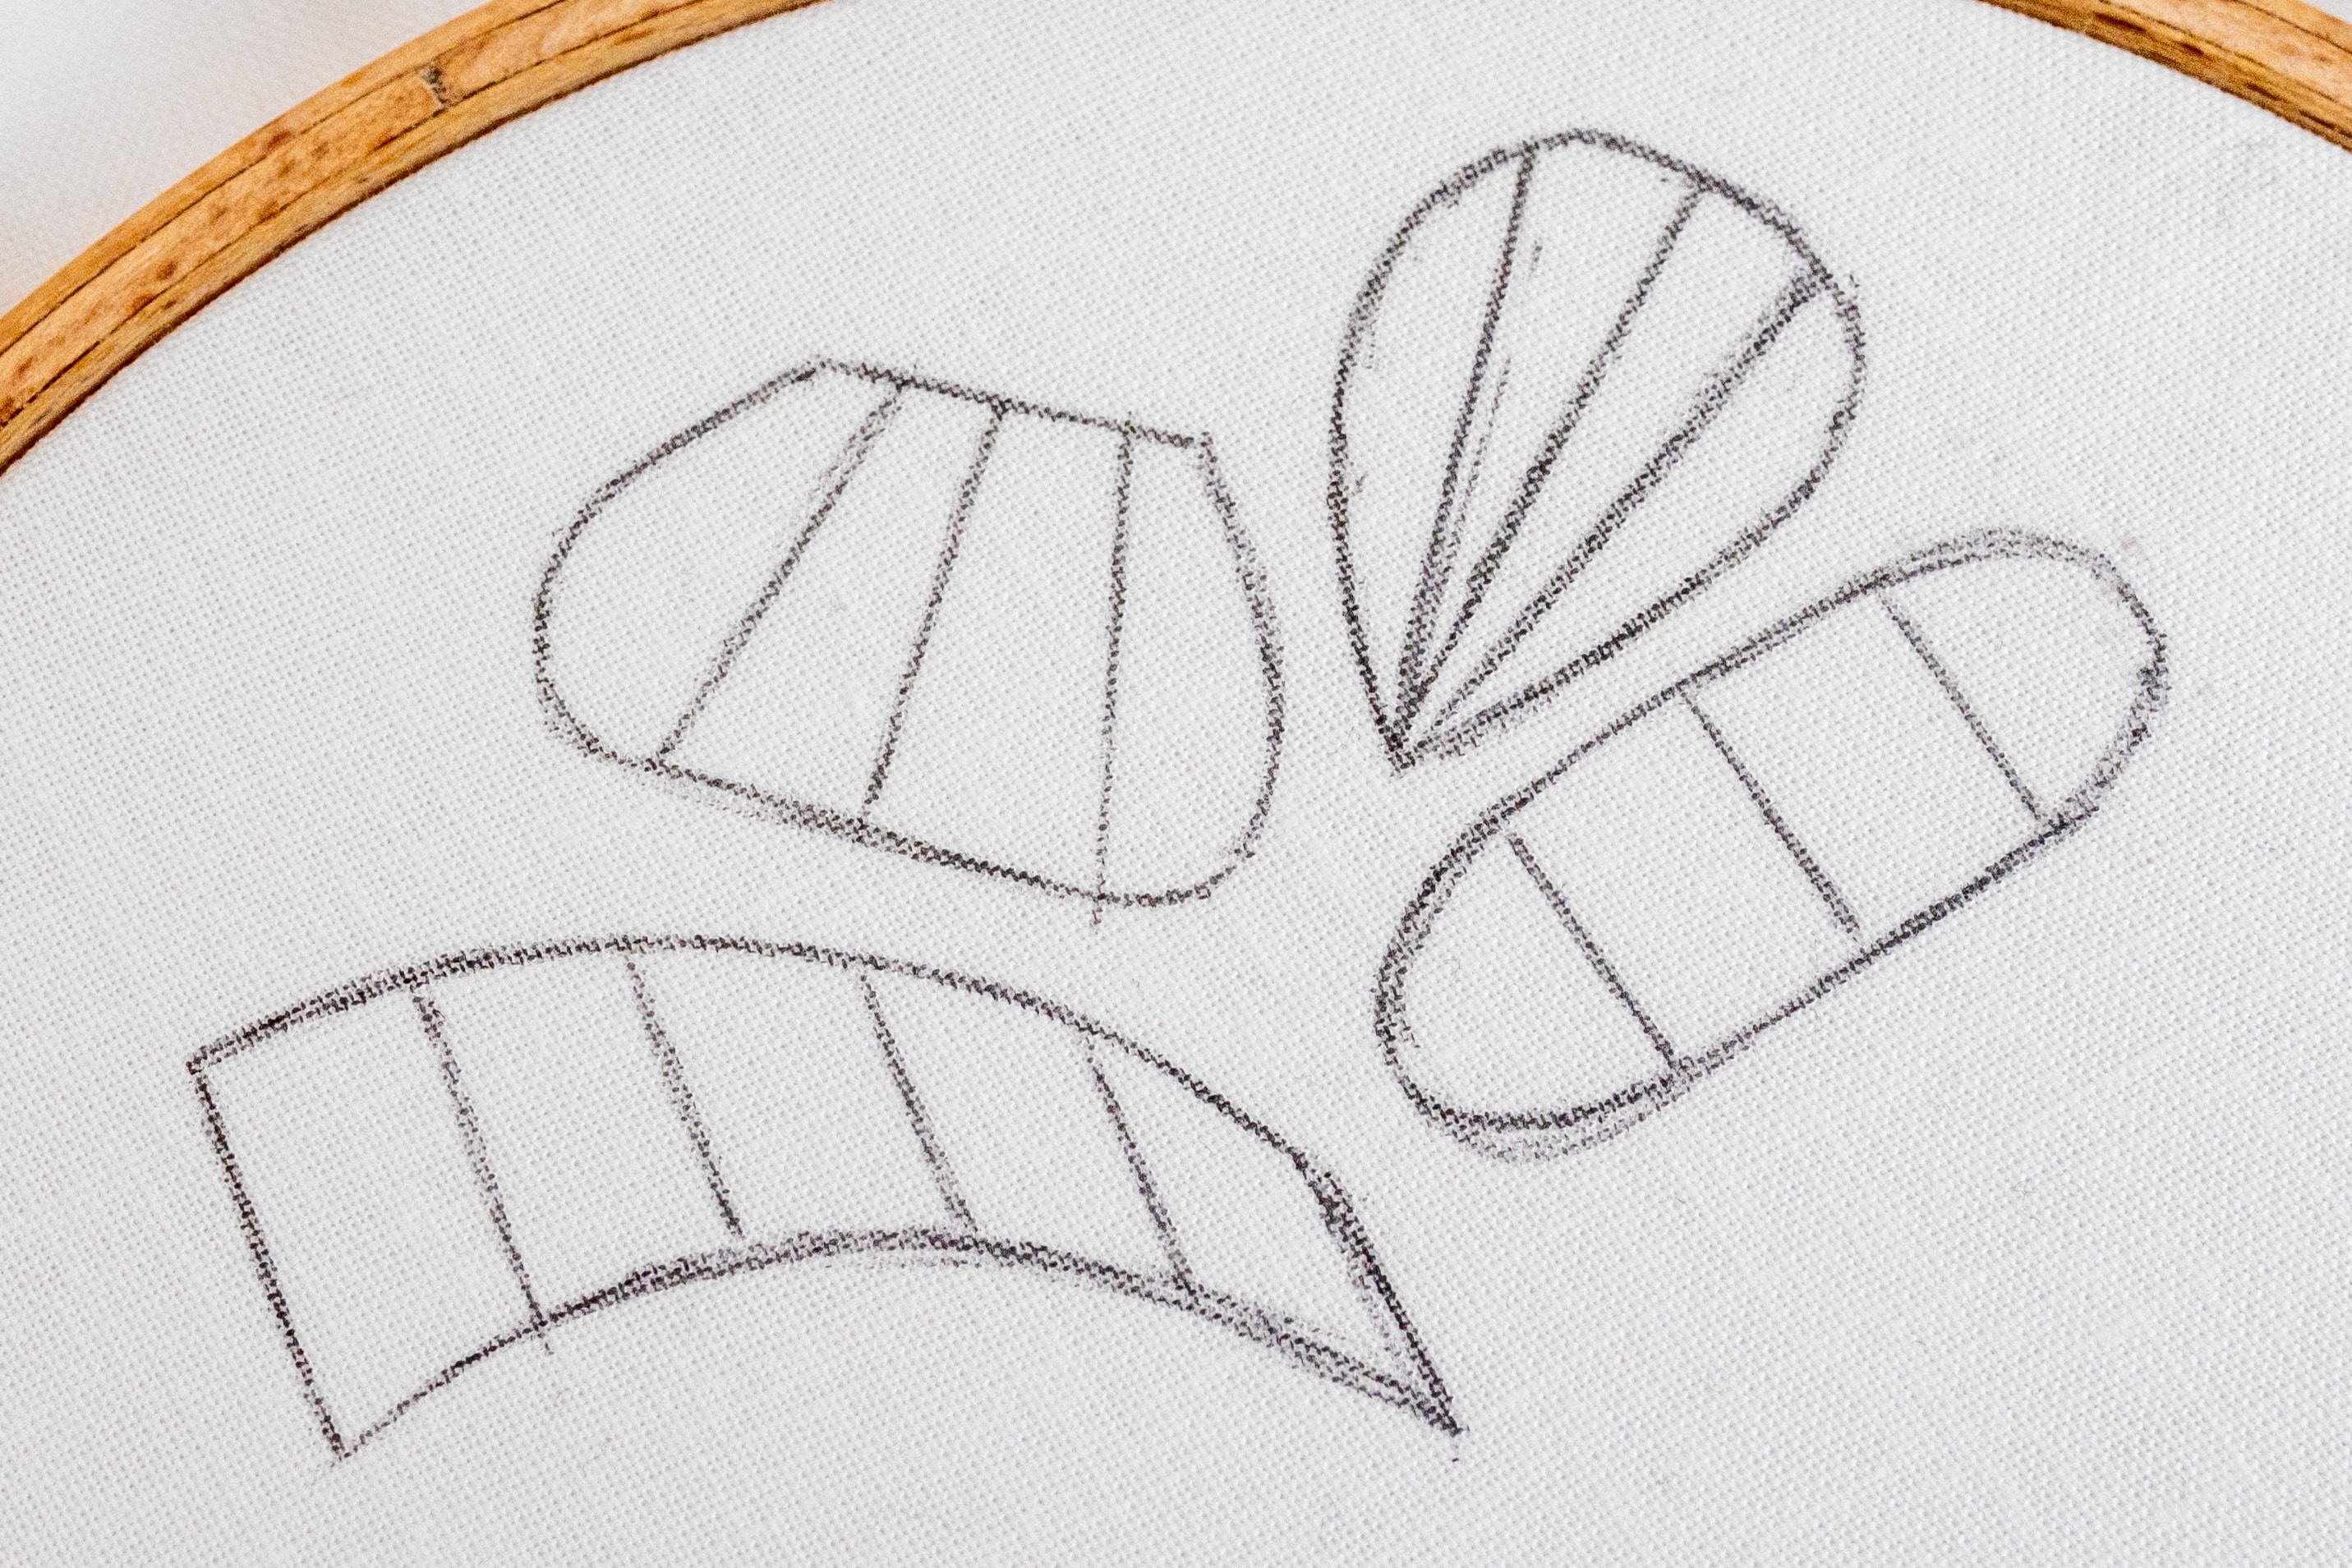
Example # 3: Let’s fill a petal with a tapered shape
In a nutshell: To fill a tapered shape (e.g. leaf or petal), we will create a series of stitches that angle in towards the tapered end of the shape (rather than working parallel stitches). We'll fill in each side separately, from the middle out. I call this the ‘Staggered Stitch Length Method’, and it’s so helpful!
Step 1
To start, sketch three directional lines which split the shape roughly into quarters. Extend these lines from the top of the petal to the base, angling them in to reflect the tapered shape. As you can see on the two images here, this will create a different effect compared to parallel stitches.
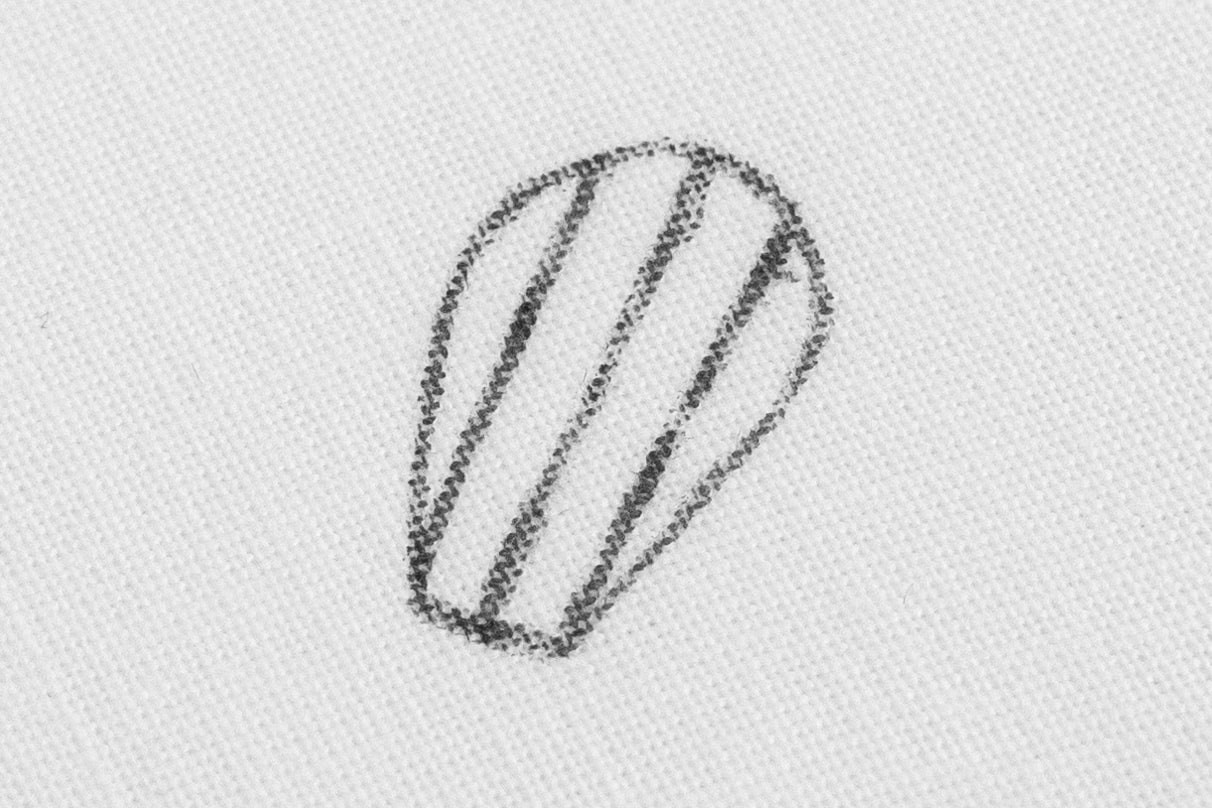

Parallel stitch direction Tapered stitch direction
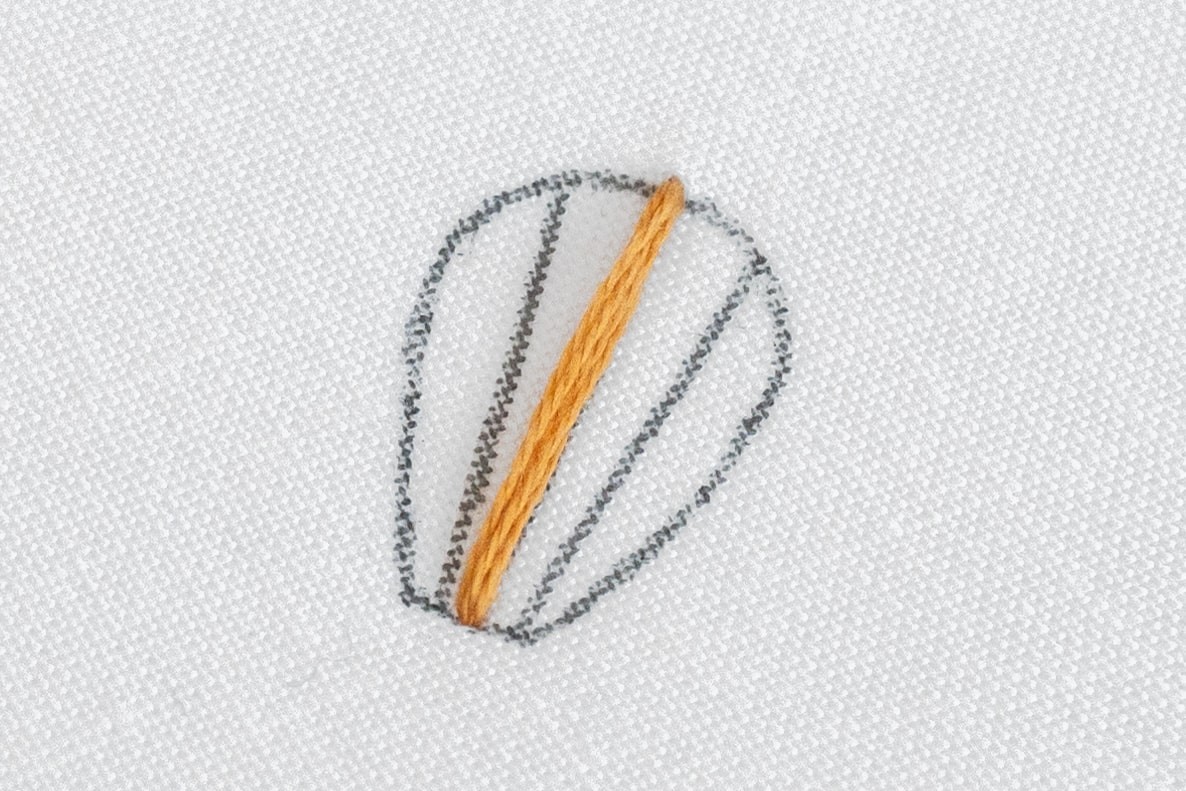
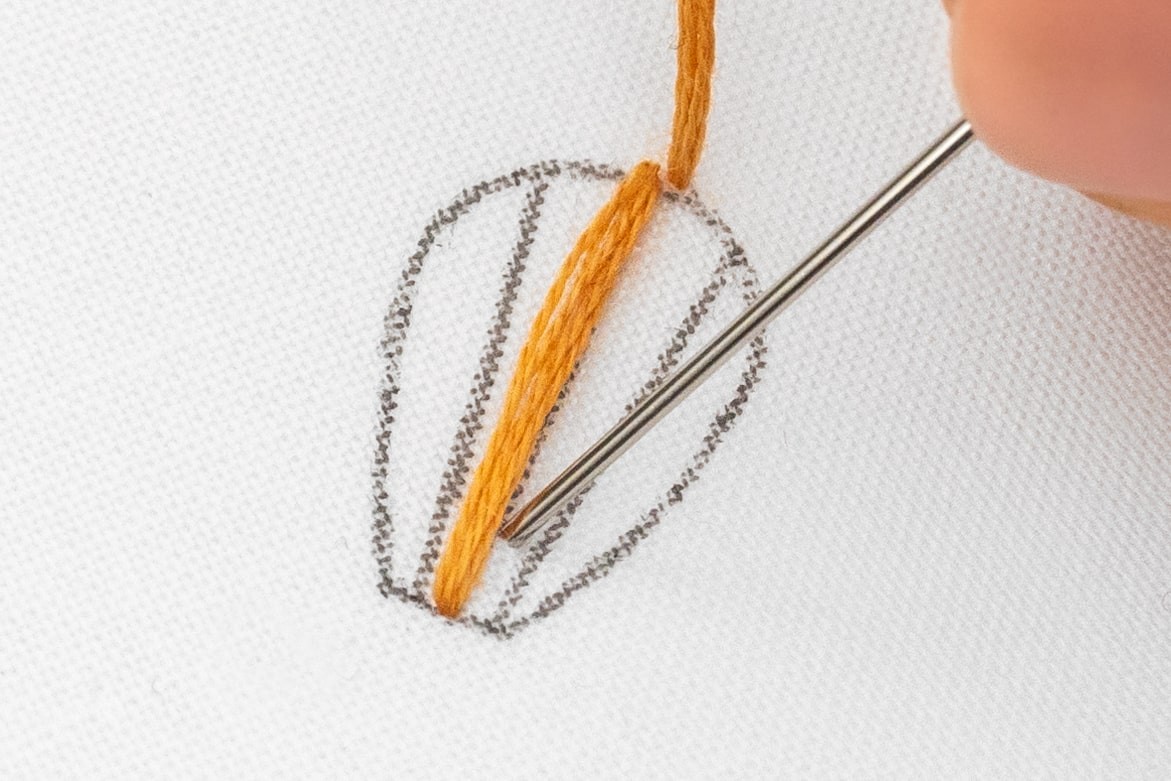
Step 2
Work your first stitch down the middle, bringing your needle up at the top edge of the petal and down at the base.
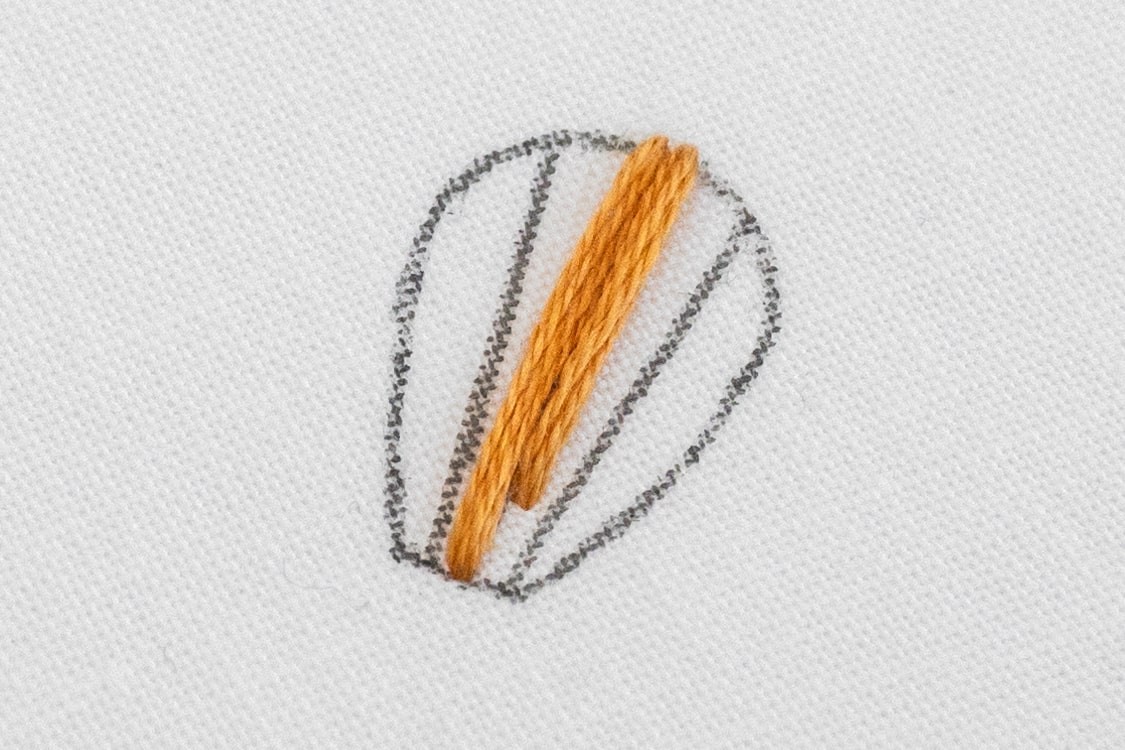
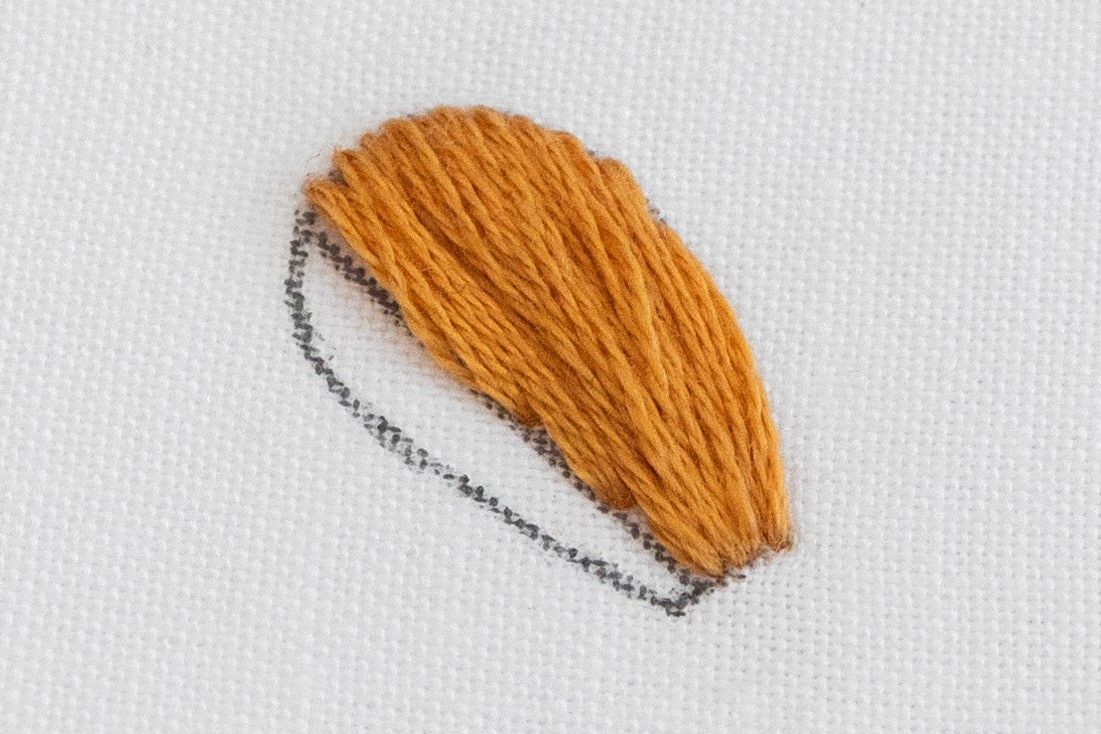
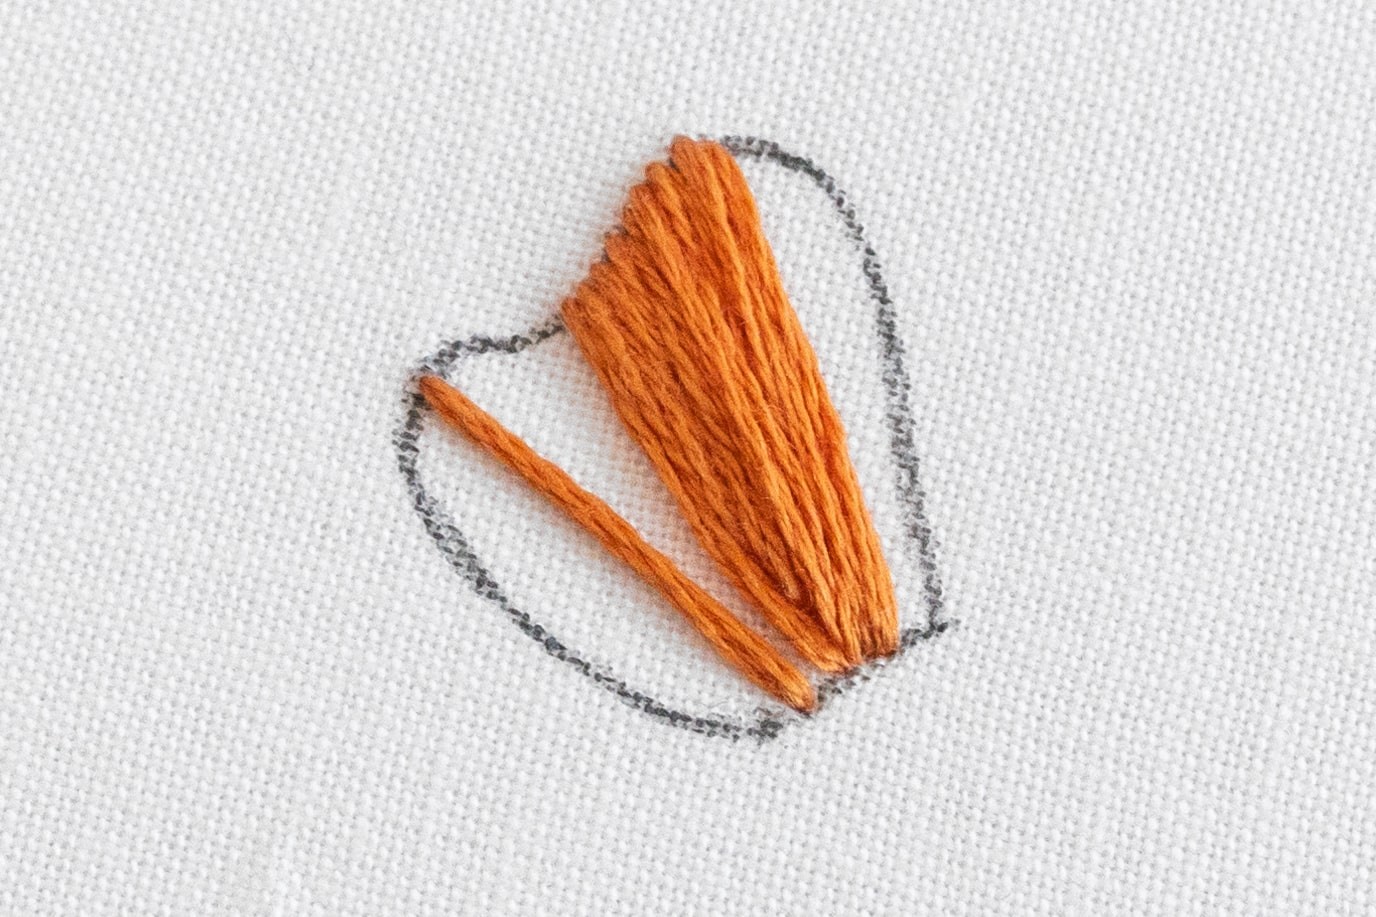
Step 3
Now you’ll focus on filling in the right-side of the petal, always bringing your needle up on the top edge and back down at the base. You could do all of your stitches the full length of the petal (and that’s totally fine!), but let’s try the Staggered Stitch Length Method - by mixing full length stitches with shorter ones, we can prevent congestion at the base of the petal.
So bring your needle up just to the right of the first stitch, and work your second stitch on a similar angle, but poke your needle down just short of the base of the petal.
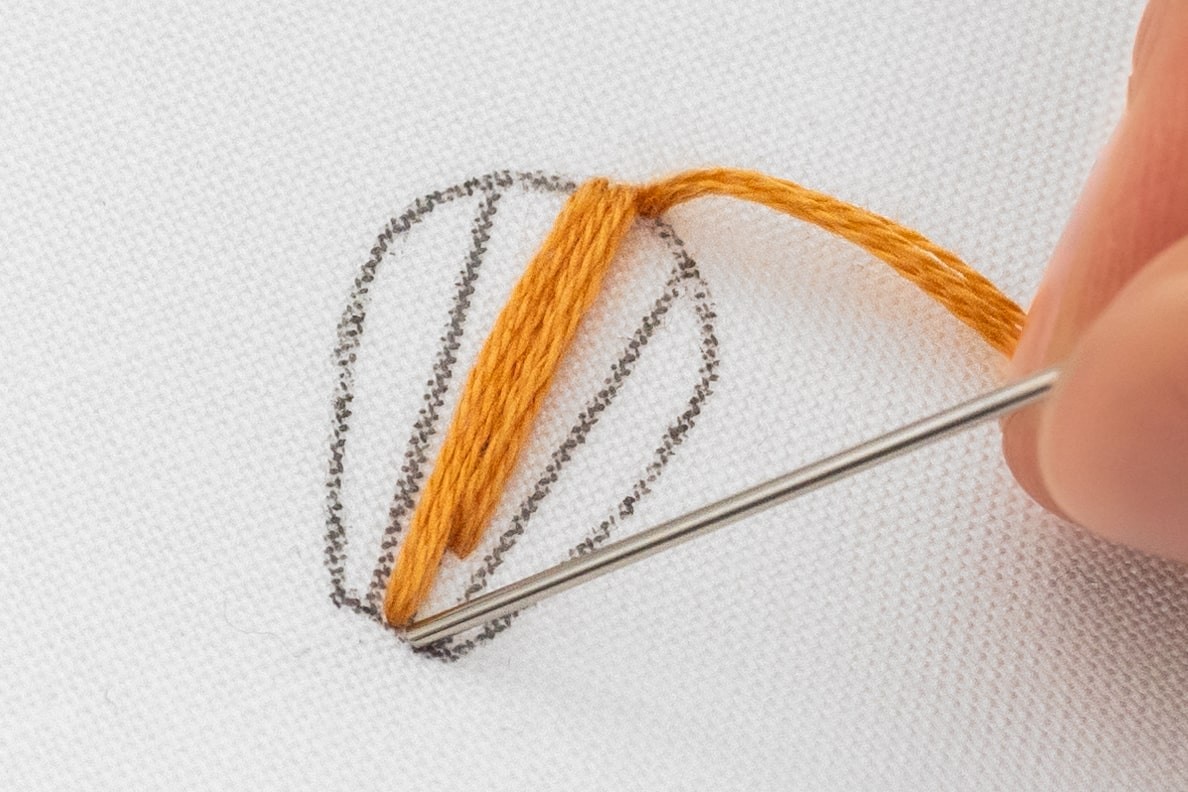
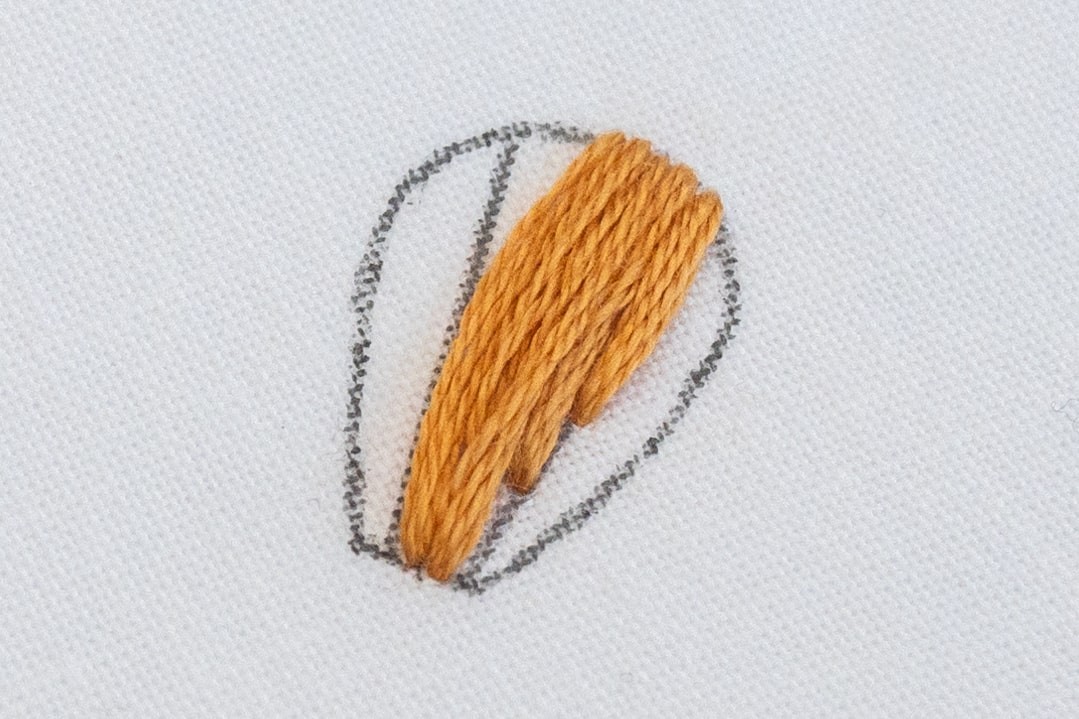
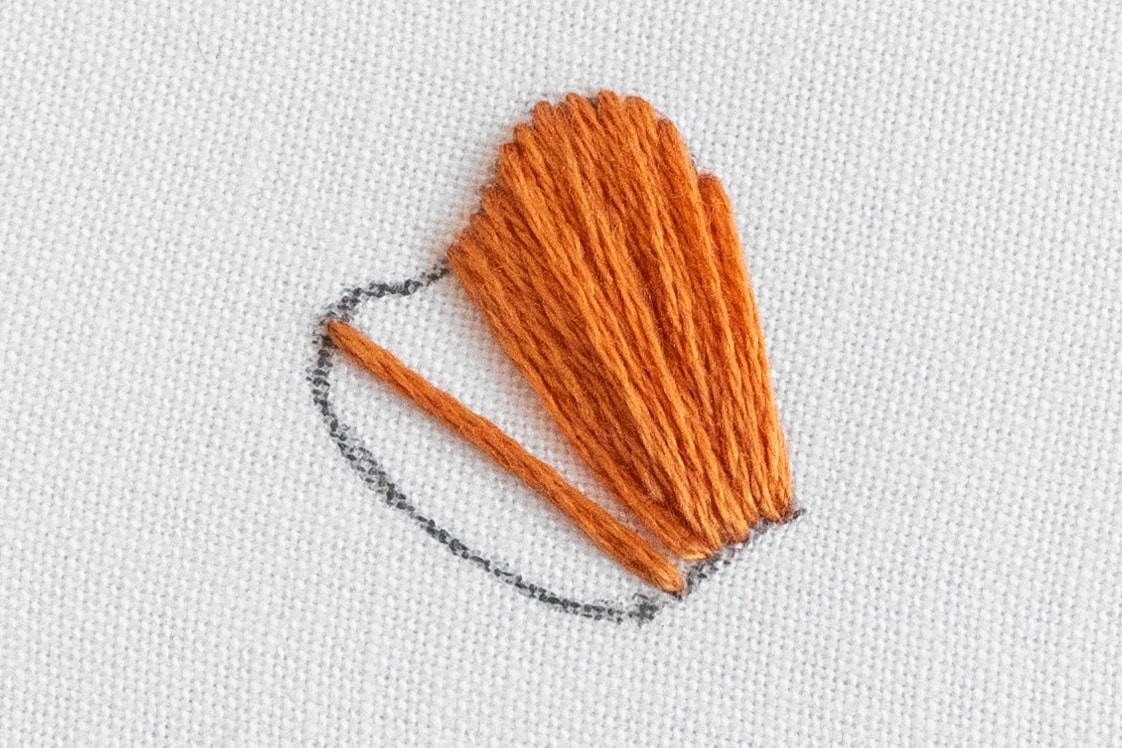
Step 4
For your third stitch, bring your needle up just to the right of the second stitch, and poke it down at the base, just to the right of the first stitch. See how the angle of your third stitch covered up the staggered effect, so that it all 3 look lovely and smooth? That’s what we want!
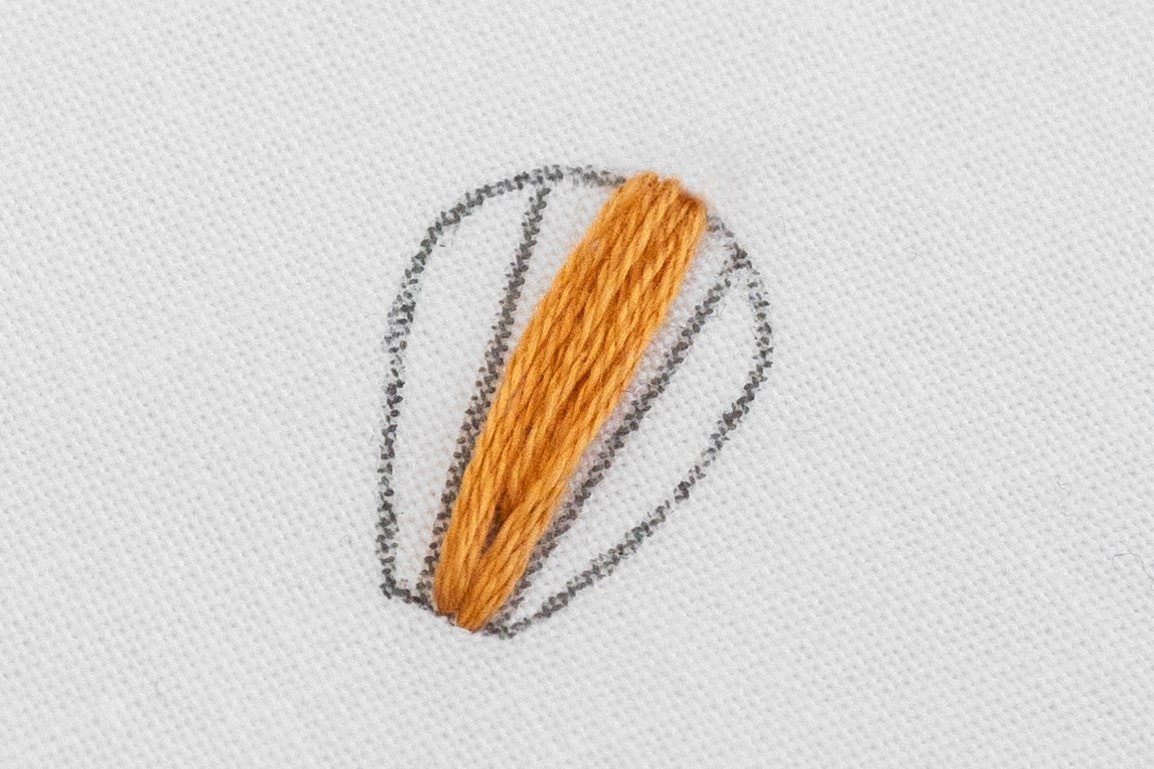
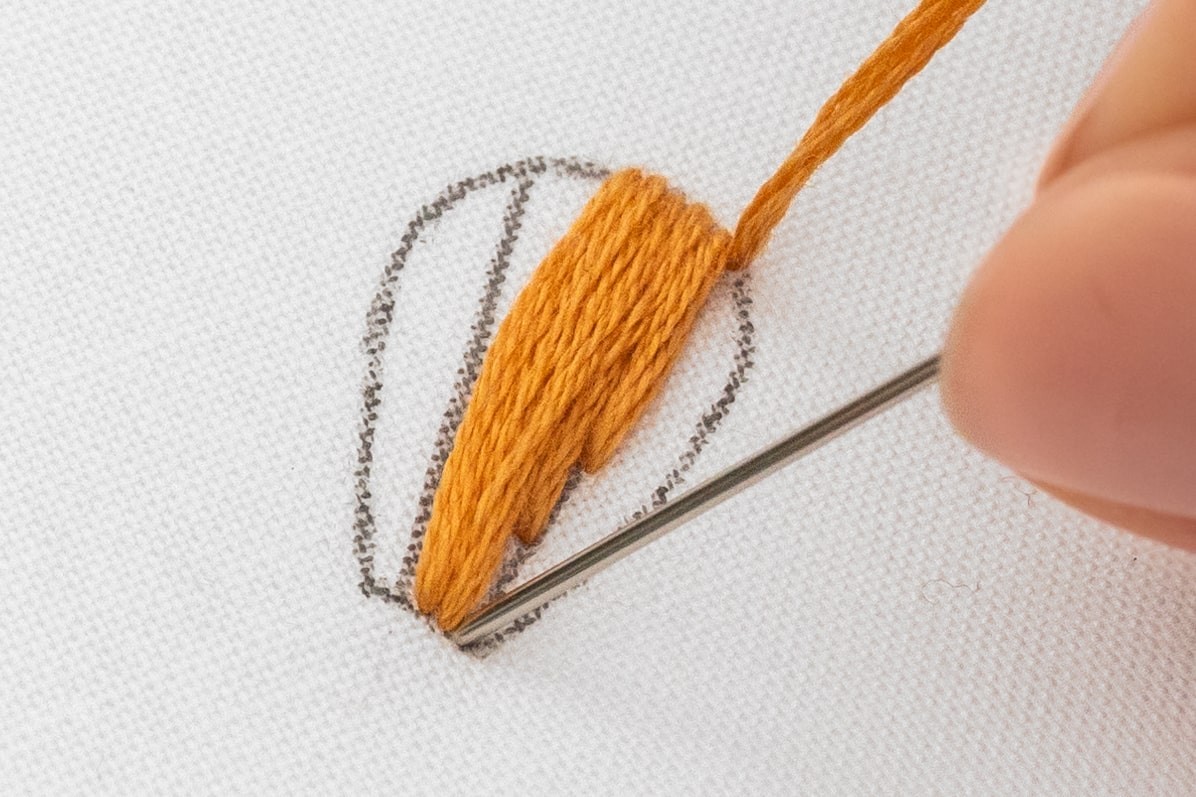
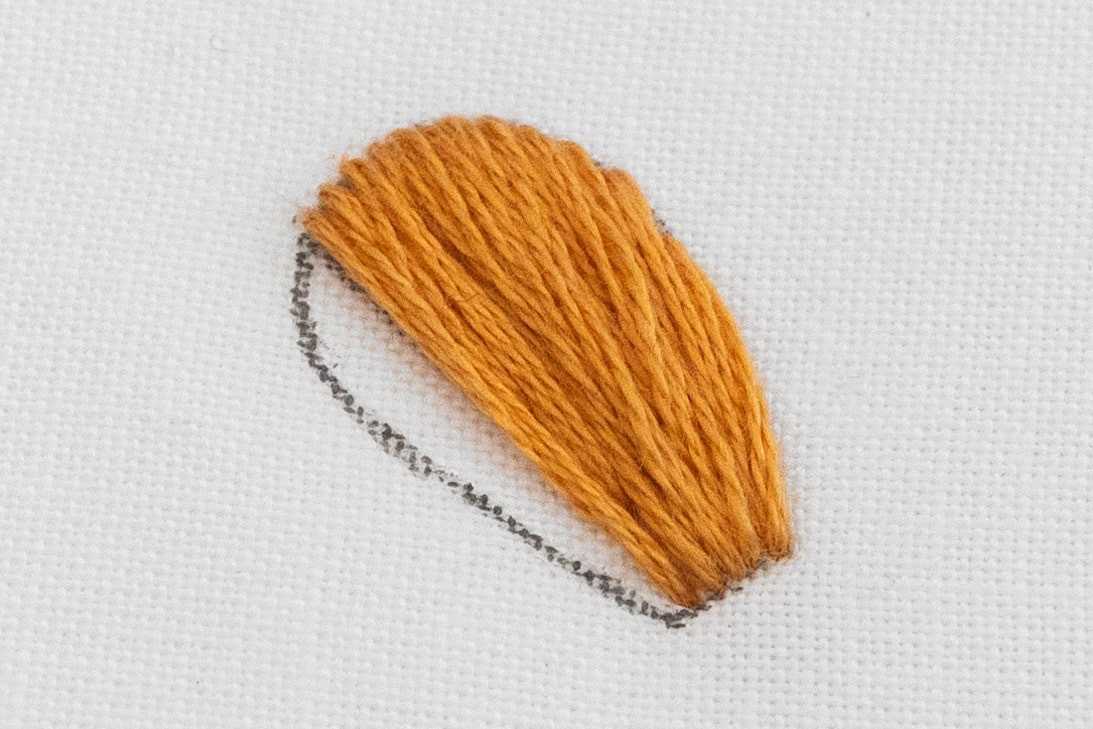
Step 5
Now keep working your stitches to the right in the same manner – start with a full stitch, followed by a shorter stitch. But you can actually do your third stitch slightly shorter again (because this part of the shape is quite tapered).
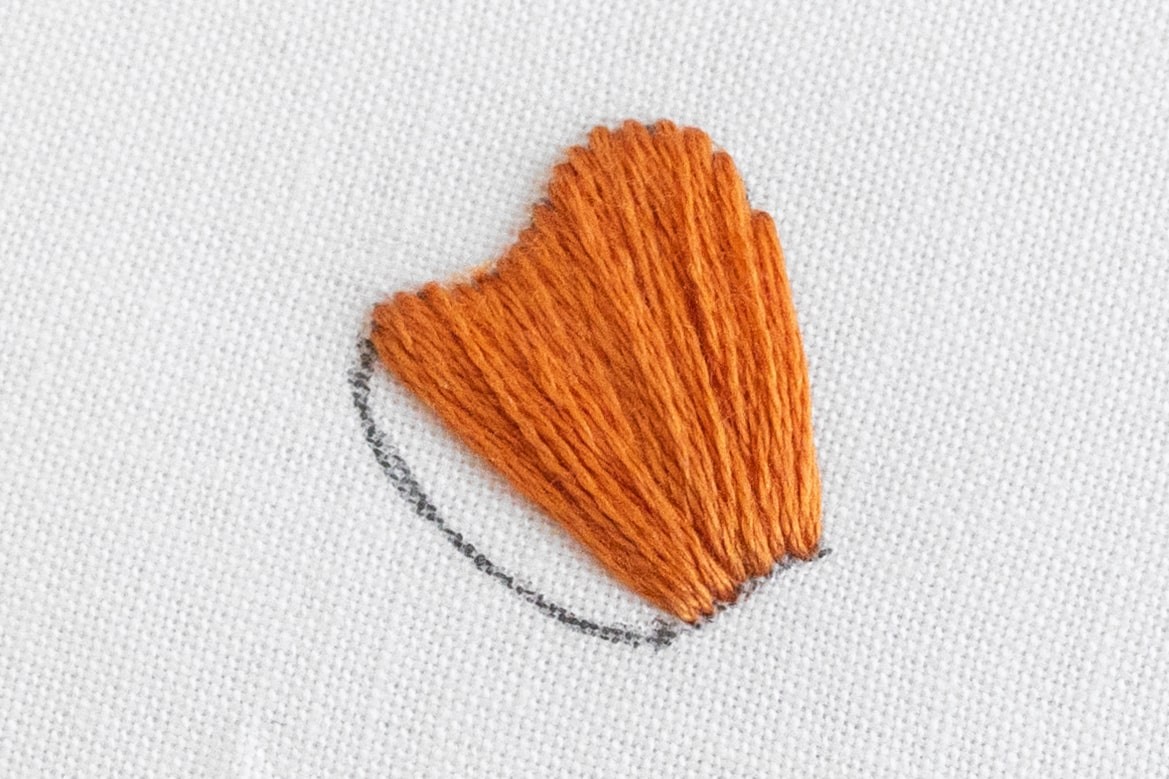
Step 6
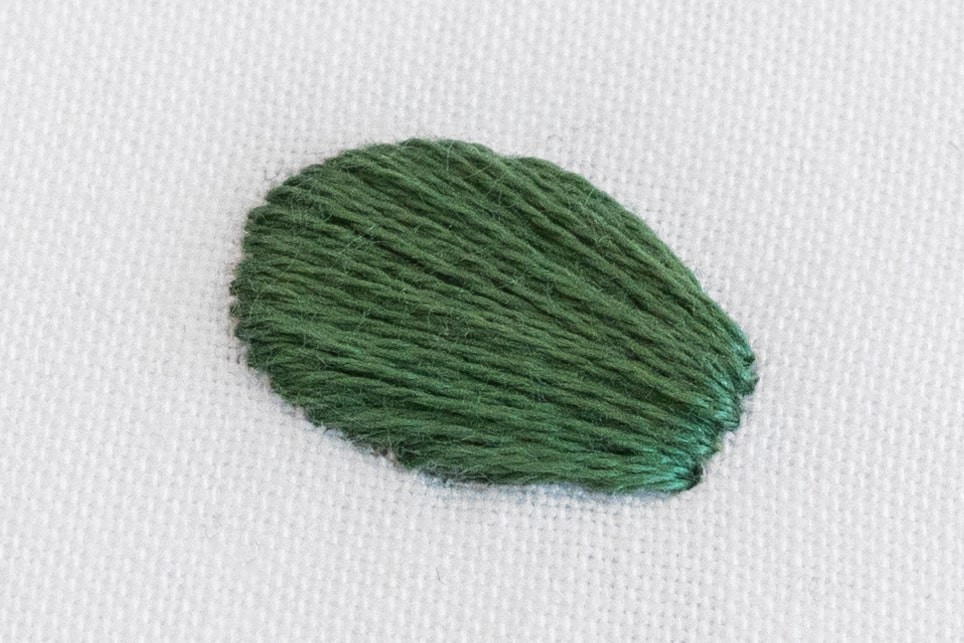
Then do a few more stitches to the right, making sure the final one goes right to the base of the petal. It’s totally ok if sometimes you poke your needle into the same hole more than once.
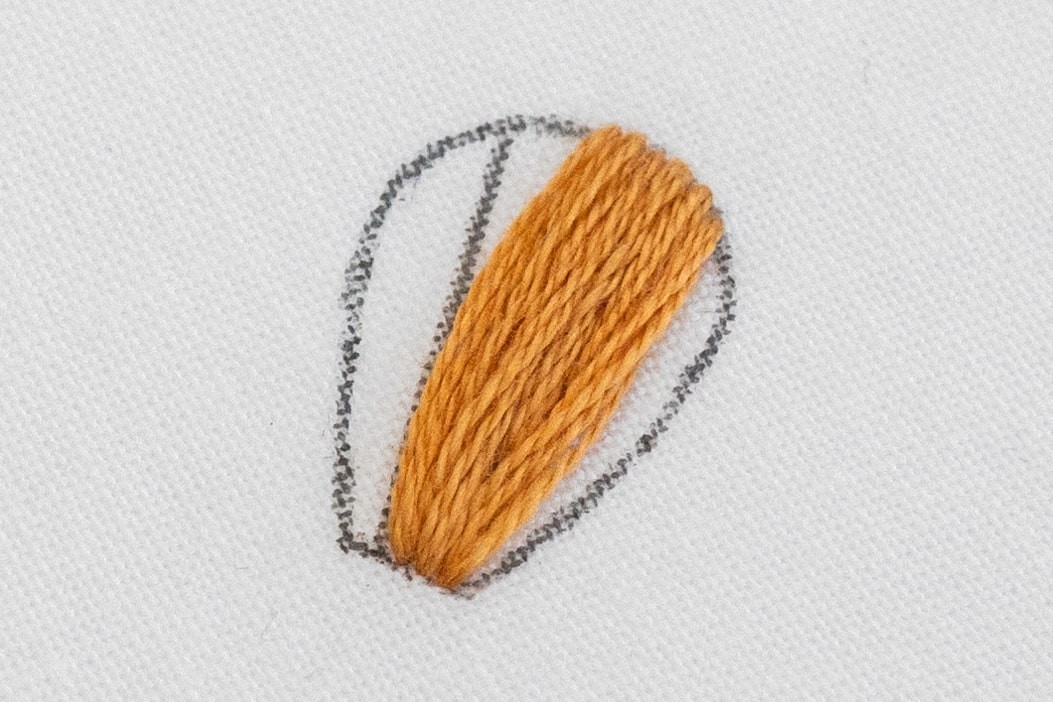
Can you see how this is a helpful trick to fill petals with lovely stitches which follow the tapered shape, but don’t get all congested at the bottom? There is no set rule to this method, just follow this general pattern - full-length stitches followed by one or two shorter ones, then a longer one again. You’ll find that the stitches flow nicely, and the staggered effect is hidden overall. It will take practice, and I don’t want you to worry if it feels challenging at first - but it’s definitely worth trying!
Step 7
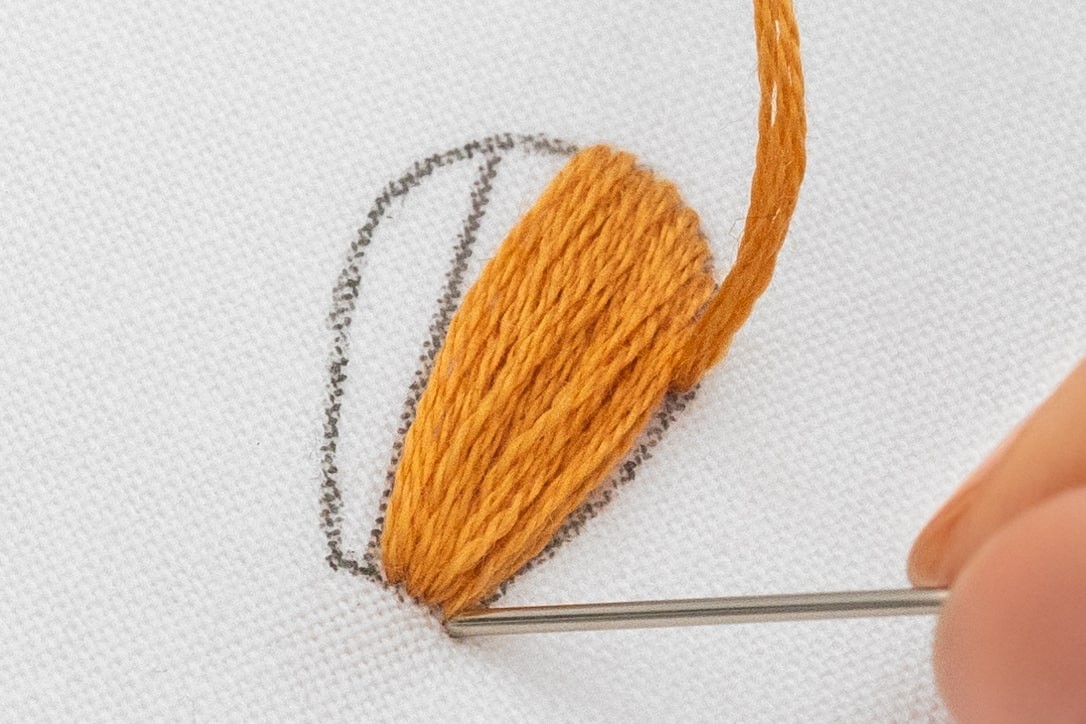
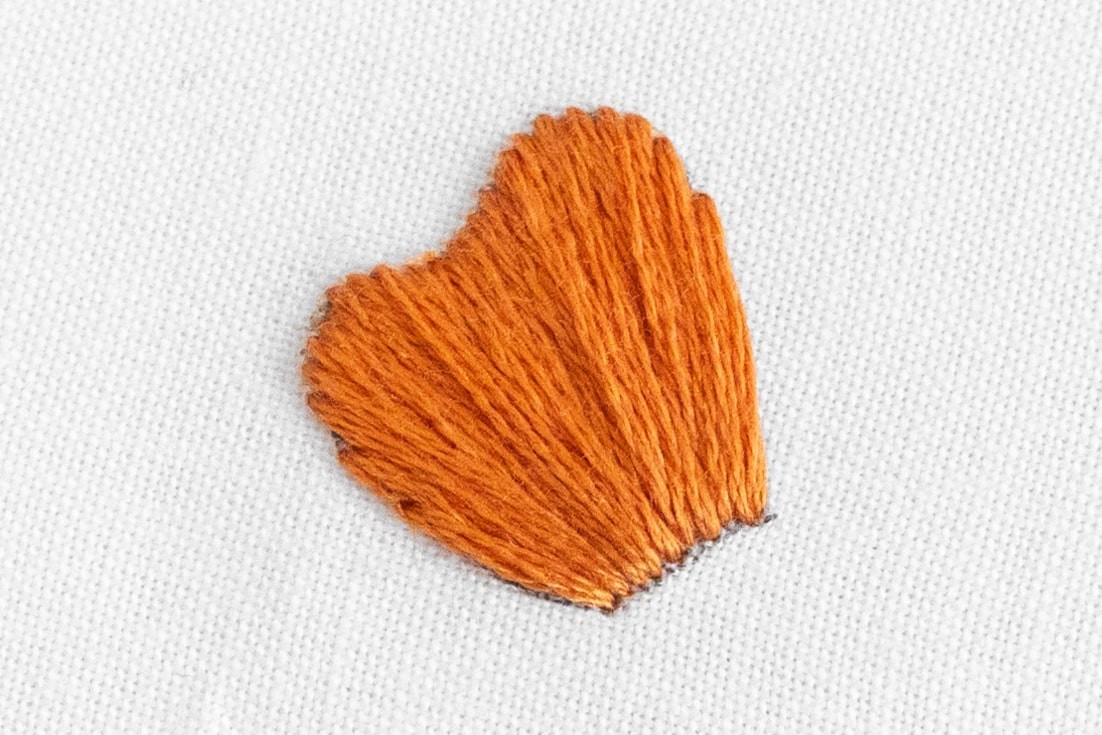
Now fill in the left side of the petal, working from the middle out. Keep following the staggered stitch length method.
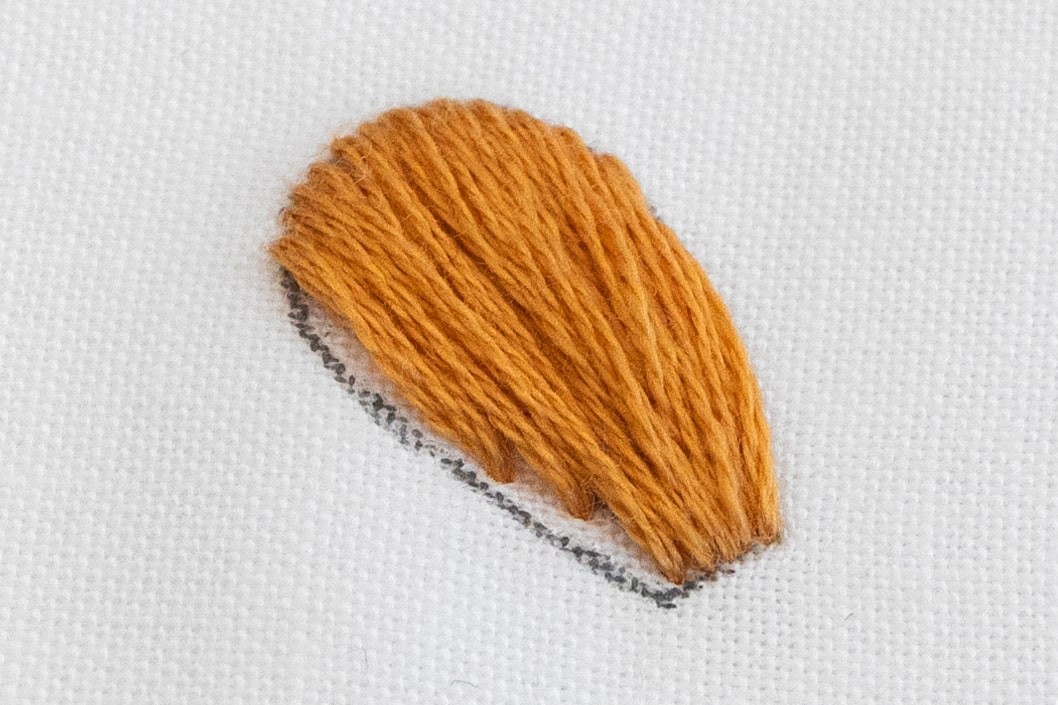
Tip about Double Ups: It’s totally fine if you end up going down into the same hole 2-3 times, as you angle your stitches in.
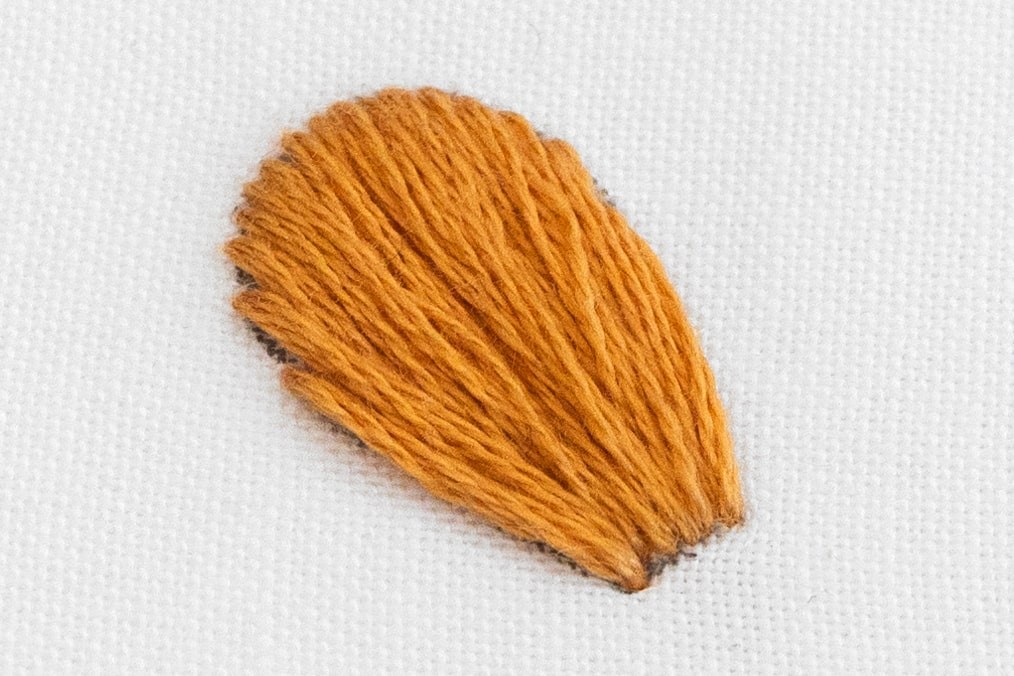
Step 8
When you've finished stitching, secure and tidy away your thread.
Tip for larger petals: You can section your petals into more parts, and use the staggered stitch length method, focusing on one section at a time.

General Satin Stitch Tips:
-
Sectioning: For larger shapes, it’s so helpful to split them into smaller sections using those handy directional lines. Before you fill the shape, stitch right over those lines. Then, you can focus on filling one small section at a time. This really helps to break the shape down into smaller, more manageable steps. And the directional lines help to keep your stitches on the correct overall angle.
-
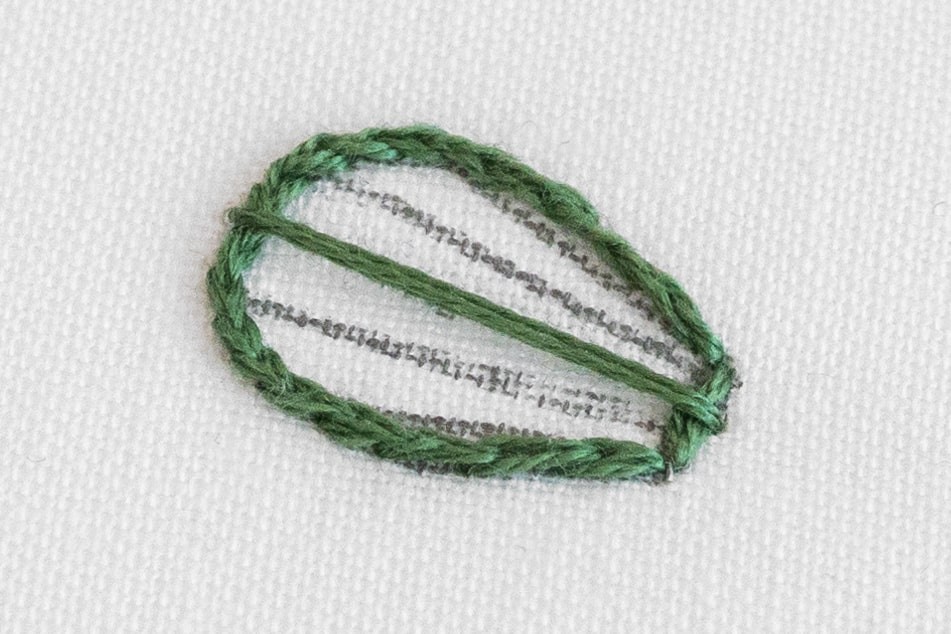
Optional Outlines: If you find it tricky to stitch a clean edge (especially when it’s a larger shape), you can use the same thread to pre-stitch your shape with an outline stitch (e.g. Back Stitch or Split Stitch). Then work your SatinStitches directly over this outline, effectively hiding it. The outline serves as a handy guide for placing your stitches along the edge of the shape. Plus, it seamlessly fills in those little gaps that tend to occur along the edge when your stitches aren't perfectly flush with each other (which happens to us all!). Working an outline stitch definitely adds on a bit of time to your overall project, but you may find it really helpful while you’re learning.

-
Stitch Lengths: It’s a good idea to keep your Satin Stitches about a maximum of 1 inch in length. This is because longer stitches might get a bit wobbly and even catch on your needle. But hey, lots of modern embroidery designs feature stitches longer than this, so go for it - but take care!
-
Direction: Traditionally, Satin Stitch is worked by always coming up on the same side of your shape, and down on the other. This helps to keep a nice even tension, but it does use more thread (because you’re essentially creating Satin Stitch on the underside of your fabric). So feel free to bring your needle up along side the previous stitch if you wish – mix it up! Just take care that you don’t group and down in the same hole which can unwind your previous stitch.
Video examples
In this video, I’ve shared my top tips for doing Satin Stitch on the car in this pattern - Zooming Home for Christmas.
Examples of Satin Stitch in my patterns
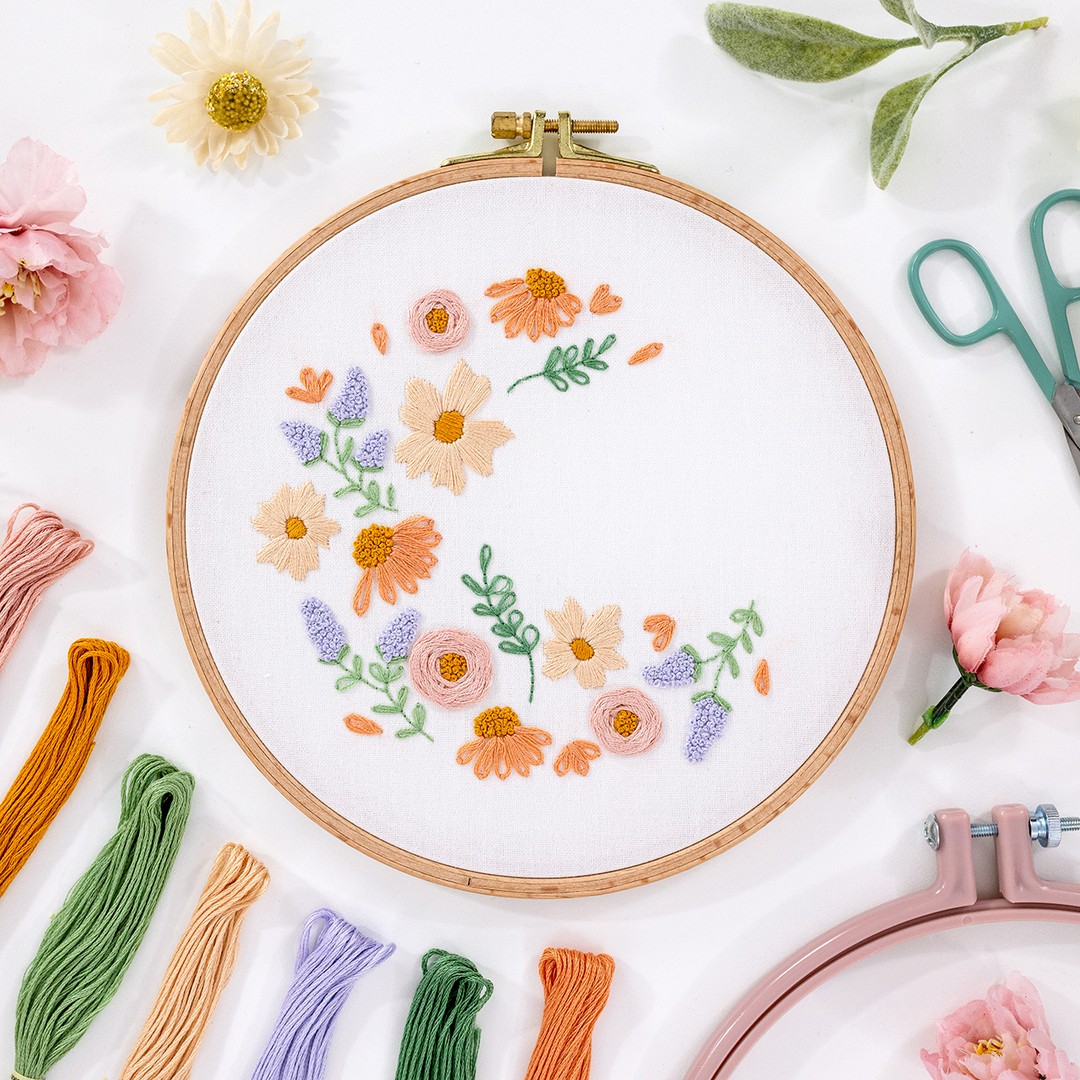
Let's look at some examples of how you can use this awesome foundation stitch in your work! First up, here's my Blooming Butterfly. See how the petals are worked with Satin Stitch?
In this case, the petal shape is tapered, so the angle of the stitches all come together towards the point.
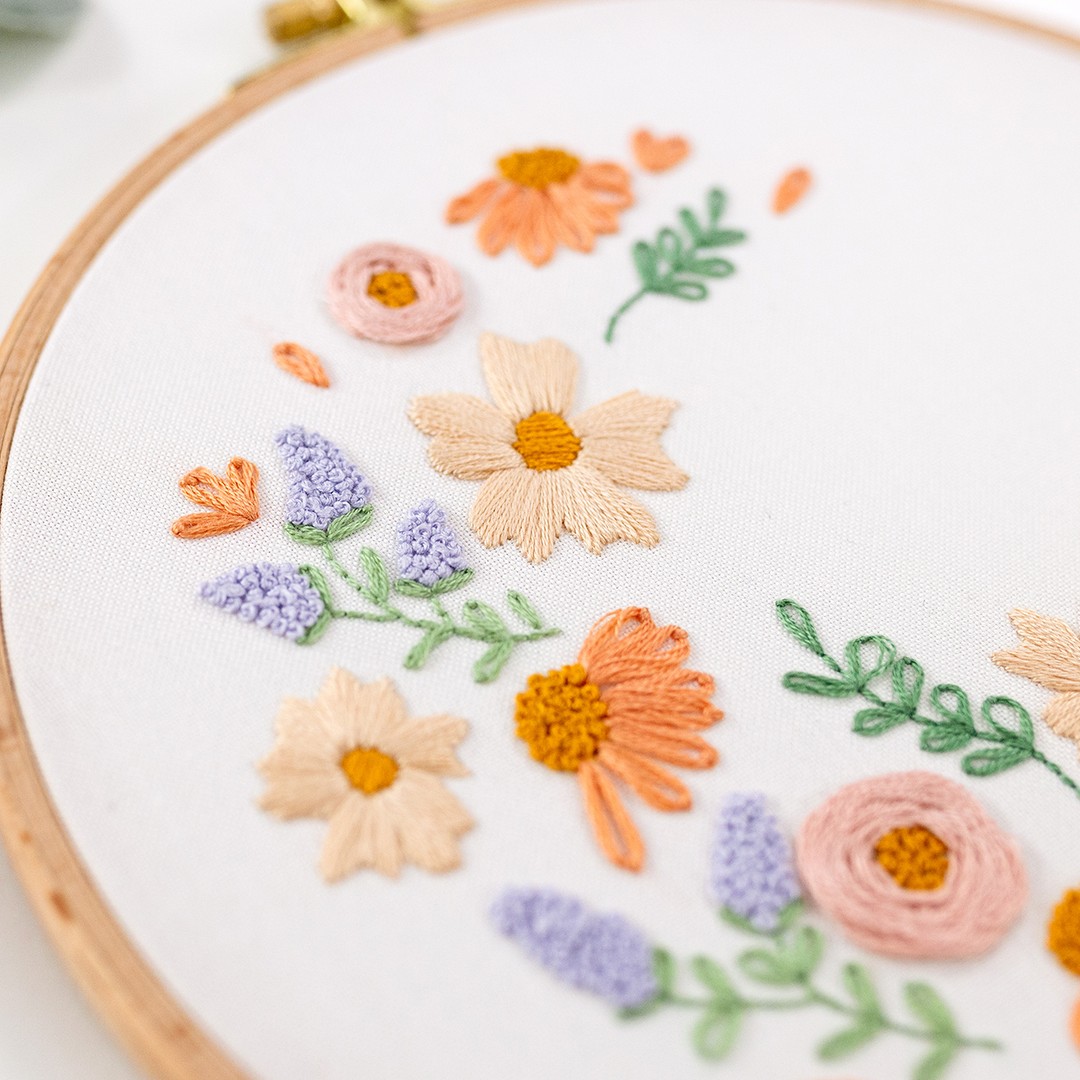
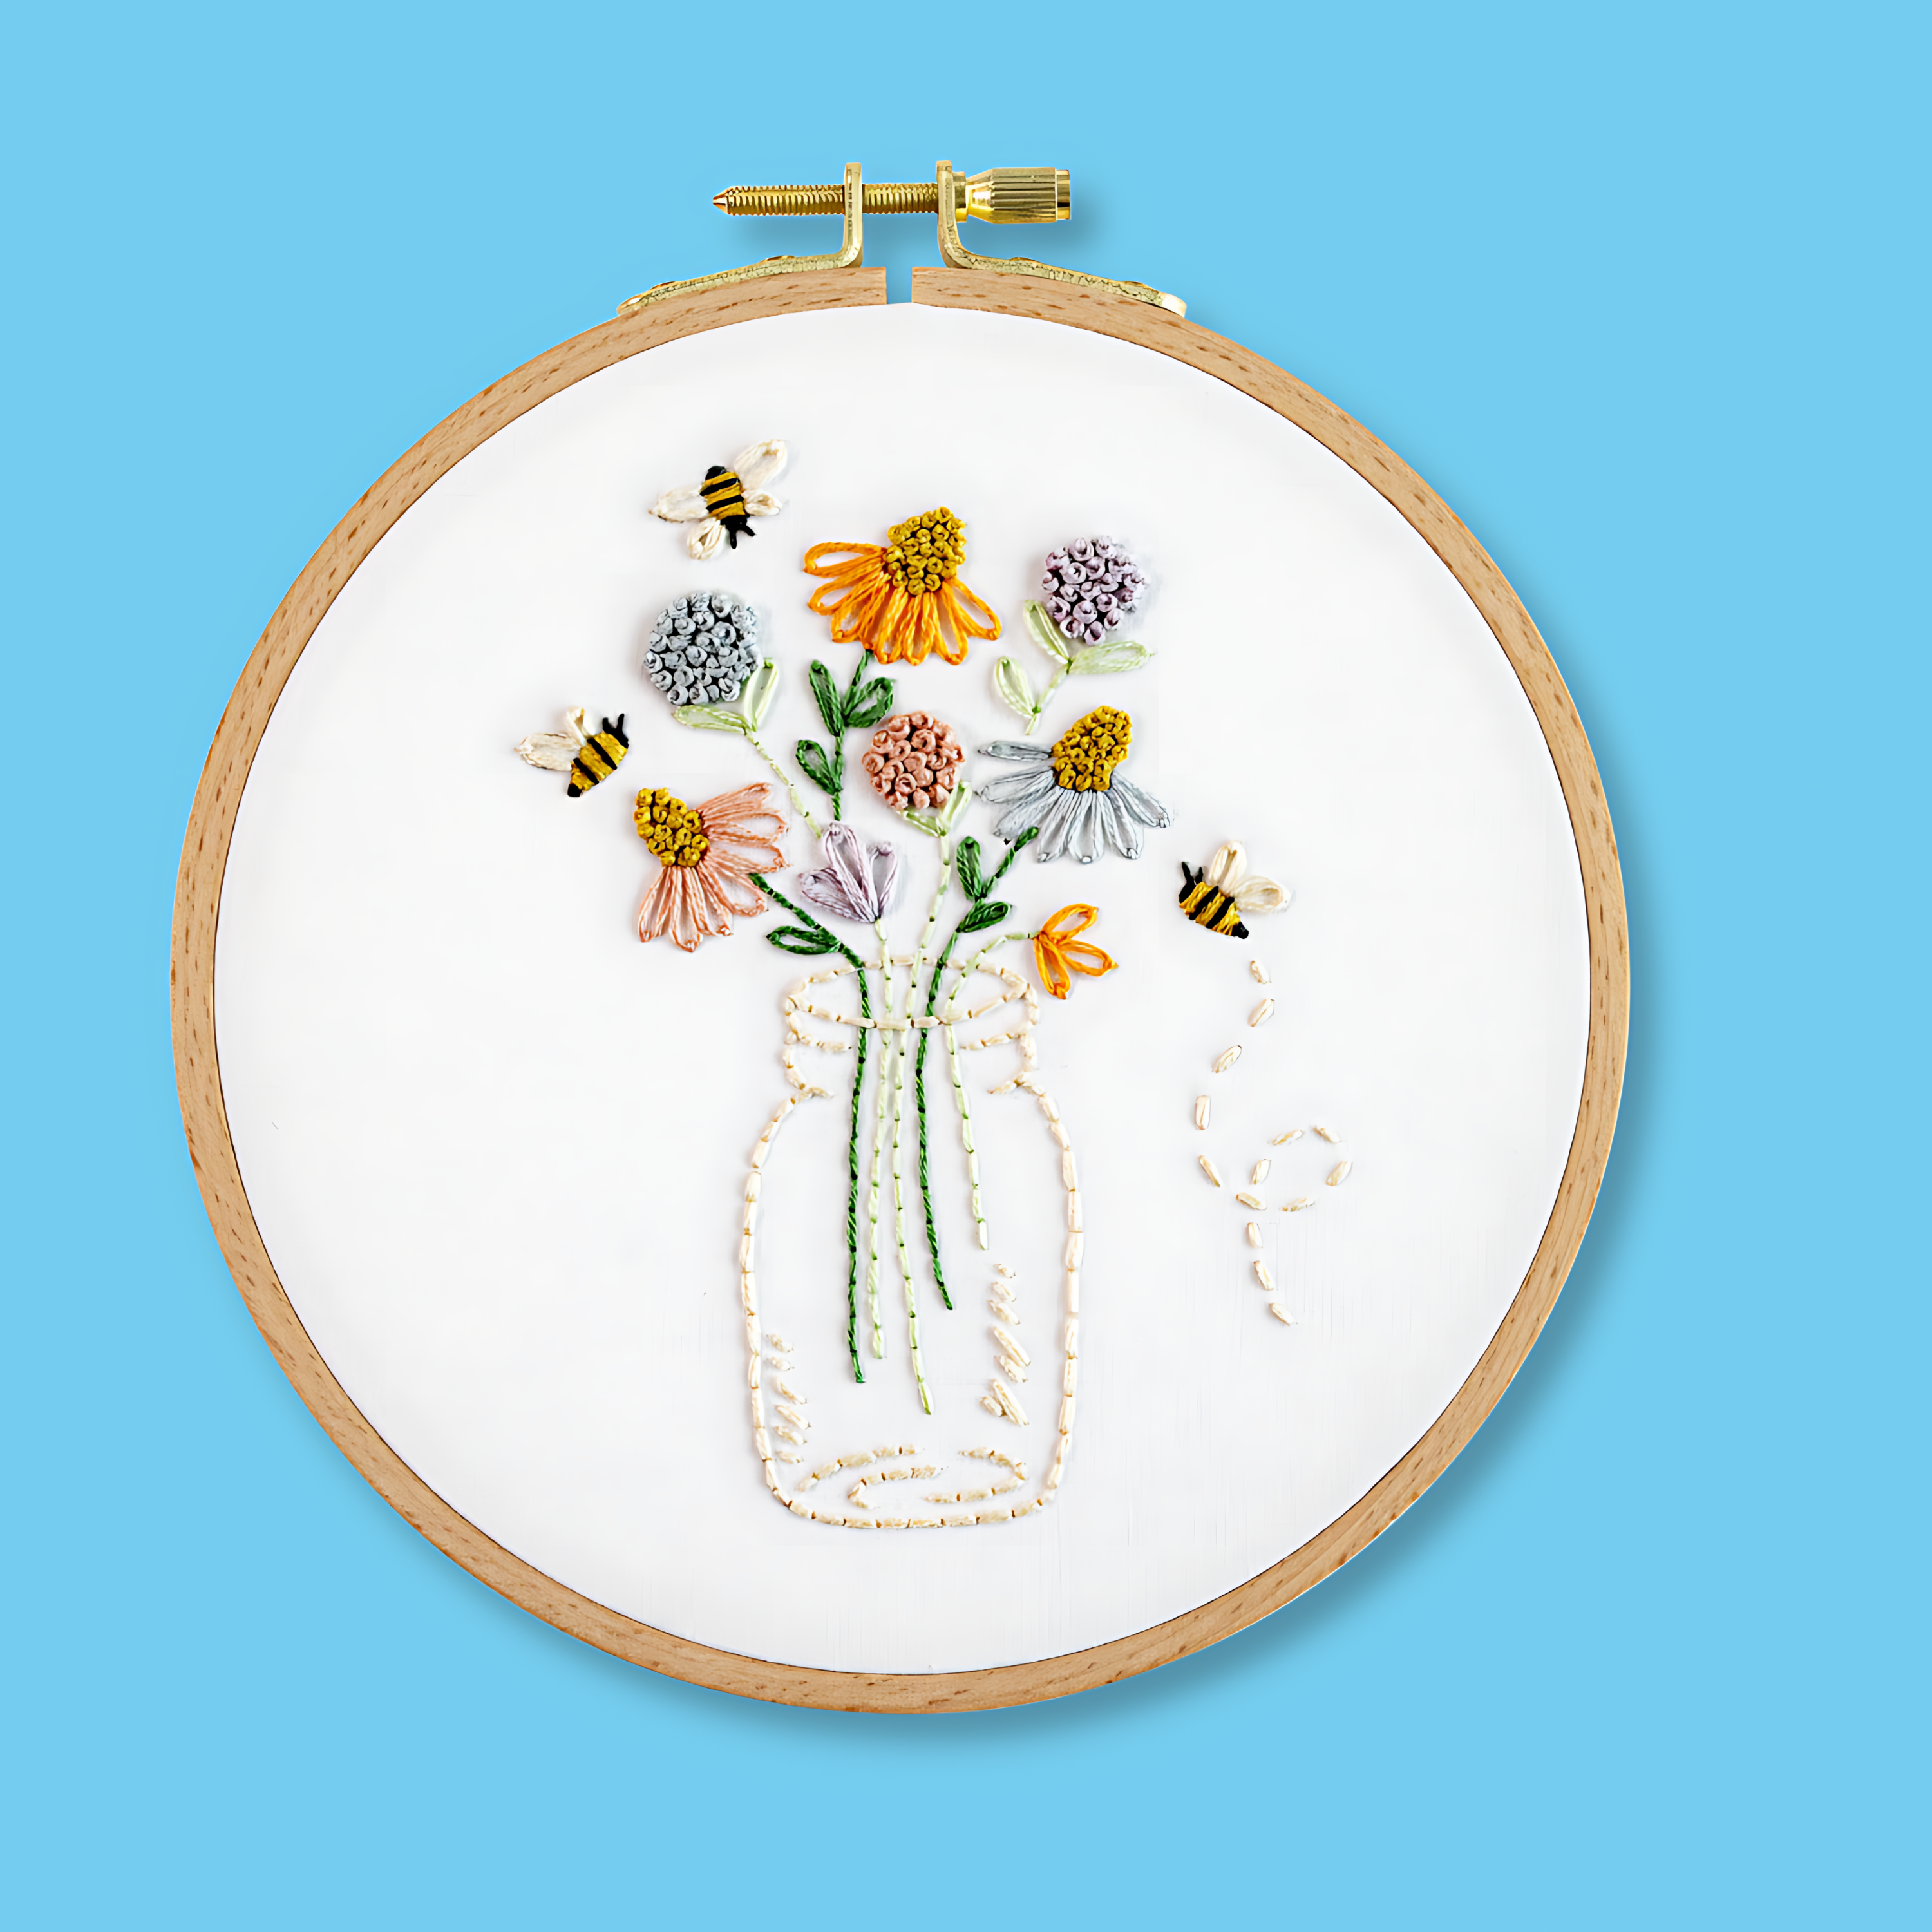
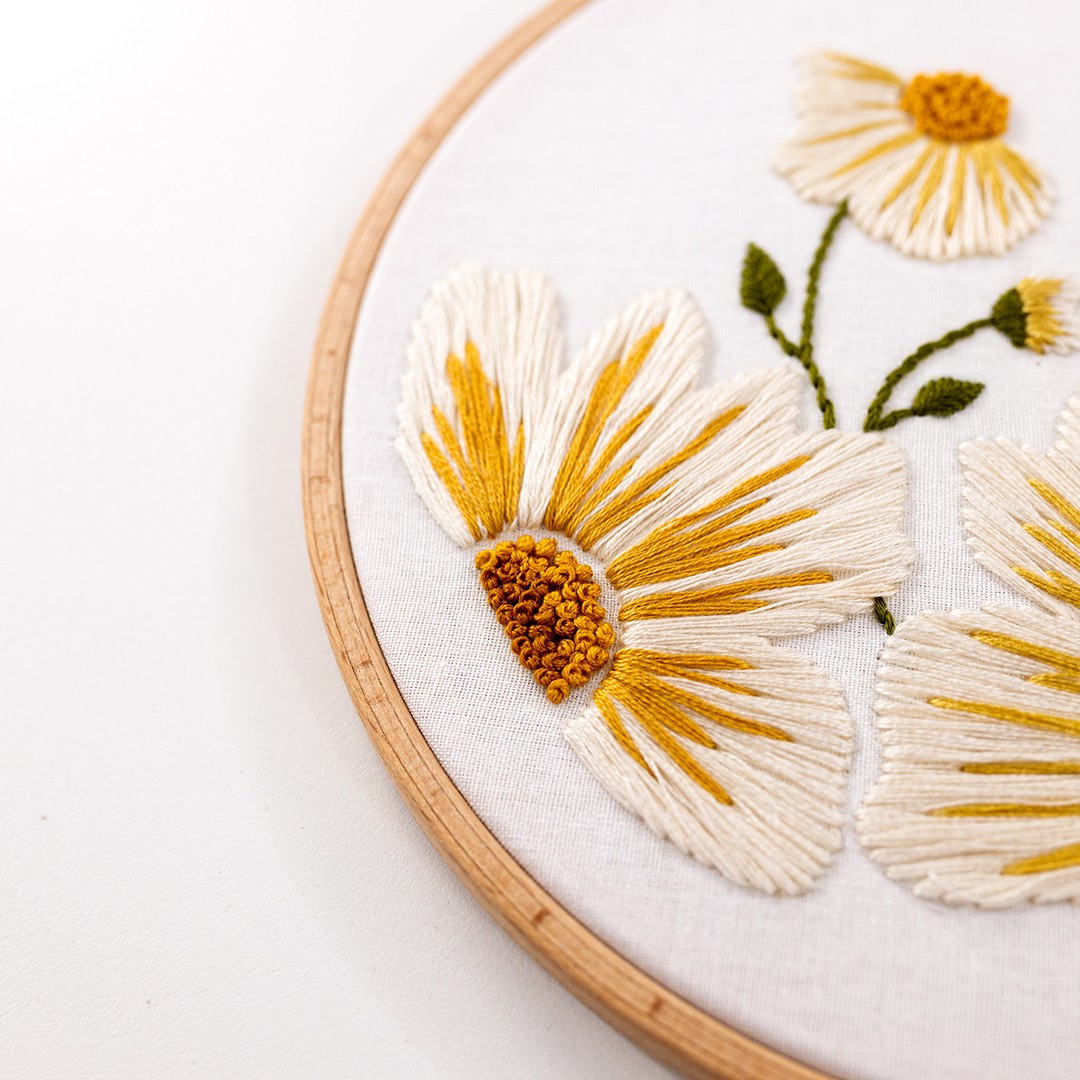
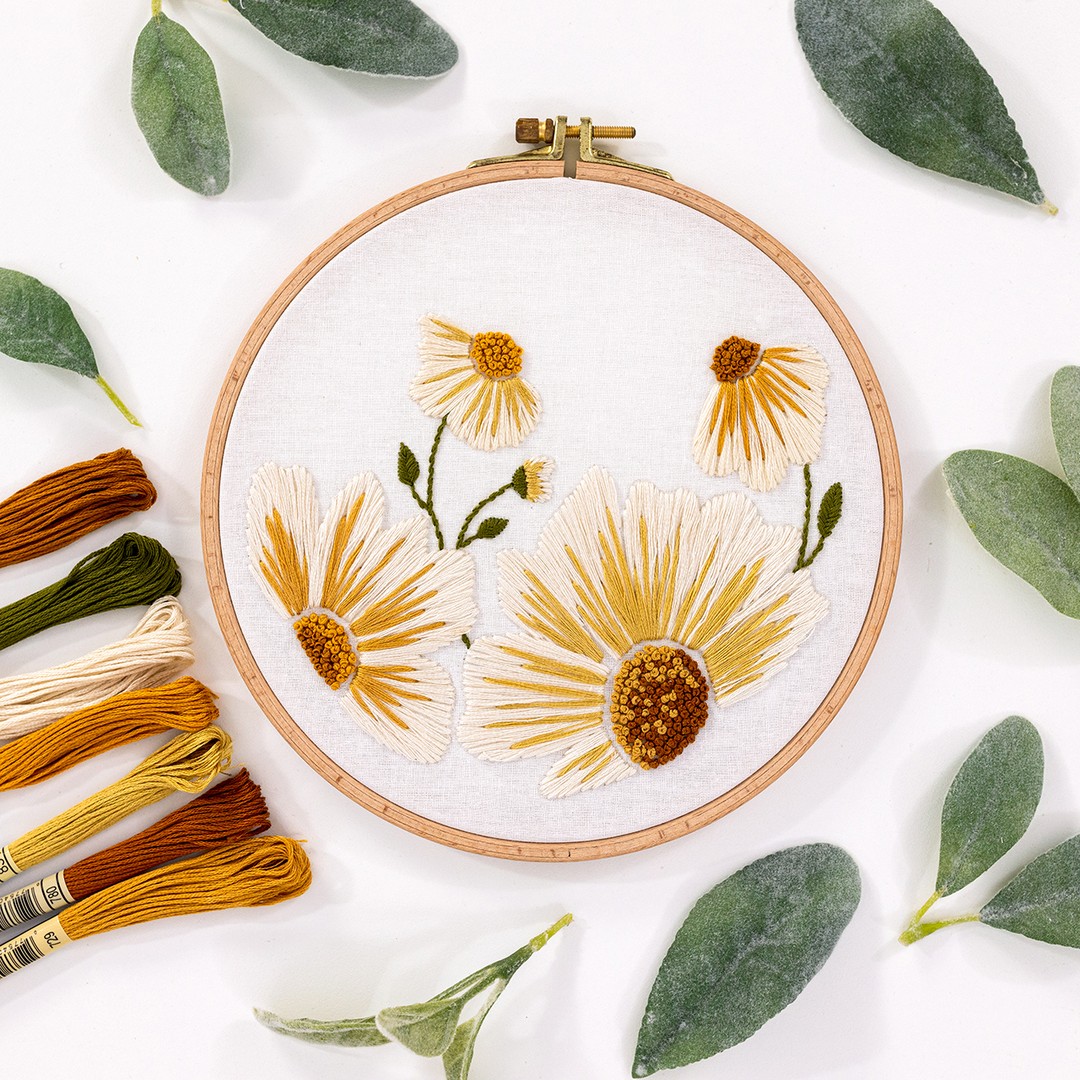
Another example is my Daisy Blooms pattern. The cream colour on the daisies is all Satin Stitch, so you can imagine this pattern is a fantastic way to practice this technique!
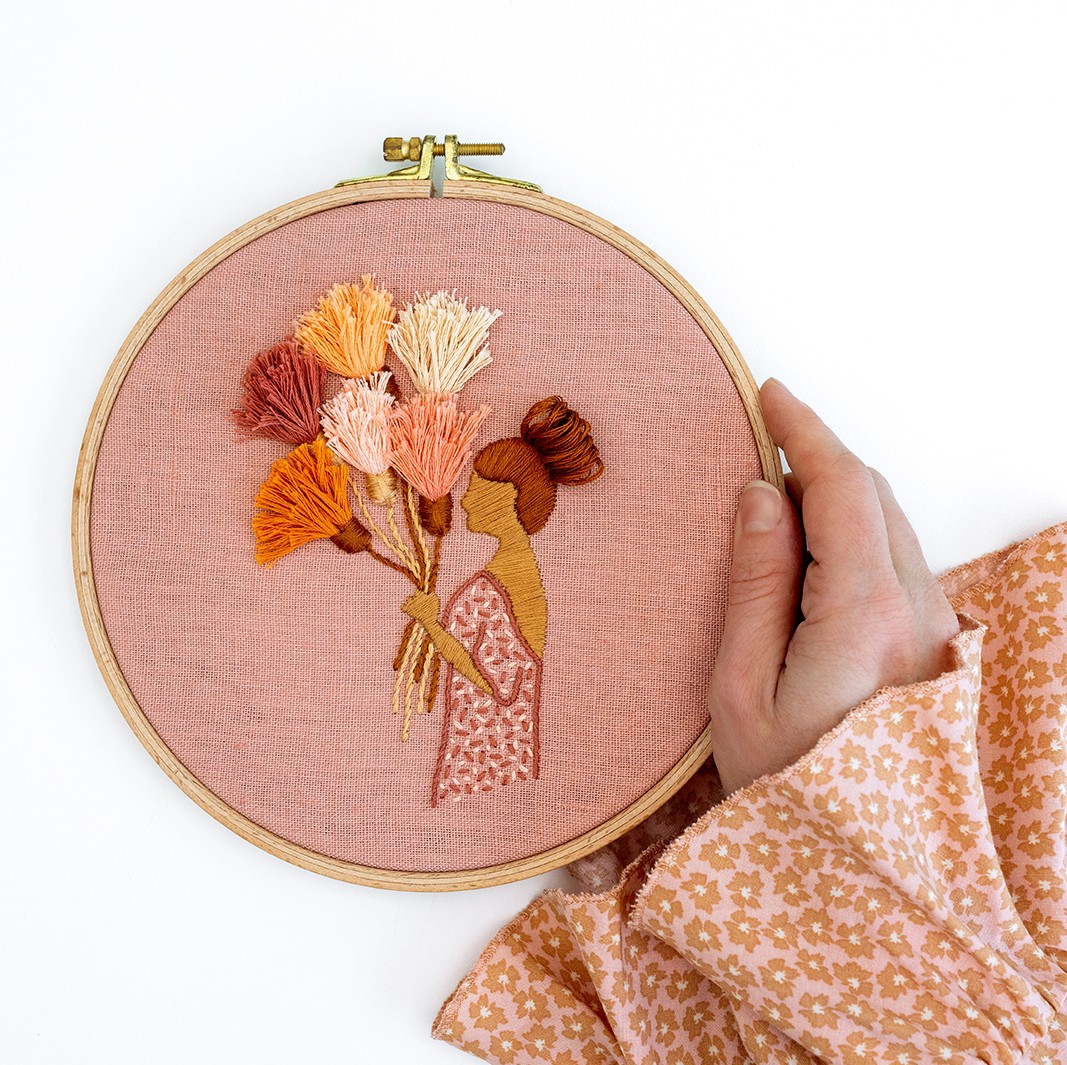
The last example I want to show you is my pattern The Florist. All of her face and part of her hair is worked in Satin Stitch - doesn't it look so lovely? For the profile of her face, I stitched an outline with Split Stitch, just like I mention as a tip above in the tutorial. It definitely helped to keep my stitching on track for the shape of her face.
Conclusion
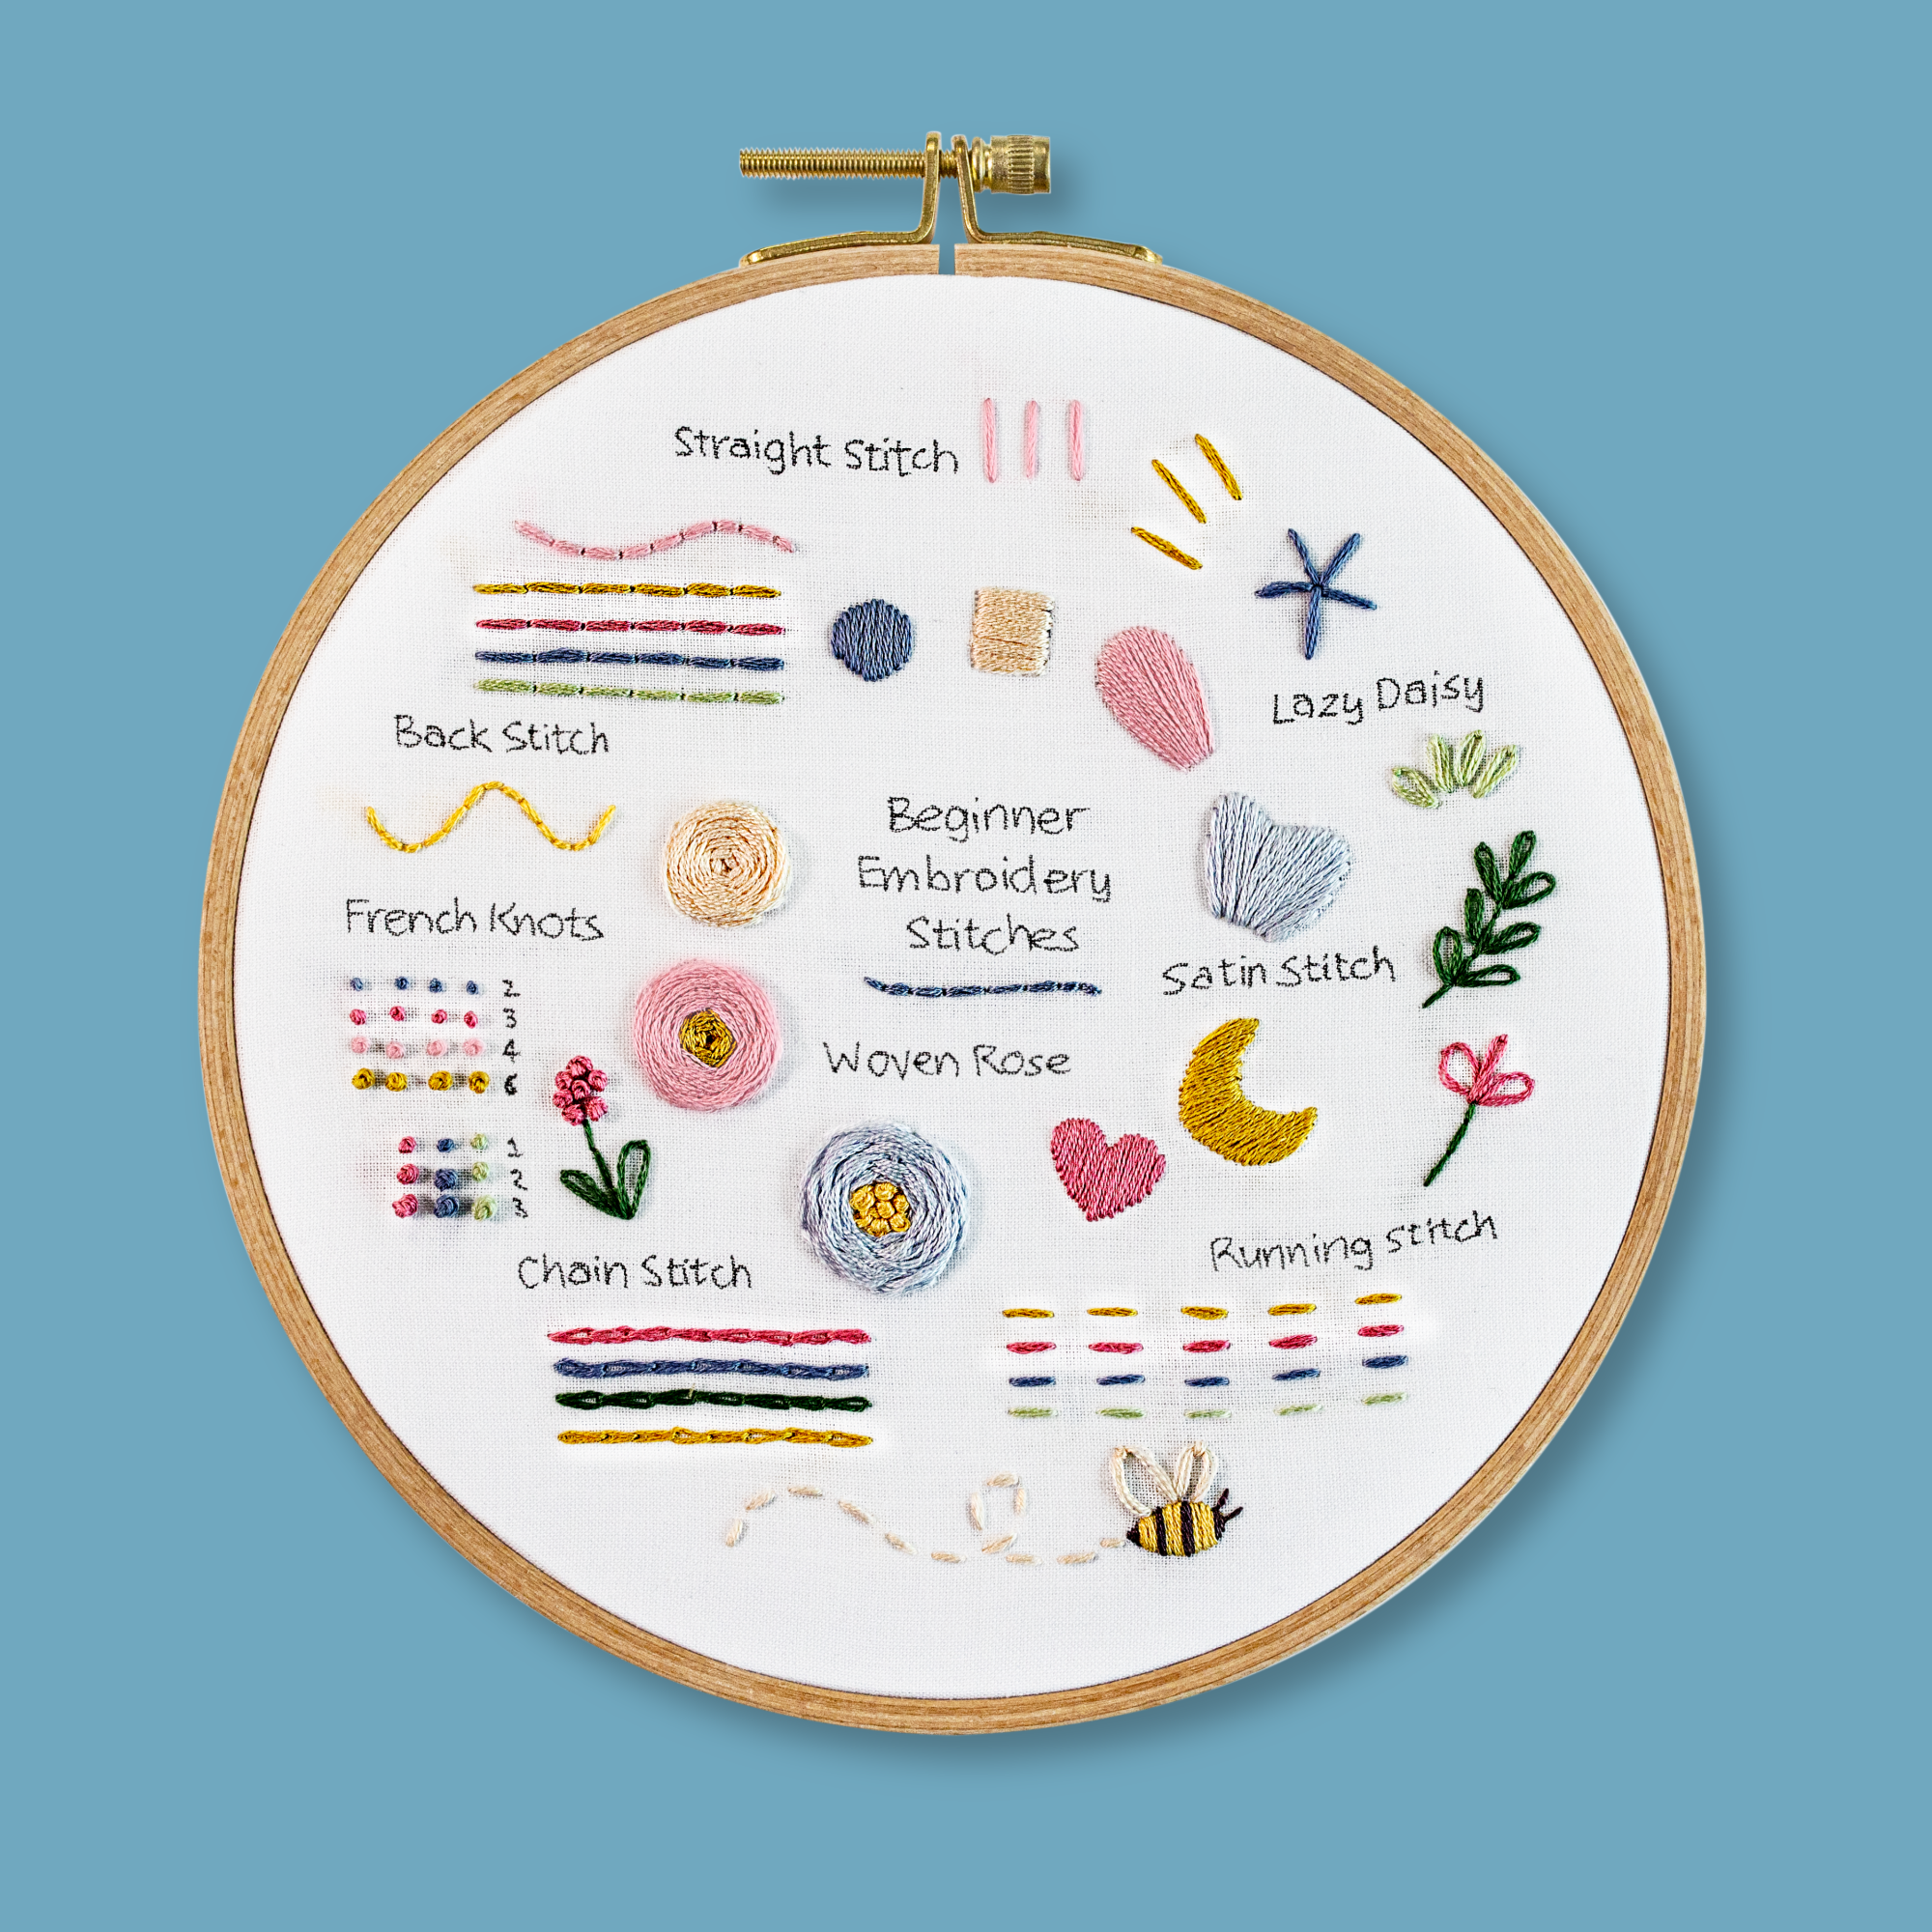
You’ve now learnt a beginner’s set of embroidery techniques! Well done, that was a lot of learning, and you’re doing really well! Don’t feel like you need to be an expert already – it will take practice for you to build confidence with each technique.
Which brings me to your next step – practicing what you’ve learnt on your beginner patterns! I’m sure you’ll be absolutely chuffed at what you can make.
Let’s do this!
What's next?
Our beginner embroidery kits are a favourite among new stitchers for their simple, step-by-step instructions and beautiful designs that make learning easy and fun. Whether you’ve been wanting to learn embroidery or are just searching for your next creative hobby. These kits are the perfect introduction to embroidery.
Why people love our beginner kits:
-
Everything you need is included: fabric, thread, hoop, and more!
-
Clear instructions to guide you every step of the way.
-
Gorgeous designs you’ll be proud to display.
Our most popular beginner kits