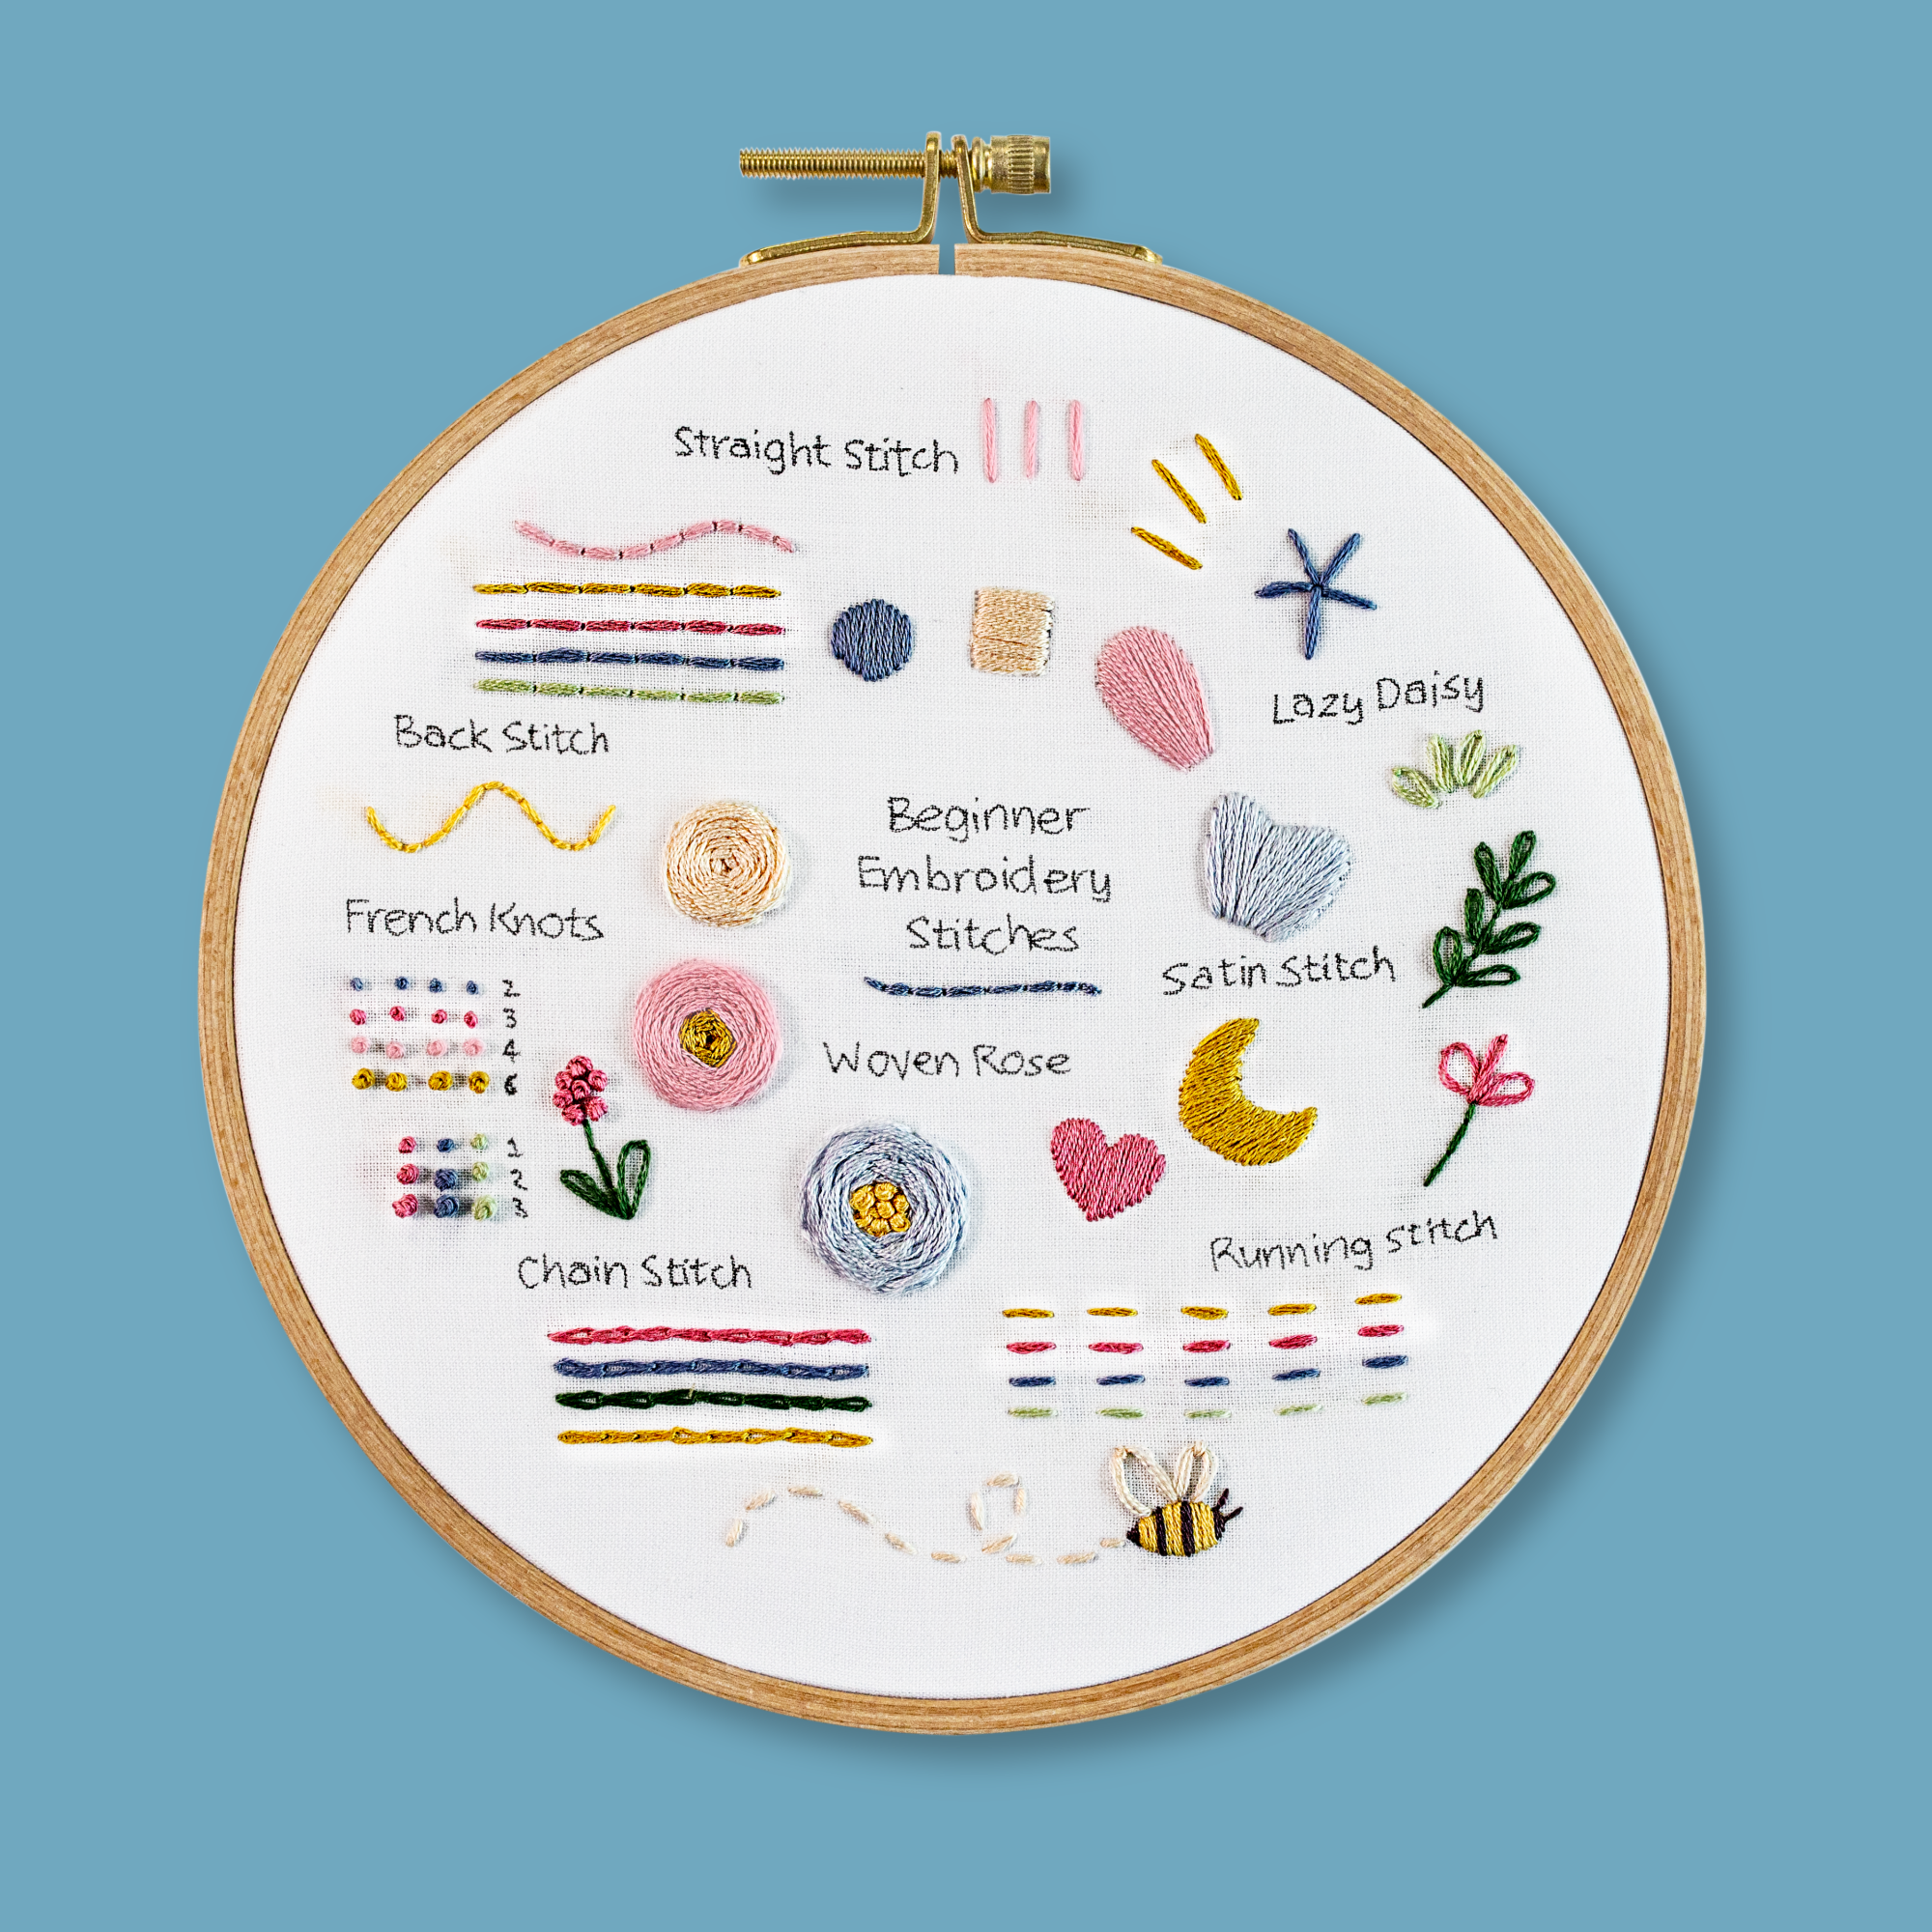


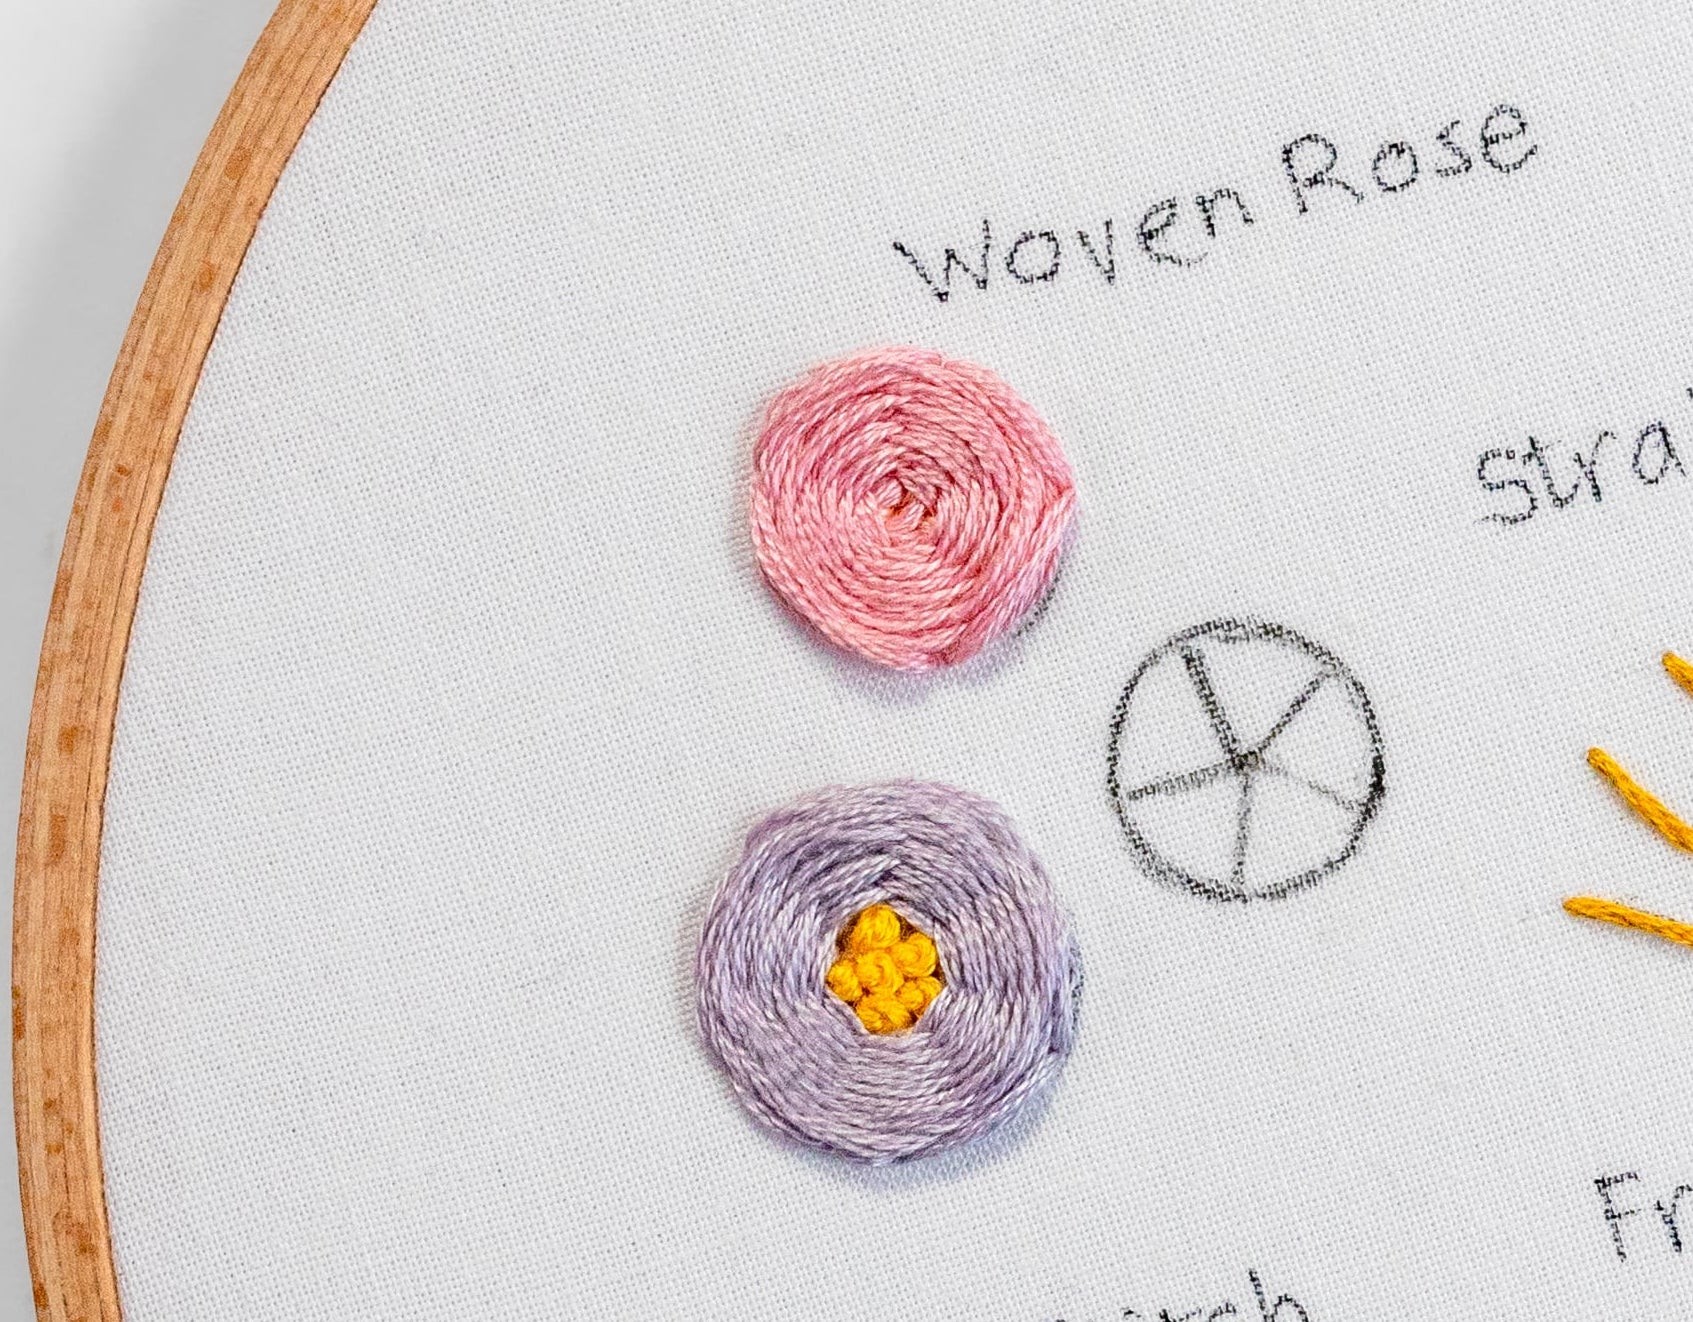
Woven Rose - Learn how to do this Modern Embroidery Technique
Introduction
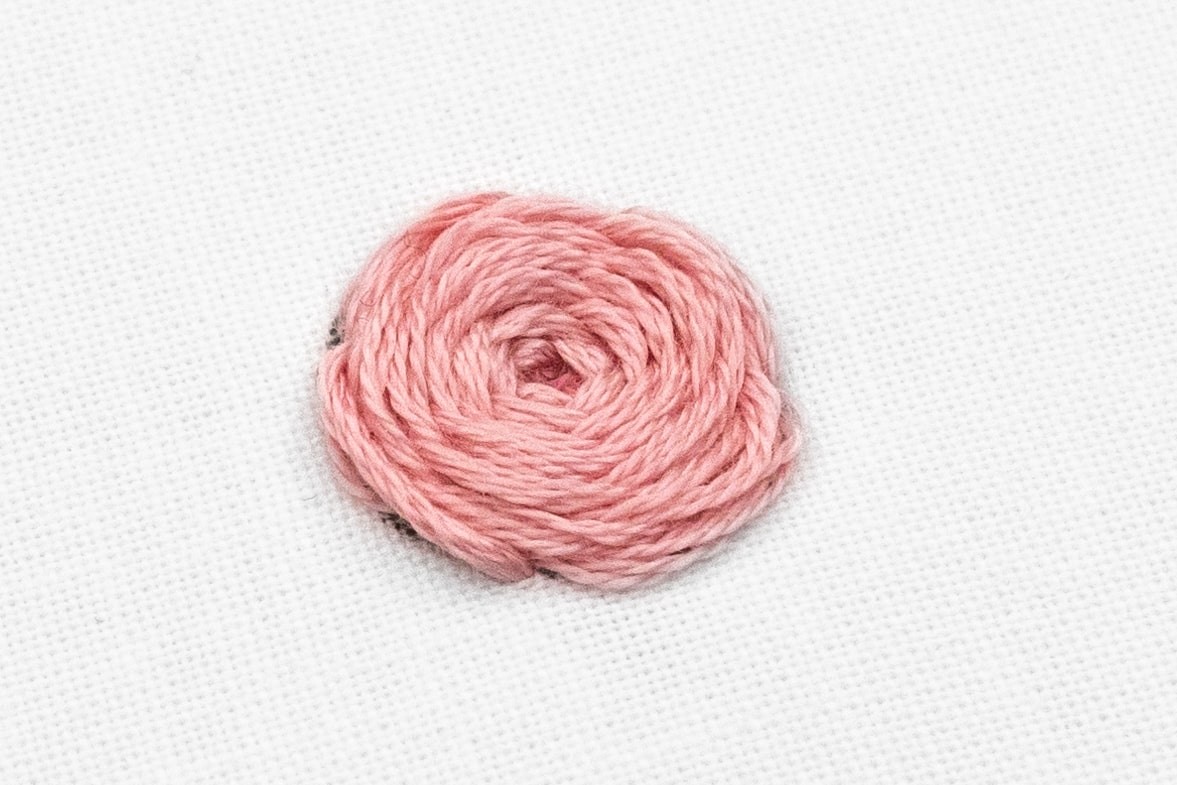
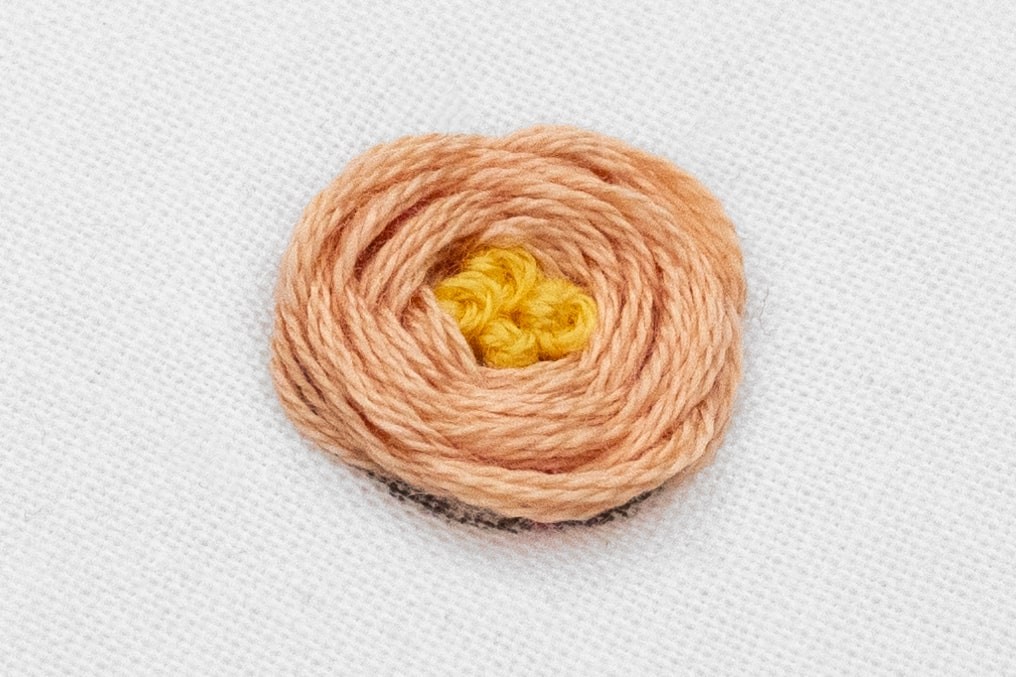
I absolutely love this decorative embroidery technique because it adds such wow factor to your work! The woven rose technique (also known as a woven wheel) involves weaving threads in a circular pattern to create a lovely, textured rose-like design in embroidery.
Let’s try it out:
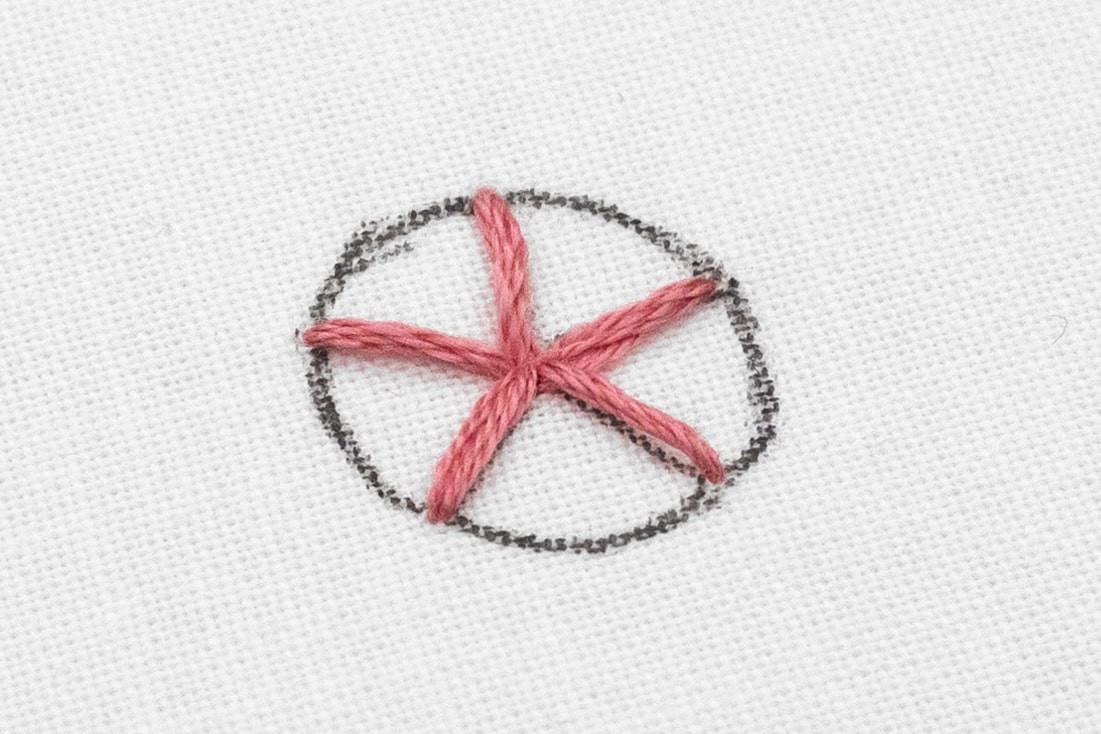
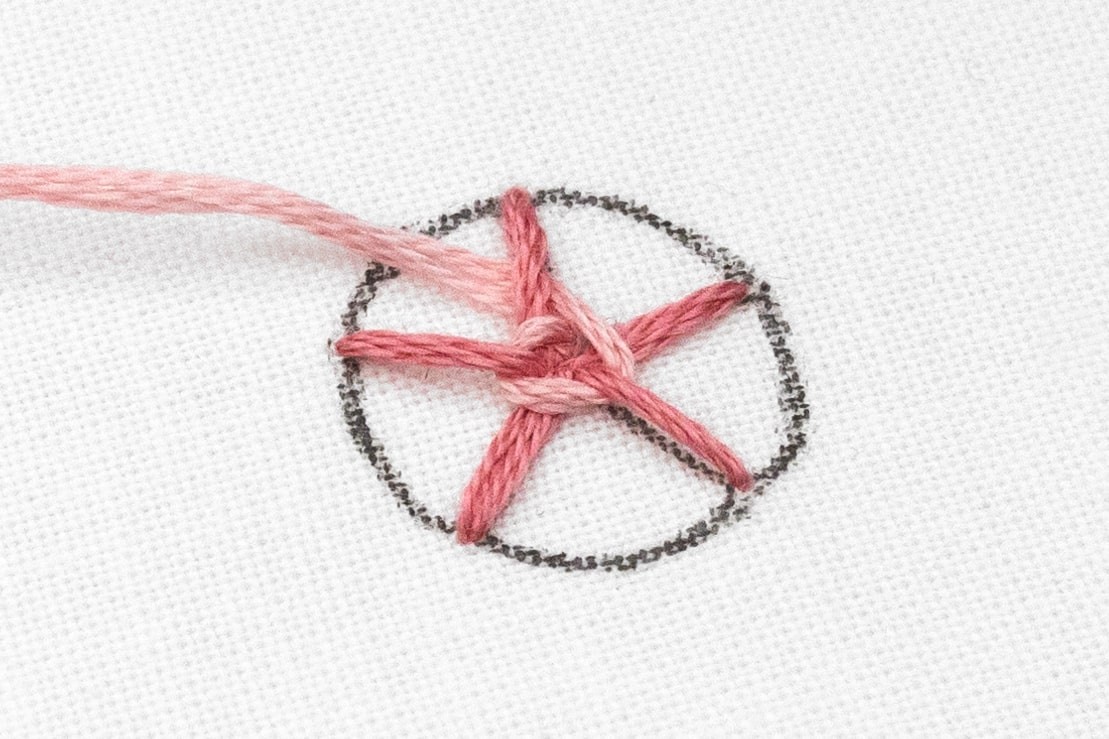
Phase 1: Create the Spokes
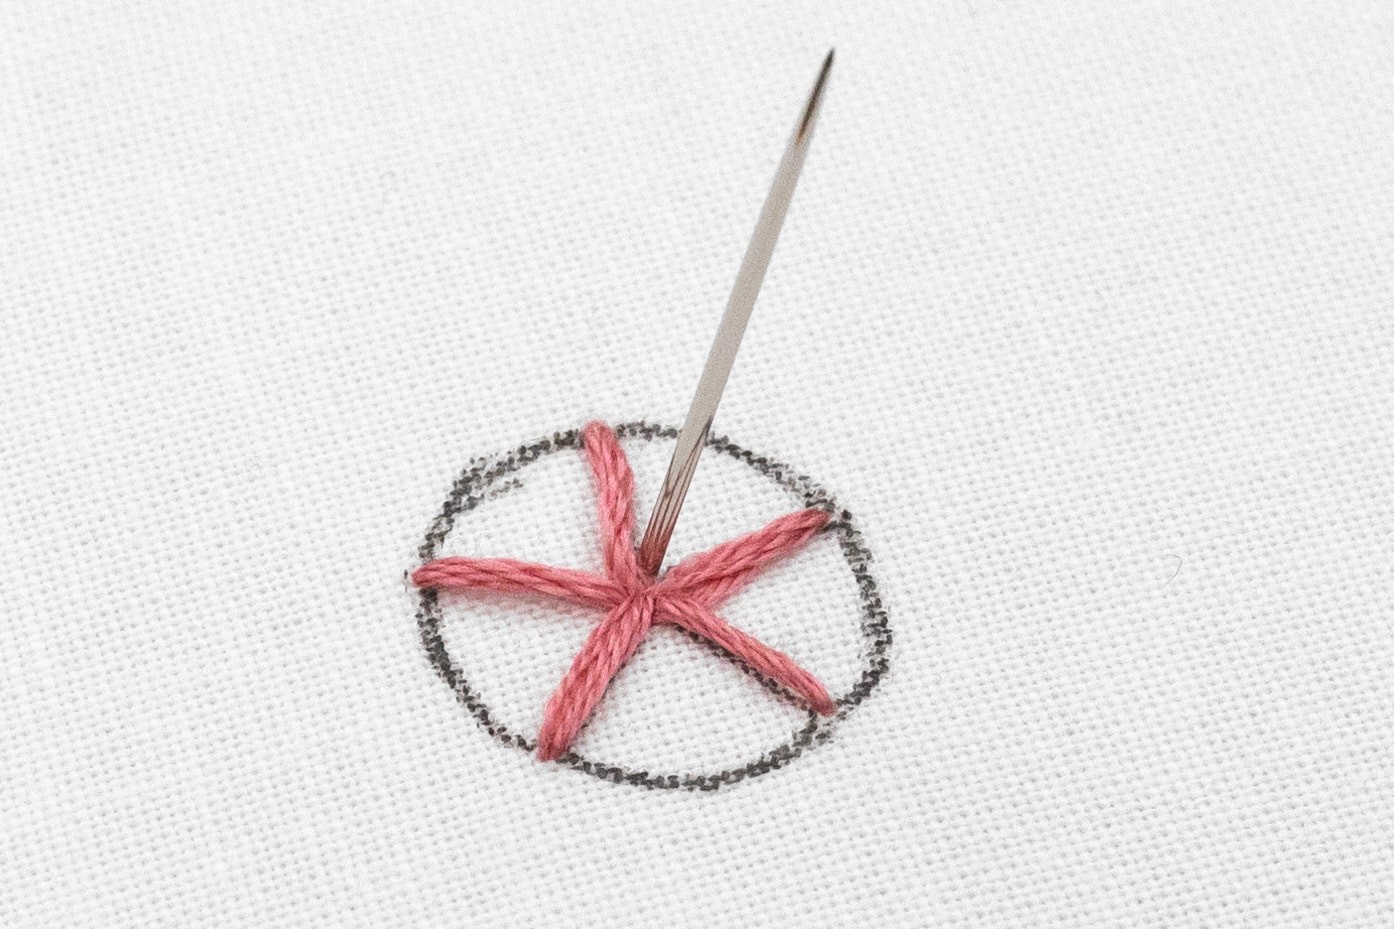
1. Start by bringing your needle up from the back of the fabric to the front, on the outer point of one of the rose’s spoke. Gently pull the working thread through to the front so that your knot secures the thread at the back.
2. Work a Straight Stitch by poking your needle down into the centre, and draw all the thread to the back.
3. Repeat this for each of the spokes.
4. It’s great if the spokes are nice and sturdy, so I recommend you secure and tidy away your thread before moving to the next phase of the rose.
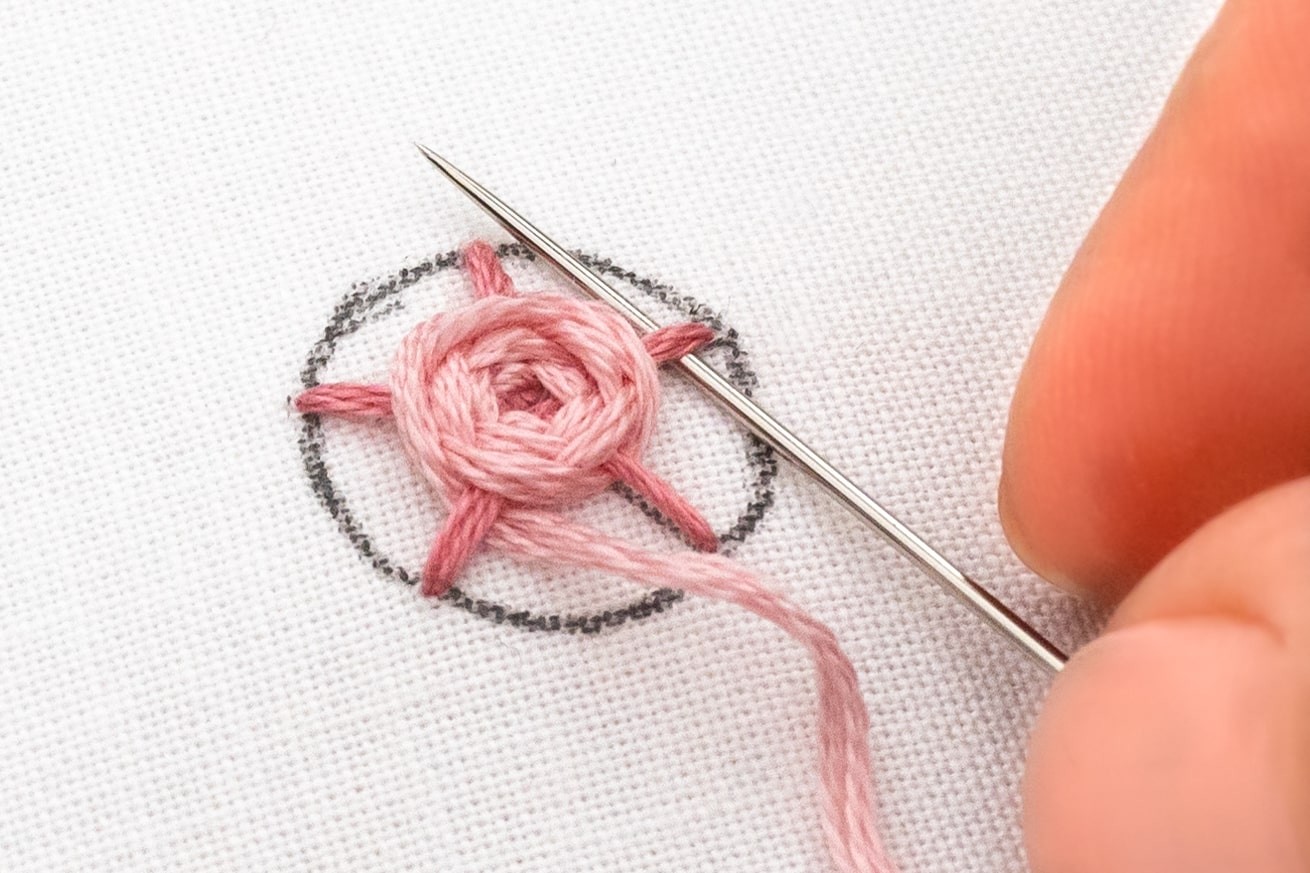
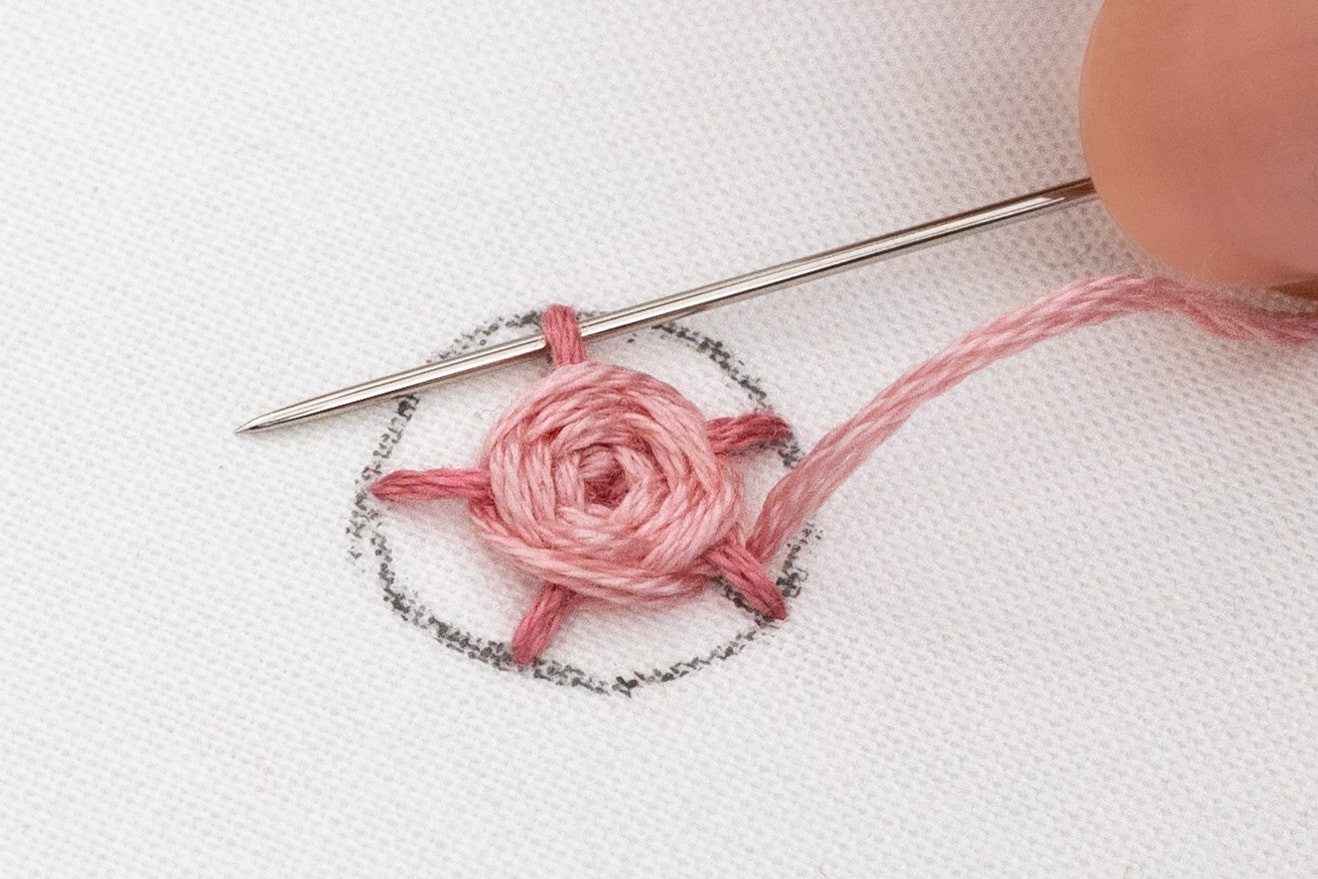
Phase 2: Weaving the Rose
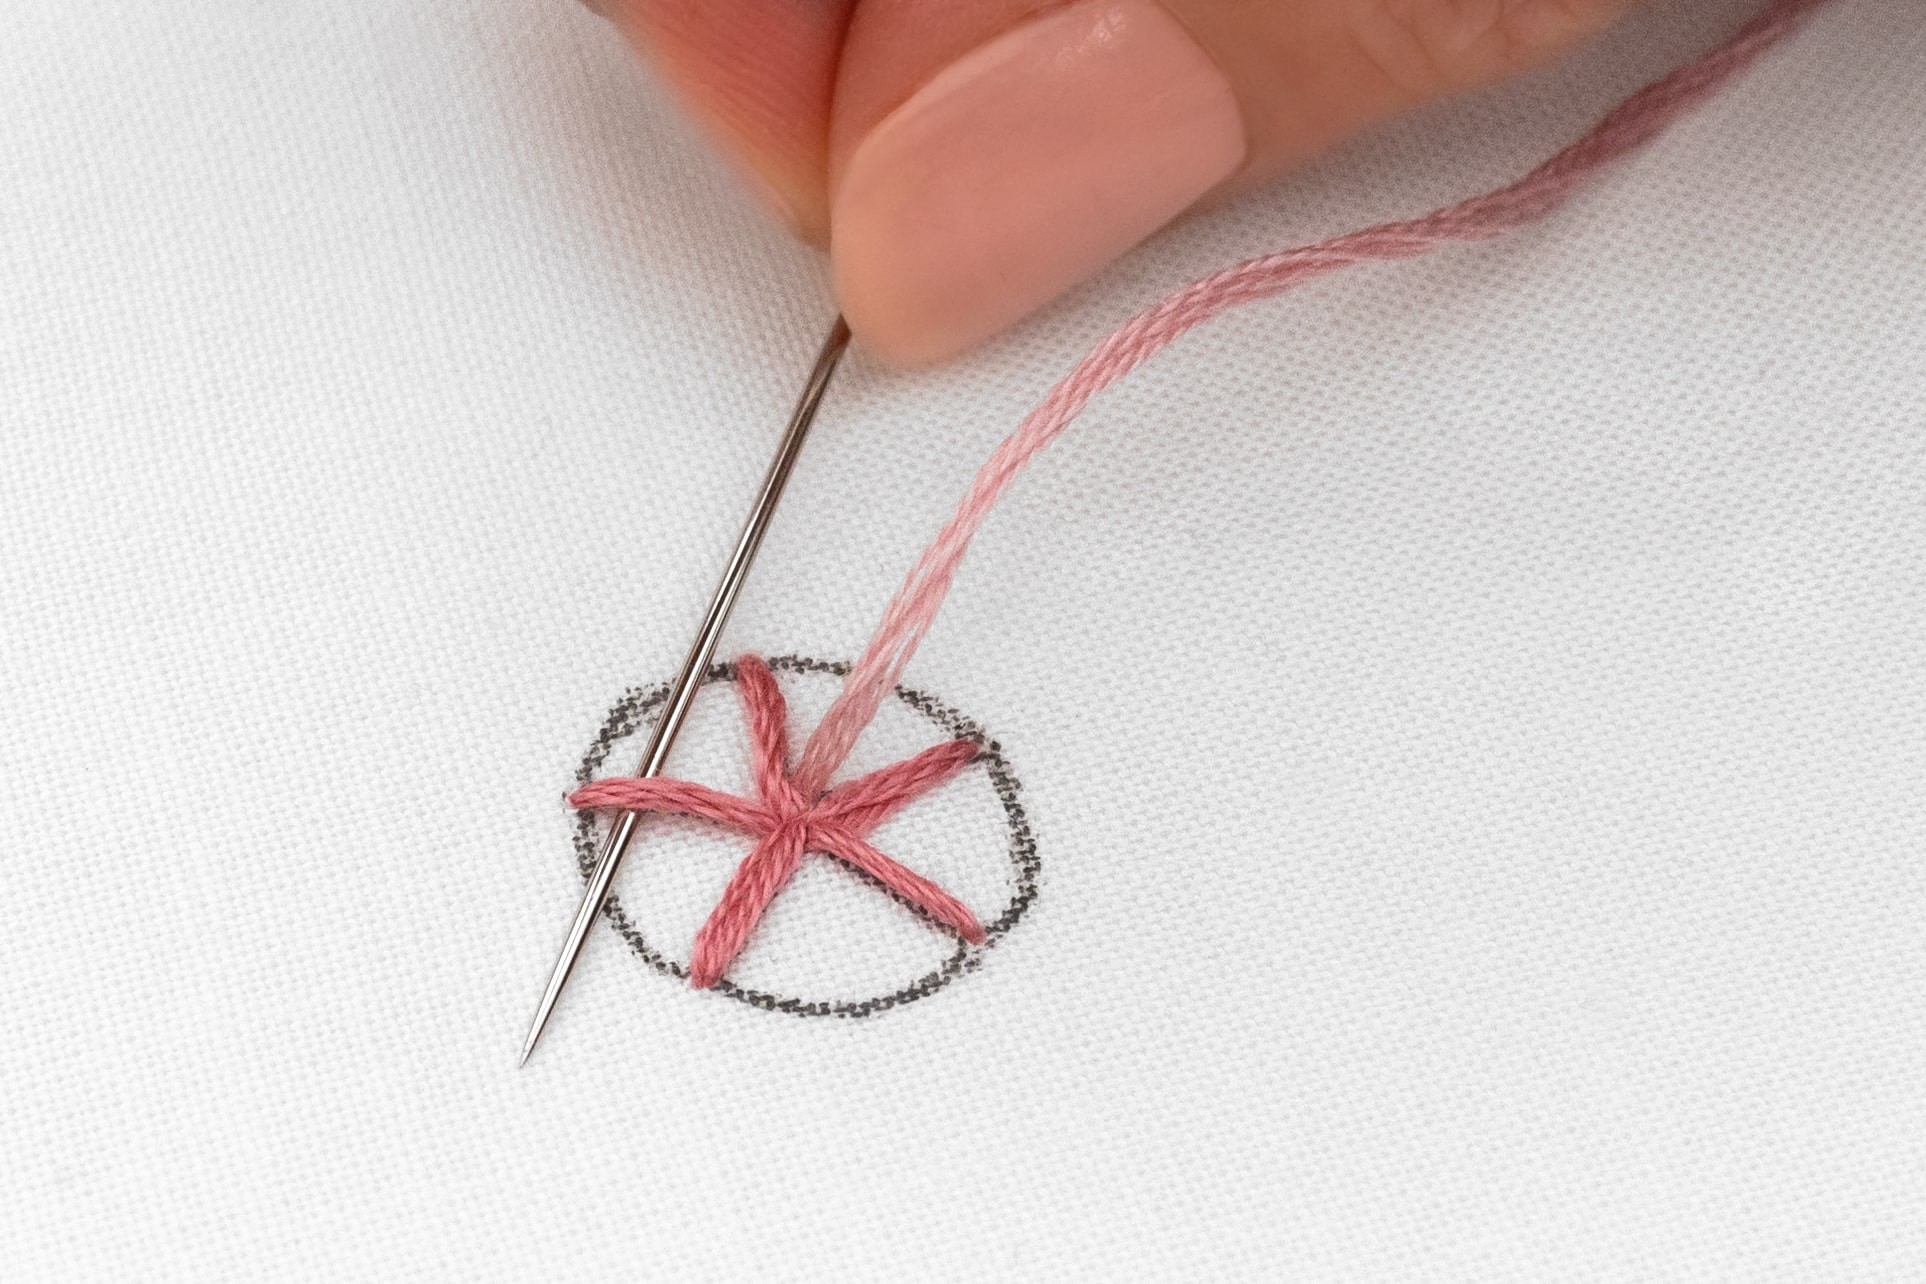
5. Using a new piece of thread, bring your needle up from the back to the front of the fabric, positioning it very near the centre right between two spokes. Gently pull the working thread through to the front so that your knot secures the thread at the back.
6. Now the fun part- let’s start weaving! Choose a direction, carry your needle over the closest spoke and then ‘weave’ it under the next spoke. By weave, I’m referring to sliding your needle under the stitch without piercing the fabric (your needle stays on the top-side of the fabric throughout). Pull all the working thread through.
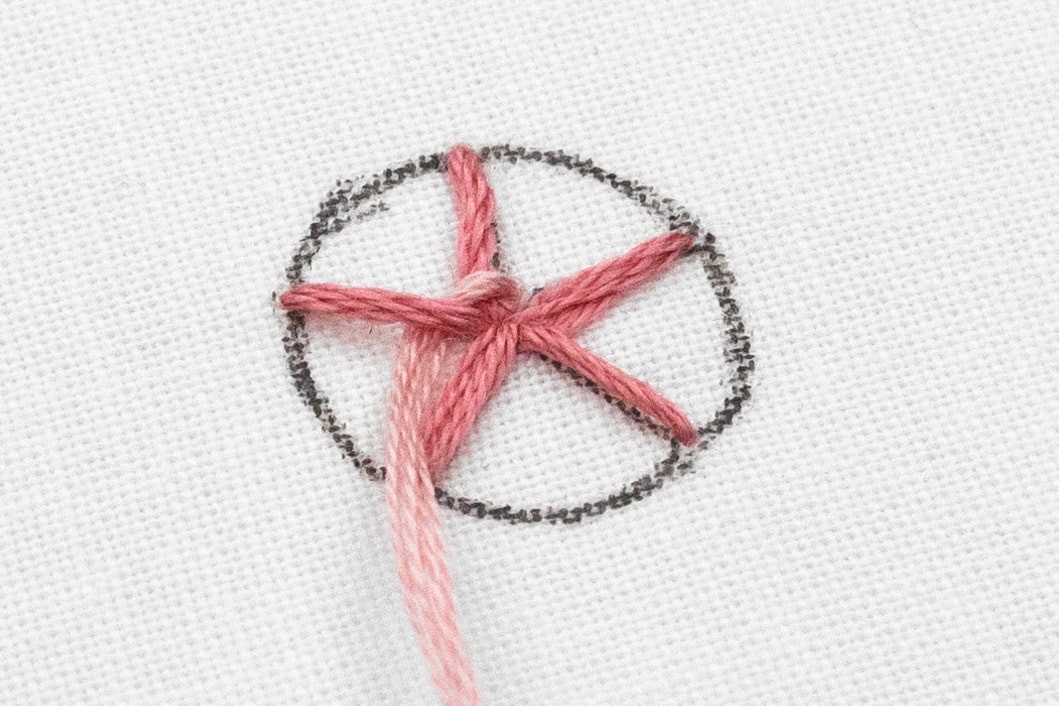
7. Now, in a single motion, weave your needle over the next spoke and under the following spoke. Then pull through all the thread.
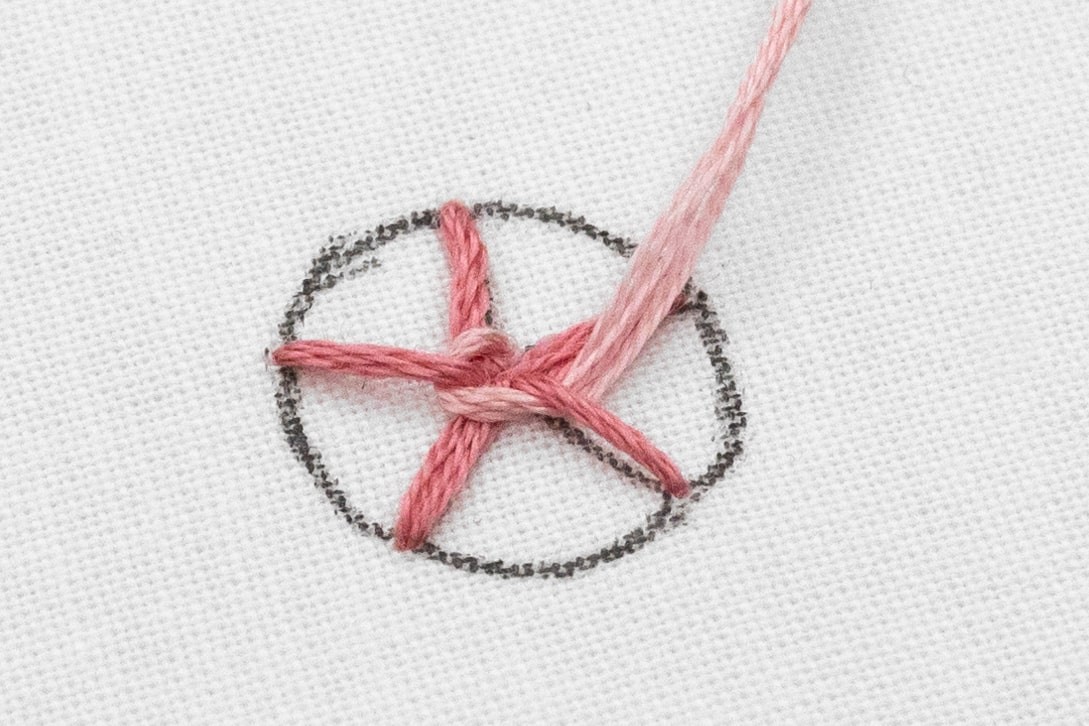
8. Repeat this process for the next two spokes, following the pattern of weaving over then under each spoke. As you go, you might find it helpful to press underneath the rose with your non-stitching hand, to give some clearance for your needle. Then take a look, and you should be just past where you started. Nice work!
9. Keep weaving around the rose to fill about half of the space. You can pull the thread reasonably tight for this part. Notice how each time, you’re working an opposite weave compared to the first time around? This alternating patter creates the charming woven effect we're aiming for! It looks best if each weave sits close to the previous one, so avoid pulling so hard that they start crossing over. Don't worry, this gets easier with practice!
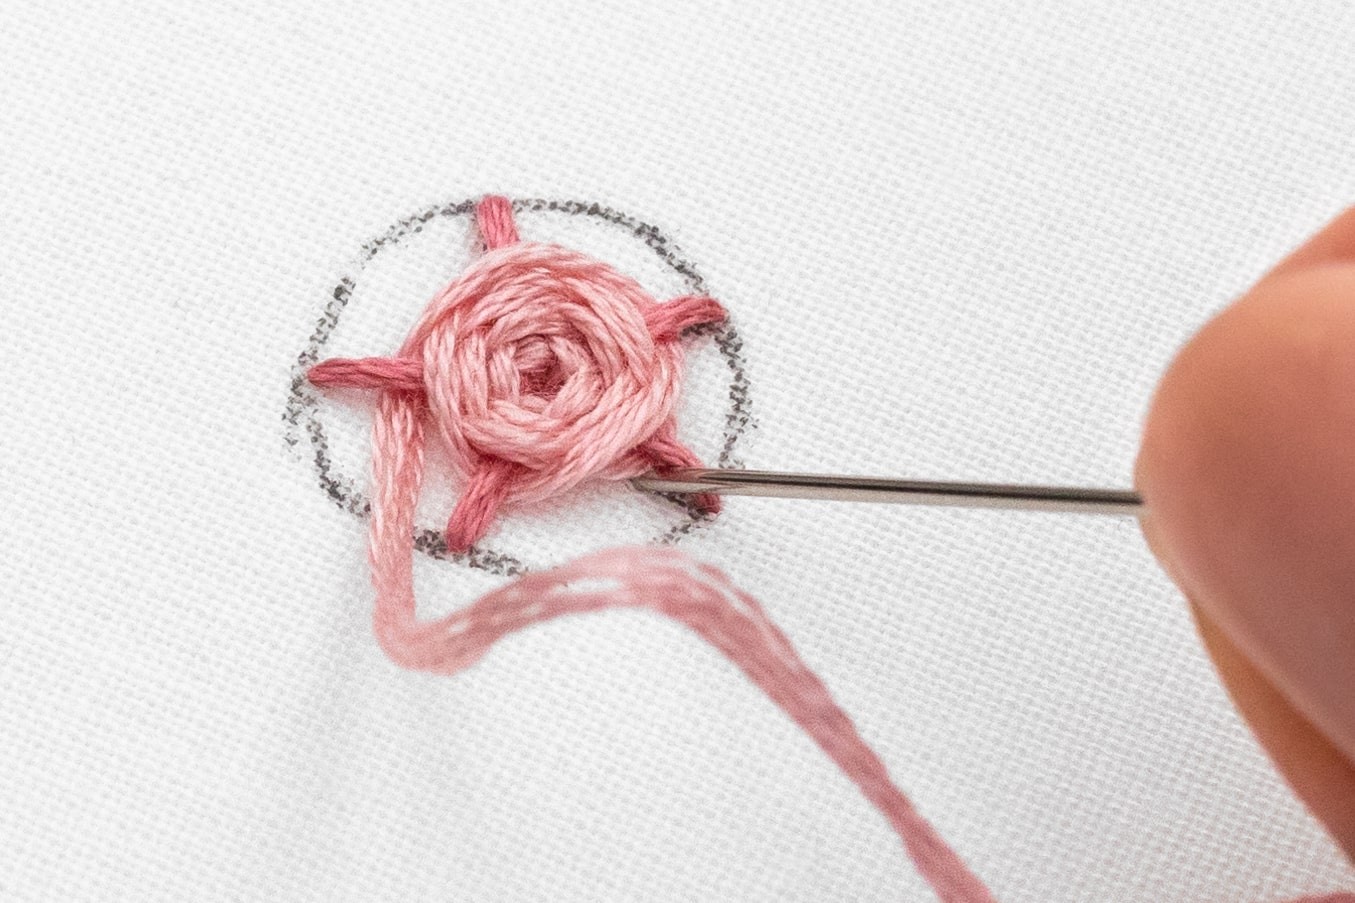
10. Time to work on the second half of the rose! Go slow and watch carefully, so that you don’t snag your needle. You can have a think about how tight or loose you pull the thread – that affects the tension of each weave. Relax the tension a bit for this part; it helps the weaves sit nicely next to the ones before. And you can use your fingers to nudge the weaves into place as you go.
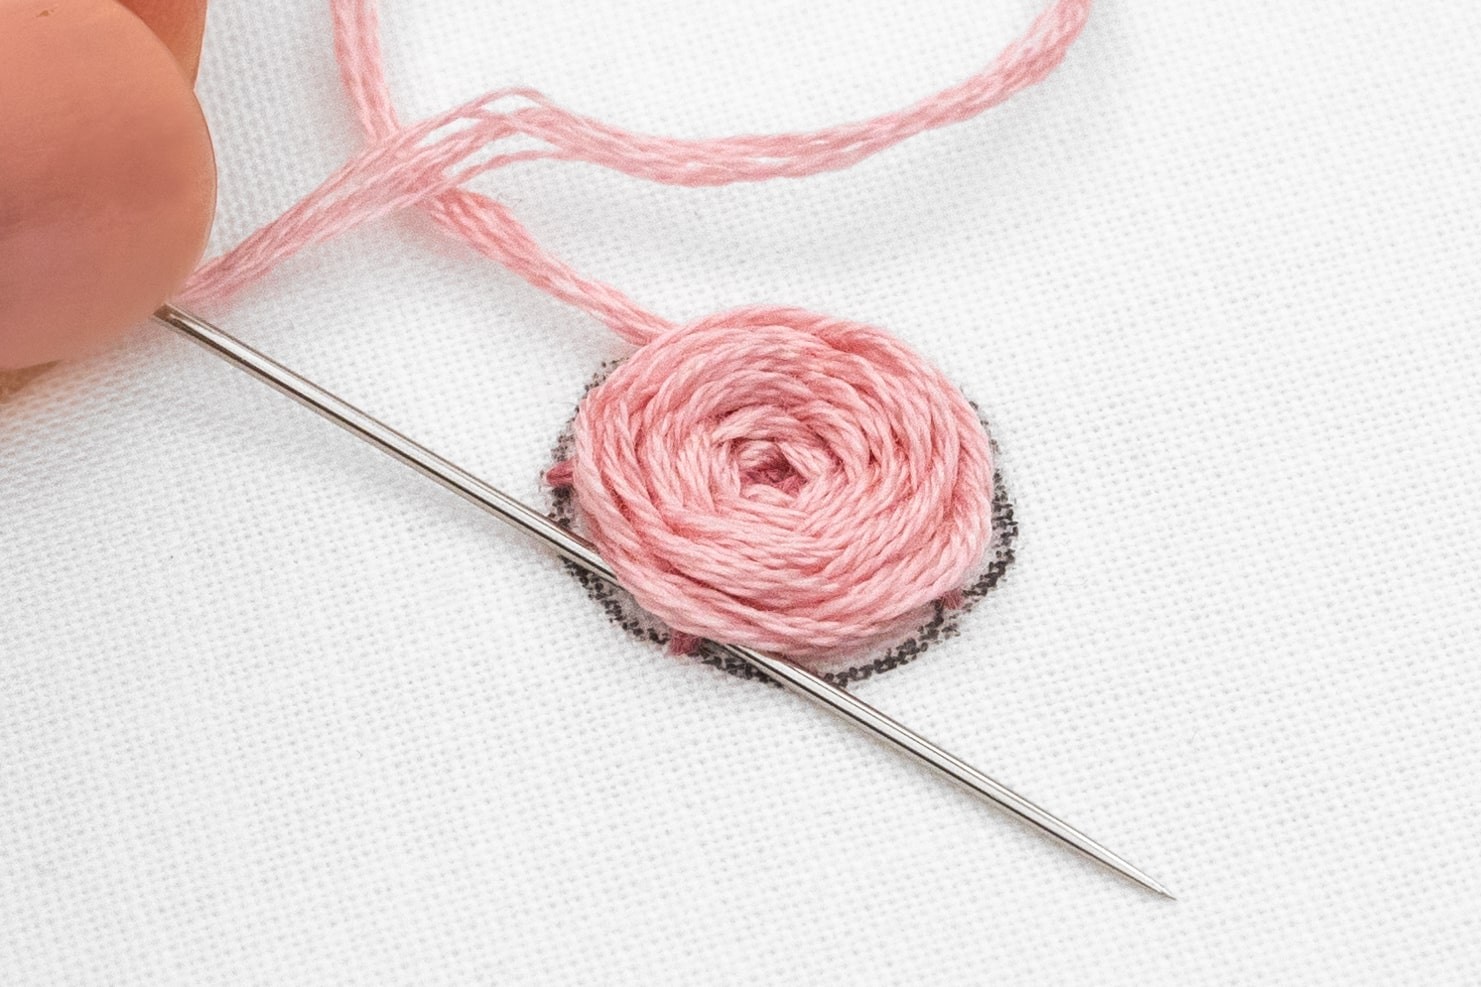
11. As you approach the end, your final weaves will ideally cover the spokes. However, if that proves challenging, you can use a few Straight Stitches around the outer edge to conceal the spokes. These stitches should seamlessly blend into the overall design.
12. When you've finished stitching, secure and tidy away your thread, using our usual method. But while you do this, be gentle and press your finger against the rose on the upper side of your fabric. This will help avoid distorting its shape while you secure your thread.
Restarting your thread mid-rose:
A. When you reach the spot where you would normally weave under a spoke, instead poke your needle through the fabric and pull the remaining thread to the underside.
B. Knot your thread against the centre of the spokes, then cut off a short tail. But as you do, take care not to distort your rose by going gently, and pressing your finger against it on the top-side to hold its shape.
C. On the opposite side of the spoke where you went down, bring up the new piece of thread. Now you can continue the rose by weaving over the next spoke.
Tips for Woven Rose:
-
How many spokes: Make sure there's an odd number of spokes, to enable the weaving pattern. The sizeof the shape determines the number of spokes needed, and I suggest a minimum of 5 spokes.
-
Spokes Placement: It helps if the spokes are all the same length, evenly distributed around the circle.
-
Tension: Feel free to play around with the amount of tension you apply to the thread while filling in the rose. If you keep the thread relaxed, you'll achieve a flatter and looser rose. Whereas pulling the thread tighter results in a fuller, more elevated rose. Personally, I start by pulling the thread quite tight for the first half of weaving, and then I loosen up a bit as I finish the rest.
-
Keep alert: Woven roses are delicate and easily disturbed or pulled out of shape - I know by experience! So concentrate and go slow as you weave your way around, especially for the second half.
-
Type of needle: Sometimes the sharp end of your needle can get snagged on your thread. If that’s a problem, you can lead with the blunt end of your needle.
-
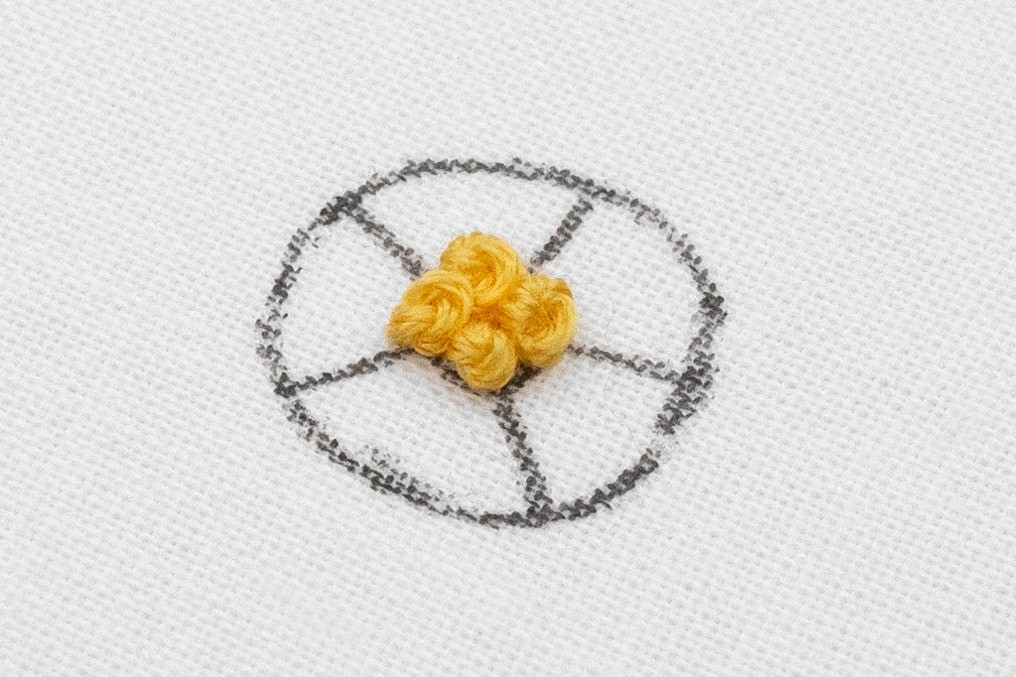
Variation with French Knots: A lot of patterns feature Woven Roses with a beautiful cluster of French Knots in the centre. In this case, adjust your stitching as follows:
A. First fill in the centre area with French Knots.
B. Next, stitch the spokes so that they extend from the outer edge of the French Knots’ centre, instead of from the middle.
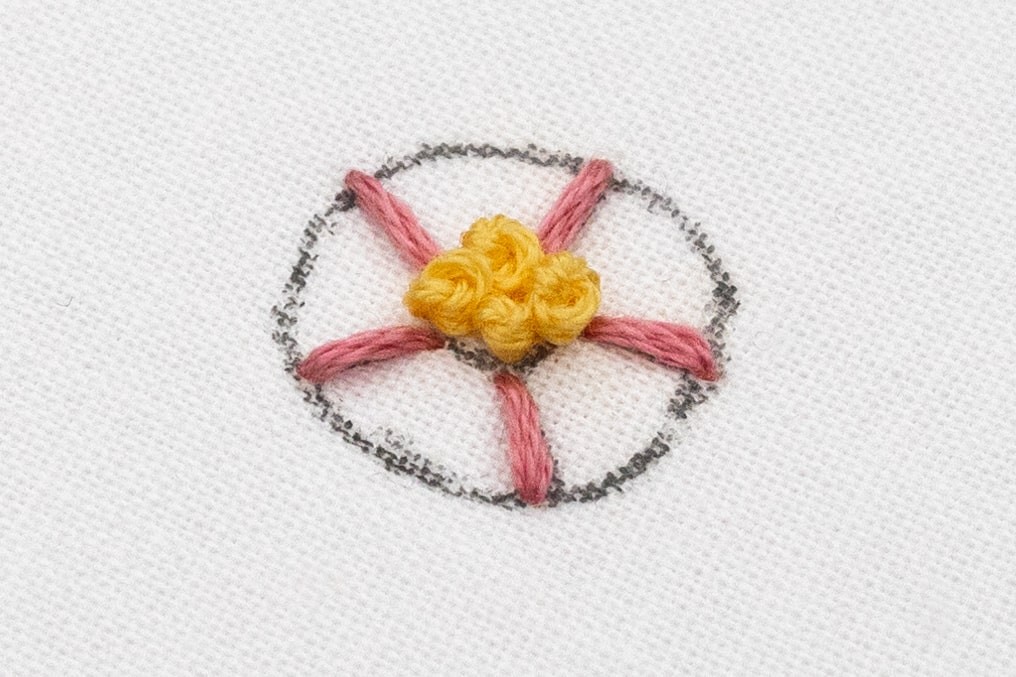
C. Last, weave the Woven Rose technique around the spokes.
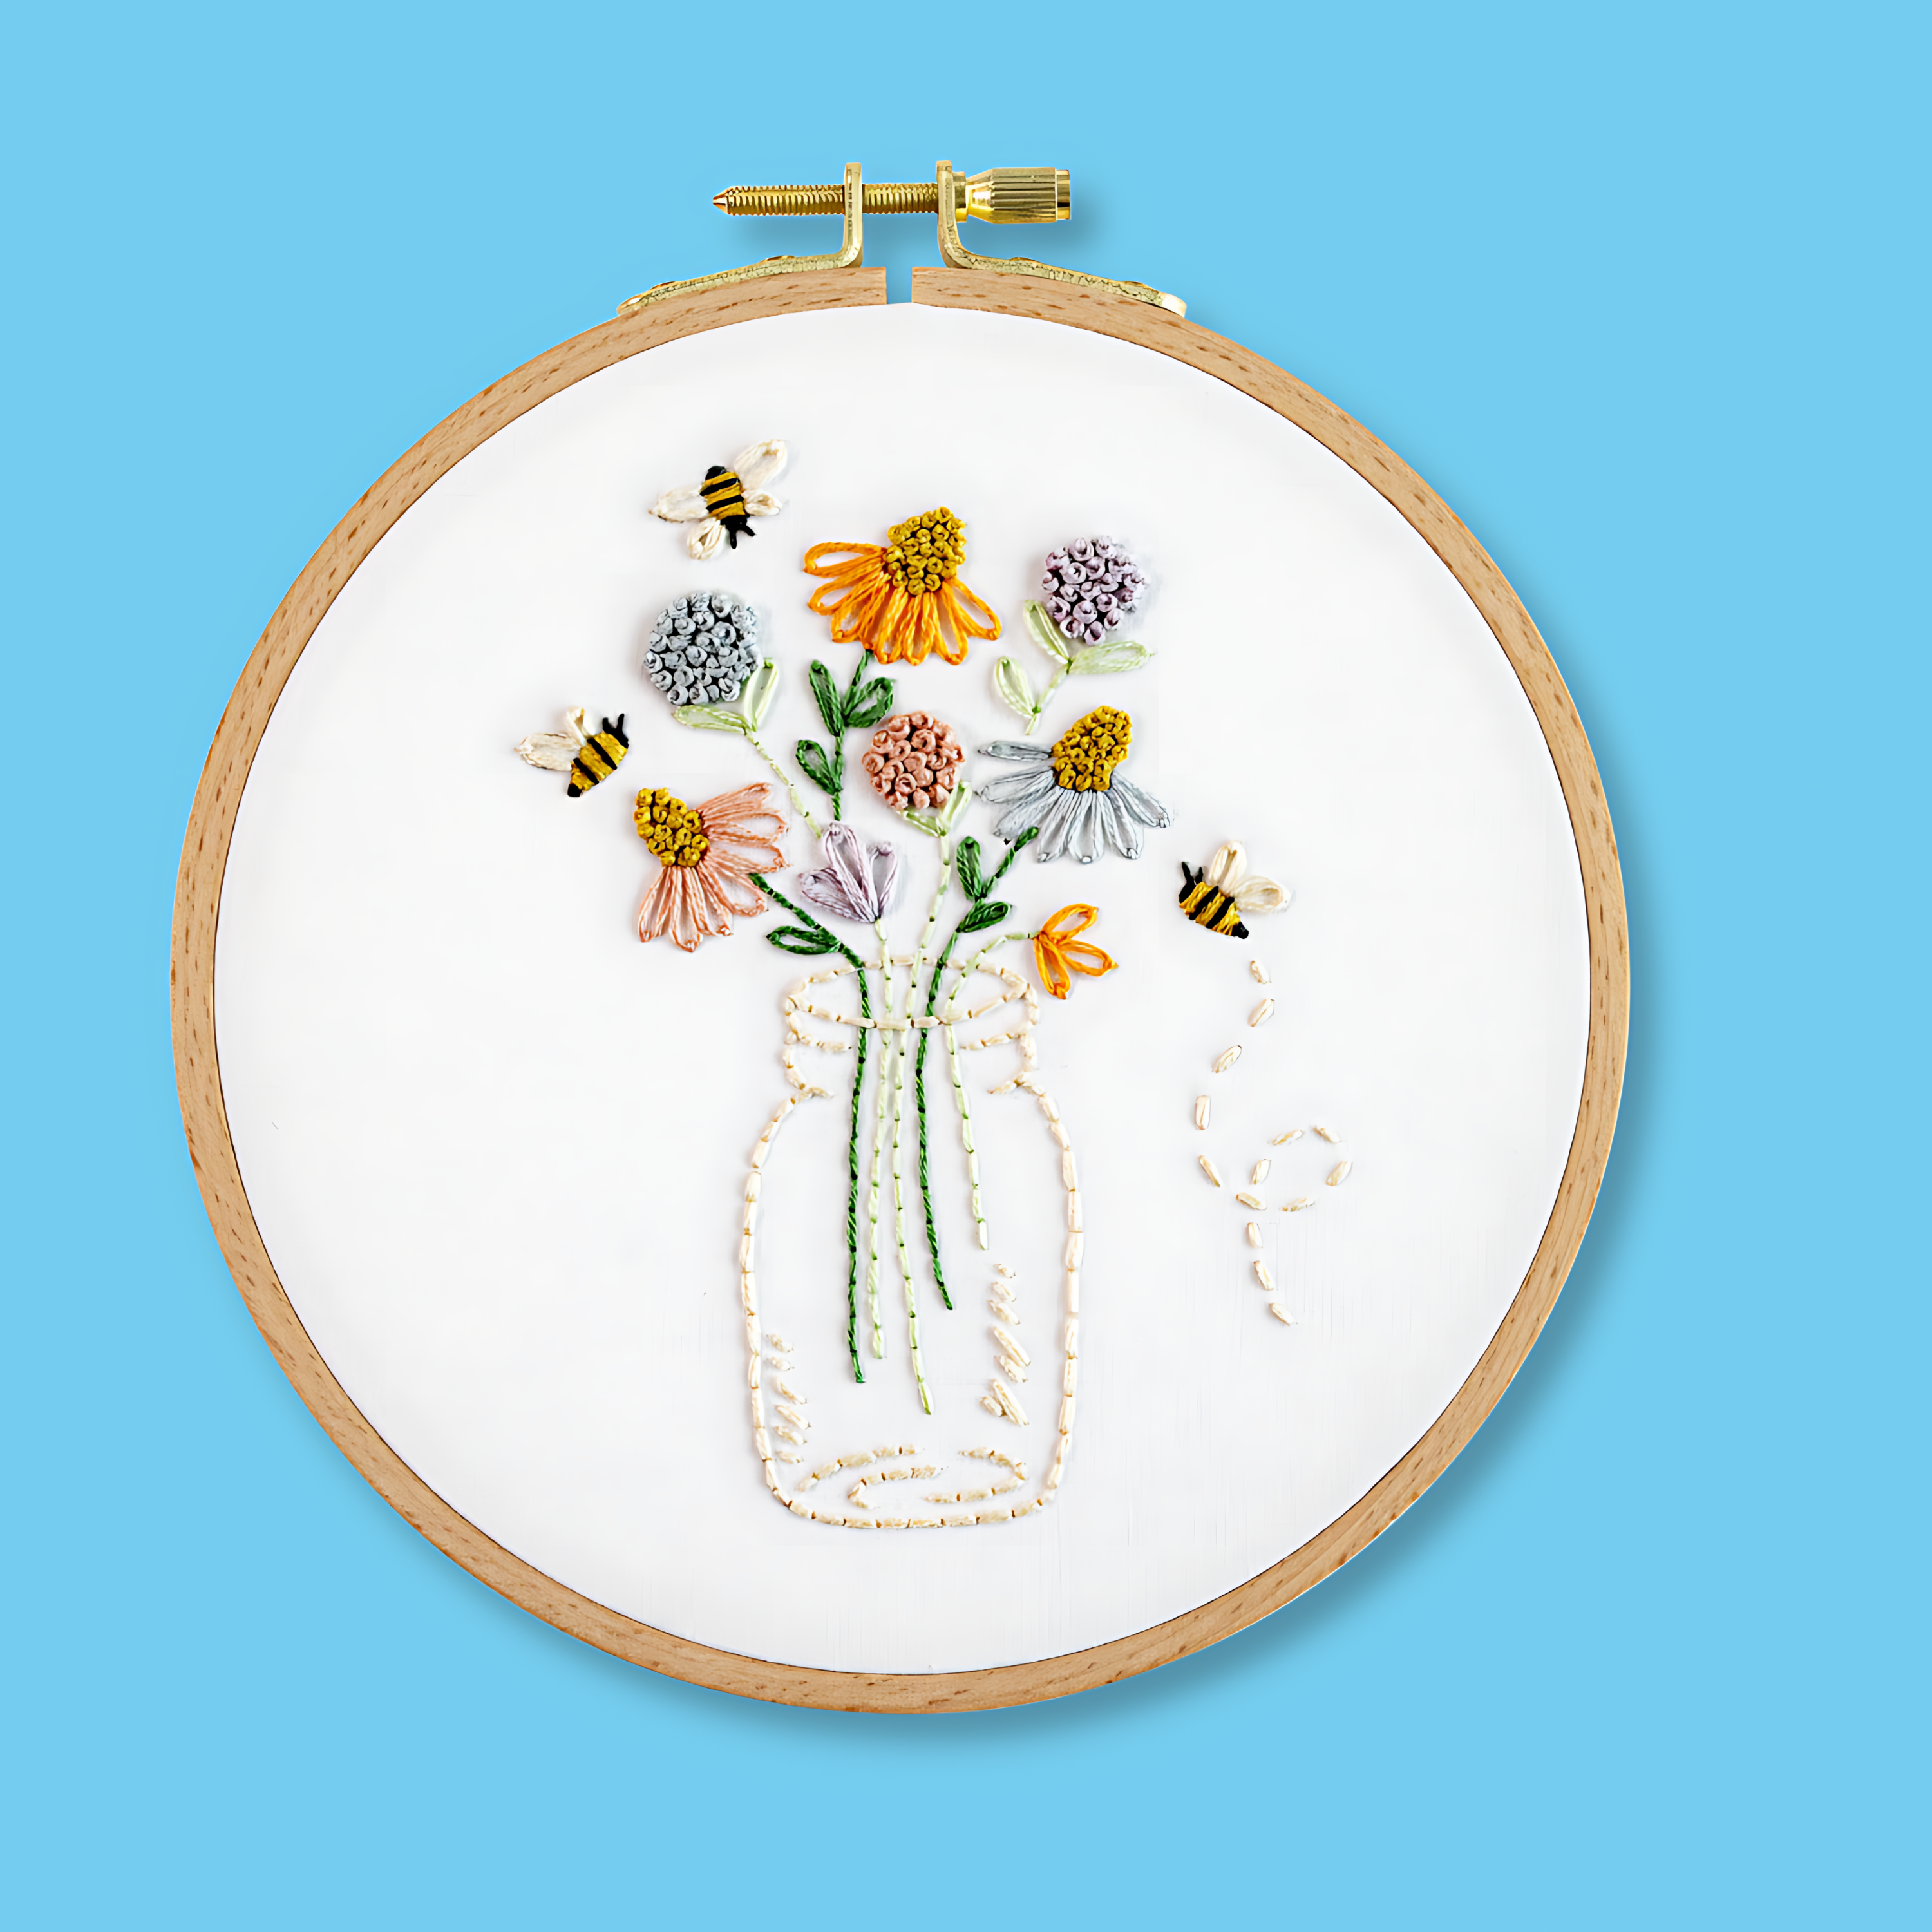
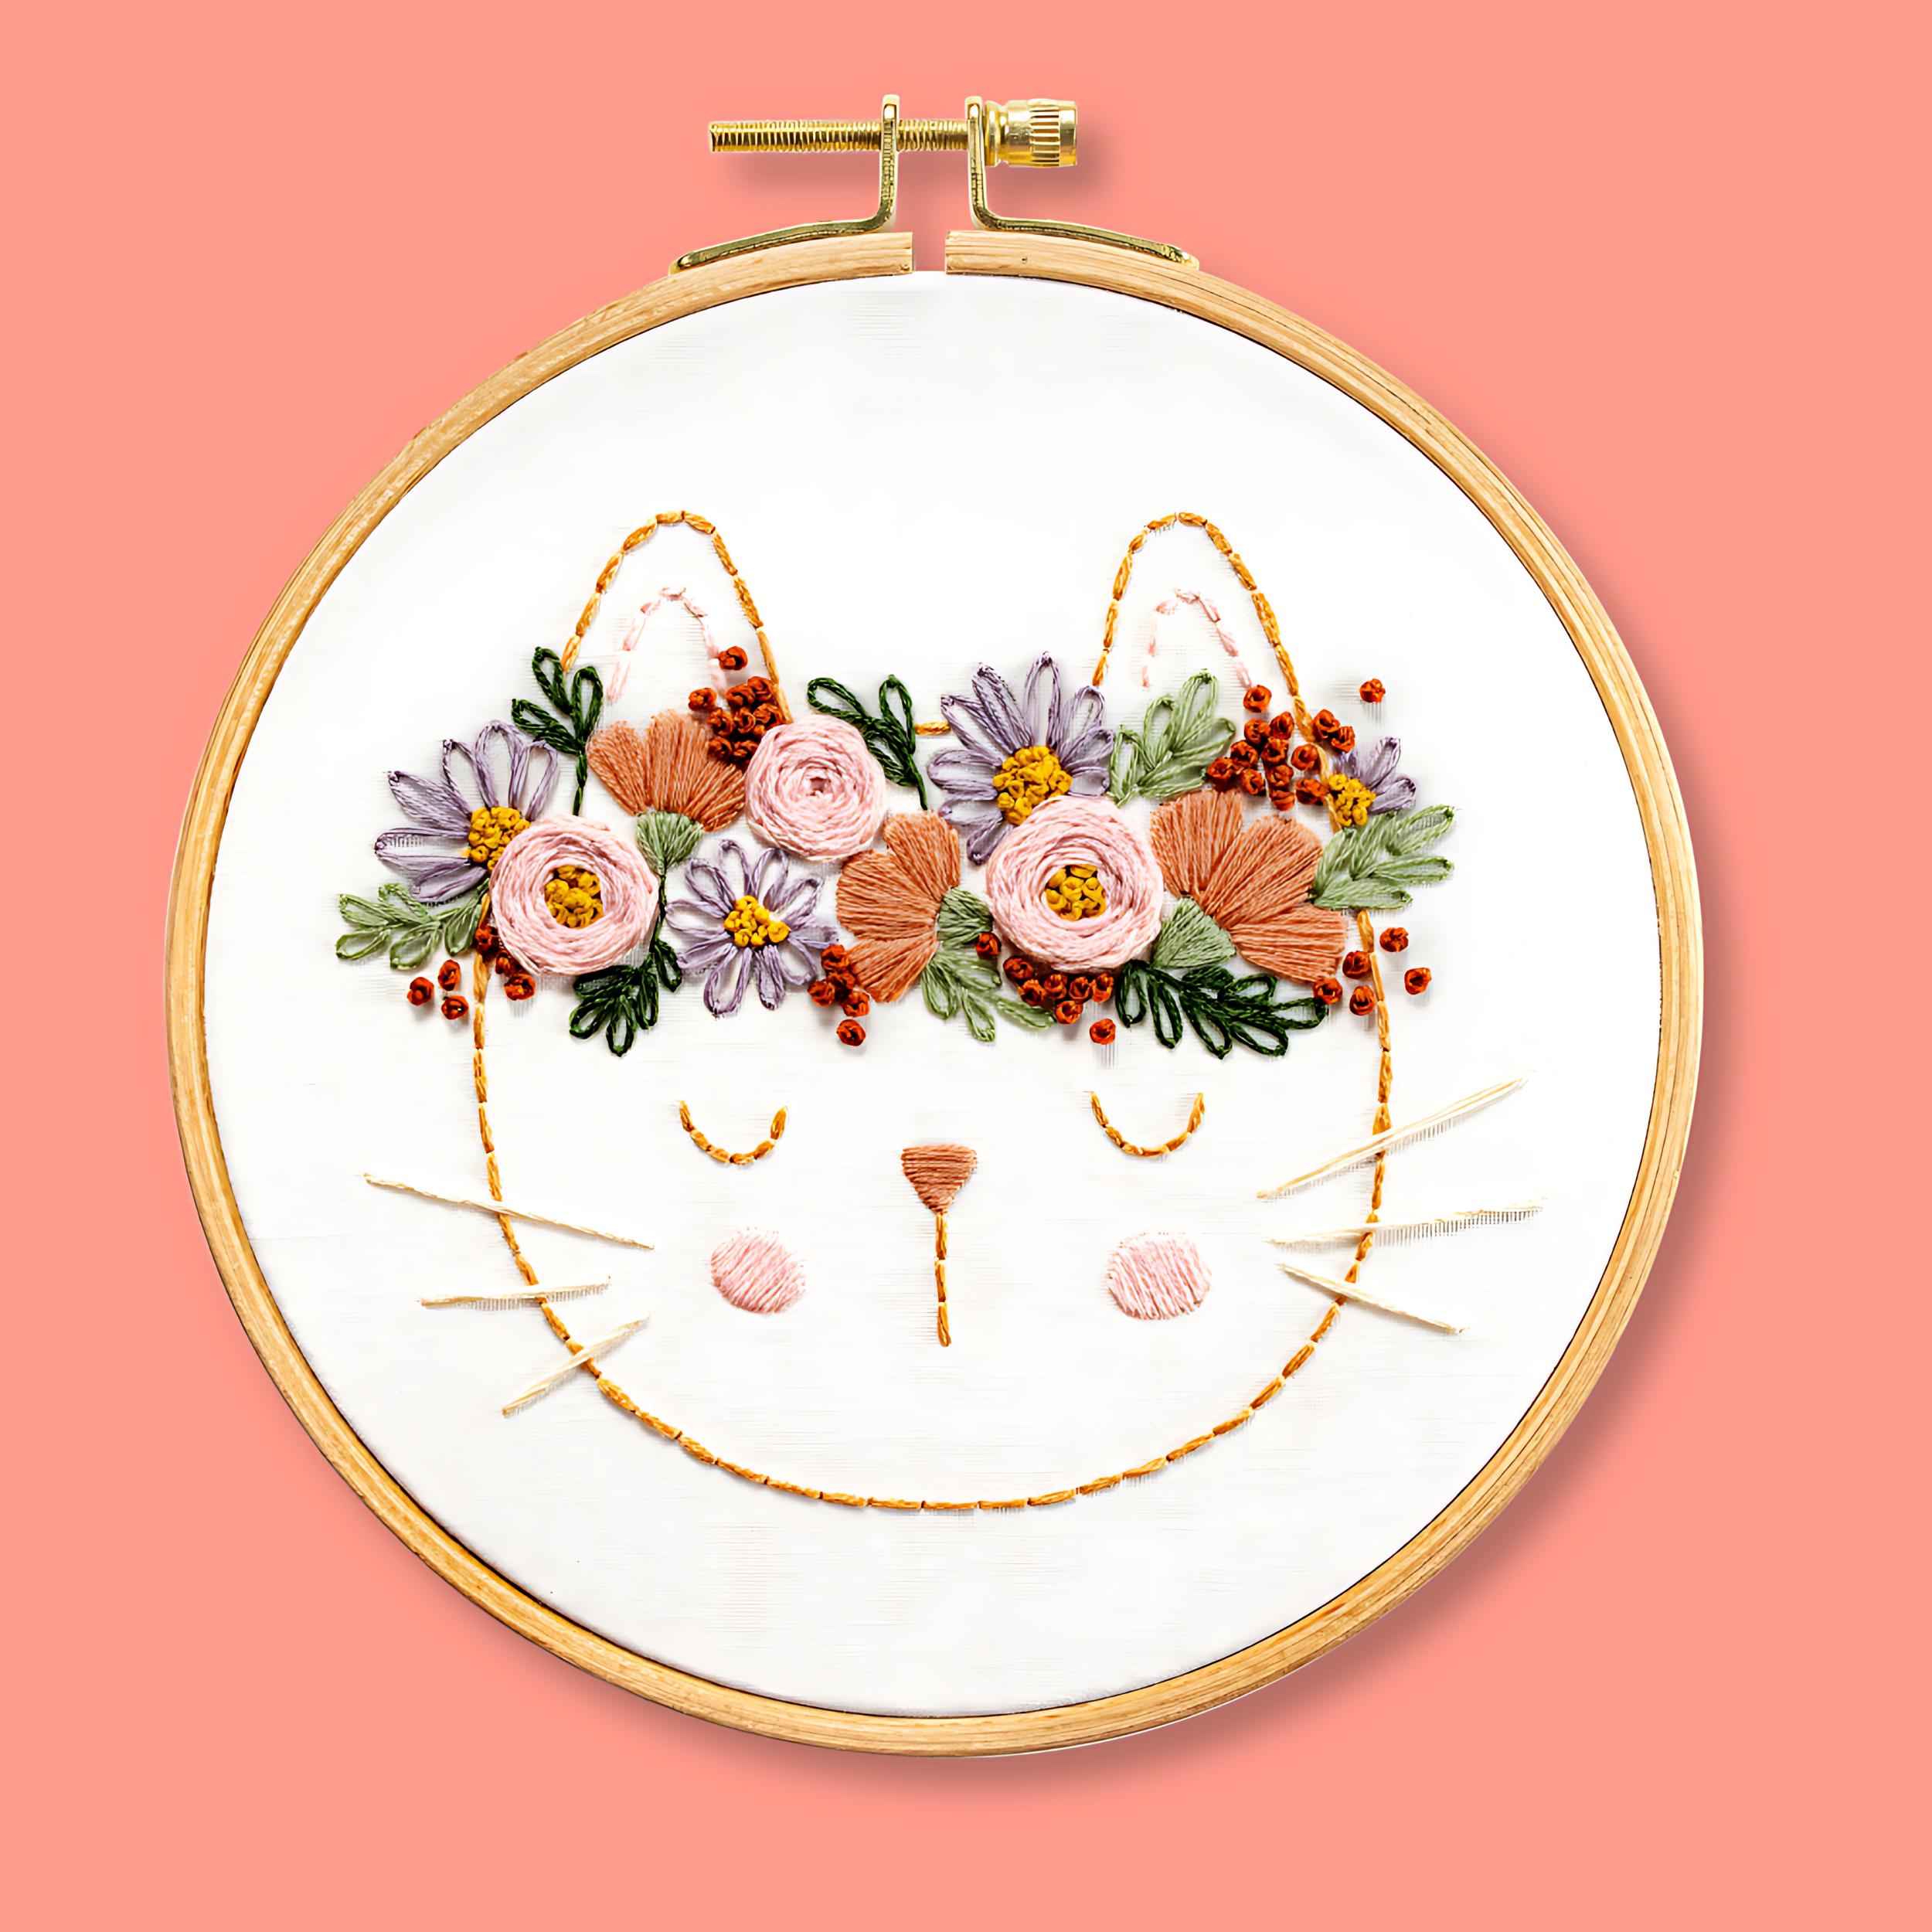
Examples of Woven Rose in my patterns
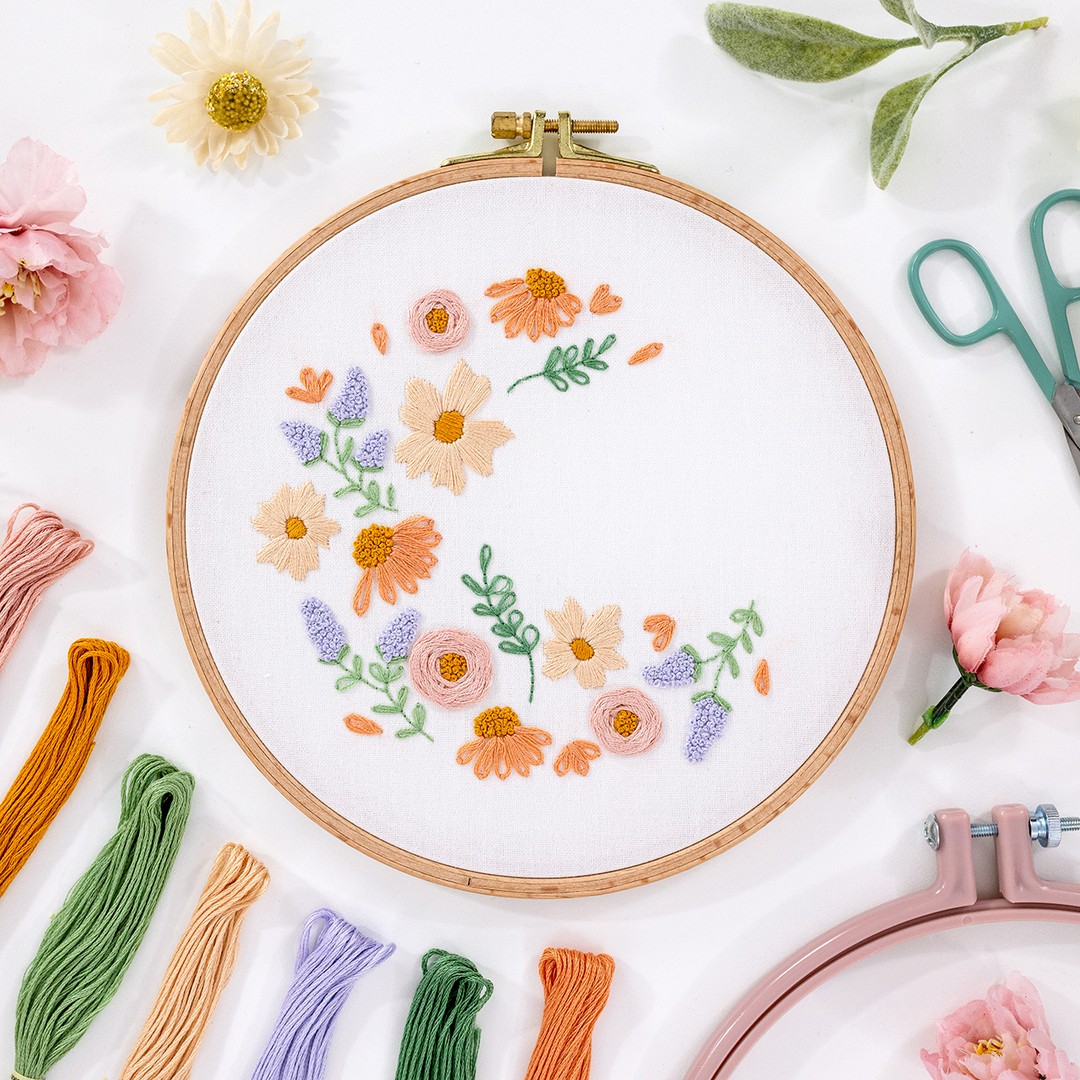
Let's look at some examples of how you can use this awesome foundation stitch in your work! First up, here's my Blooming Lovely pattern. See the three Woven Roses, aren't they beautiful?
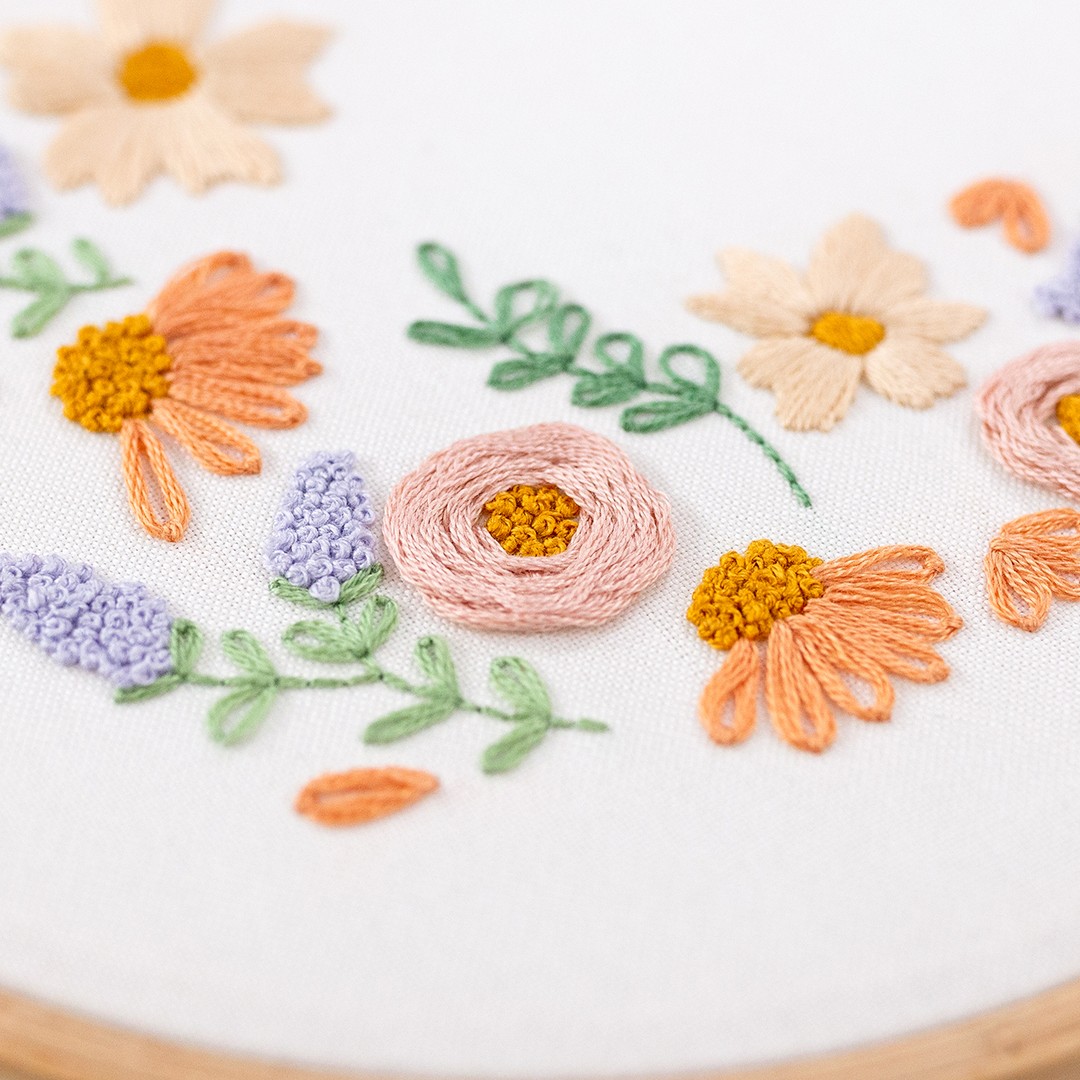
How about this pattern - Scandi Blooms? It has a lovely big Woven Rose on the left flower, full of stunning texture.
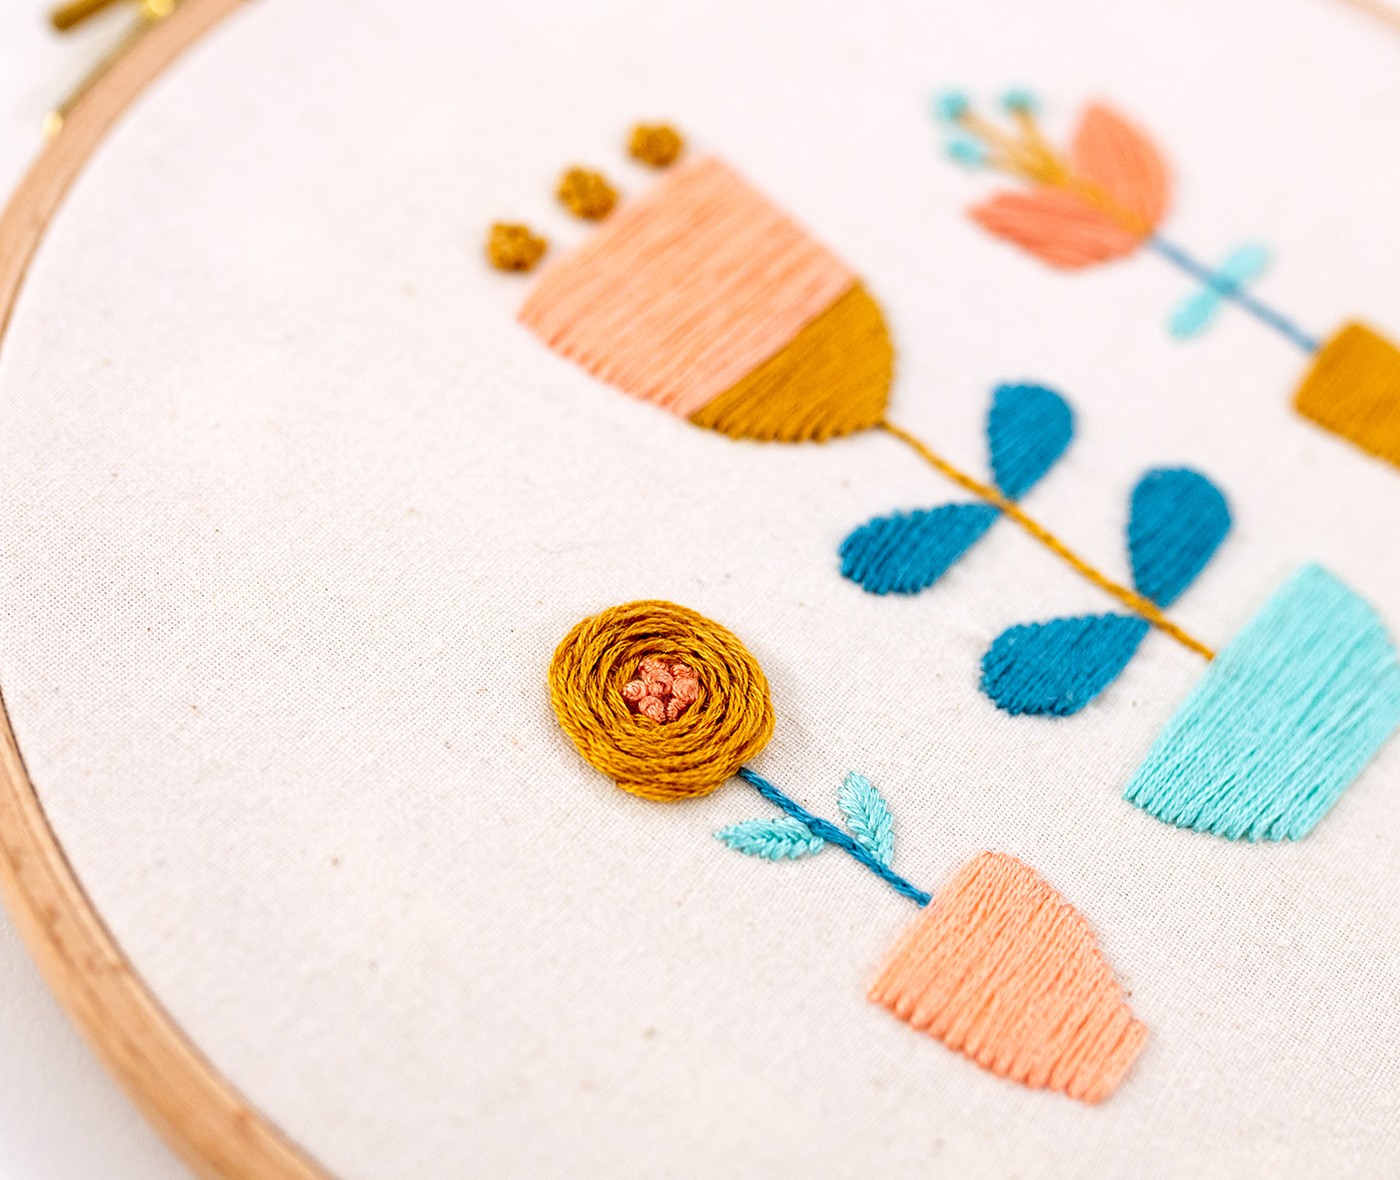
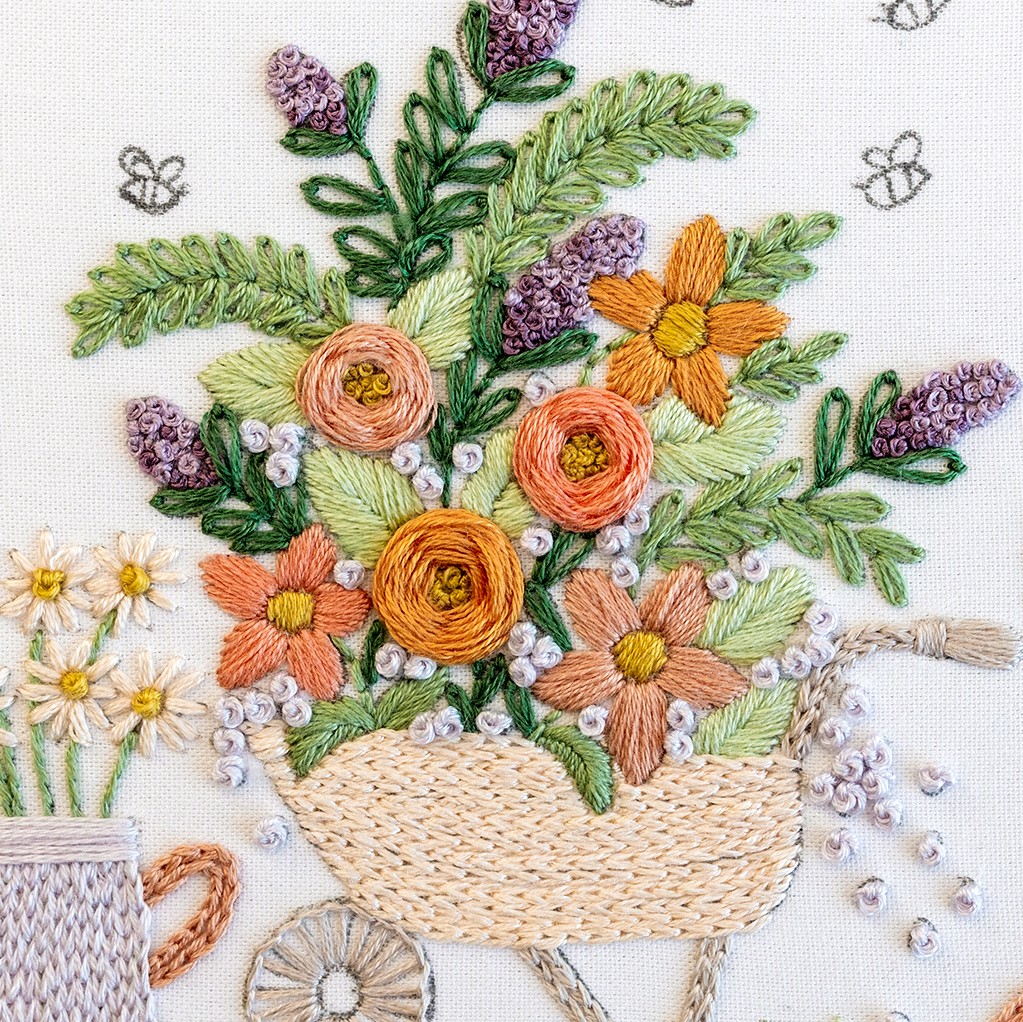
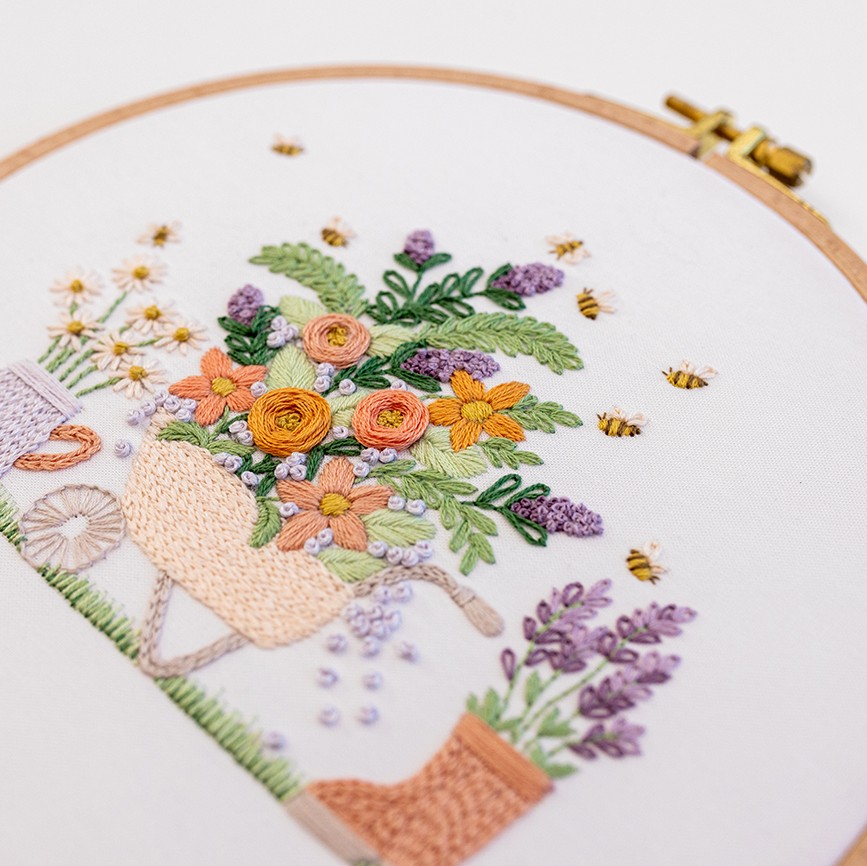
And one more - check out the stunning Woven Roses in my pattern The Gardening Bee. For these roses, I actually pulled the thread quite tight as I wove around, and this made the roses quite dense and high. I just love them so much!
Conclusion
Congratulations, you now know how to create gorgeous woven roses, perfect for any embroidery pattern. This stitch can be quite tricky to get right at first, especially getting the woven round of the flower even and looking gorgeous. But once you’ve made a few roses, you’ll have gotten into the swing of it!
So there you have it, my straightforward instructions and tips so that you can make your own woven roses.
What's next?
Our beginner embroidery kits are a favourite among new stitchers for their simple, step-by-step instructions and beautiful designs that make learning easy and fun. Whether you’ve been wanting to learn embroidery or are just searching for your next creative hobby. These kits are the perfect introduction to embroidery.
Why people love our beginner kits:
-
Everything you need is included: fabric, thread, hoop, and more!
-
Clear instructions to guide you every step of the way.
-
Gorgeous designs you’ll be proud to display.
Our most popular beginner kits