

Lazy Daisy - Learn How to Do This Modern Embroidery Technique
Introduction
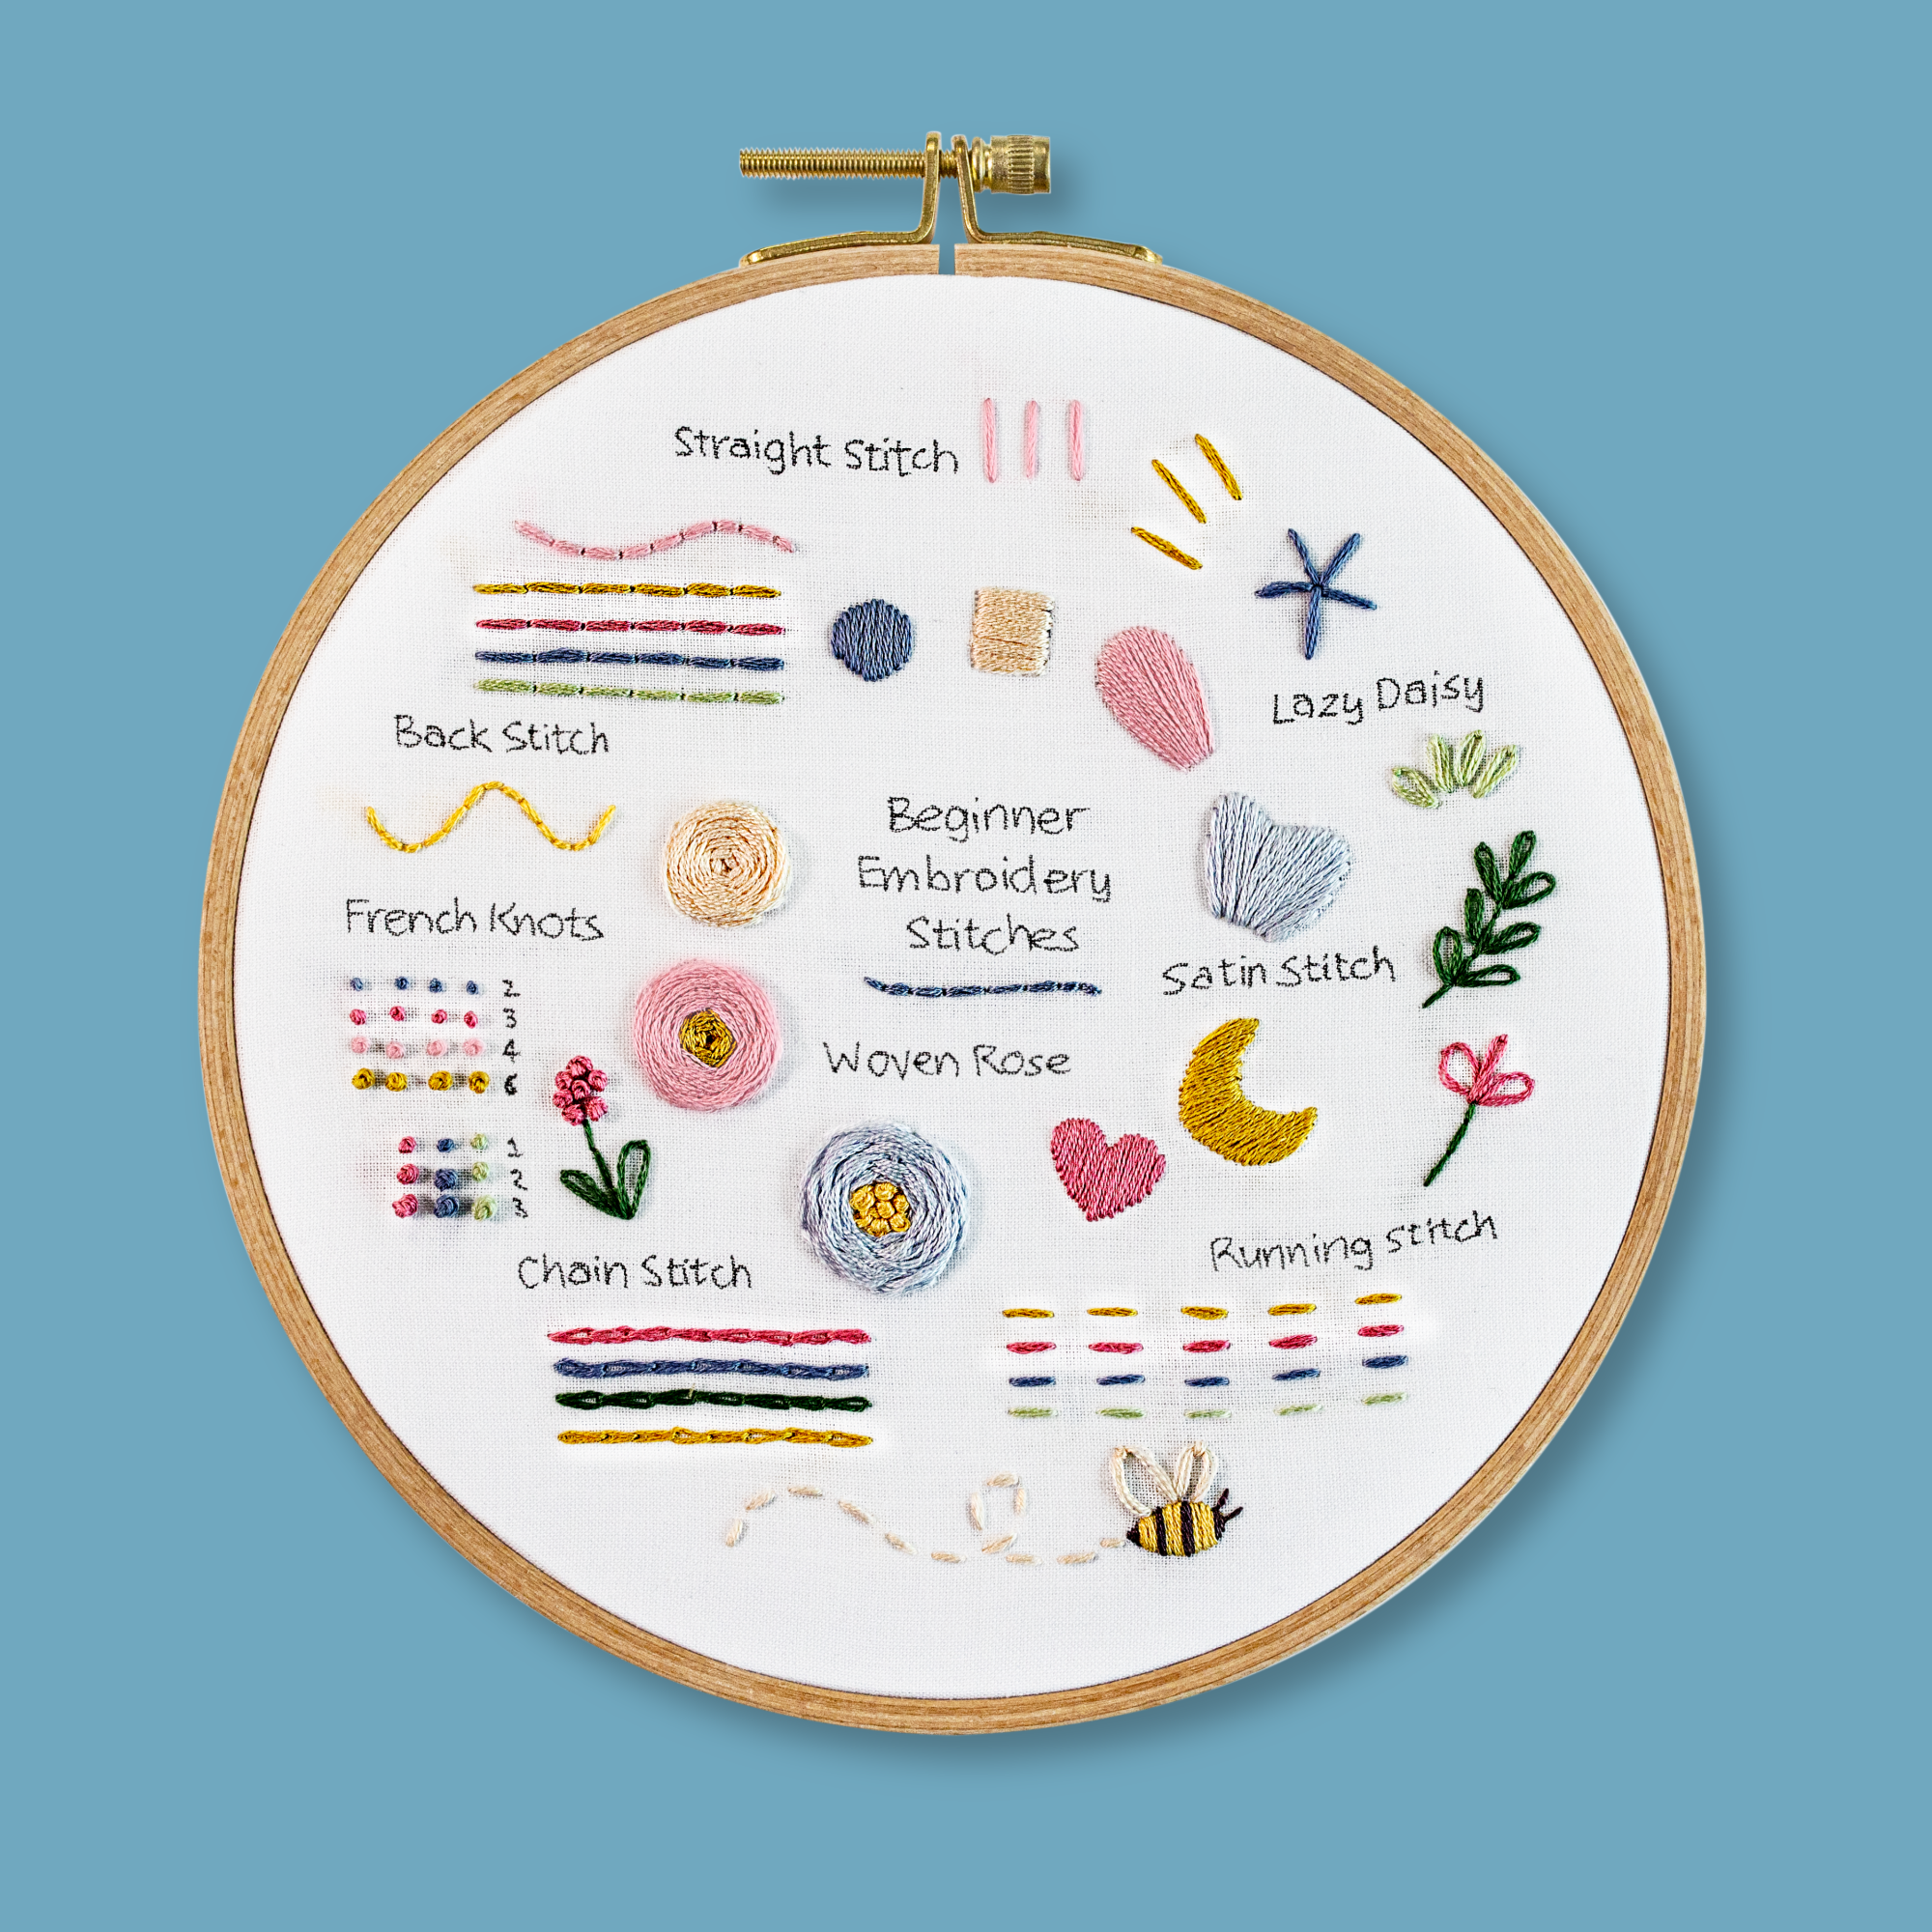
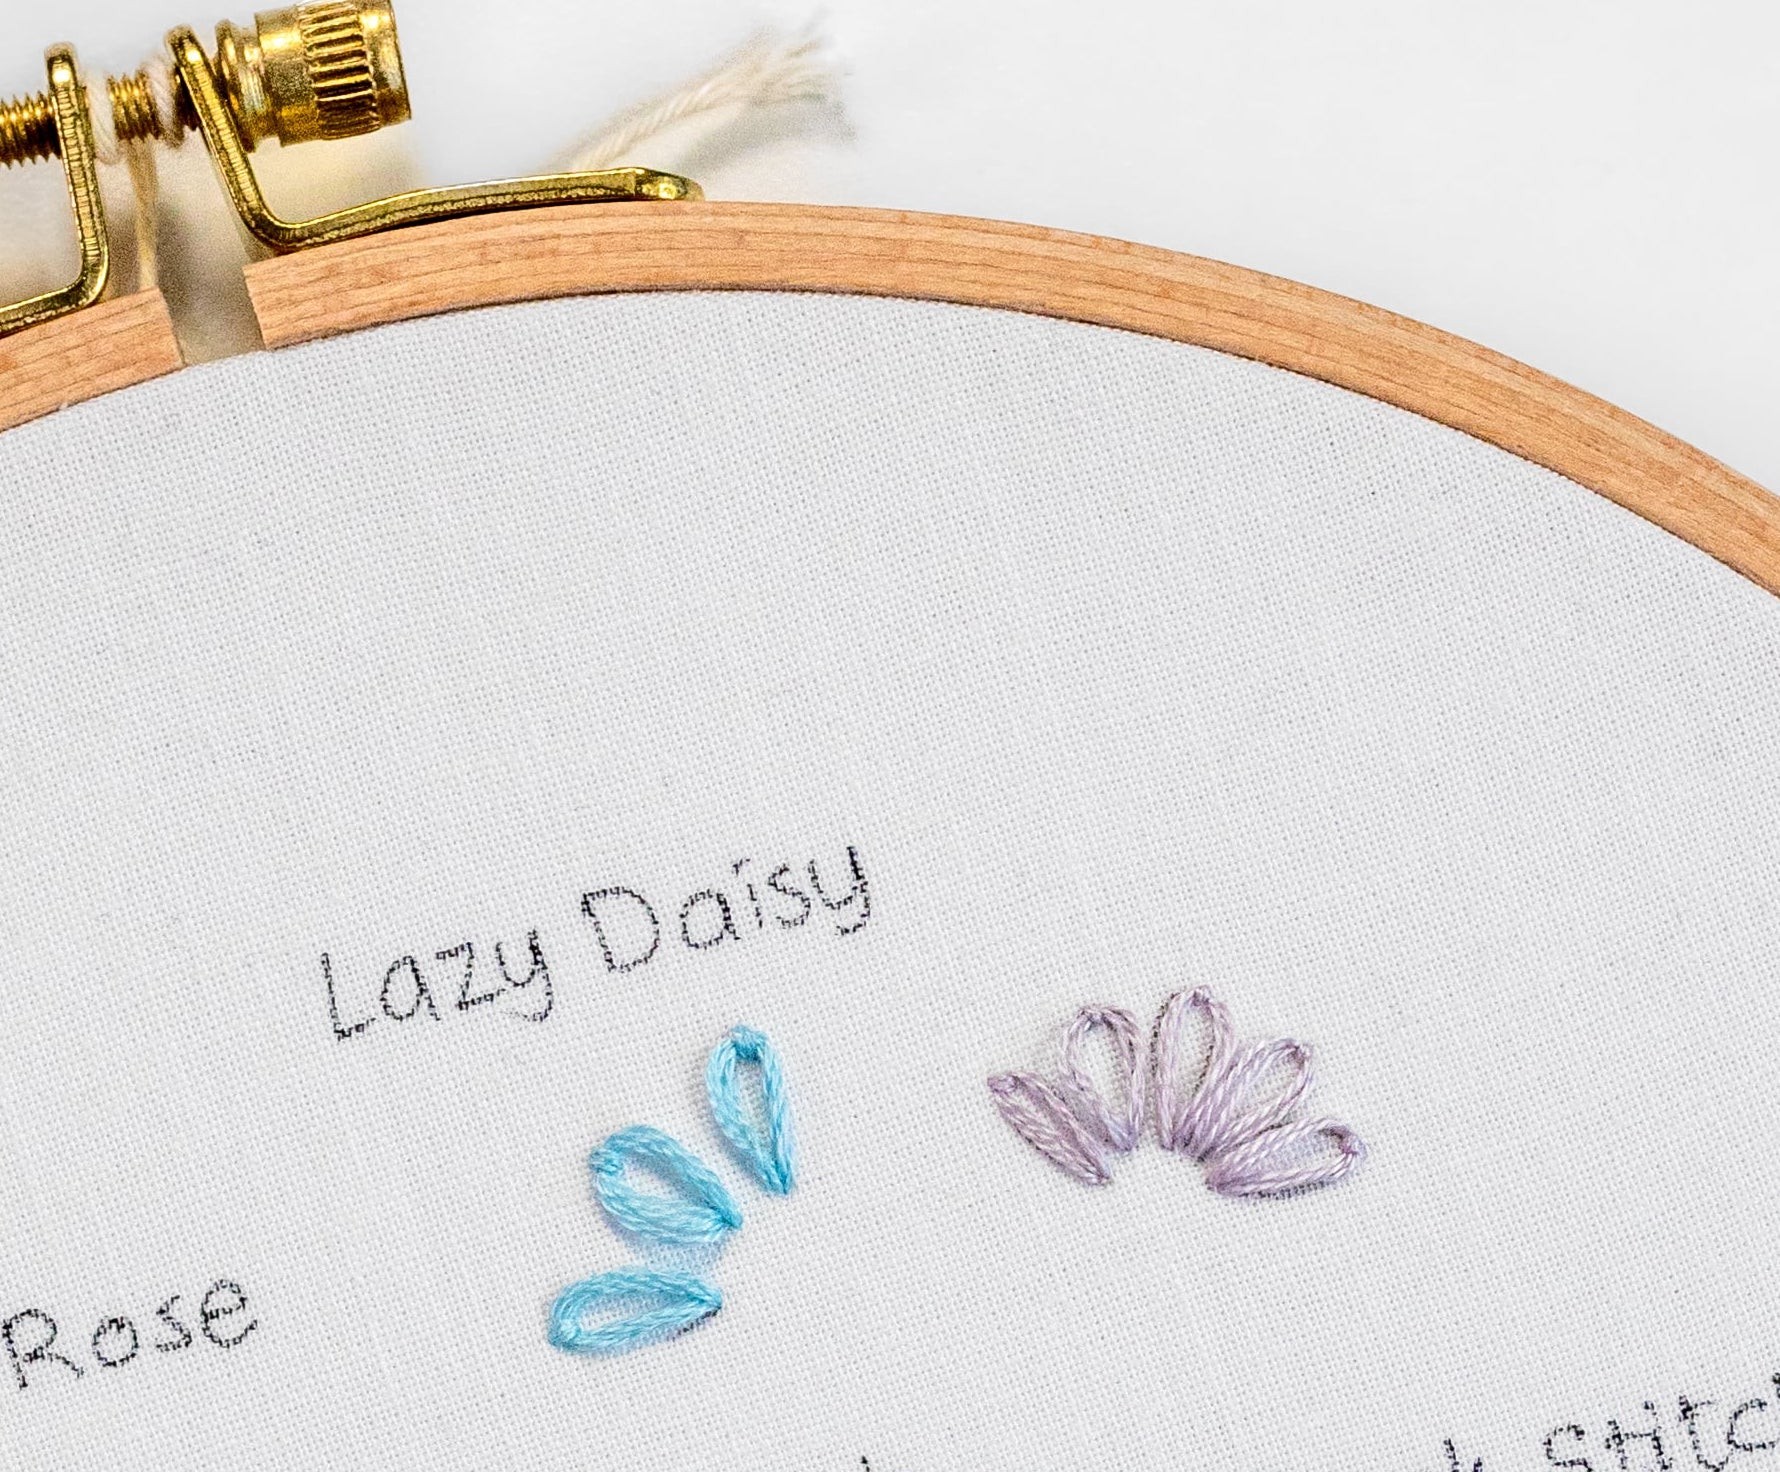
Say hello to one of my favourite techniques, the Lazy Daisy (also known as the detached chain stitch). This technique involves forming loops on your fabric, with each loop anchored in place by a small stitch. Once you get the hang of it, you’ll find it’s a relatively quick and easy way to create petals and leaves, and other decorative shapes.
Let’s try it out:
Step 1
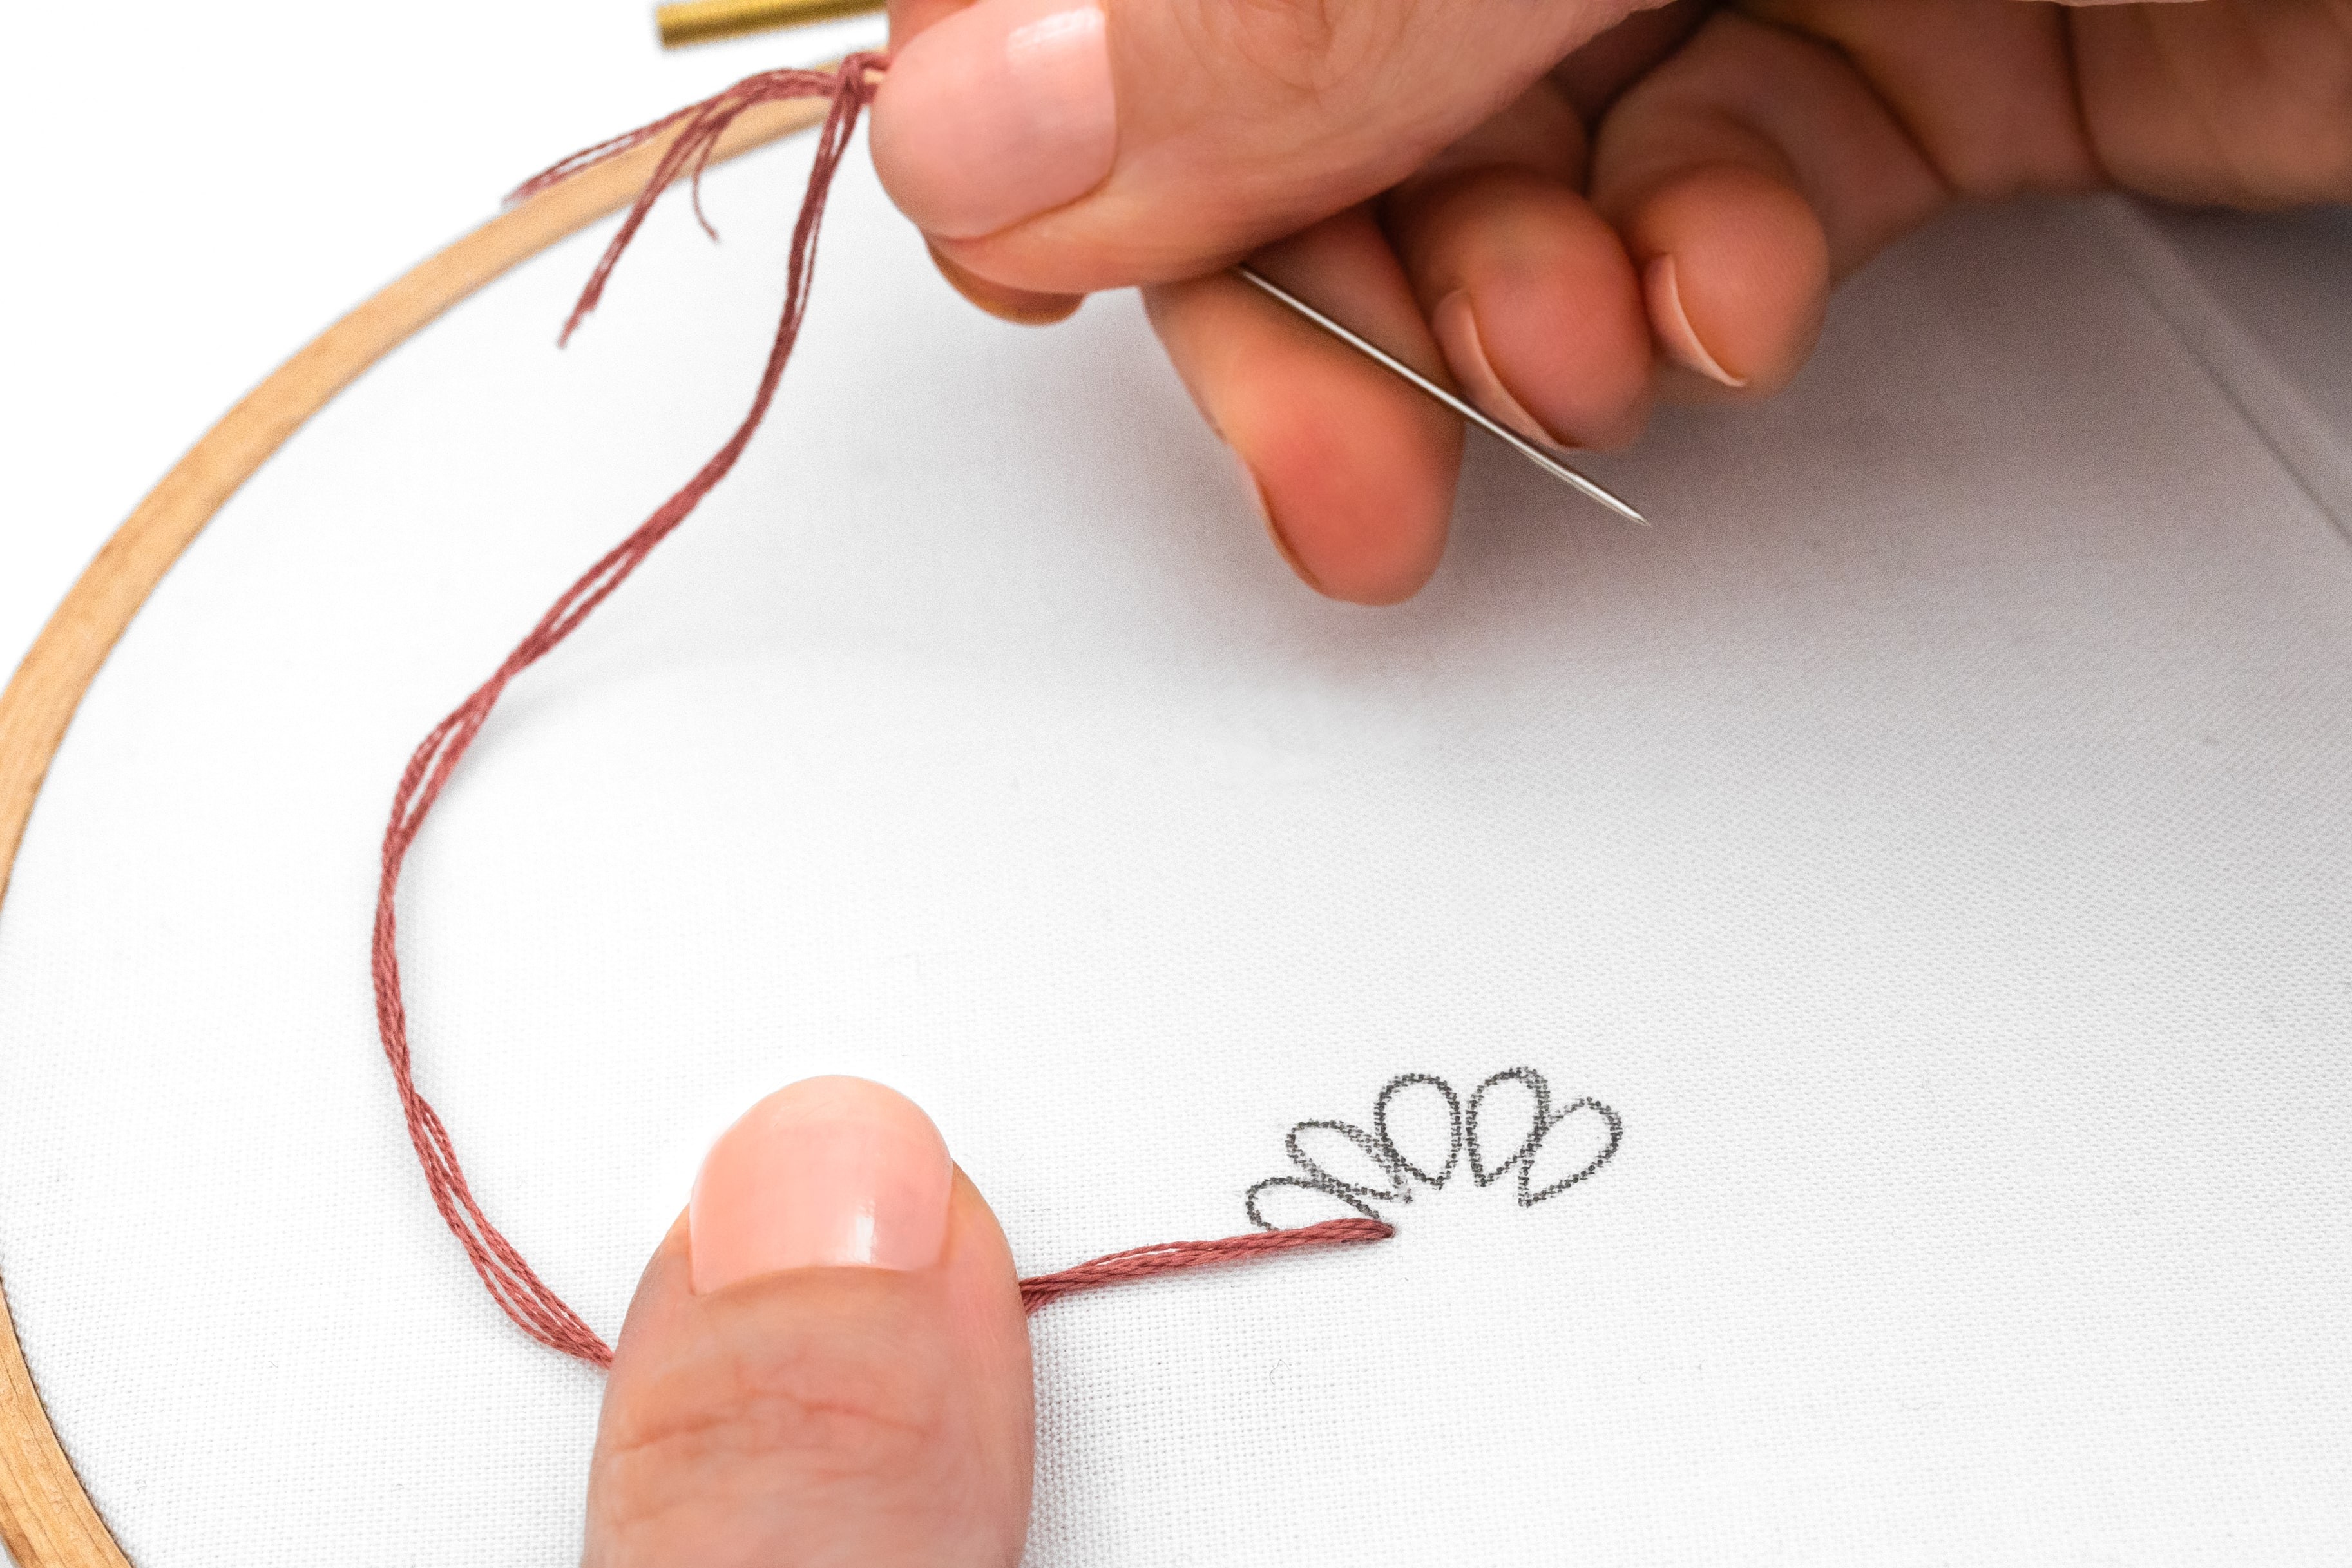
Start by bringing your needle up from the back of the fabric to the front, at the pointed end of the loop. Gently pull the working thread through to the front, so that your knot secures the thread at the back.
Step 2
Use your non-stitching (‘other’) hand to lay the thread out in the direction the line is heading in, and press it against the fabric to hold it in place.
Step 3
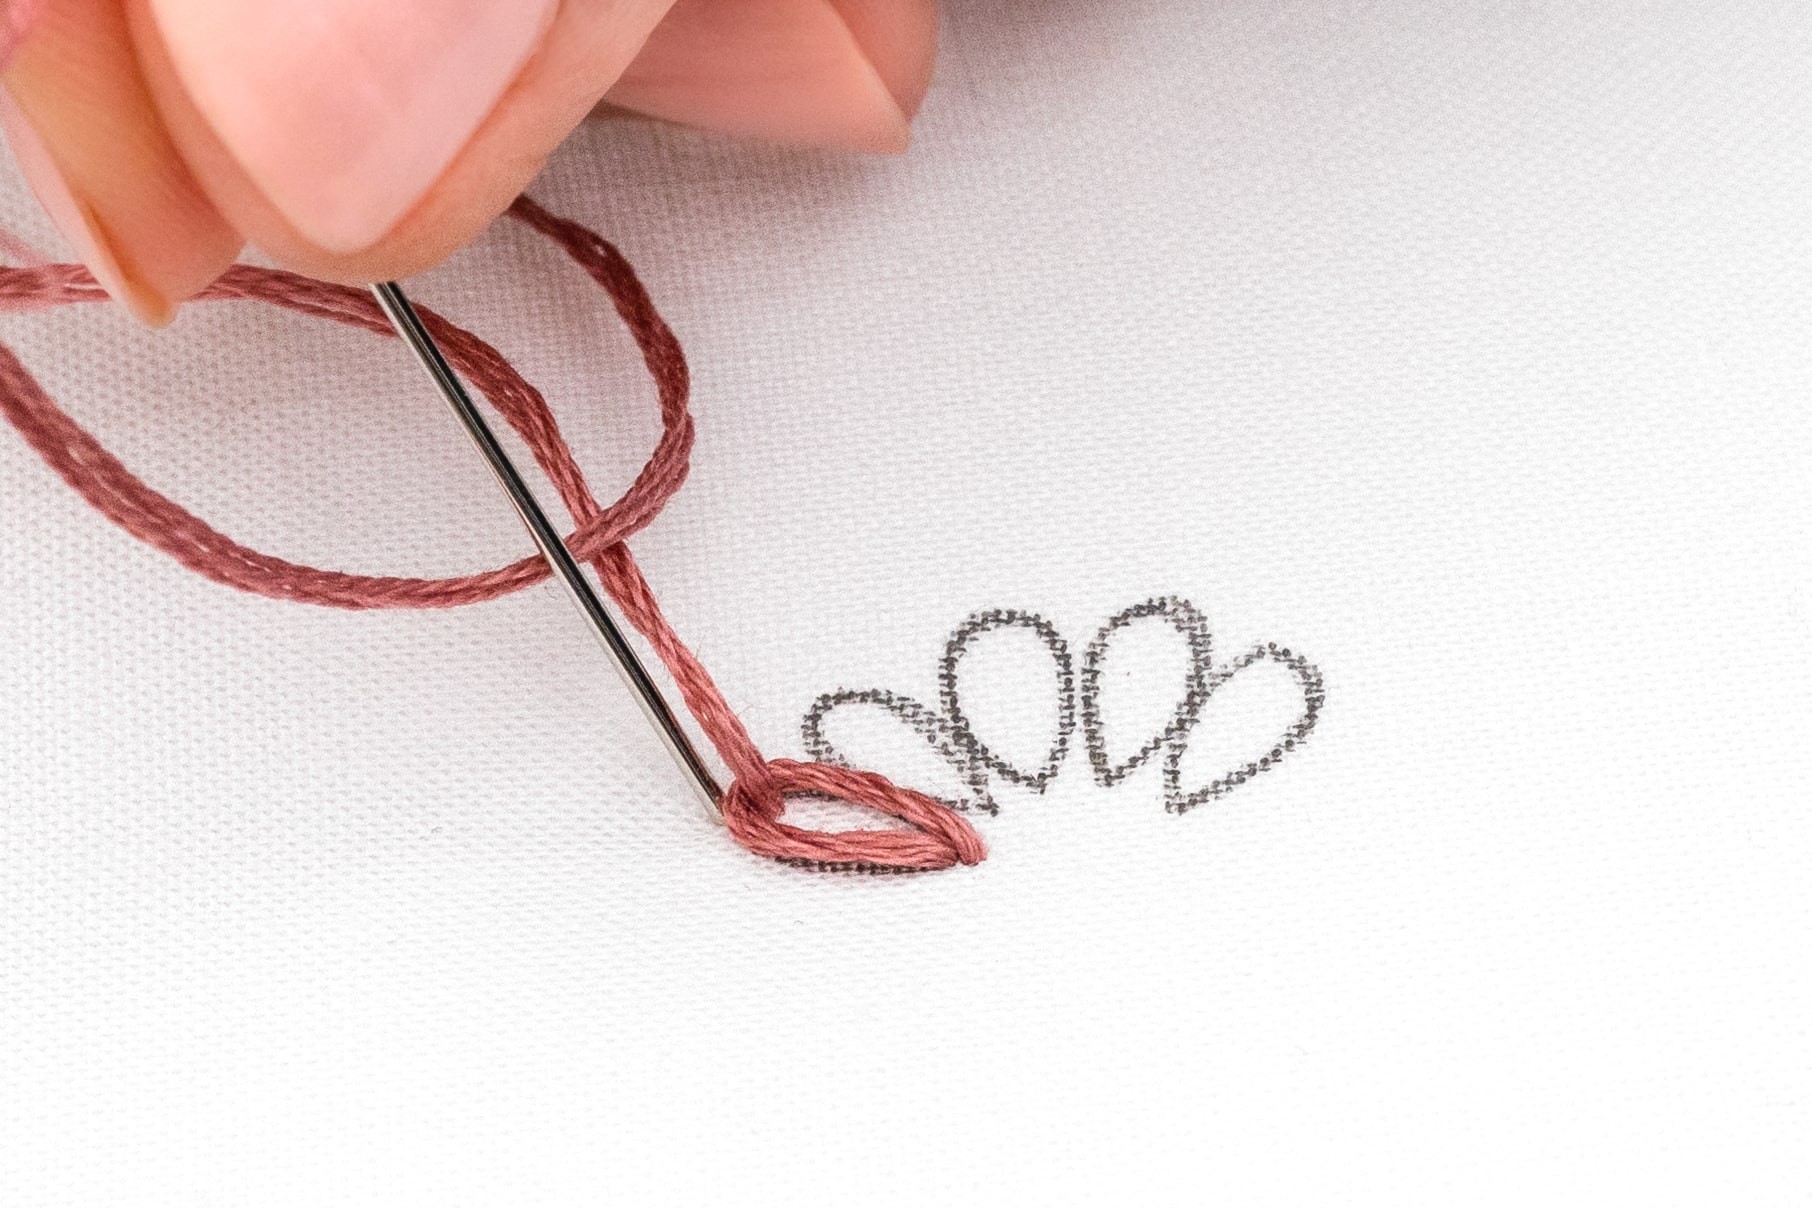
Poke your needle back down into the same hole as you came up from (or right next to it).
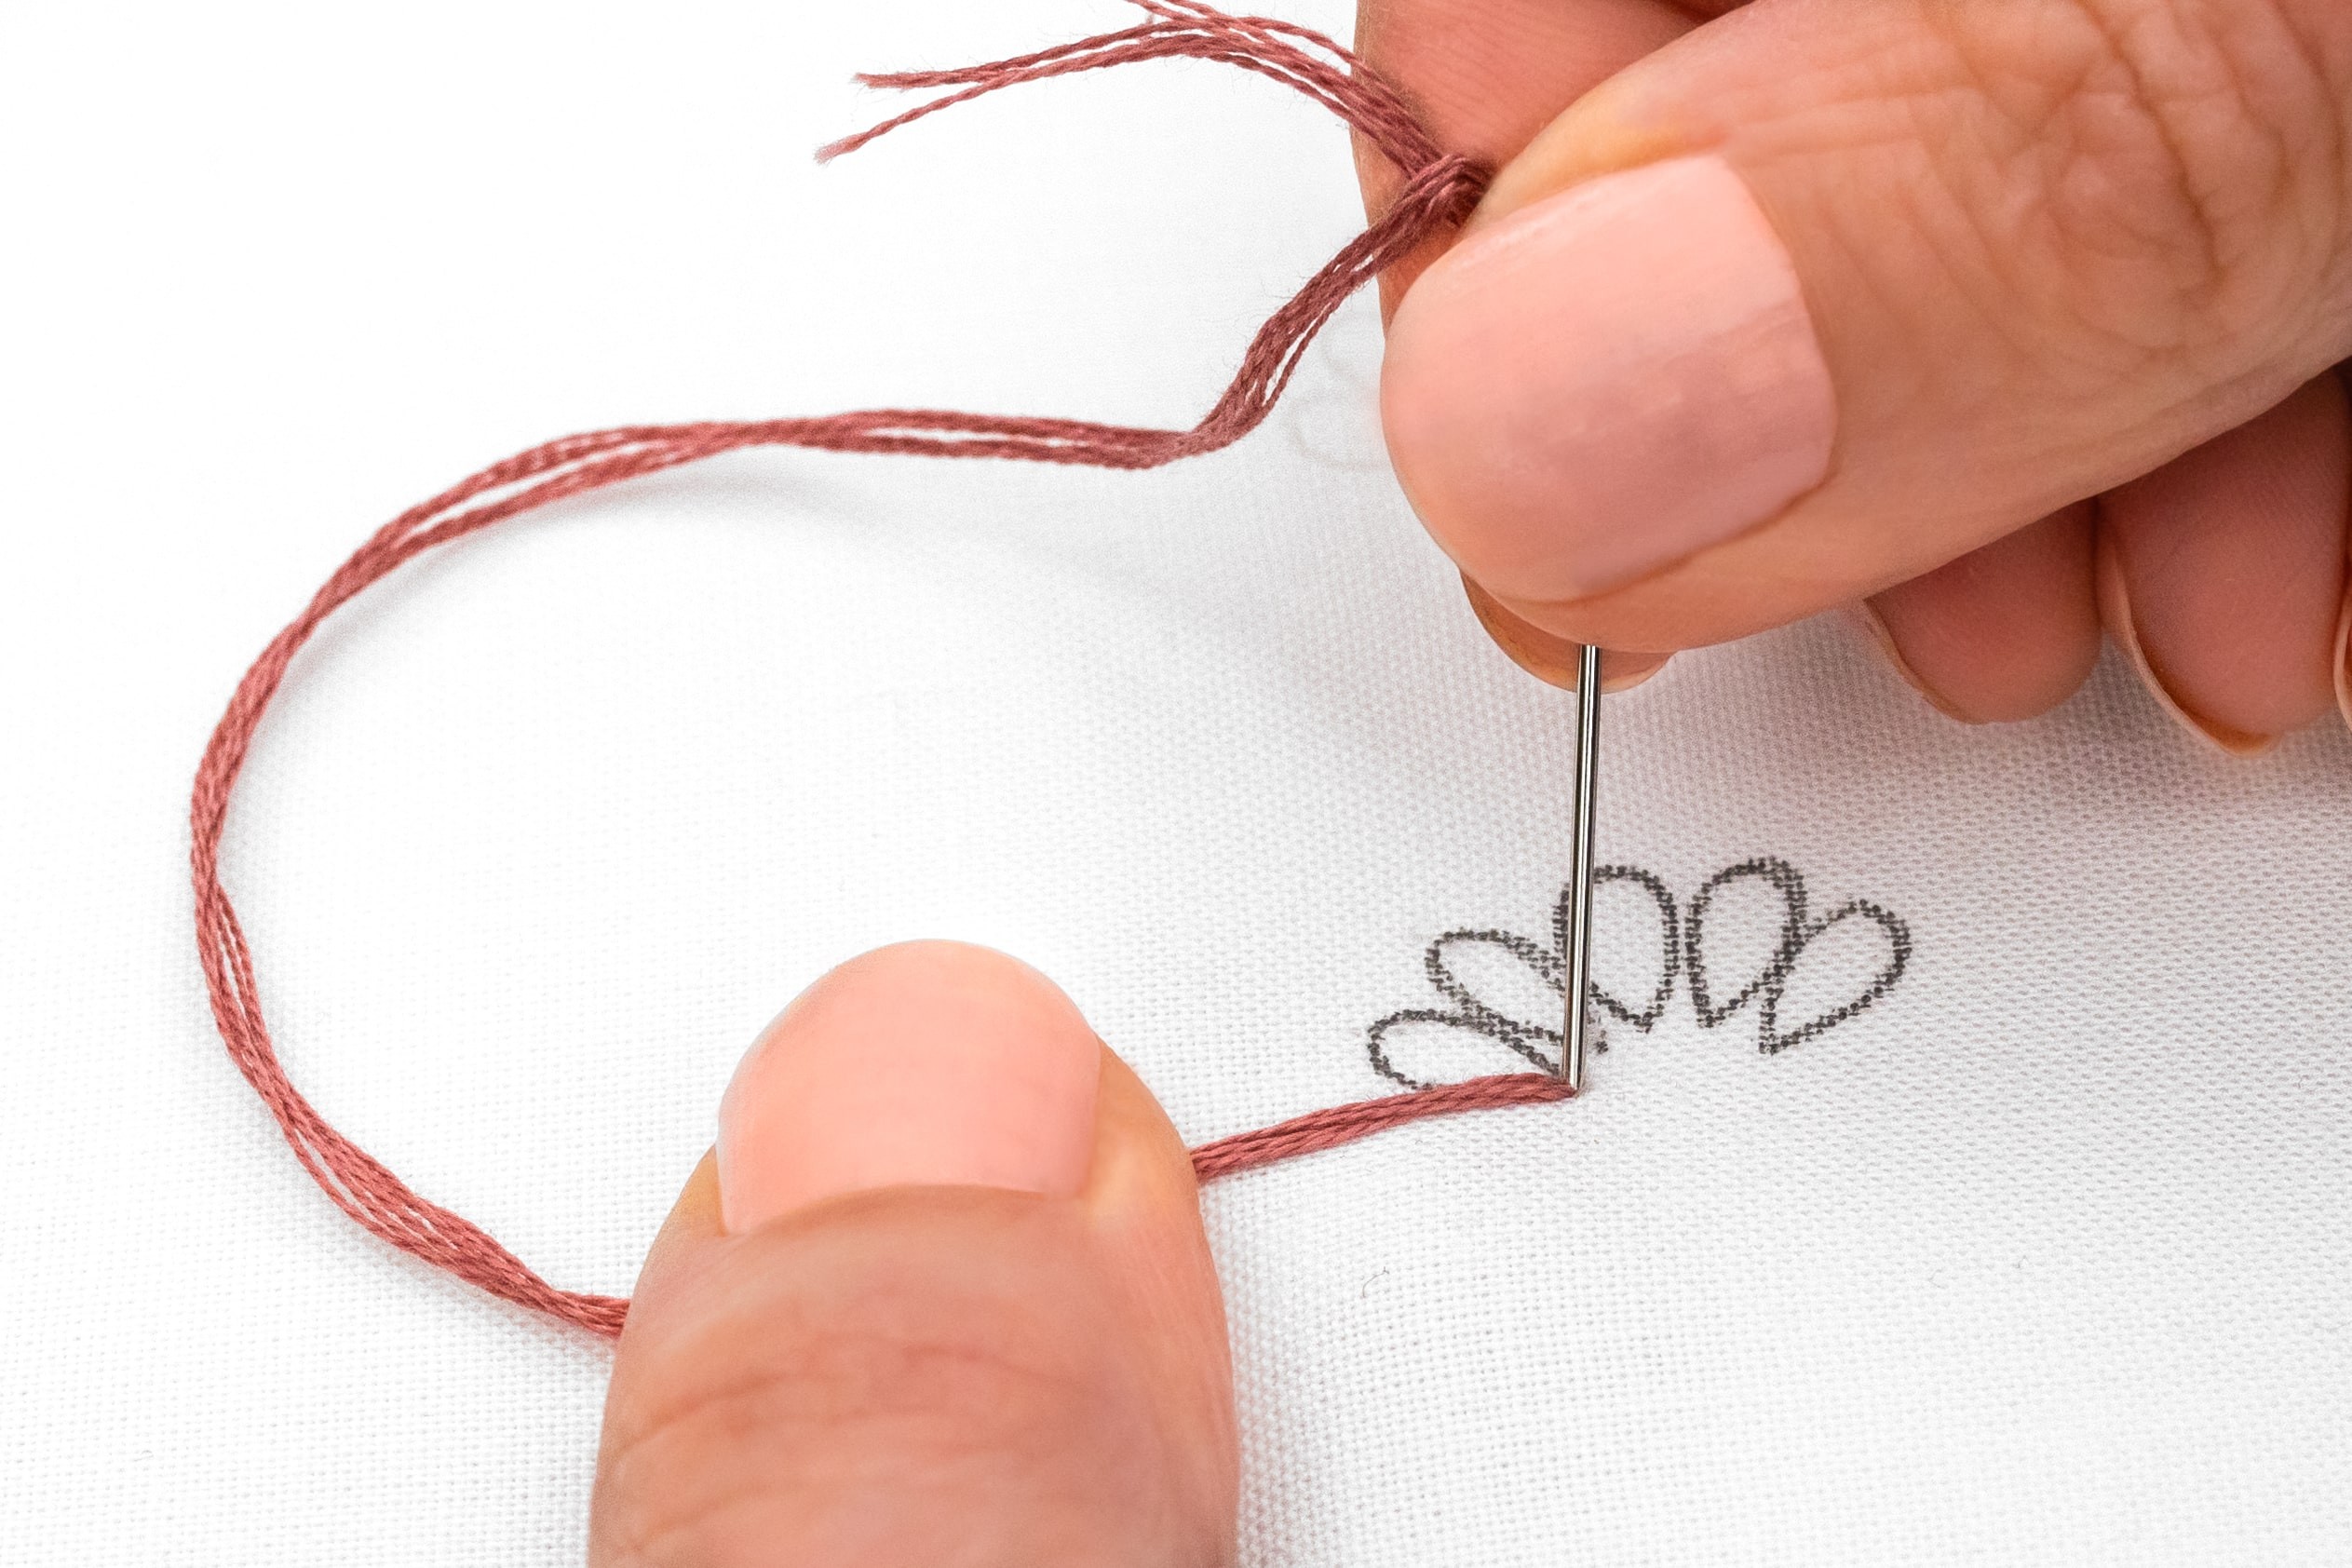
Step 4
Slowly pull the working thread through, but stop when you’ve formed a lovely big loop on top of the fabric. Your other hand’s job is to keep the thread in position, guiding the loop to form where you want it. If the loop isn't quite right—maybe it's twisted or facing the wrong direction—no worries! You can easily adjust and arrange it as needed.
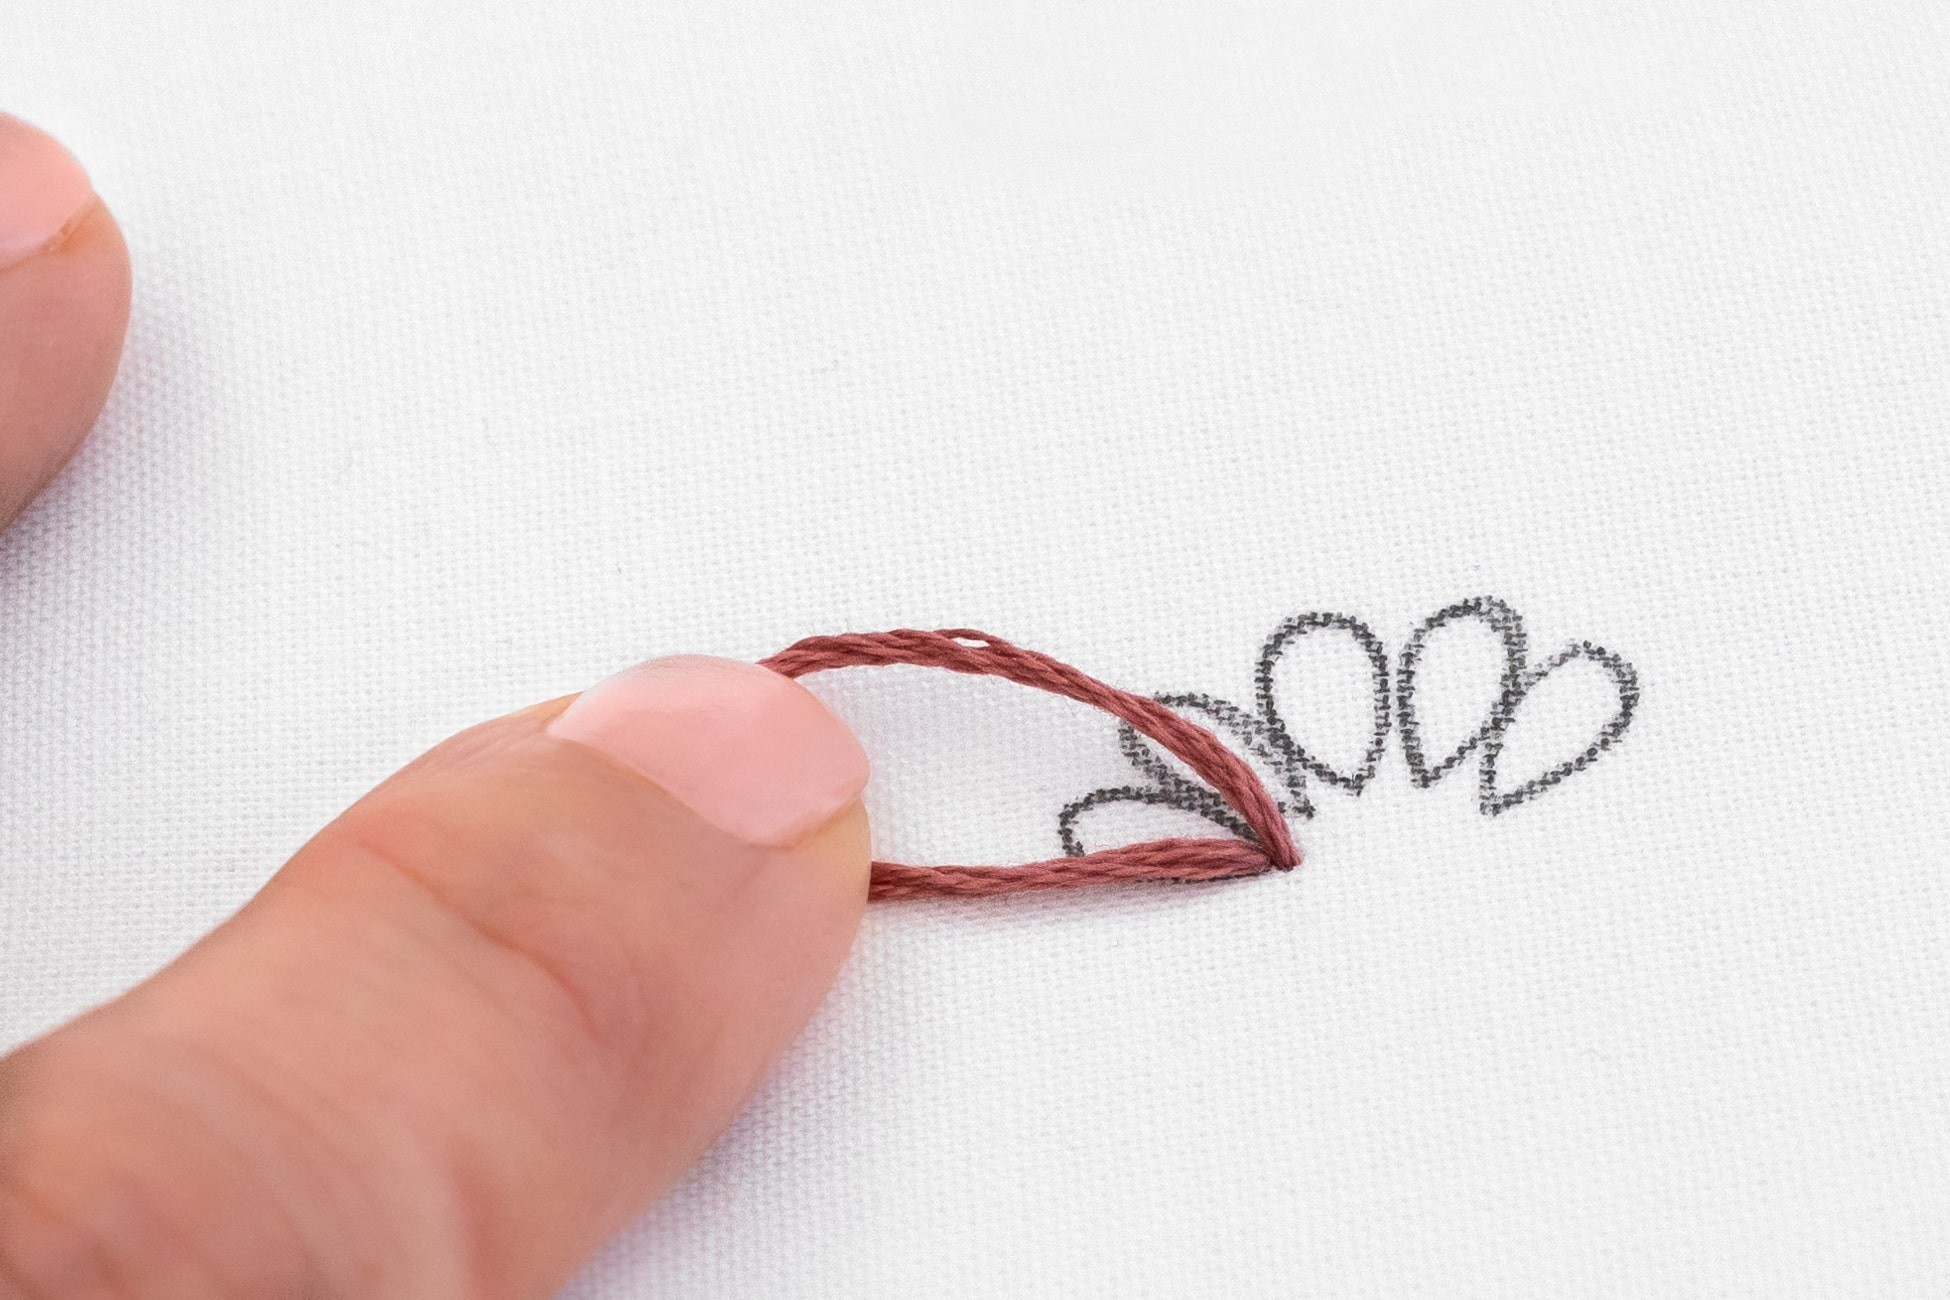
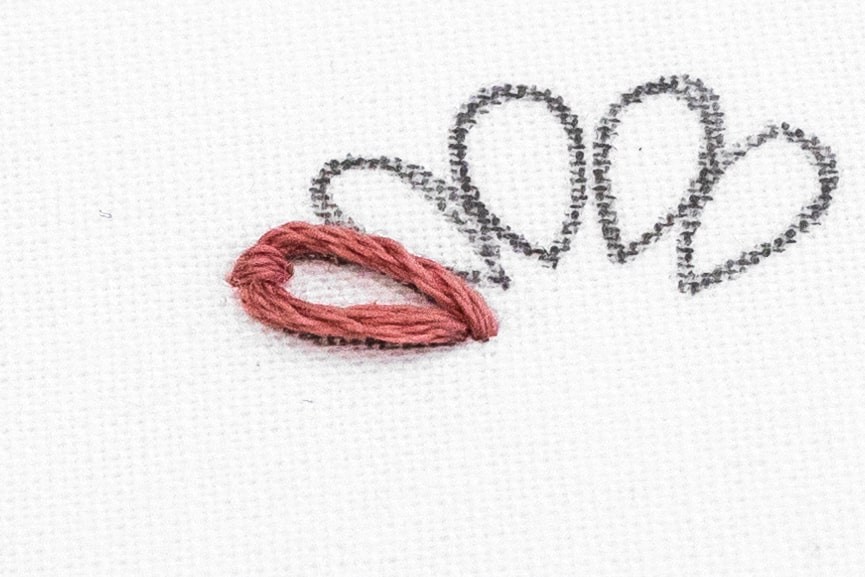
Step 5
Bring your needle back up inside the loop, aiming for the point just inside the curved top edge of the loop's outline.
Step 6
Gently pull the working thread, extending it away from the pointed end of the loop. Pull slowly, and notice how the loop tightens as you increase the tension. The trick is to stop pulling when the loop forms a nice rounded shape.
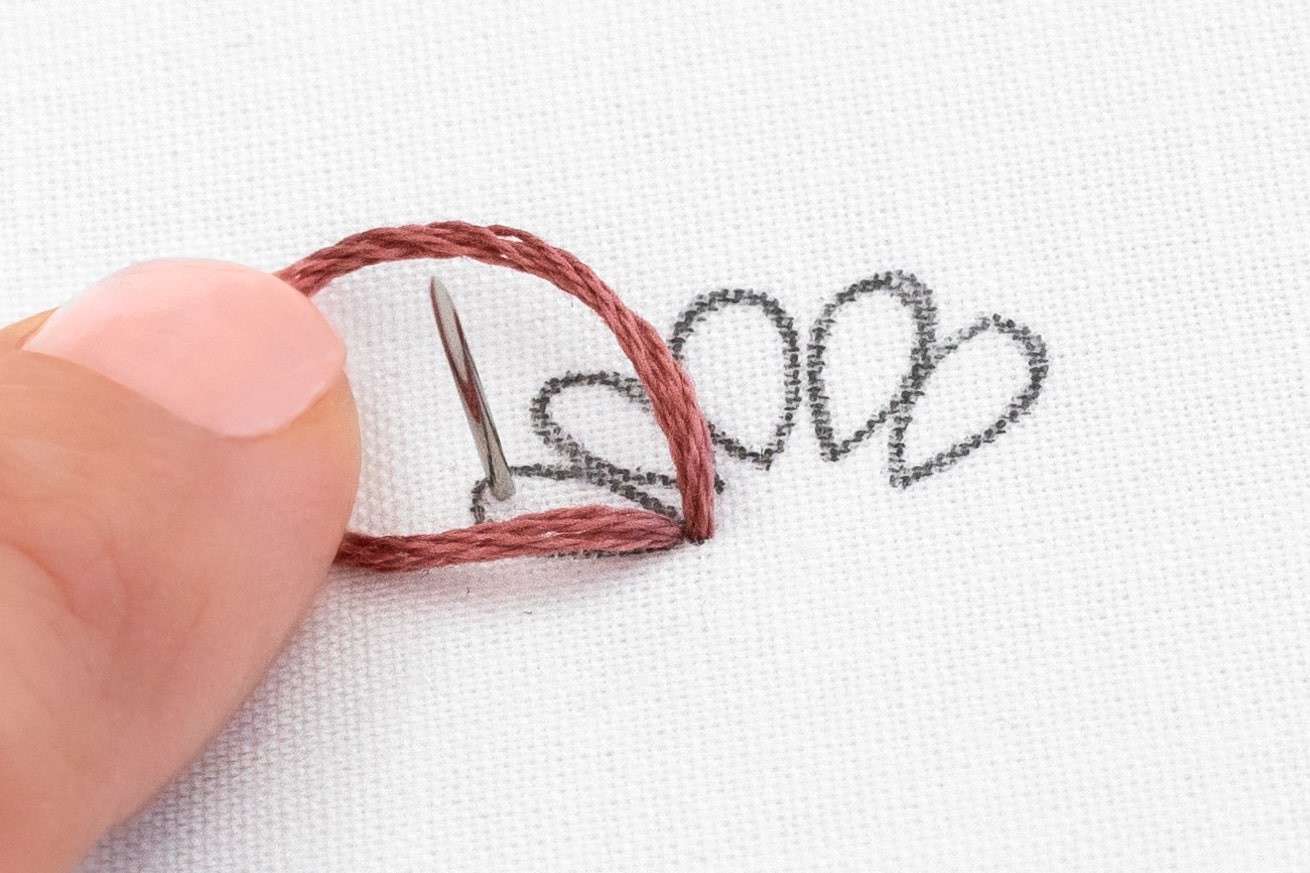
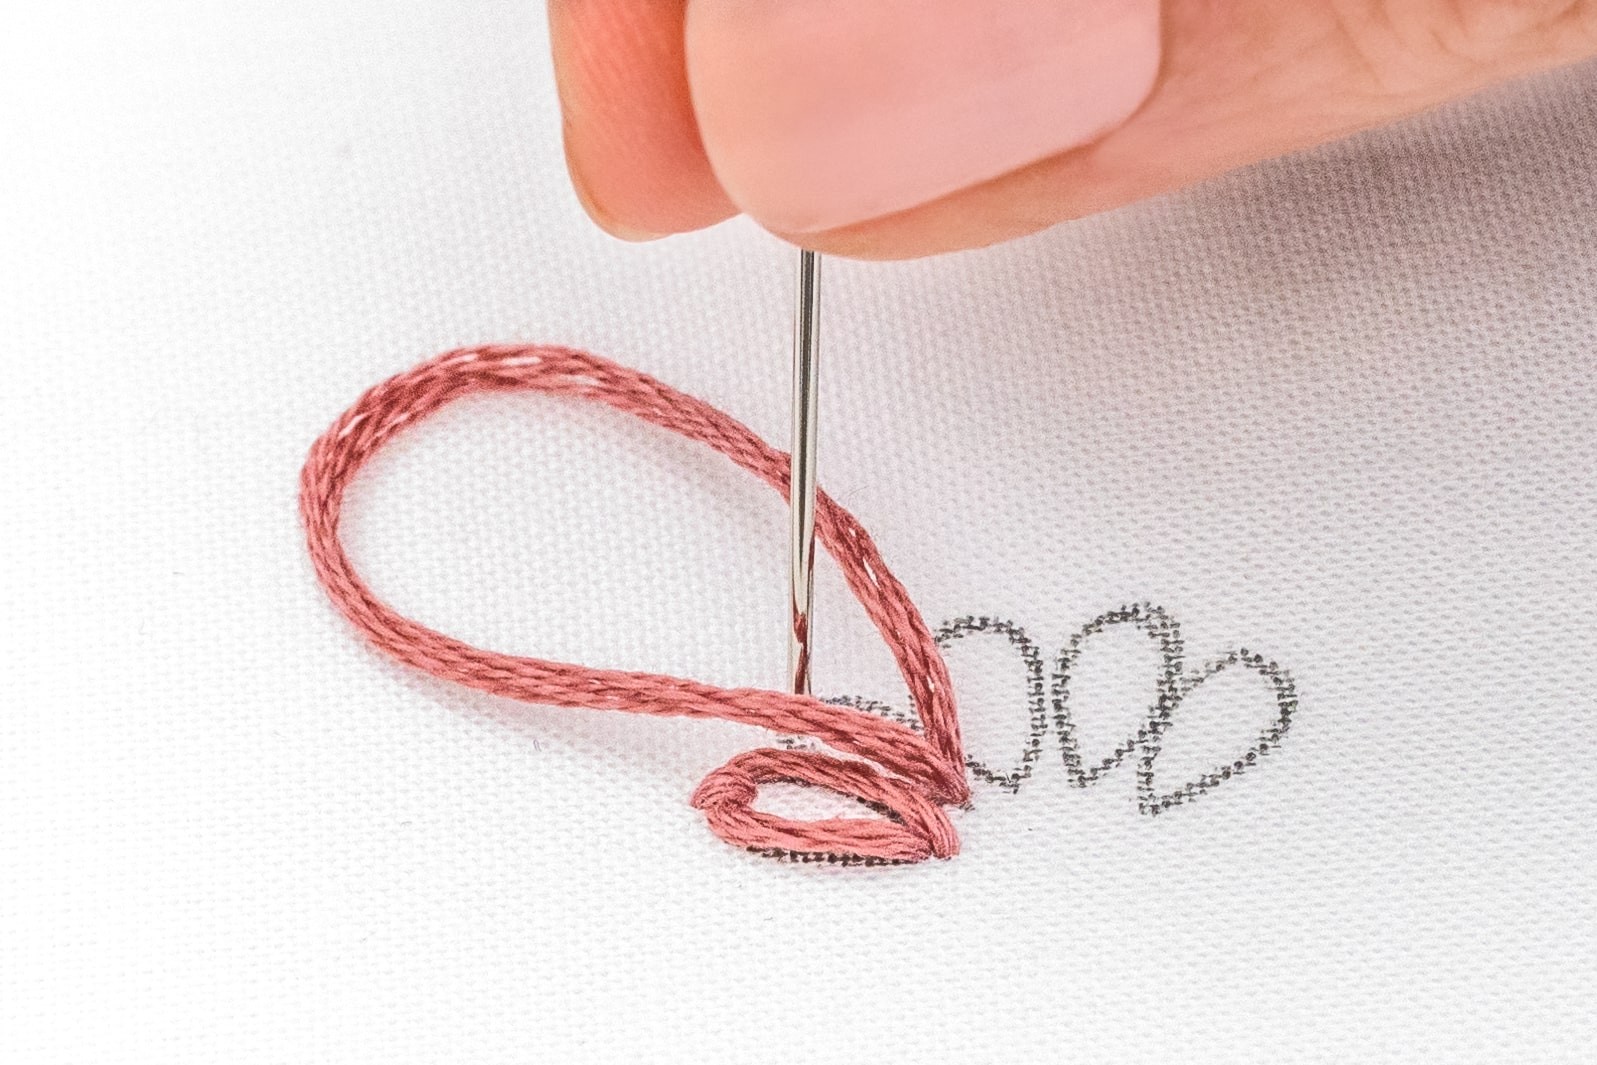
Step 7
Now poke your needle down a tiny stitch length away, on the outside edge of the top of the loop. This creates a small stitch that secures (or "couches") the loop in place on the fabric.
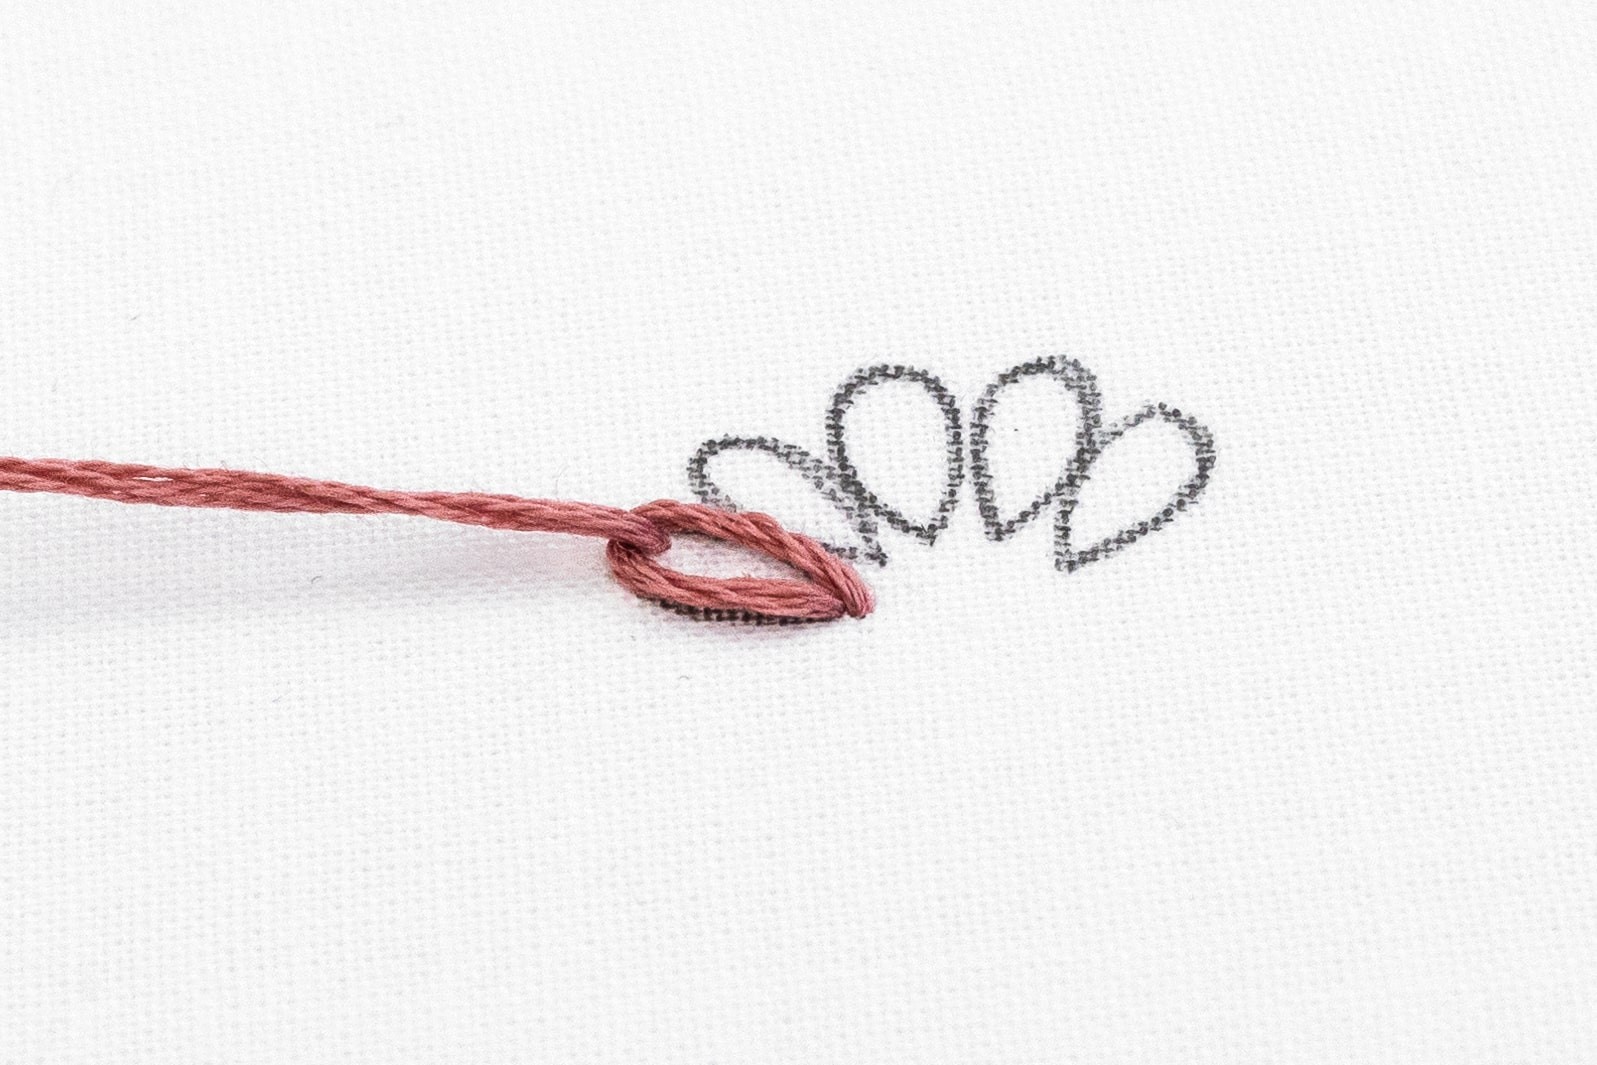
Step 8
Once again, press your thumb over the loop, then pull the working thread through. Go gently and stop while the loop still holds its lovely round shape. And now you’ve made your first Lazy Daisy stitch, woohoo!
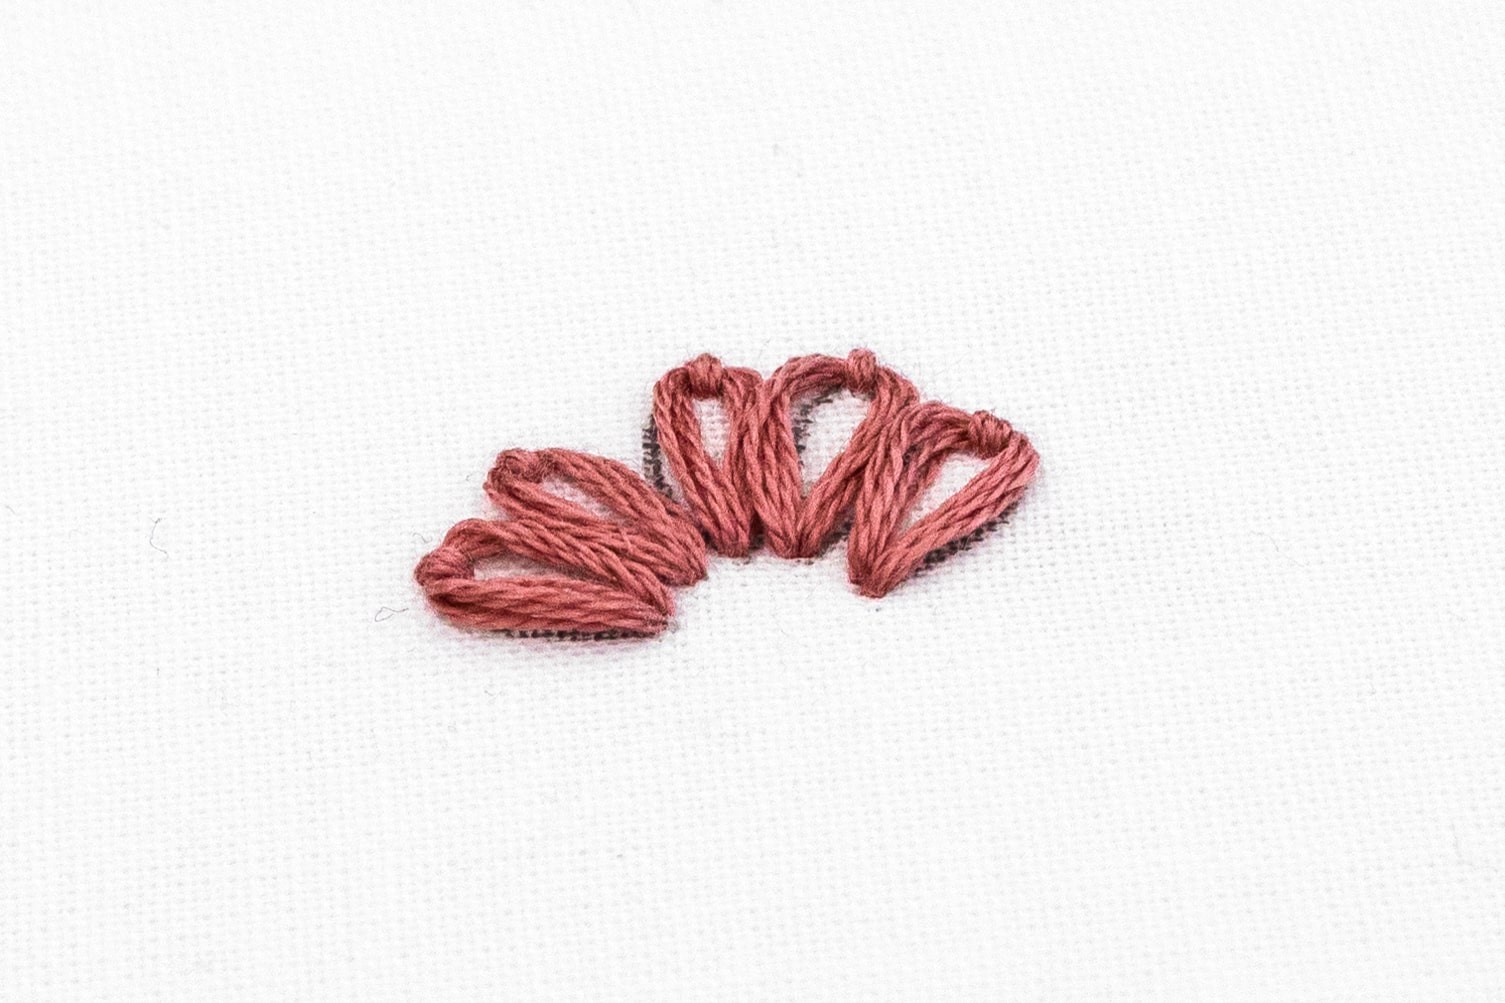
Step 9
Continue to work Lazy Daisies, always bringing your needle up at the pointed end of the loop. If you’re working on a flower, the starting point may be the same for each loop, or just beside.
Step 10
When you've finished stitching, secure and tidy away your thread.
Lazy Daisy Tips:
-
Tension is key: The key for this stitch, my friend, is all about tension! If you pull your thread too quickly and tightly when you’re forming the loop and/or securing it in place, you’ll end up with narrow loop shapes. And that’s totally ok (and expected) while you’re learning! But I encourage you to have a play with the tension as you make this stitch - focus on going slowly with less tension, in order to create that round loopy effect.
-
Fixing a narrow loop: If you create a narrow loop, you can gently pull on the thread to make it rounder again, before you secure off this stitch. Just tug the side of the loop which goes down into the fabric.
-
Option to Not Unwind Floss: If the threads on your loops are separating, you are welcome to skip the step of unwinding your floss for this technique. Just take care with tangles.
Examples of Lazy Daisy in my patterns
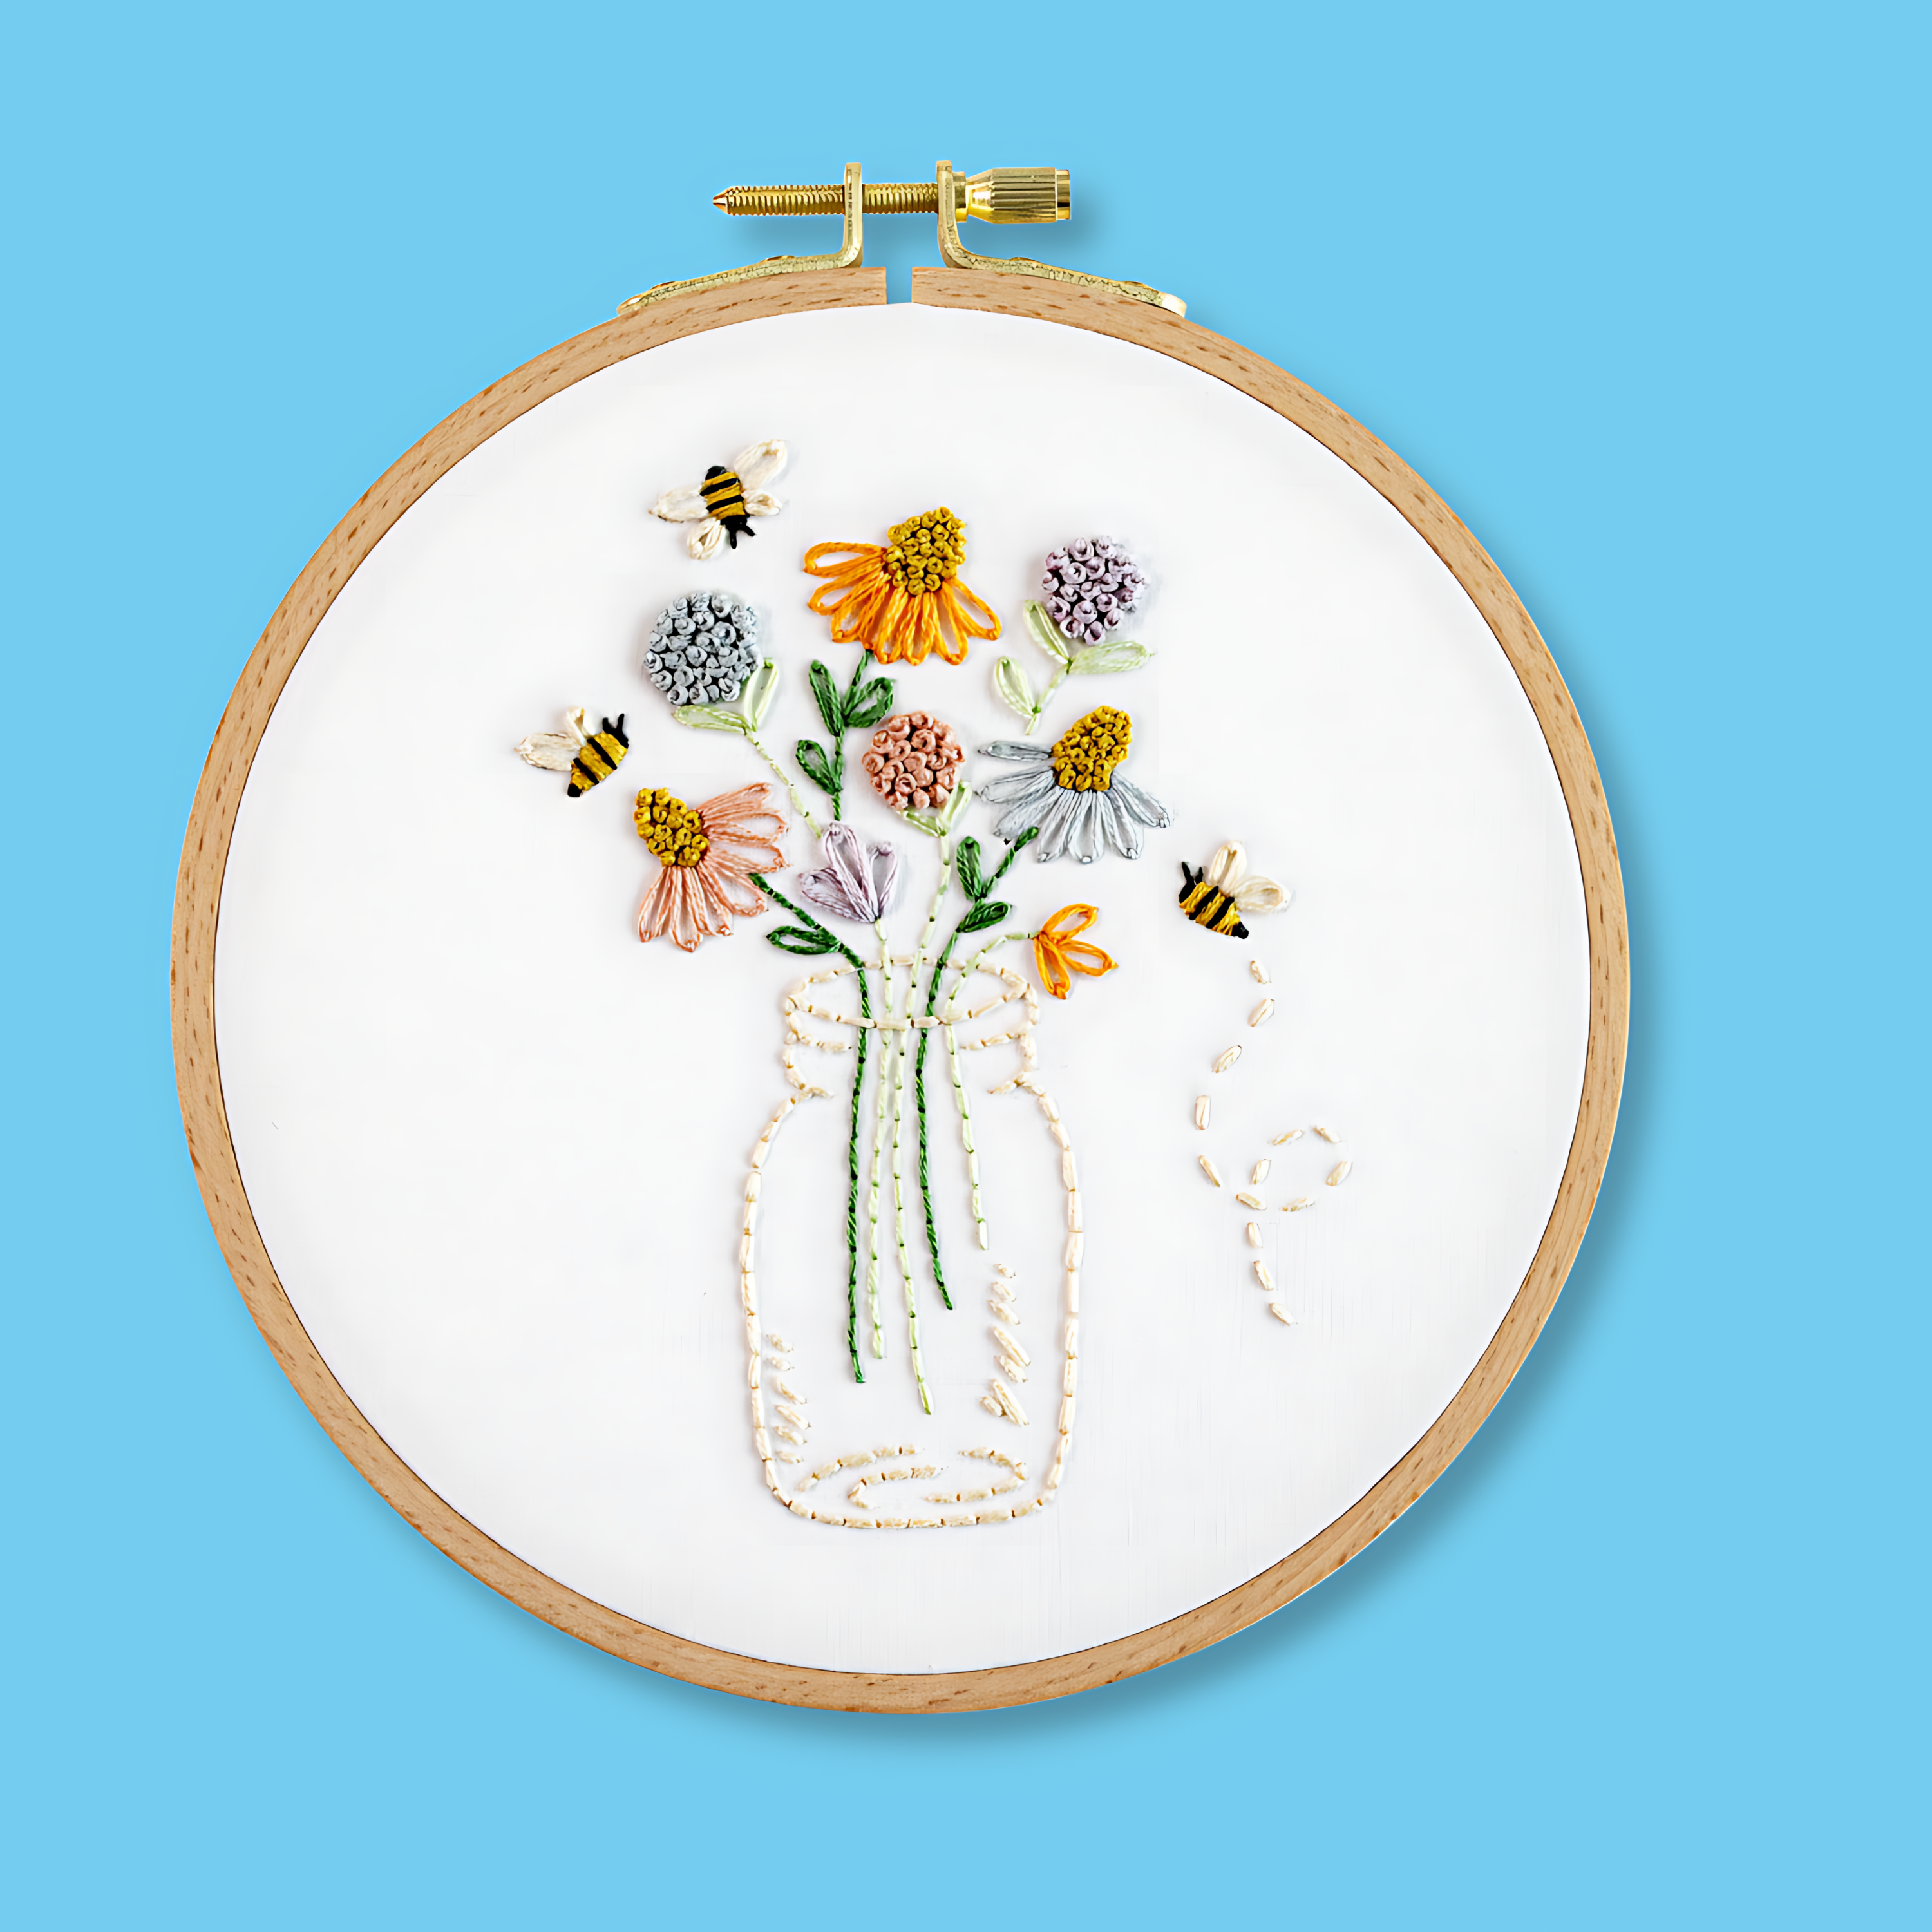
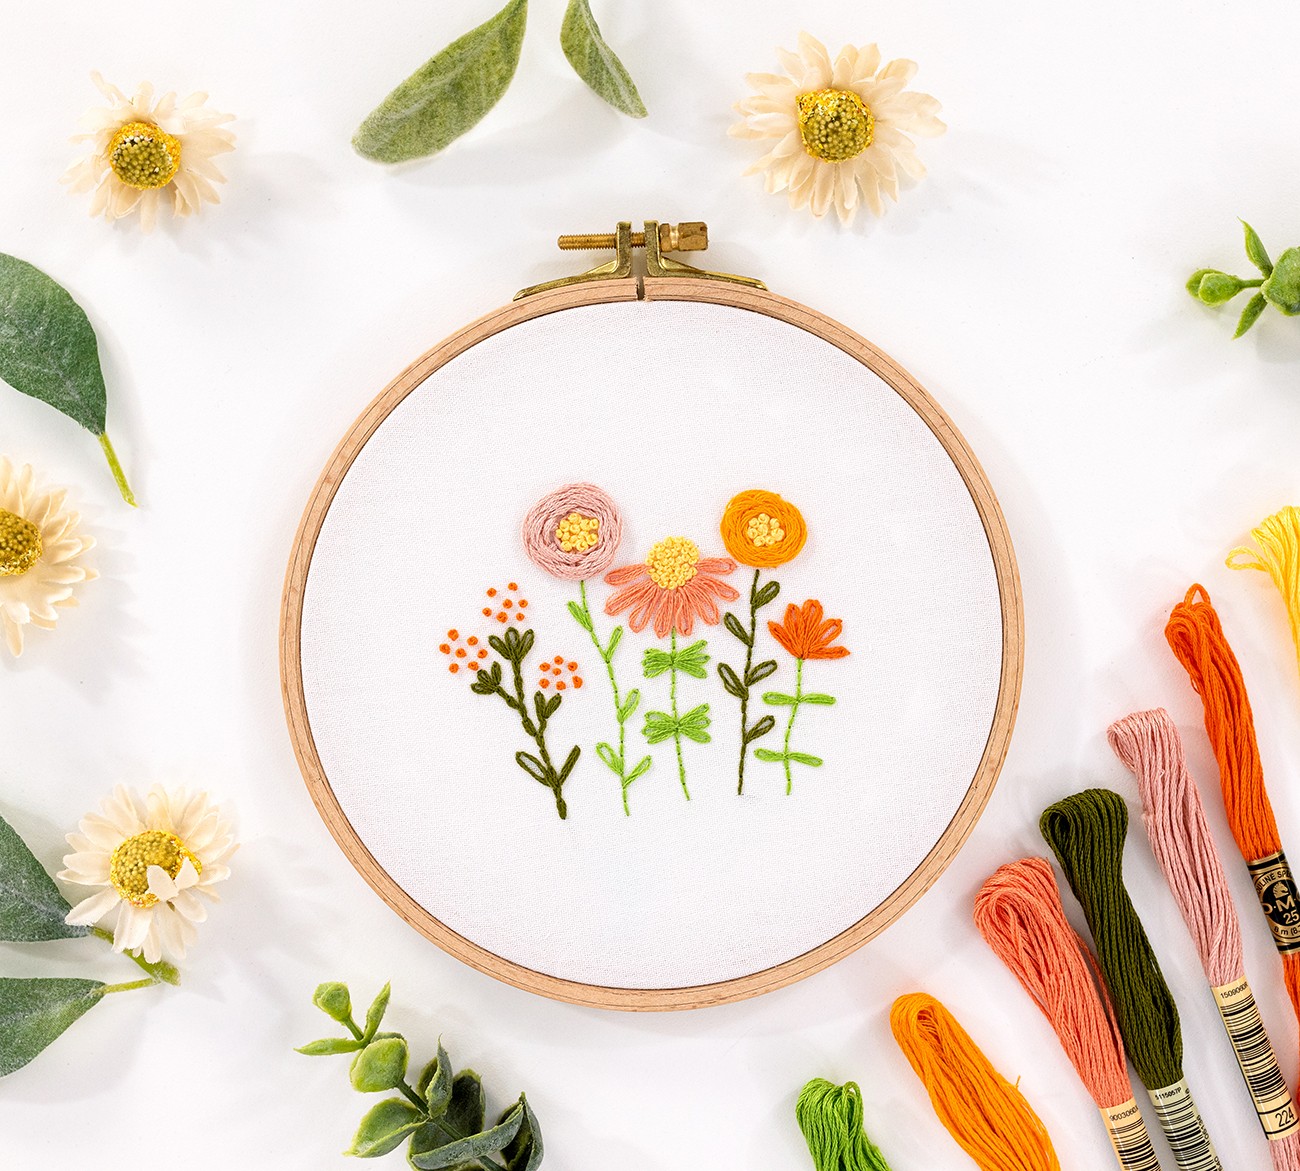
Once you've got the hang of this stitch, I'm sure you'll be dying to try it out in some patterns! Here are some examples, starting out with my pattern A Little Wildflower Meadow. As you can see there are beautiful examples of a Lazy Daisy forming leaves and the petals on the flower in the centre.
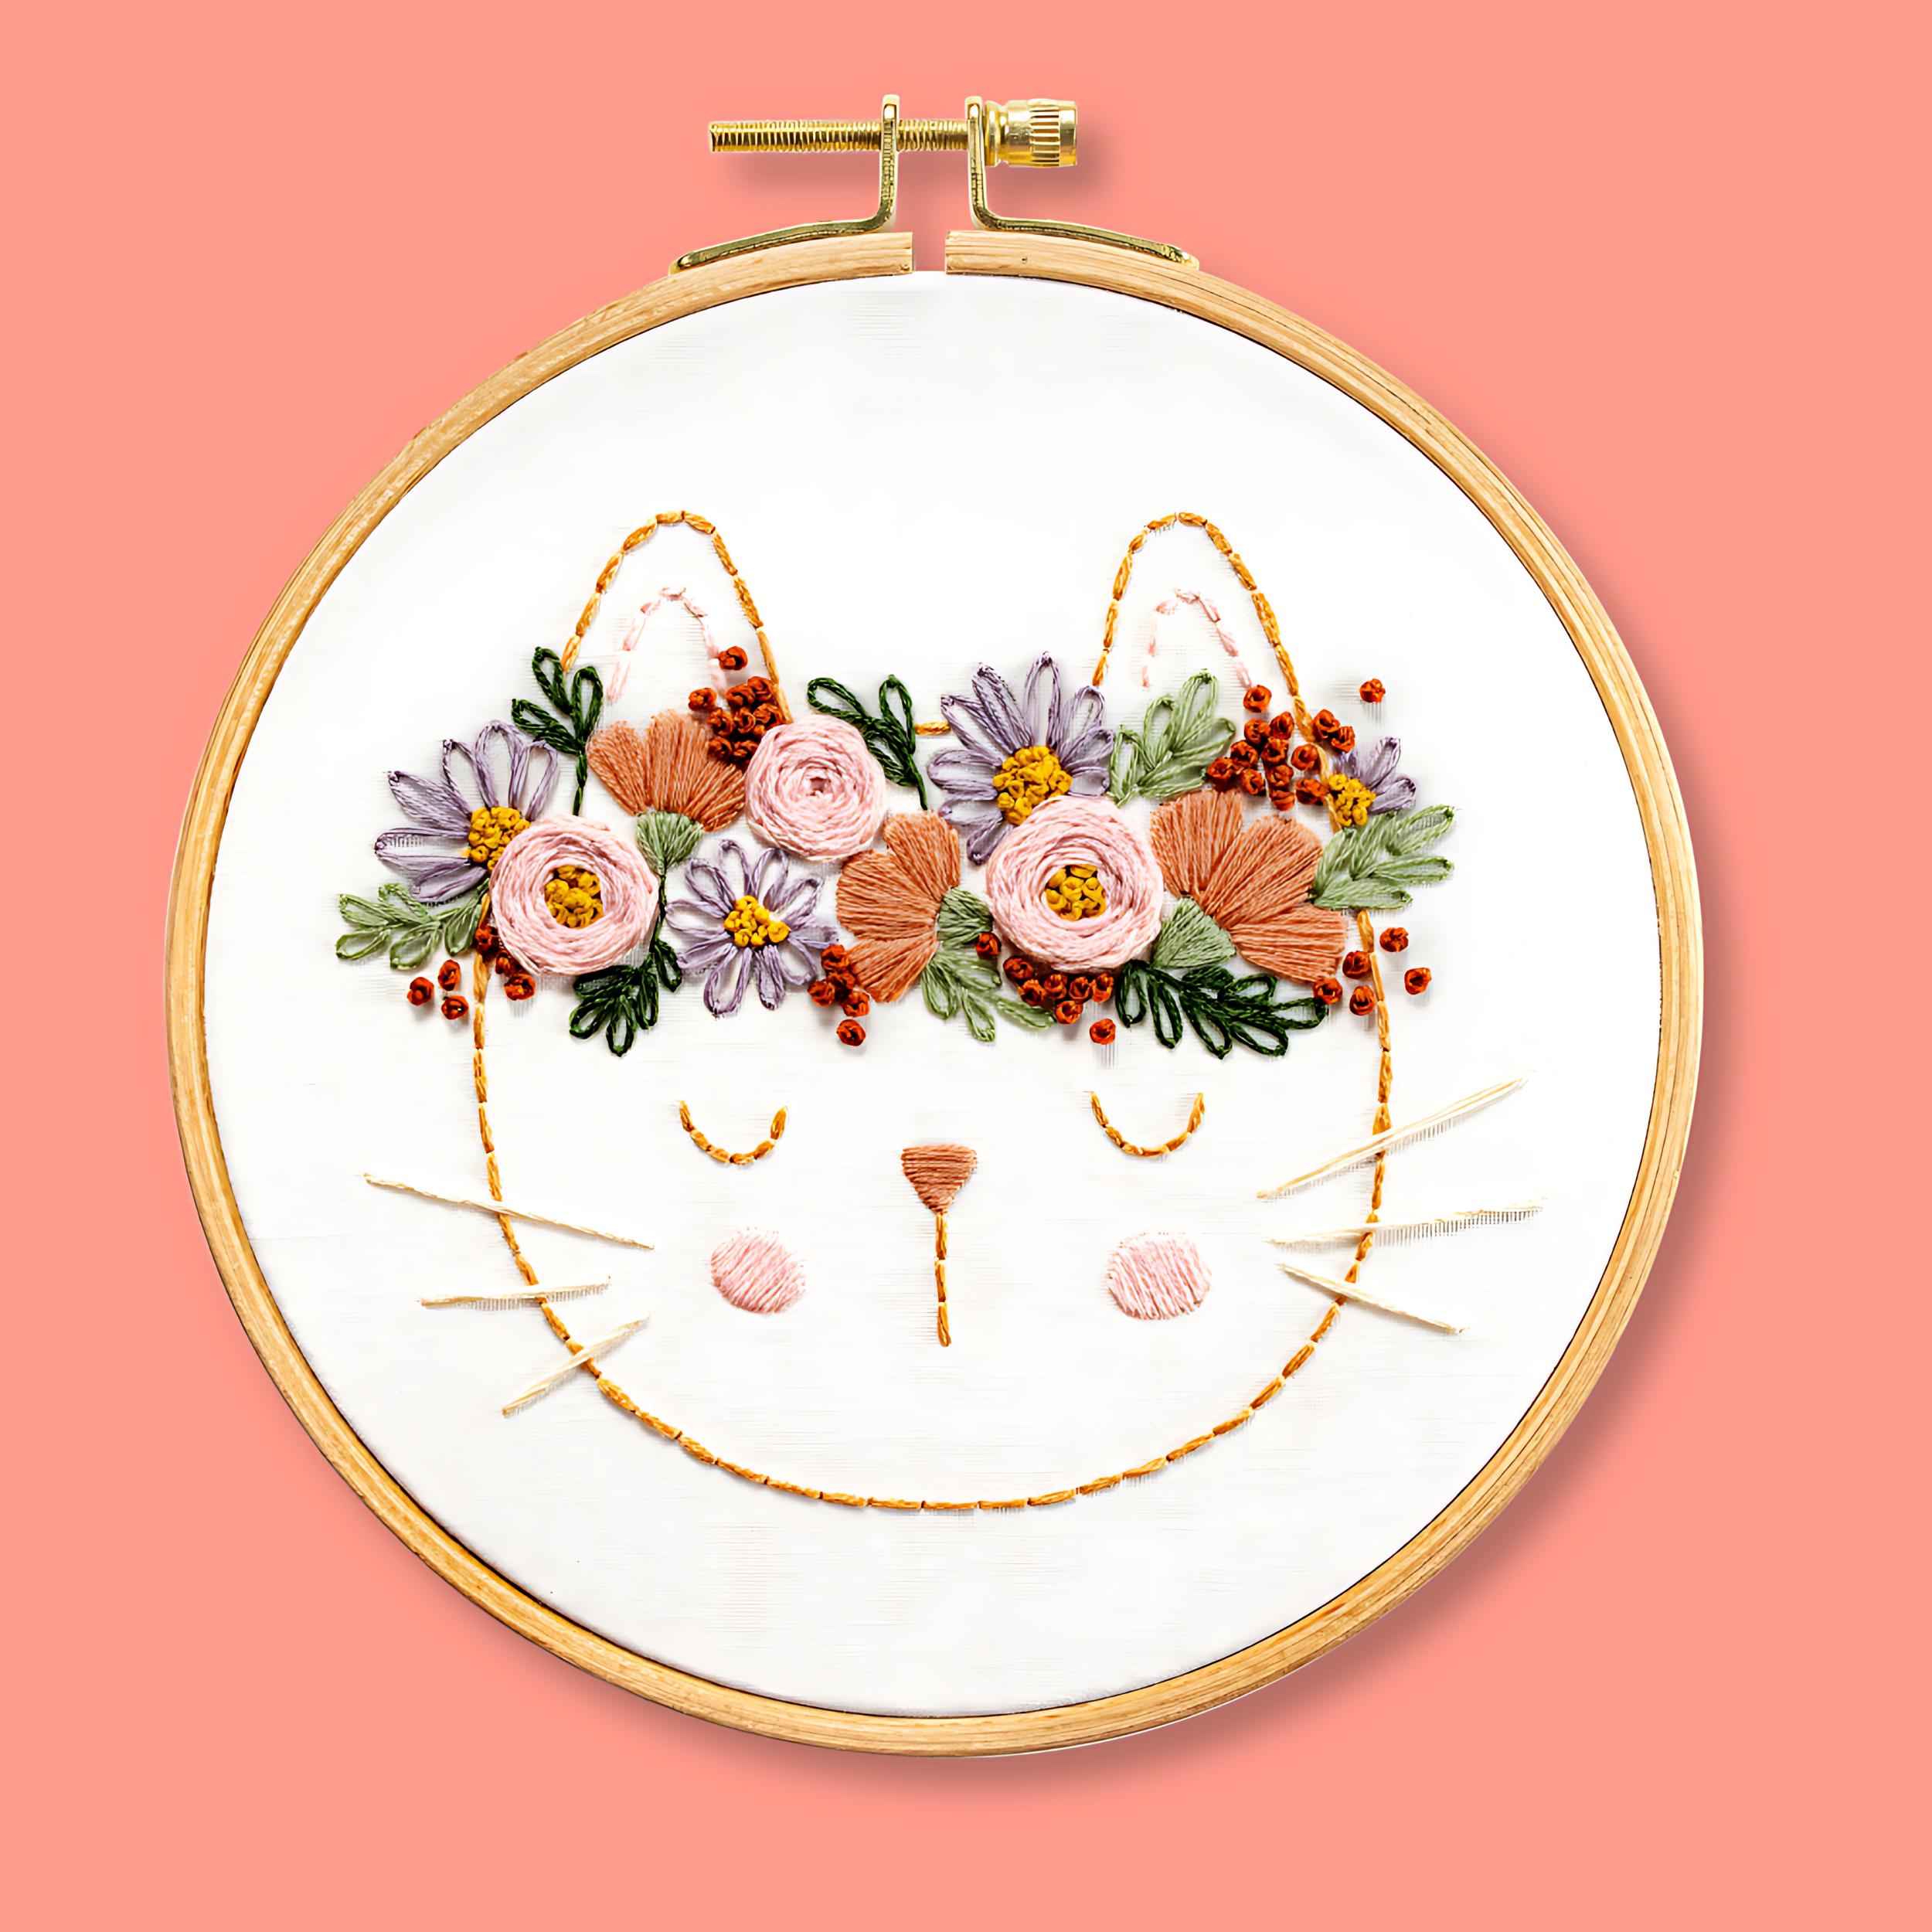
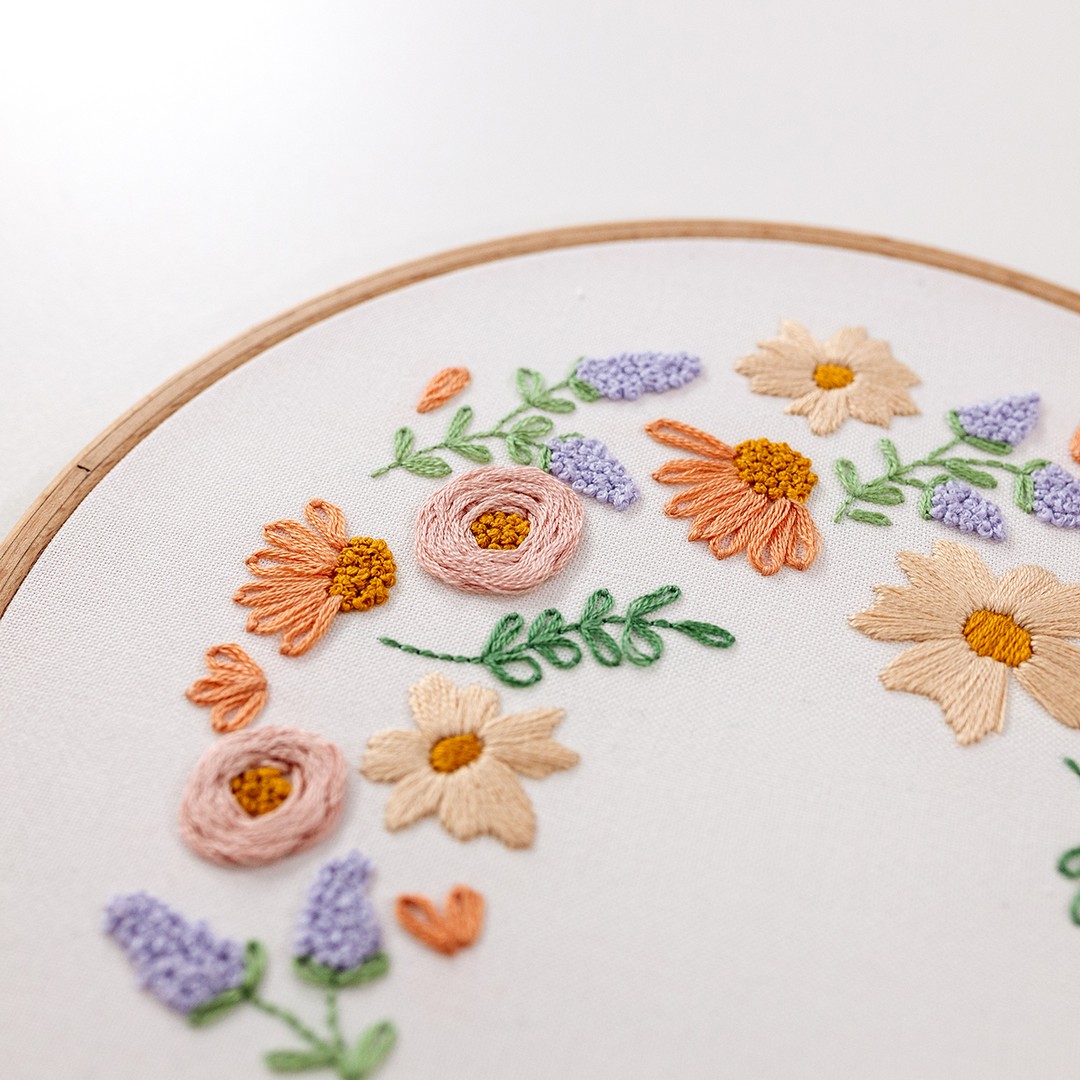
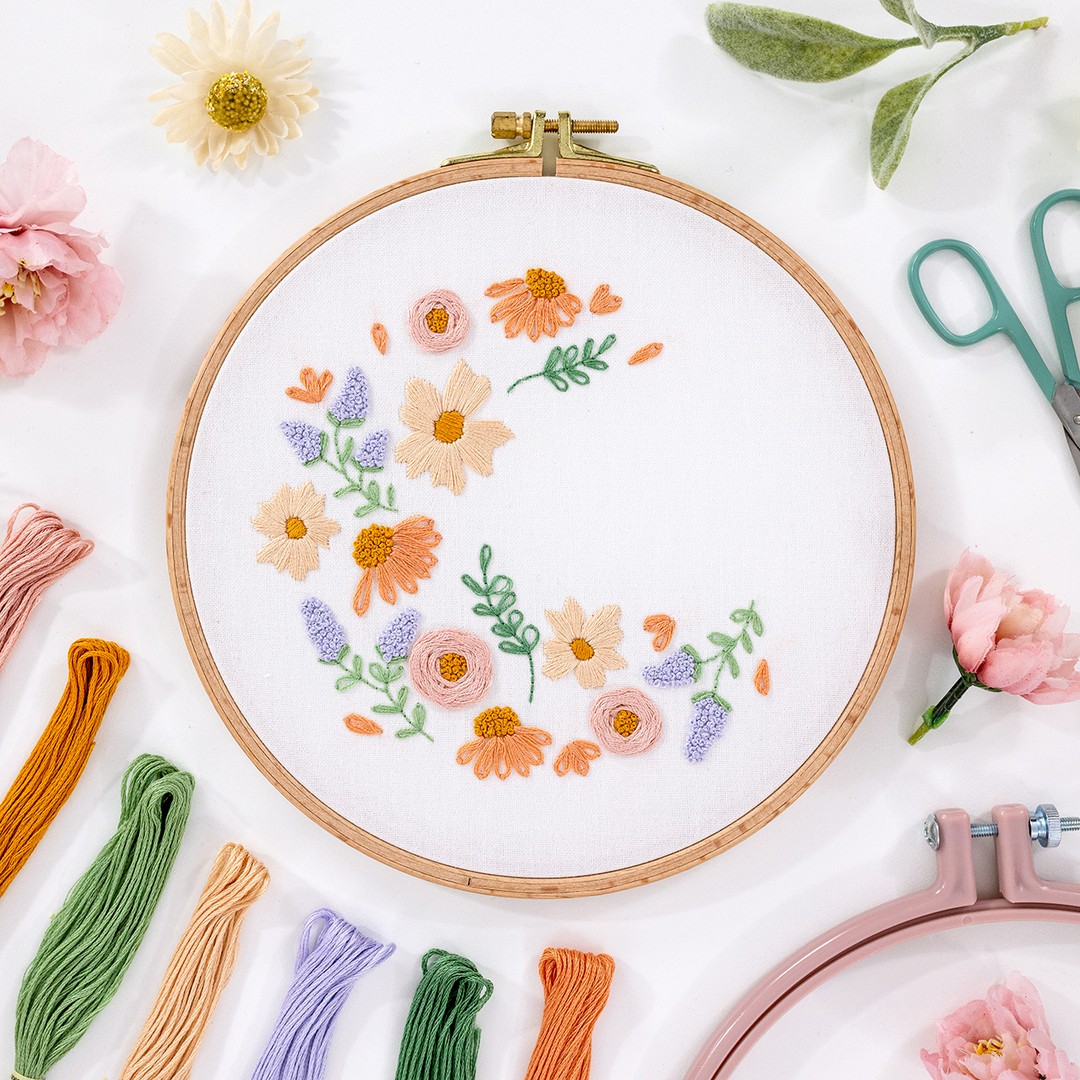
Another example is my Blooming Lovely Pattern. This design has Lazy Daisy petals and leaves all through it, and they create such amazing texture!
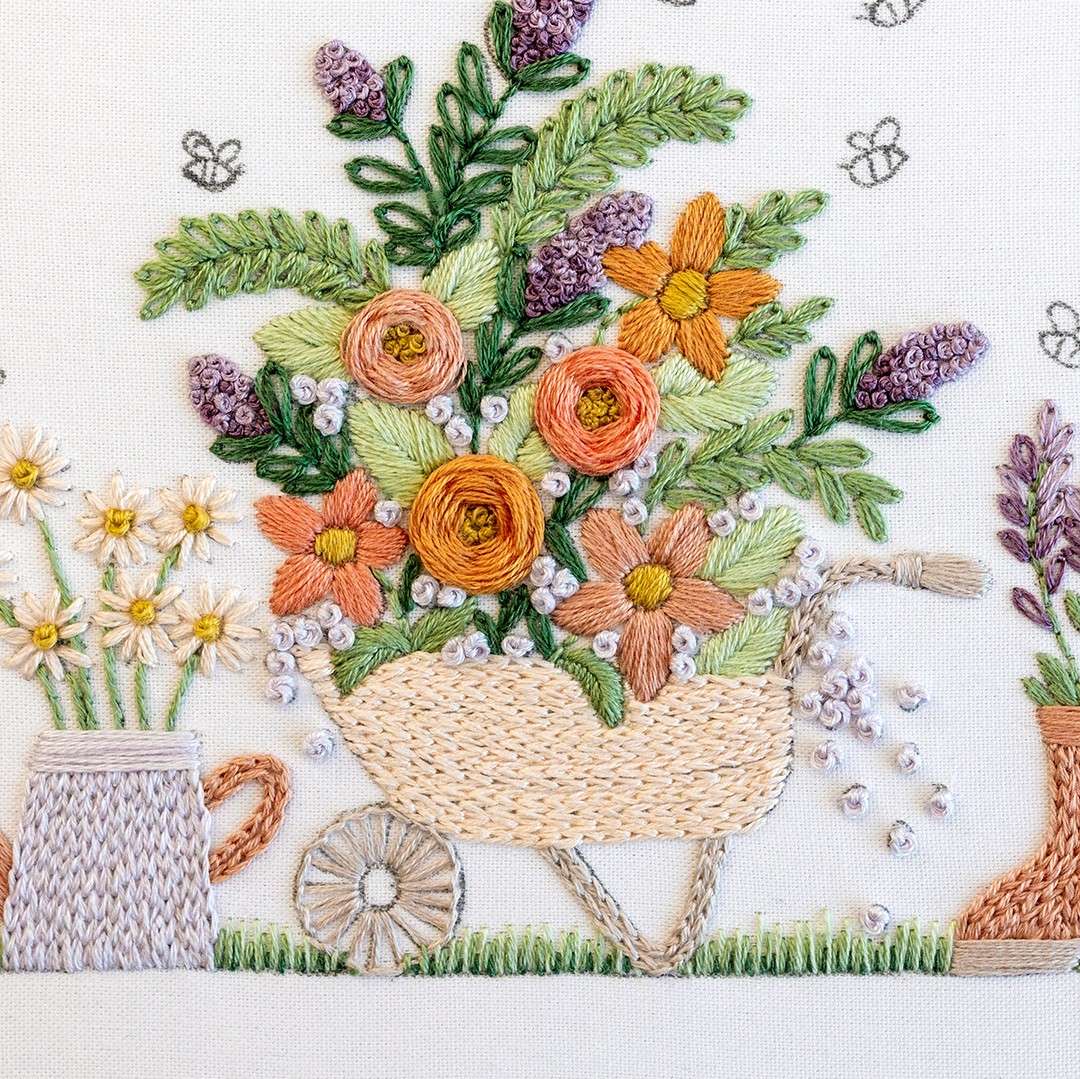
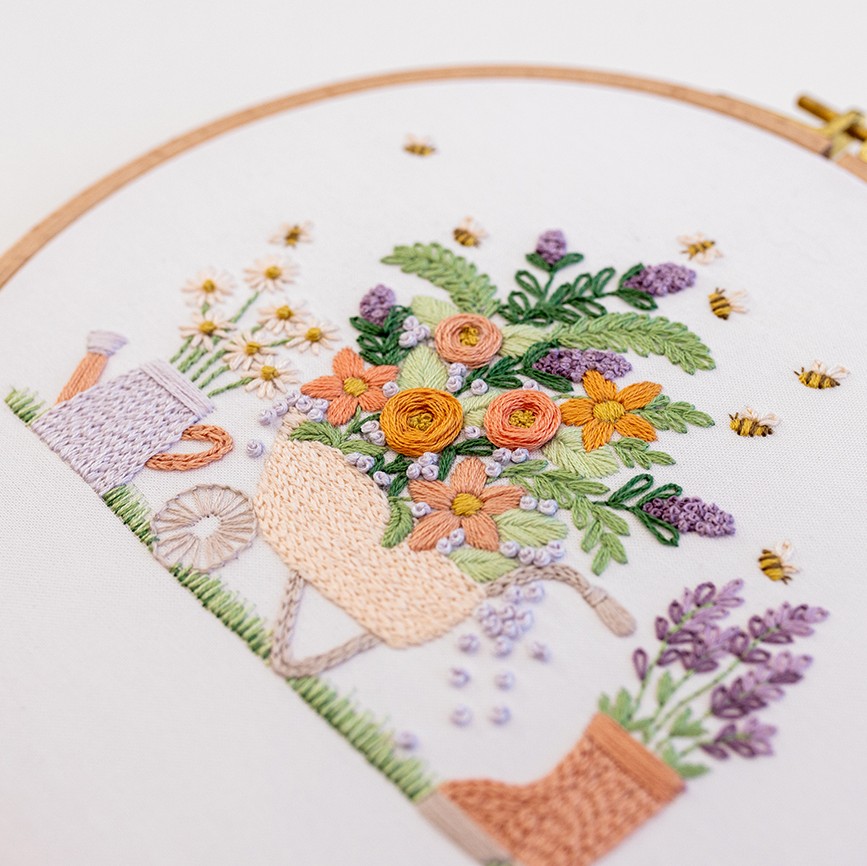
Last but not least is my pattern The Gardening Bee. Just look how I've used Lazy Daisy leaves to create so much movement and colour bursting out of the wheelbarrow!
Conclusion
Congrats on learning one of my favourite (and most used) beginner stitches - Lazy Daisy. This stitch may take a little bit of practice to understand how to do it properly. But believe me, if you keep practising, you’ll be a lazy daisy master in no time at all! Plus, it’s super fun doing the little loop that makes up this stitch.
So there you have it, my top tips and knowledge you need to understand how to do Lazy Daisy stitch. Well done, go you!
What's next?
Our beginner embroidery kits are a favourite among new stitchers for their simple, step-by-step instructions and beautiful designs that make learning easy and fun. Whether you’ve been wanting to learn embroidery or are just searching for your next creative hobby. These kits are the perfect introduction to embroidery.
Why people love our beginner kits:
-
Everything you need is included: fabric, thread, hoop, and more!
-
Clear instructions to guide you every step of the way.
-
Gorgeous designs you’ll be proud to display.
Our most popular beginner kits